You are using an out of date browser. It may not display this or other websites correctly.
You should upgrade or use an alternative browser.
You should upgrade or use an alternative browser.
Water damage, the good the bad and other upgrades
- Thread starter shadow
- Start date


Help Support Van Living Forum:
This site may earn a commission from merchant affiliate
links, including eBay, Amazon, and others.
shadow
Well-known member
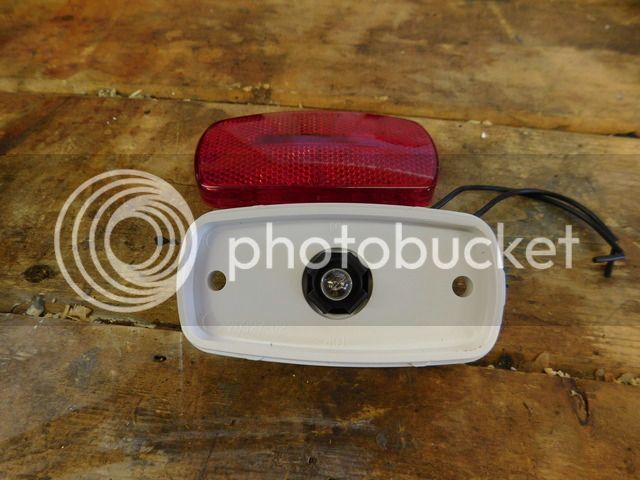
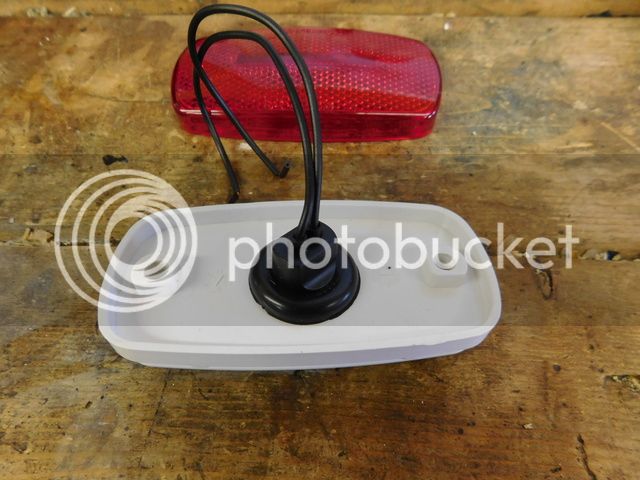
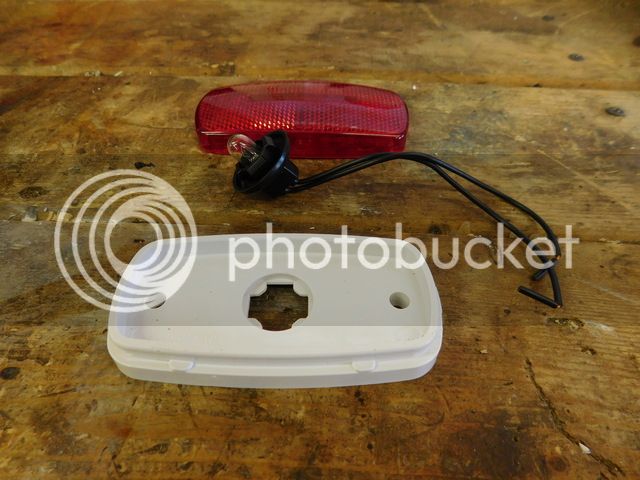
highdesertranger said:one thing I noticed is, with the new housing the bulbs must be replaced from the back. this means removing the whole housing, or can you replace the bulbs from the front without removing the housing? highdesertranger
The bulbs are changed from the front. I would never use a light that had to be removed to replace the bulb, that would
be a major pain in the butt just to replace a light bulb.
shadow
Well-known member
Weekend update #2
Two whole days of nice sunny weather was great, and it allowed me to get a lot done.
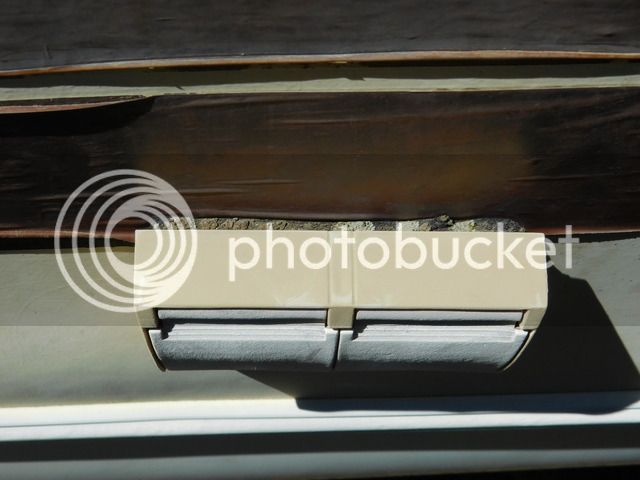
The first thing I did was replace the 110 volt plug and cover on the outside of the rv. The plastic cover was not
in good shape after 33 years in the weather.
Once I started taking it a part, it was worse than it looked on the outside.
The plastic electrical box was cracked and only one of the two screws was holding everything together.
This is the old plug cover, you can see how bad it is, and you could scratch the plastic off with you finger nail.
Here you can see what`s left of the old seal behind the cover.
Here is all of the stuff removed, I think it has seen better days.

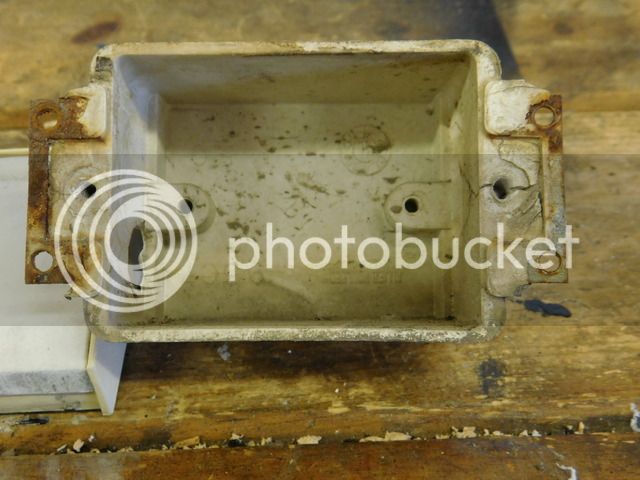
Here is the old electrical box, you can see how bad it has cracked, and you can just push the screw all the way in.
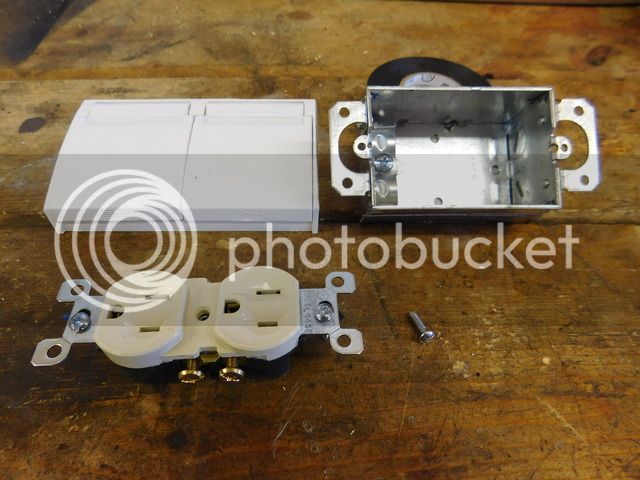
Here is the new set up, notice I am using a metal electrical box.
The new electrical box installed, and all of the gaps sealed with butyl tape.
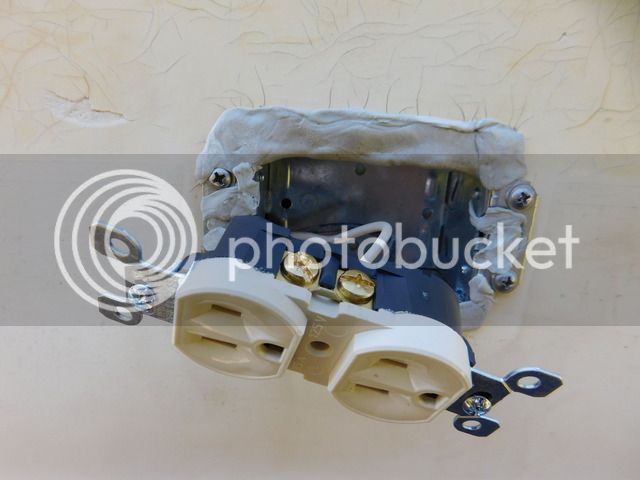
Here is the finished product, It is rebuilt and put together better than it ever was.
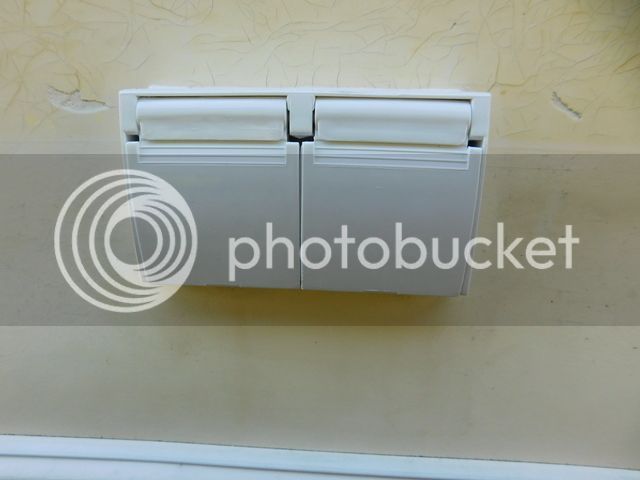
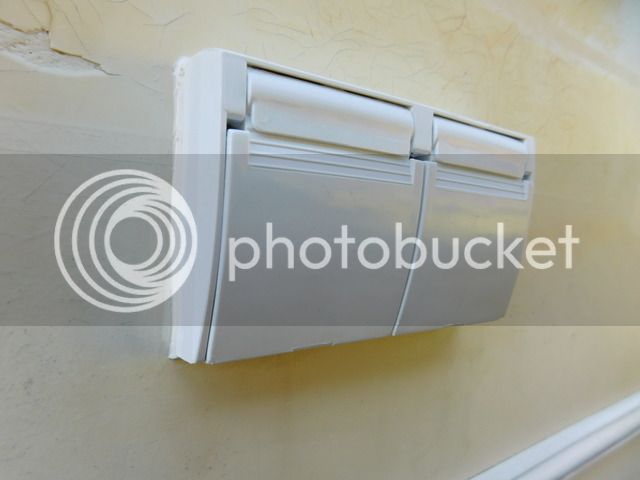
I did not use a rubber seal behind the plug cover like it was originally, because after a few years they go bad and leak.
I used Dicor to seal it, it looks better and will last longer.
Two whole days of nice sunny weather was great, and it allowed me to get a lot done.
The first thing I did was replace the 110 volt plug and cover on the outside of the rv. The plastic cover was not
in good shape after 33 years in the weather.
Once I started taking it a part, it was worse than it looked on the outside.
The plastic electrical box was cracked and only one of the two screws was holding everything together.
This is the old plug cover, you can see how bad it is, and you could scratch the plastic off with you finger nail.
Here you can see what`s left of the old seal behind the cover.
Here is all of the stuff removed, I think it has seen better days.
Here is the old electrical box, you can see how bad it has cracked, and you can just push the screw all the way in.
Here is the new set up, notice I am using a metal electrical box.
The new electrical box installed, and all of the gaps sealed with butyl tape.
Here is the finished product, It is rebuilt and put together better than it ever was.
I did not use a rubber seal behind the plug cover like it was originally, because after a few years they go bad and leak.
I used Dicor to seal it, it looks better and will last longer.
shadow
Well-known member
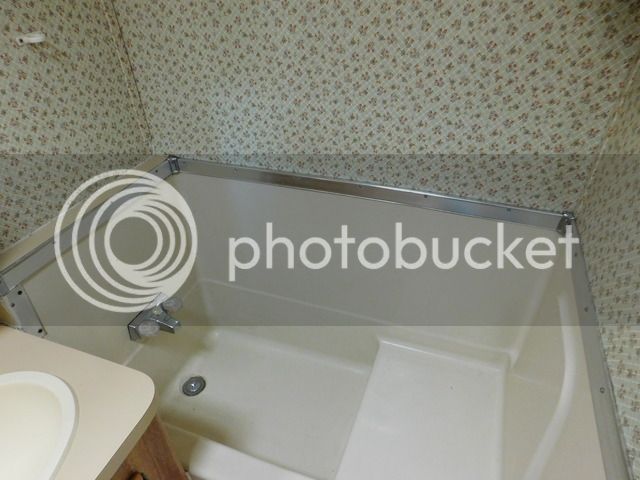
Next up was the bathroom
I cleaned all the walls, and the tub. I removed some old caulking and resealed a couple of places.
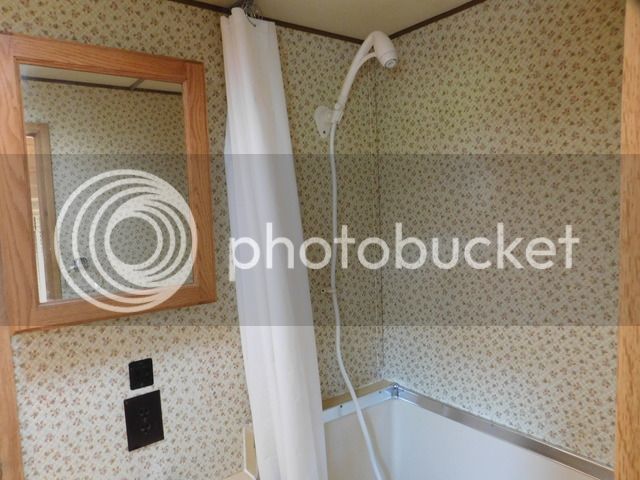
Then I put up a new shower curtain and a new oxygenics shower head.
The new shower curtain and shower head.
And that's it for this weekend.
I cleaned all the walls, and the tub. I removed some old caulking and resealed a couple of places.
Then I put up a new shower curtain and a new oxygenics shower head.
The new shower curtain and shower head.
And that's it for this weekend.
Ballenxj
Well-known member
- Joined
- Sep 4, 2012
- Messages
- 3,211
- Reaction score
- 15
shadow said:Weekend update #2
<-------->
Here is the finished product, It is rebuilt and put together better than it ever was.
I'm thinking the whole coach is going to be better than it ever was. Good work.
")
AbuelaLoca
Well-known member
Yay for great weather!! Nice work!


$22.27
$23.95
Van Life Cookbook: The portable, budget-friendly and sustainable cookbook for life on the go
Amazon.com


$25.99 ($0.29 / Ounce)
Gas One 6 Hour Chafing Fuel - Food Warmer for Chafing Dish Buffet Set - Liquid Safe Fuel With Wick & Lid Opener 7.4 Oz (Pack of 12)
Amazon.com


$14.49
$19.95
The Van Life Cookbook: Delicious Recipes, Simple Techniques and Easy Meal Prep for the Road Trip Lifestyle
Amazon.com


$30.59
$40.00
The Van Conversion Bible: The Ultimate Guide to Converting a Campervan
Amazon.com


$50.49
$67.49
Amazon Basics 173-Piece General Household Home Repair Mechanic's Hand Tool Set with Storage Case, Portable for DIY
Amazon.com


$17.43
$19.99
How to Live in a Van and Travel: Live Everywhere, be Free and Have Adventures in a Campervan or Motorhome - Your Home on Wheels
Blue Rose Seller


$12.99 ($1.30 / FL Oz)
$14.00 ($1.40 / FL Oz)
Bath & Body Works Cherry Blossom Shower Gel 10 oz
Home&Y


shadow
Well-known member
A little update for anyone reading, or for those following this thread.
I asked one of the moderators to change the name of this thread, because it has become more than just a
water damage repair and rebuild thread, it has also become a repair, remodel and upgrade thread as well, so
there is a little bit of everything in this thread.
And as I have said before, I am no carpenter and I have no experience what so ever in rebuilding or repairing an rv, so if I can
do it, anyone can.
Lots more to come, one weekend at a time.
highdesertranger
R.I.P HDR
- Joined
- Apr 4, 2012
- Messages
- 22,892
- Reaction score
- 89
yes very good don't sell yourself short. I am curious about the choice of a metal box, care to share why you chose metal? highdesertranger
shadow
Well-known member
highdesertranger said:yes very good don't sell yourself short. I am curious about the choice of a metal box, care to share why you chose metal? highdesertranger
The one thing I have learned in the rebuild and remodel of my rv is that a lot of things are built cheap, and a lot of things are made of
plastic. Now that is not necessarily a bad thing, but all plastic becomes brittle with age and eventually breaks.
The plastic electrical box that was in my rv is a good example of that. So when I am repairing or rebuilding something on the rv, I know in
most cases I can rebuild it or replace it with something better than what was there originally, and using a metal electrical box was an
improvement over the factory plastic box that had cracked.
I could have replaced the original cracked plastic electrical box with another plastic electrical box and it would have been fine for many years, but the potential for it to break again is still there, and just a matter of time before it does.
If there is a reason why I shouldn`t have used a metal electrical box, let me know and I will swap it out for a plastic box.
highdesertranger
R.I.P HDR
- Joined
- Apr 4, 2012
- Messages
- 22,892
- Reaction score
- 89
I was just wondering. in locations that could get wet I like to use the weatherproof Die Cast boxes. highdesertranger
shadow
Well-known member
Weekend update.
I have got a lot done so far this weekend, and I will post more about it tomorrow.
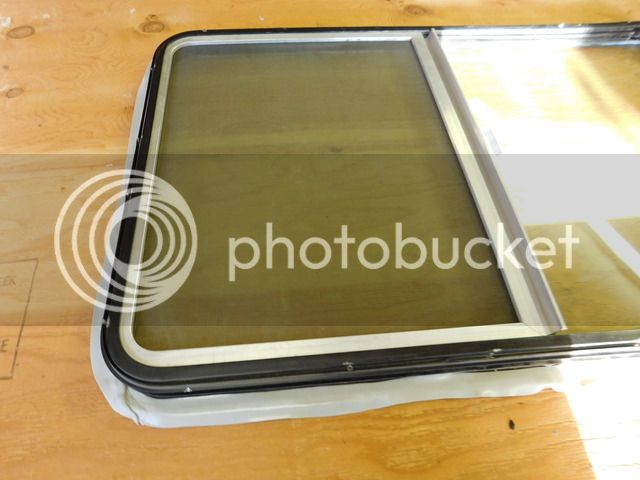
But for now I thought I would show you how to reseal a window that`s been on an rv for over thirty years.
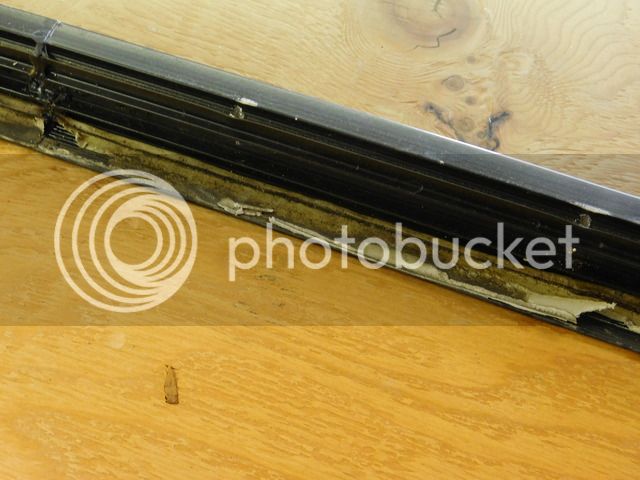
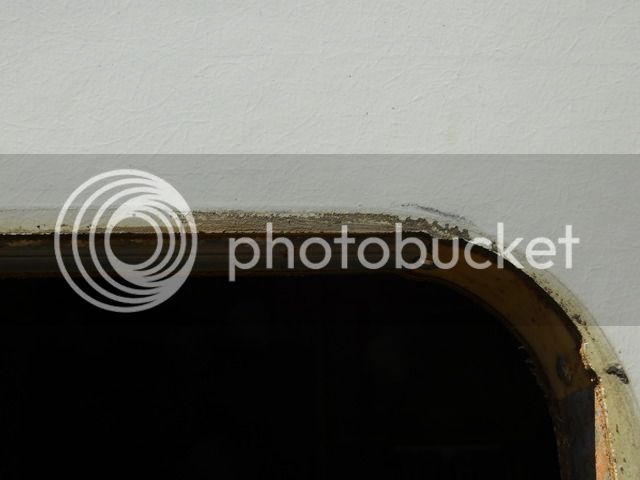
Here is the window removed, you can see the thirty year old butyl tape and how dried out it is, as well as all
of the dirt that has got past it. When I removed the screws that hold the window in place, it almost fell out of
the window frame because the butyl tape had dried out.
Here you can see all of the dirt that has got past the butyl tape.
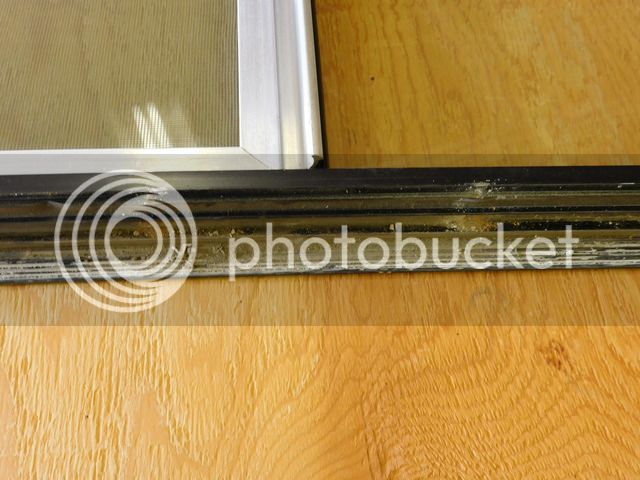
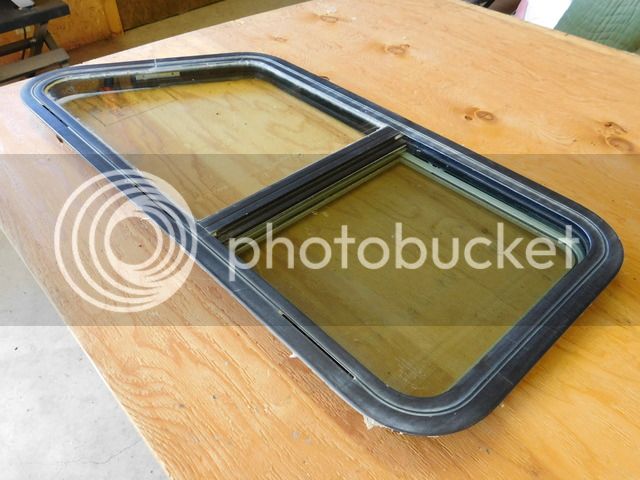
So once the window is removed you need to clean the outside window frame on the rv, remove any old butyl tape
and dirt so the new butyl tape can make a good seal.
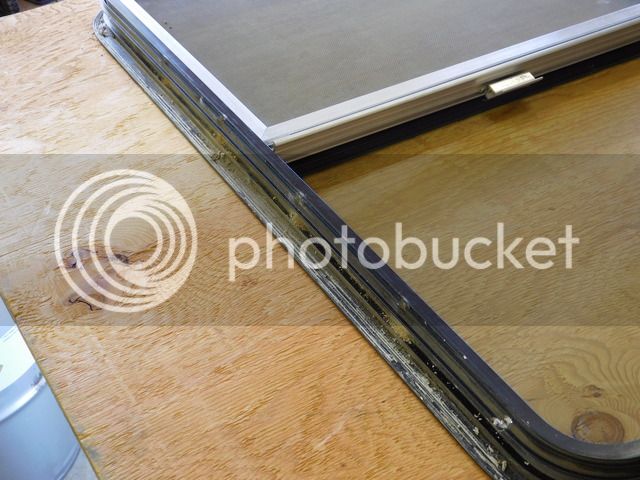
Next you want to remove all of the old butyl tape from the window frame. my windows have grooves on the back side were
the butyl tape goes, so you need to clean these grooves so the new butyl tape can make a good seal.
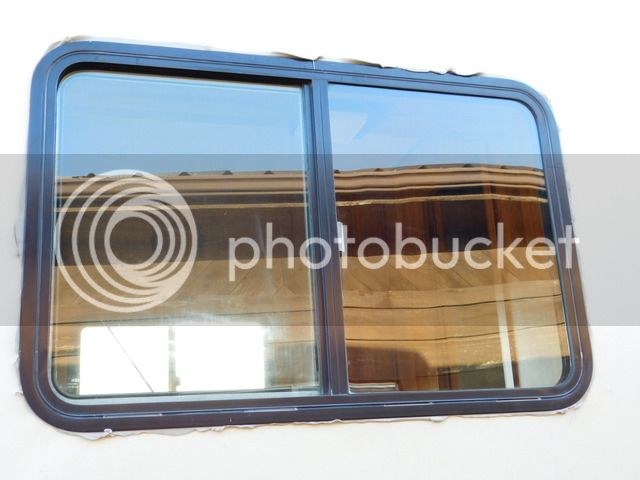
Now with the window frame cleaned, you can put the new butyl tape on the window frame.
The new butyl tape is sticky, so take your time and get it on even all the way around the window frame.

Now its time to reinstall the window on the rv and reinstall all of the trim screws that hold the window in place.
Once this is done go outside and look around the edges of the window and you will see the butyl tape that has
been squeezed out around the edge of the window frame, trim it off with a putty knife or screw driver, and that`s
it, your done.
You might have to trim the excess butyl tape several times as it settles in after the window is installed, but
other than that, your done.
I have got a lot done so far this weekend, and I will post more about it tomorrow.
But for now I thought I would show you how to reseal a window that`s been on an rv for over thirty years.
Here is the window removed, you can see the thirty year old butyl tape and how dried out it is, as well as all
of the dirt that has got past it. When I removed the screws that hold the window in place, it almost fell out of
the window frame because the butyl tape had dried out.
Here you can see all of the dirt that has got past the butyl tape.
So once the window is removed you need to clean the outside window frame on the rv, remove any old butyl tape
and dirt so the new butyl tape can make a good seal.
Next you want to remove all of the old butyl tape from the window frame. my windows have grooves on the back side were
the butyl tape goes, so you need to clean these grooves so the new butyl tape can make a good seal.
Now with the window frame cleaned, you can put the new butyl tape on the window frame.
The new butyl tape is sticky, so take your time and get it on even all the way around the window frame.
Now its time to reinstall the window on the rv and reinstall all of the trim screws that hold the window in place.
Once this is done go outside and look around the edges of the window and you will see the butyl tape that has
been squeezed out around the edge of the window frame, trim it off with a putty knife or screw driver, and that`s
it, your done.
You might have to trim the excess butyl tape several times as it settles in after the window is installed, but
other than that, your done.
GOOD JOB!!!! I had 2 windows leaking real bad on my TT and your post is great. On one of my windows it had been placed in the hole so there was very little contact with the outside wall. After I got every thing cleaned up BEFORE I put the butyl tape on the window I positioned the window in the hole in what I thought would seal better. I used some heavy-duty tape the keep it where I wanted it and put thin blocks of wood under the lip of the window to keep it in the position I wanted it . Then I took a sharpie and drew a line around the edge of the window so when I put the window back in it would in the position I wanted. (no I don't care if anyone cares about a line around my window) I did everything like you did I just added this for those reading this who might have the same problem I did.
Allen
Allen
shadow
Well-known member
I wanted to add a few more details to removing and resealing the windows.
You can remove a window and remove the old butyl tape, apply the new butyl tape and reinstall the window and be done with
it in about thirty minutes if your in a hurry.
But if you want to do a really good job, you take your time and remove all of the old butyl tape, you thoroughly clean the windows
and the window frame.
While I had the windows out, I cleaned all of the glass and window frames with Blue Magic, its a metal polish.
Why would I use metal polish on the glass your wondering ?, because it removes the oxidation and mineral streaks
from the glass and makes it look good as new.
I spent at least two hours on each window, and I got four windows done. I still have two more windows to do
and they will all be done.
I have to admit, that my old rv is built like a tank. all of the window openings are aluminum framed.
When you remove the screws that hold the window in place, chances are that they will be rusty.
You can use a wire wheel to clean them up, then repaint them.
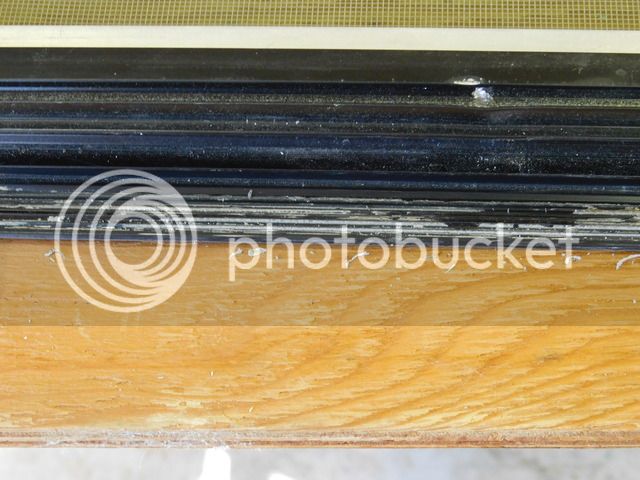
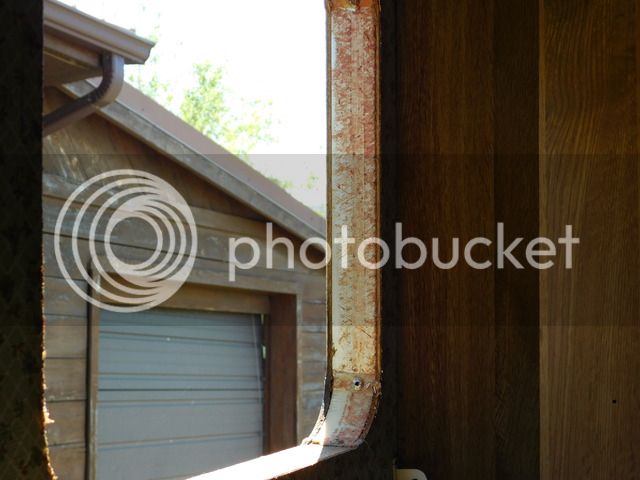
Here is one of the over cab windows, you can see were the old butyl tape gone bad and let water and dirt in.
This isn`t a great picture, but you can see how dirty and oxidized the window frame and glass is.
Here are the over the windows all cleaned up and reinstalled.


And that`s it.
You can remove a window and remove the old butyl tape, apply the new butyl tape and reinstall the window and be done with
it in about thirty minutes if your in a hurry.
But if you want to do a really good job, you take your time and remove all of the old butyl tape, you thoroughly clean the windows
and the window frame.
While I had the windows out, I cleaned all of the glass and window frames with Blue Magic, its a metal polish.
Why would I use metal polish on the glass your wondering ?, because it removes the oxidation and mineral streaks
from the glass and makes it look good as new.
I spent at least two hours on each window, and I got four windows done. I still have two more windows to do
and they will all be done.
I have to admit, that my old rv is built like a tank. all of the window openings are aluminum framed.
When you remove the screws that hold the window in place, chances are that they will be rusty.
You can use a wire wheel to clean them up, then repaint them.
Here is one of the over cab windows, you can see were the old butyl tape gone bad and let water and dirt in.
This isn`t a great picture, but you can see how dirty and oxidized the window frame and glass is.
Here are the over the windows all cleaned up and reinstalled.
And that`s it.
highdesertranger
R.I.P HDR
- Joined
- Apr 4, 2012
- Messages
- 22,892
- Reaction score
- 89
a little hint we used a carpenters pencil(the heavy duty rectangle pencils) to trim the excess butyl tape. this was so metal objects would not scratch the paint or fiberglass surfaces. highdesertranger
shadow
Well-known member
highdesertranger said:a little hint we used a carpenters pencil(the heavy duty rectangle pencils) to trim the excess butyl tape. this was so metal objects would not scratch the paint or fiberglass surfaces. highdesertranger
That`s something I would have never thought of.
shadow
Well-known member
Weekend update.
I didn`t get a chance to finish my weekend update yesterday, so I will do it now.
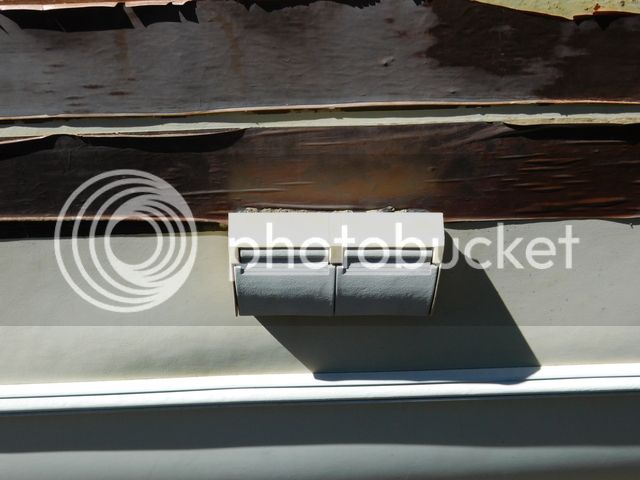
Besides getting most of the windows resealed, I also got the over cab clearance lights wired up.
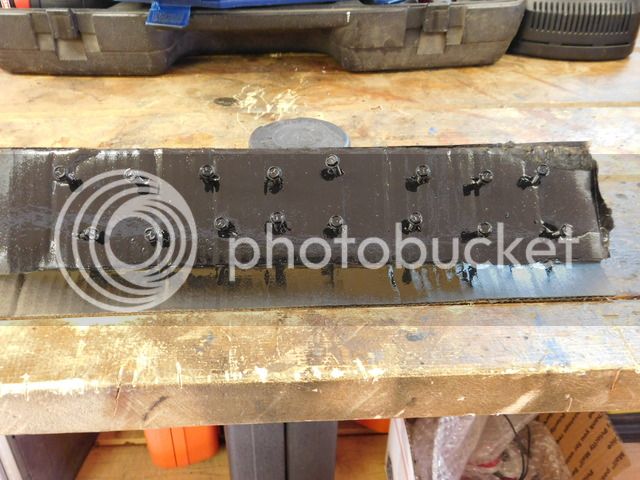
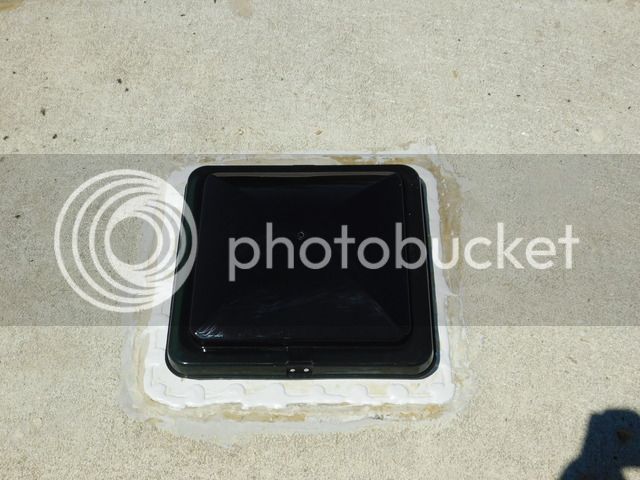
Then I replaced the last two original roof vents that were totally shot.
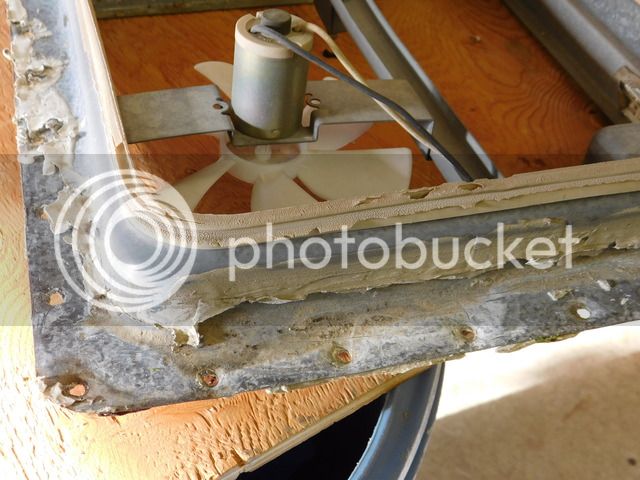
Here is one of the two vents, after thirty years baking in the sun, its totally worn out.
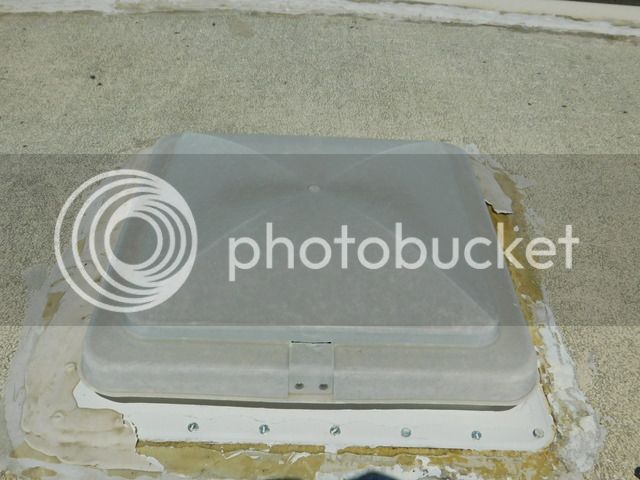
I`m sure some of you are saying, why not just replace the vent cover, but that wouldn`t fix the complete problem.
as you can see here.
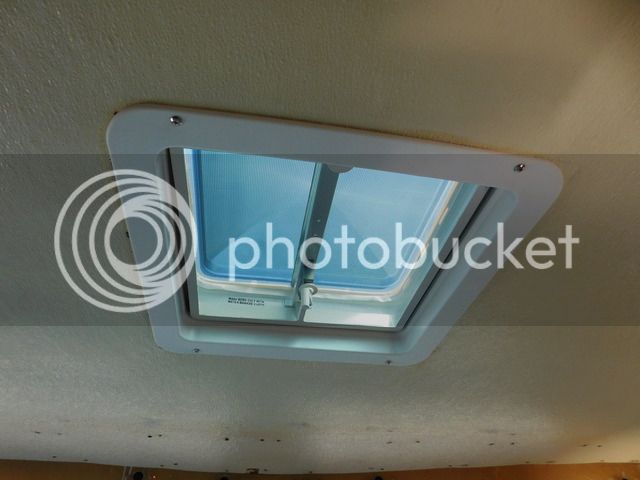
This is the vent in the over cab bed area.
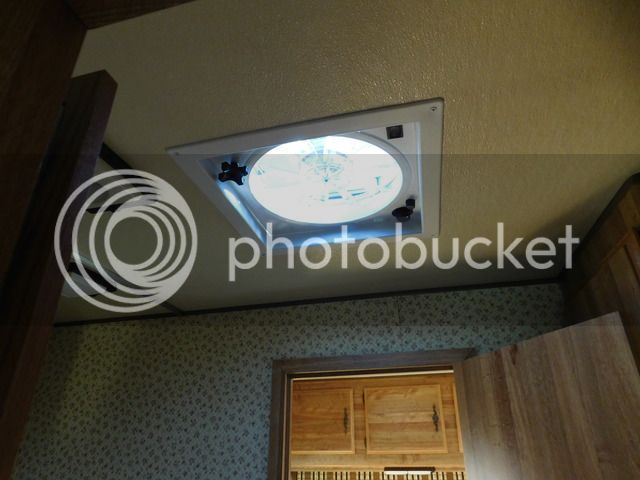
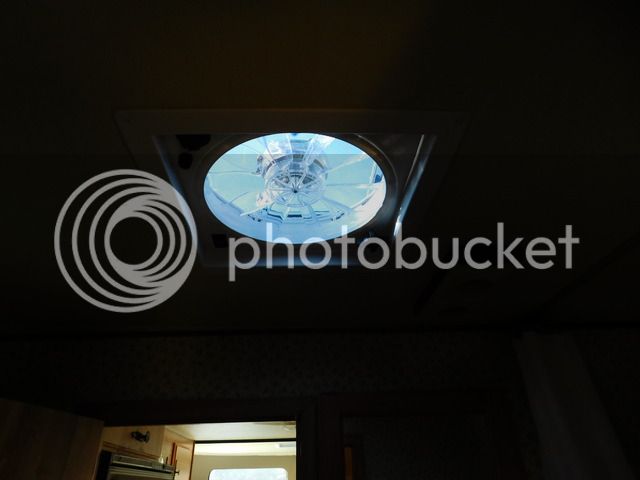
This is the new vent in the bathroom, its a fantastic fan.
That`s everything I got done this weekend.
I didn`t get a chance to finish my weekend update yesterday, so I will do it now.
Besides getting most of the windows resealed, I also got the over cab clearance lights wired up.
Then I replaced the last two original roof vents that were totally shot.
Here is one of the two vents, after thirty years baking in the sun, its totally worn out.
I`m sure some of you are saying, why not just replace the vent cover, but that wouldn`t fix the complete problem.
as you can see here.
This is the vent in the over cab bed area.
This is the new vent in the bathroom, its a fantastic fan.
That`s everything I got done this weekend.
shadow
Well-known member
Yea, thanks for the offer.
I wish I could move into it, or at least use it, but it still needs lots of work. What I really need is money and time.
I am doing as much of everything as I can, but some things it will have to go into the auto shop for, and some things
it will have to go to an rv shop for, because certain things are above my pay grade.
shadow
Well-known member
Weekend update.
I didn`t get much done this weekend, but I started making the over the cab trim pieces that I need to finish things up.
I had to renew my vehicle insurance, so money it a bit tight right now, so I just used some wood that I had around the shop.
I need to order some more beige vinyl and some more dura snap screw covers, but it will be several weeks before I can do that.
Until then, I will try and make as many of the trim pieces as I can with the wood that I have.
Still much more to come.
Similar threads
- Replies
- 5
- Views
- 960