You are using an out of date browser. It may not display this or other websites correctly.
You should upgrade or use an alternative browser.
You should upgrade or use an alternative browser.
Cummins Canoe (A Stepvan Story)
- Thread starter PlethoraOfGuns
- Start date


Help Support Van Living Forum:
This site may earn a commission from merchant affiliate
links, including eBay, Amazon, and others.
PlethoraOfGuns
Well-known member
Thanks! We're moving and grooving. Trying to beat the cold weather. We've been lucky so far. And I had money for the lawyer, but just spent it on important things like a projector and mobile hot tub equipment.
GntlStone
Well-known member
- Joined
- Dec 6, 2019
- Messages
- 194
- Reaction score
- 73
Looks really great! All your prep and hard work is turning out awesome.
Any thought on painting the ceiling white or a light color? It will give a feeling of openness. It would look like shiplap. Maybe use a bathroom type paint for more water resistance.
Any thought on painting the ceiling white or a light color? It will give a feeling of openness. It would look like shiplap. Maybe use a bathroom type paint for more water resistance.
PlethoraOfGuns
Well-known member
Oh no, not a white ceiling! We did all this work to get the walls to match the 1960's ceiling! We thought about doing some kind of light colored composite ceiling, but this wood panelling popped up and we went with it. Good point about the white opening things up, it will also reflect light more and make it brighter inside.
GntlStone
Well-known member
- Joined
- Dec 6, 2019
- Messages
- 194
- Reaction score
- 73
Lolol PoG! I especially love your use of found materials. I'm all about recycled construction practices. It amazes me all the useful stuff people throw away, and I love a good find. I have a vintage military field desk I hope to find a place for in mu build one day.
highdesertranger
R.I.P HDR
- Joined
- Apr 4, 2012
- Messages
- 22,892
- Reaction score
- 87
very nice work. did you use the water base or oil base clear? highdesertranger
PlethoraOfGuns
Well-known member
Even if we had the money, we'd still rather use recycled items. Humans are terrible to the earth. Any lil bit of trash we can keep out of the landfills just makes us feel good inside.
And the polyurethane is oil base clear. It was an old, rusty, unopened can that someone threw to the curb. That's a $50 can! People be crazy out there. We still have about half a can. Going to use it on all the cabinets and stuff.
And the polyurethane is oil base clear. It was an old, rusty, unopened can that someone threw to the curb. That's a $50 can! People be crazy out there. We still have about half a can. Going to use it on all the cabinets and stuff.
PlethoraOfGuns
Well-known member
Polyurethane is all dry, time to start framing and fitting components.
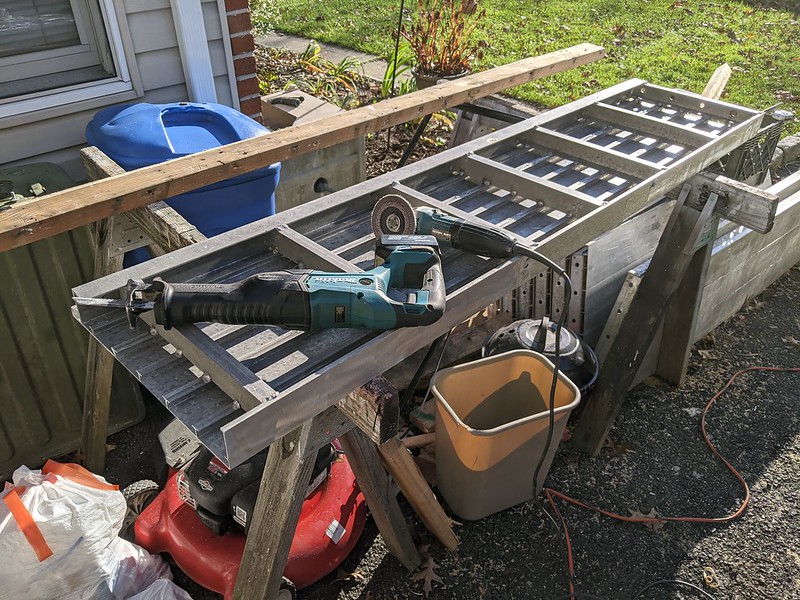
[size=small][size=small]Cleaned up some of these sections of old pool decking. Many years of chlorine all up on the aluminum created a mess. Nothing a wire wheel couldn't fix. Do this outside with good ventilation so people don't think you have the corona.[/size][/size]
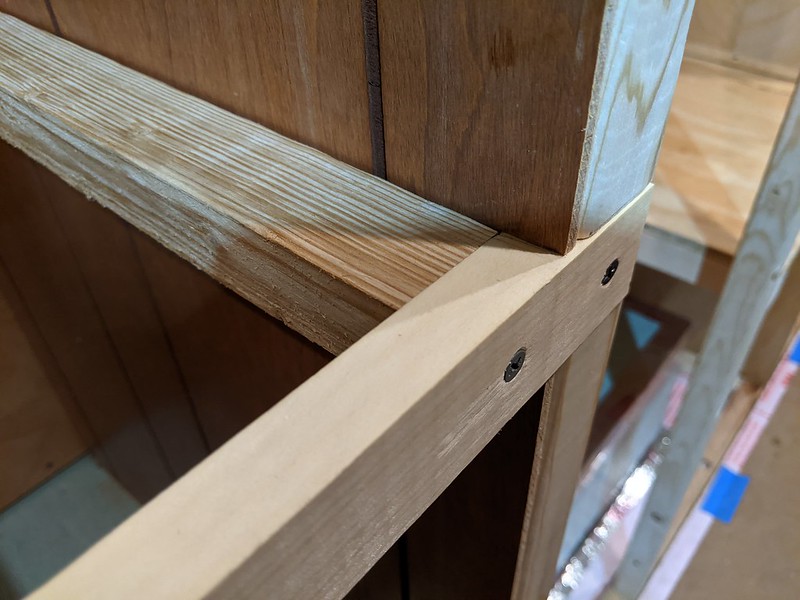
[size=small]Laying out some stuff, seeing where it all fits. We didn't want to randomly put screws through the floor in a whole bunch of spots. So, we took a 16' 2"x4" that we found in the garbage, ripping it down to 1"x1.5" and bolted that to the floor in about 6 spots with 3/8" aluminum bolts. the bolts are countersunk into the wood so the bolt heads are flush with the top of the wood. The idea is to mount everything to either the walls or this strip of wood that is at about the edge of all the future cabinets. We're going for real simple aisle design. To frame any interior walls, we're going lightweight with 2'x2" wood.[/size]
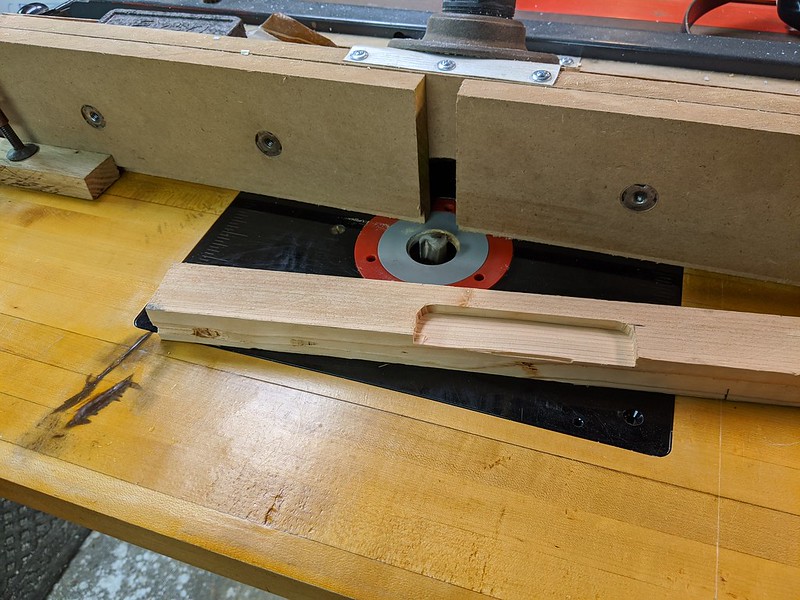
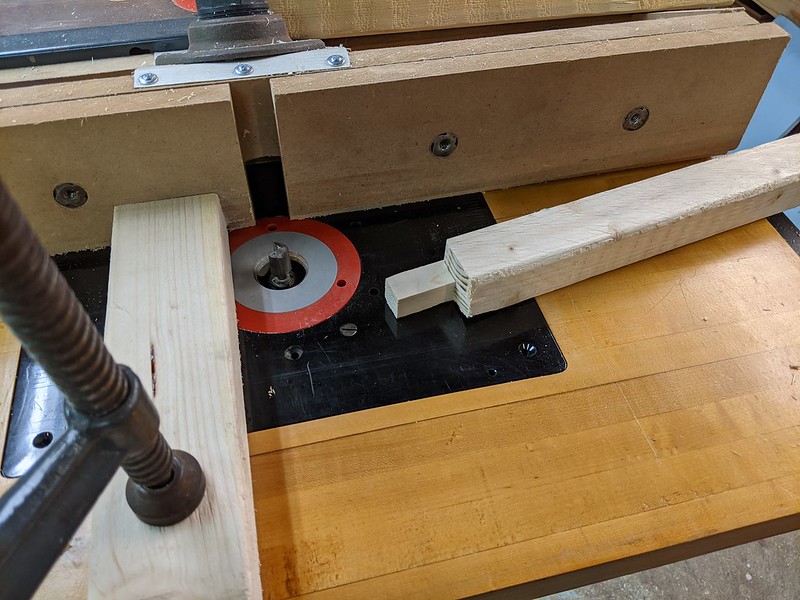
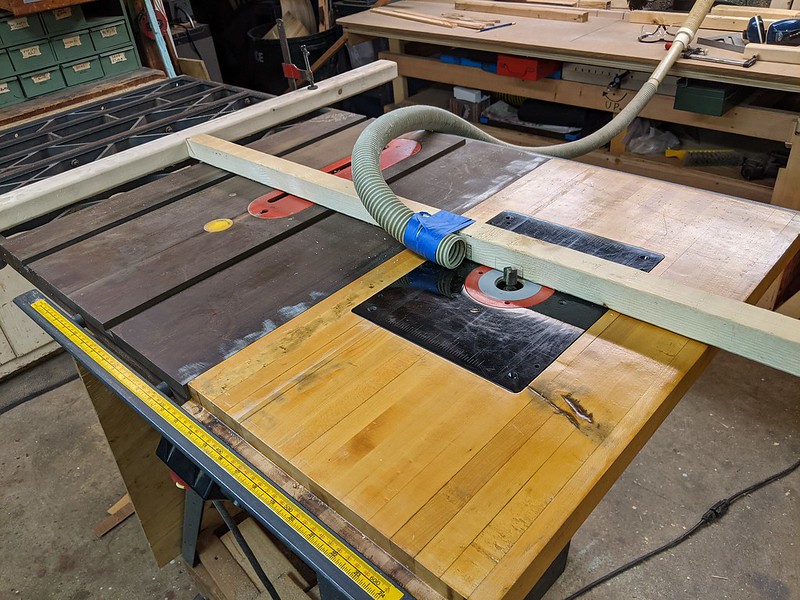
[size=small]I have a feeling this router table is going to be everything in this build.[/size]
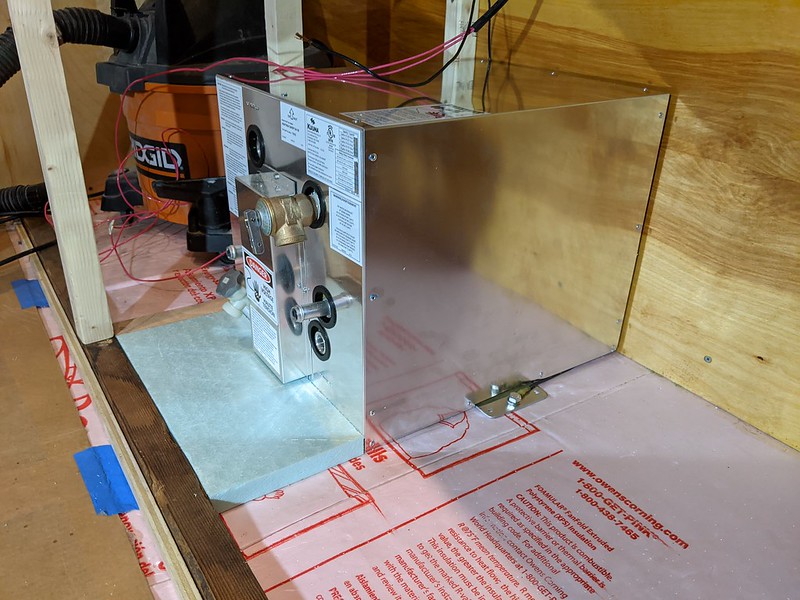
[size=small]So the water heater we have has mounting brackets of the sides. To get the water heater all the way against the wall, we made this groove under the bottom plate of the framed wall to hold down the one side of the water heater. The other side, which we have access to, we'll just bolt down to the floor with another aluminum bolt.[/size]
[size=small]Started to get real fancy with the router table. Making vertical supports for the countertop.[/size]
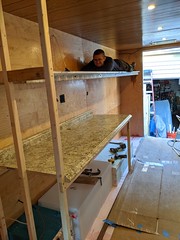
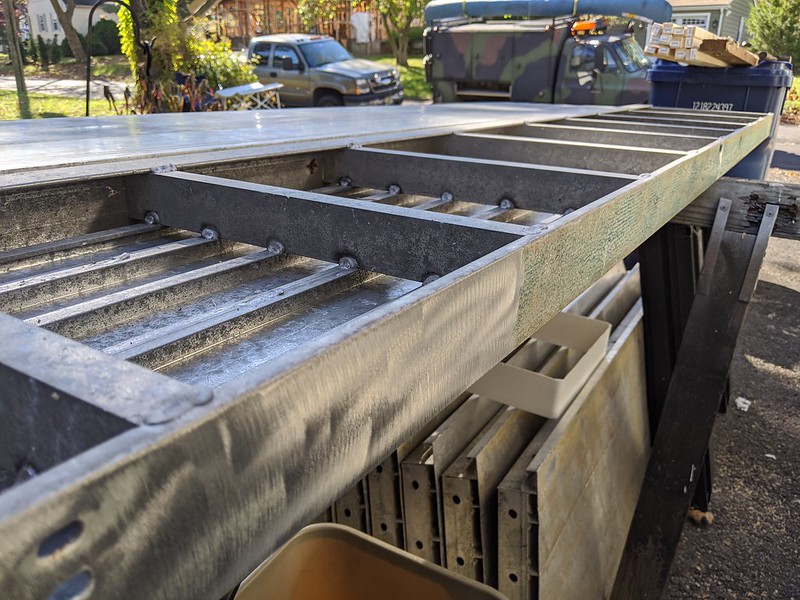
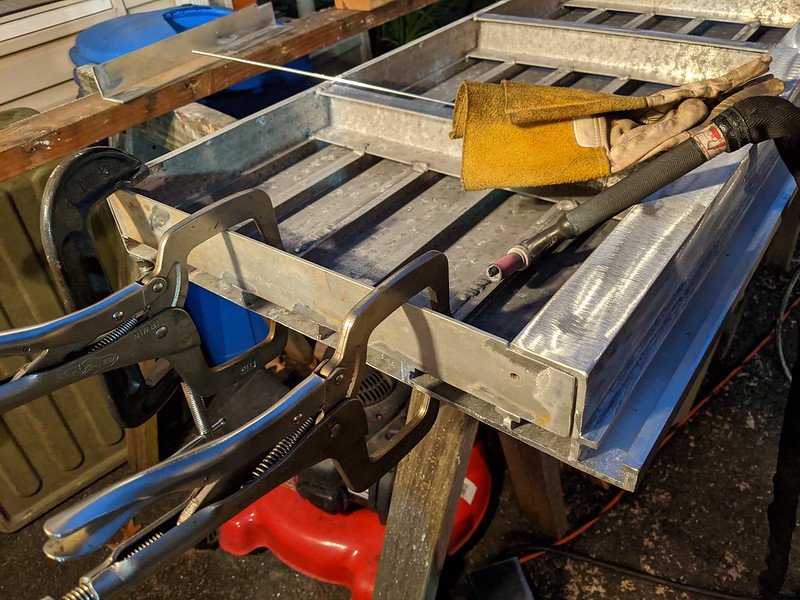
[size=small]And finished the wall and got the pool decking up. This will be our upper cabinets. the aluminum is very light and strong. You can hang and do pull-ups underneath and it doesn't flex. This will save lots of weight instead of building upper cabinets with all wood construction.[/size]
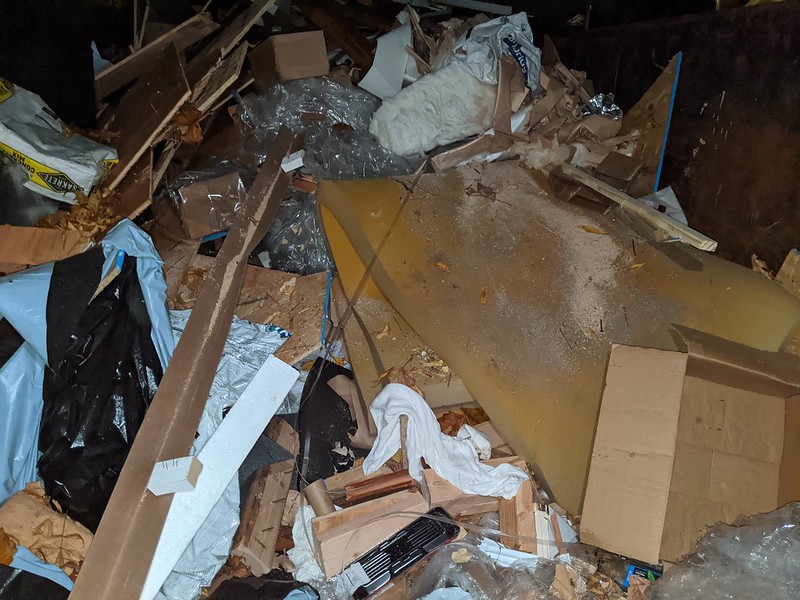
[size=small]Found some foam in a dumpster. We pulled that out and cleaned it. Maybe it will come in handy?[/size]

[size=small]And to treat ourselves for all that hard work, we got to watch a movie using the projector. Who would have thought the side of the van could be such a great movie screen![/size]
[size=small][size=small]Cleaned up some of these sections of old pool decking. Many years of chlorine all up on the aluminum created a mess. Nothing a wire wheel couldn't fix. Do this outside with good ventilation so people don't think you have the corona.[/size][/size]
[size=small]Laying out some stuff, seeing where it all fits. We didn't want to randomly put screws through the floor in a whole bunch of spots. So, we took a 16' 2"x4" that we found in the garbage, ripping it down to 1"x1.5" and bolted that to the floor in about 6 spots with 3/8" aluminum bolts. the bolts are countersunk into the wood so the bolt heads are flush with the top of the wood. The idea is to mount everything to either the walls or this strip of wood that is at about the edge of all the future cabinets. We're going for real simple aisle design. To frame any interior walls, we're going lightweight with 2'x2" wood.[/size]
[size=small]I have a feeling this router table is going to be everything in this build.[/size]
[size=small]So the water heater we have has mounting brackets of the sides. To get the water heater all the way against the wall, we made this groove under the bottom plate of the framed wall to hold down the one side of the water heater. The other side, which we have access to, we'll just bolt down to the floor with another aluminum bolt.[/size]
[size=small]Started to get real fancy with the router table. Making vertical supports for the countertop.[/size]
[size=small]And finished the wall and got the pool decking up. This will be our upper cabinets. the aluminum is very light and strong. You can hang and do pull-ups underneath and it doesn't flex. This will save lots of weight instead of building upper cabinets with all wood construction.[/size]
[size=small]Found some foam in a dumpster. We pulled that out and cleaned it. Maybe it will come in handy?[/size]
[size=small]And to treat ourselves for all that hard work, we got to watch a movie using the projector. Who would have thought the side of the van could be such a great movie screen![/size]
PlethoraOfGuns
Well-known member
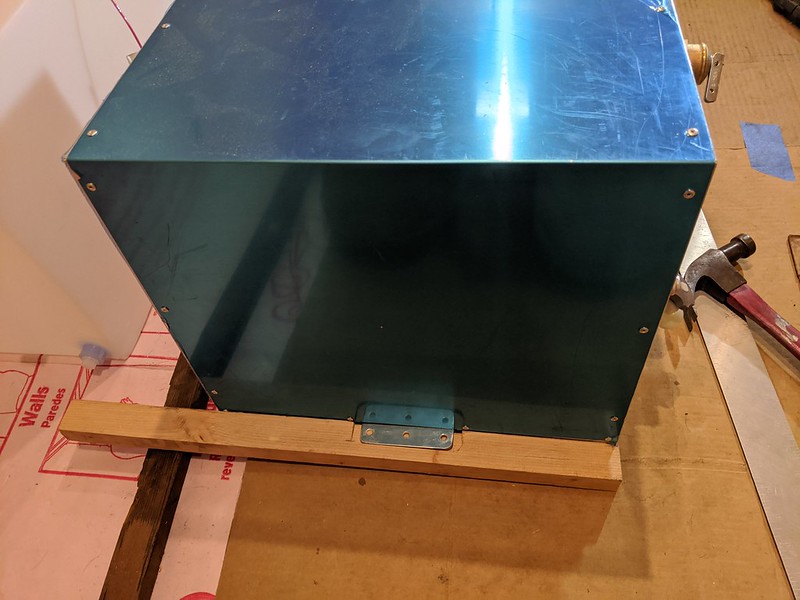
Lots of motivation to get things out of the garage, like that stupid big fridge.
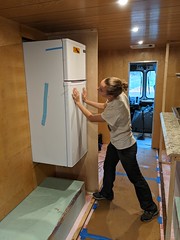
[size=small]It's big indeed. But it fits in the spot we framed out for the fridge.[/size]
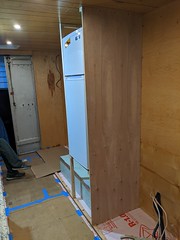
[size=small]It will probably sit something like this.[/size]
[size=small]Got tired of the pocket door flying open while driving. So we got a really strong rubber covered magnet and rigged this up to keep the door closed.[/size]
[size=small]We took the wall plywood down in the cab and stuck a magnet inside the wall to keep the door open.[/size]
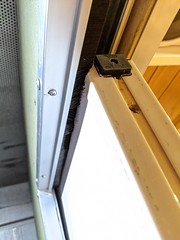
[size=small]Also attached this brush door sweep to help seal the door.[/size]
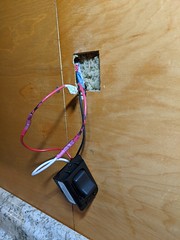
[size=small]Wired in some 12v switches.[/size]
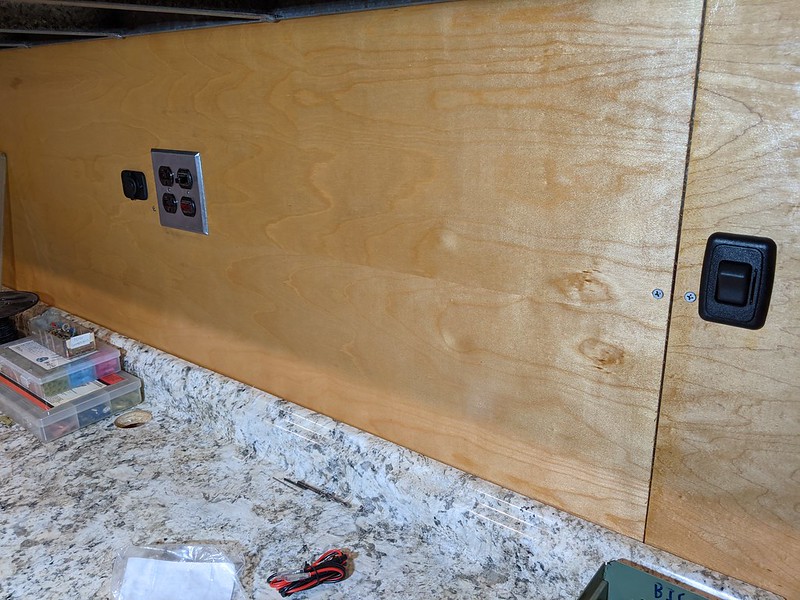
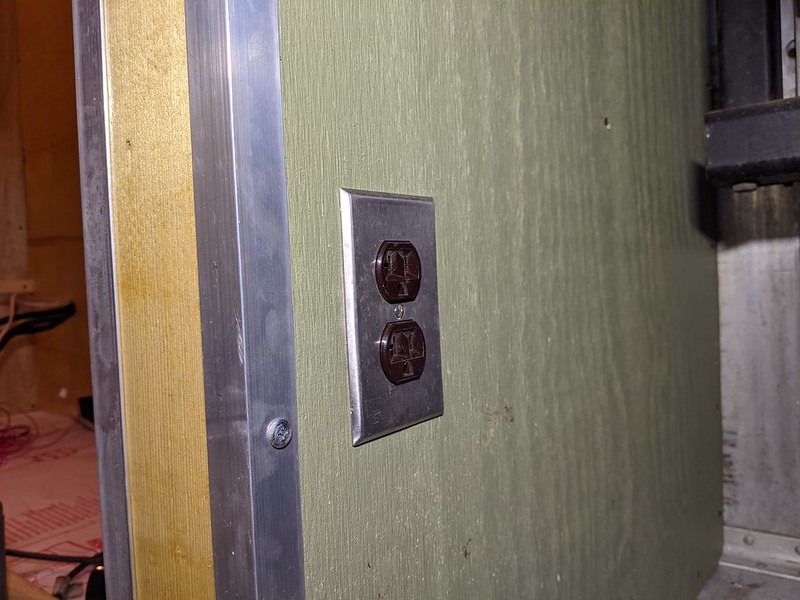
[size=small]Got 120v and 12v outlets in too.[/size]
[size=small]Even have an outlet in the cab now. Never had a vehicle with an outlet next to the drivers seat, hoping this will be useful.[/size]
[size=small]It's big indeed. But it fits in the spot we framed out for the fridge.[/size]
[size=small]It will probably sit something like this.[/size]
[size=small]Got tired of the pocket door flying open while driving. So we got a really strong rubber covered magnet and rigged this up to keep the door closed.[/size]
[size=small]We took the wall plywood down in the cab and stuck a magnet inside the wall to keep the door open.[/size]
[size=small]Also attached this brush door sweep to help seal the door.[/size]
[size=small]Wired in some 12v switches.[/size]
[size=small]Got 120v and 12v outlets in too.[/size]
[size=small]Even have an outlet in the cab now. Never had a vehicle with an outlet next to the drivers seat, hoping this will be useful.[/size]
>>>Any lil bit of trash we can keep out of the landfills just makes us feel good inside.
I did some welding work at a landfill once. I've got no problem with the concept of "landfills".
The volume of methane generated at the one I was at was powering thousands of homes with the on location power plant, and the "liquids" being captured were being separated by the same methods we used in 9th grade science class on a larger scale, turning sludge back into perfectly usable and sometime rare products.
And finally, when we run short of plastics, steel, copper, aluminum, and a half million other "compounds", we will know EXACTLY where we can dig some up and recycle it.
PlethoraOfGuns
Well-known member
We're getting ahead of the big crowds by grabbing the good stuff now, before they go into the landfill! People throw out the craziest things.
PlethoraOfGuns
Well-known member
People have been complaining that there are only 2 seats in the rig. Everyone wants to go for rides. I guess we need to build more seats...
[size=small]Can't stop making cool stuff with other cool stuff![/size]
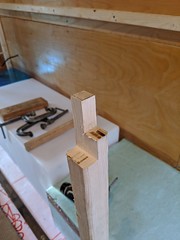
[size=small]Some lightweight seat framing. [size=small]We'll skin the frame with some 1/2" birch plywood later on.[/size][/size]
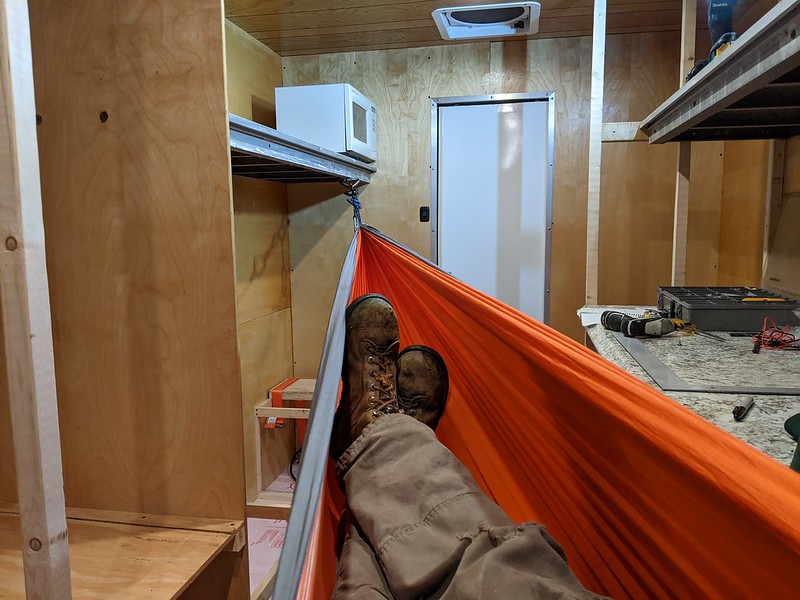
[size=small]Oh that feels so nice and warm inside...[/size]
[size=small]Something like this should work. Picked up some simple seatbelts and bolted them to the floor. They're not much, but they at least give the passenger a chance. A small dinette table thing in between the seats and storage for underneath.[/size]
[size=small]These lightweight aluminum shelves are so strong! We need to incorporate them on the drivers side. But the fridge is in the middle of the wall. Hmmm...[/size]
[size=small]I guess we'll have to cut a section in half.[/size]
[size=small]Just need to weld new ends on the cut sides.[/size]

[size=small]And just like that, we have two smaller sections.[/size]
[size=small]And now to enjoy the fruits of our labor. So glad we made that bulkhead wall out of 2x4's. Very sturdy for side loaded forces like this.[/size]
[size=small]Can't stop making cool stuff with other cool stuff![/size]
[size=small]Some lightweight seat framing. [size=small]We'll skin the frame with some 1/2" birch plywood later on.[/size][/size]
[size=small]Oh that feels so nice and warm inside...[/size]
[size=small]Something like this should work. Picked up some simple seatbelts and bolted them to the floor. They're not much, but they at least give the passenger a chance. A small dinette table thing in between the seats and storage for underneath.[/size]
[size=small]These lightweight aluminum shelves are so strong! We need to incorporate them on the drivers side. But the fridge is in the middle of the wall. Hmmm...[/size]
[size=small]I guess we'll have to cut a section in half.[/size]
[size=small]Just need to weld new ends on the cut sides.[/size]
[size=small]And just like that, we have two smaller sections.[/size]
[size=small]And now to enjoy the fruits of our labor. So glad we made that bulkhead wall out of 2x4's. Very sturdy for side loaded forces like this.[/size]
PlethoraOfGuns
Well-known member
Working on more framing and cabinet stuff.
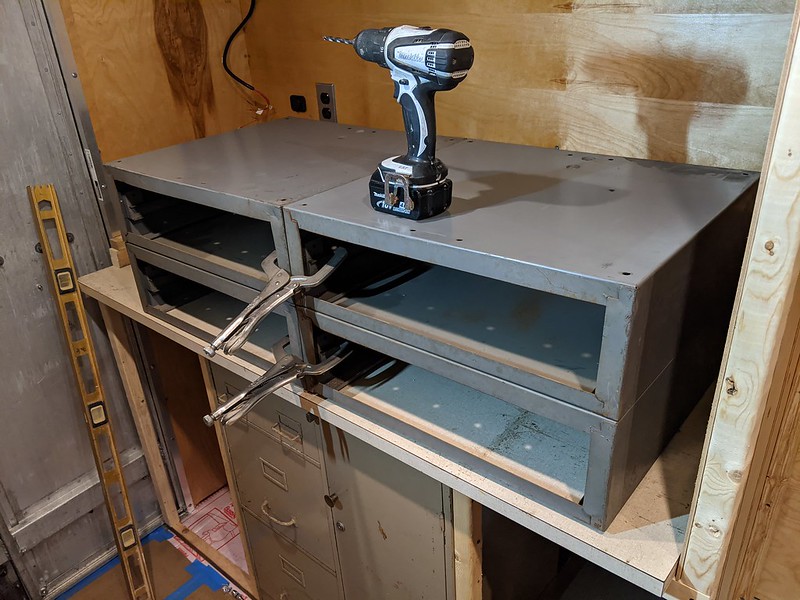
[size=small]Rear drivers side behind the wheel well we insulated the floor a wee bit more and framed for a sweet cabinet we found at an estate sale.[/size]
More neat notching and framing.
Now we have this awesome cabinet and work table!
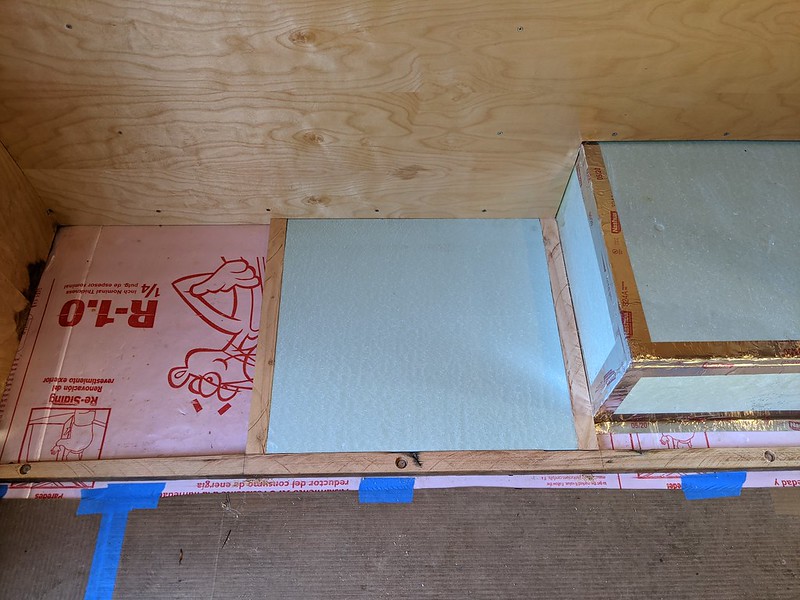
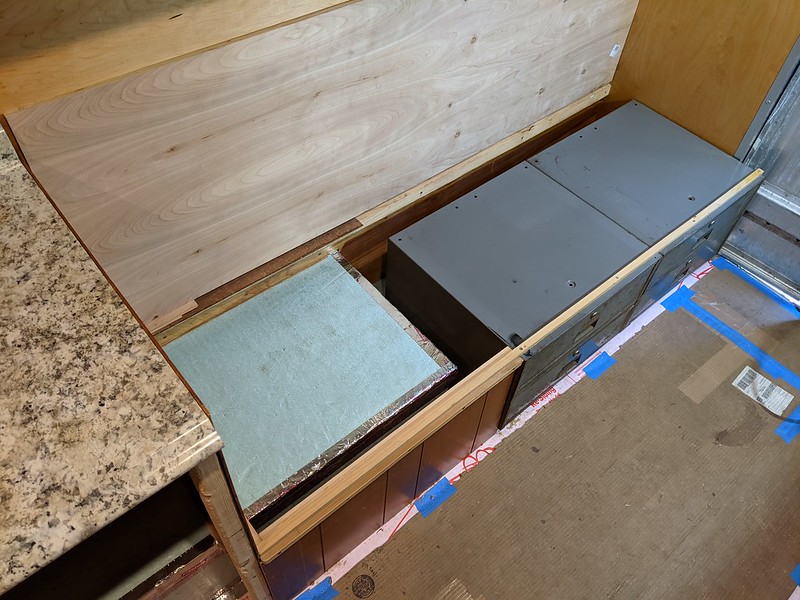
We sealed and taped the insulation around the wheel wells because we won't be able to get to them very easily anymore.
Now the passenger side rear of the wheel well.
Picked these cabinets up for free. Just need to line them up nice, drill some holes, and bolt them together.
Perfect! Well, not quite. There are some funny spaces going on down there. I'm sure we'll find stuff to store down there. Also installed the seat plywood to the futon.
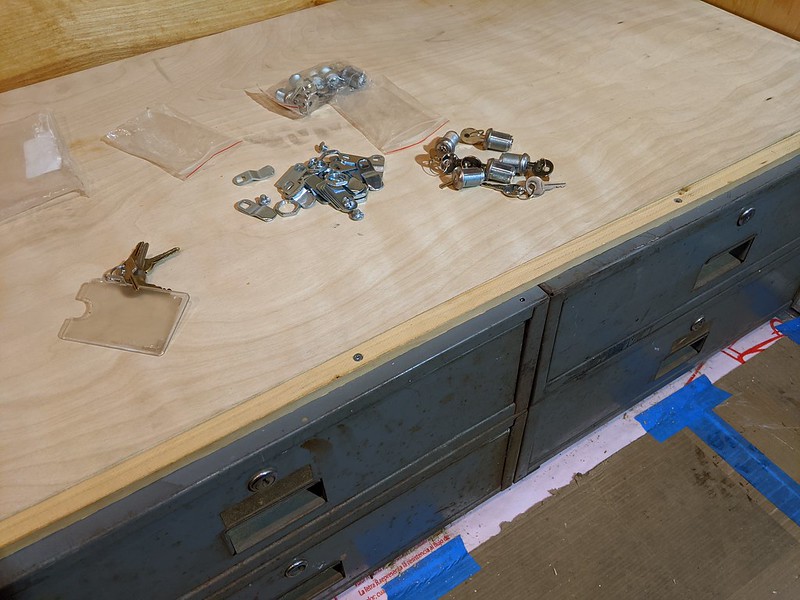
Seat folds down flat like this on hinges. Got a hole set of matching keyed lock cylinders. We'll change all the locks on everything inside and outside of van so we don't have to carry around a dozen different keys for stuff.
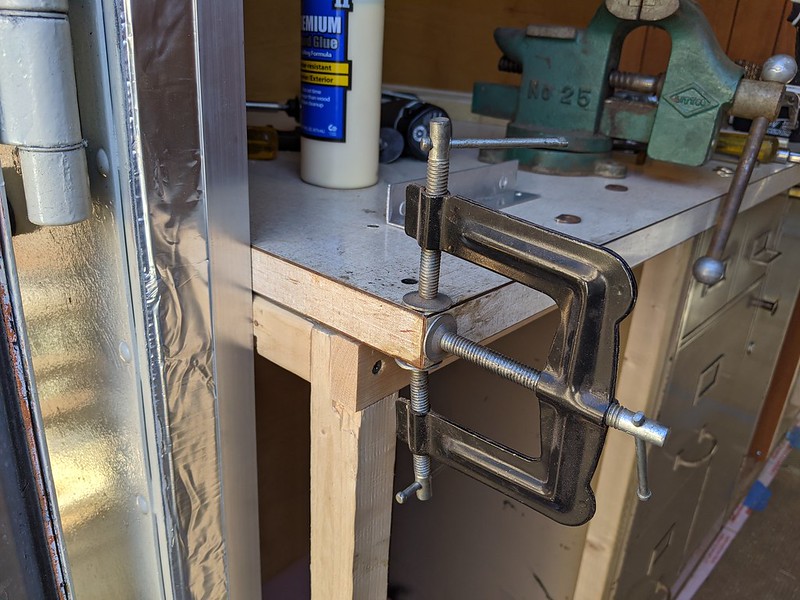
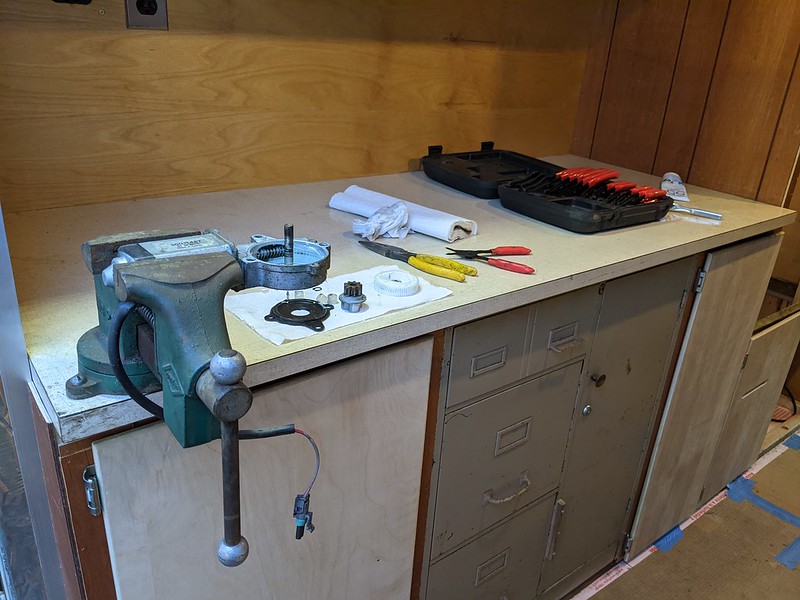
Fixed up some peeling material on the work table. Never thought I'd have to use this funny old clamp. But I think this is what it's made for.
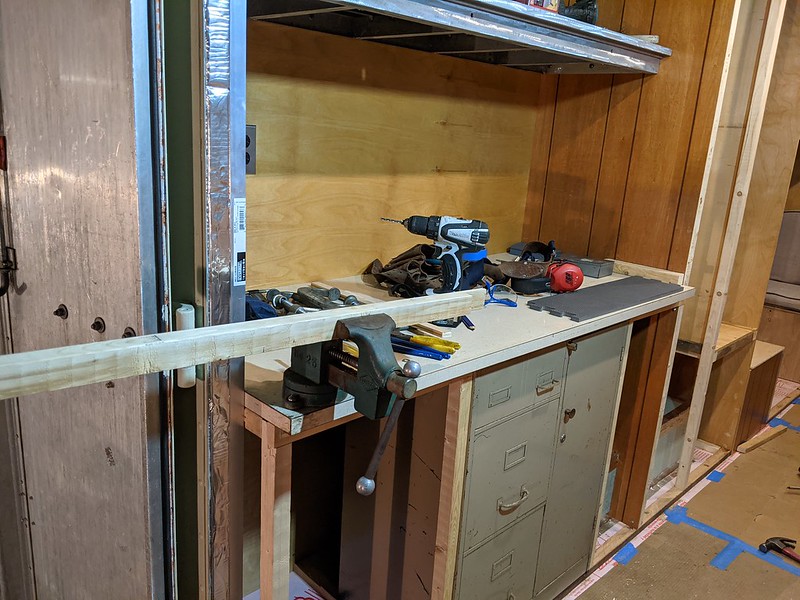
And a bench vise! Mounted it so you can open the rear door and hold long pieces of whatever. The vise also makes a good hand hold when climbing up into the van.
[size=small]Rear drivers side behind the wheel well we insulated the floor a wee bit more and framed for a sweet cabinet we found at an estate sale.[/size]
More neat notching and framing.
Now we have this awesome cabinet and work table!
We sealed and taped the insulation around the wheel wells because we won't be able to get to them very easily anymore.
Now the passenger side rear of the wheel well.
Picked these cabinets up for free. Just need to line them up nice, drill some holes, and bolt them together.
Perfect! Well, not quite. There are some funny spaces going on down there. I'm sure we'll find stuff to store down there. Also installed the seat plywood to the futon.
Seat folds down flat like this on hinges. Got a hole set of matching keyed lock cylinders. We'll change all the locks on everything inside and outside of van so we don't have to carry around a dozen different keys for stuff.
Fixed up some peeling material on the work table. Never thought I'd have to use this funny old clamp. But I think this is what it's made for.
And a bench vise! Mounted it so you can open the rear door and hold long pieces of whatever. The vise also makes a good hand hold when climbing up into the van.
PlethoraOfGuns
Well-known member
Seat belts? Yes, seat belts! Oh yea, and power baby!
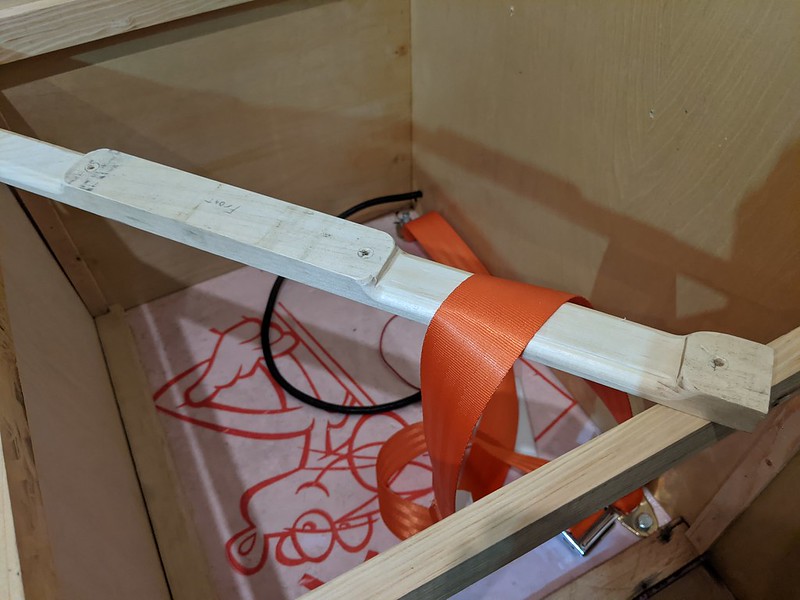
[size=small]Bolted some seats to the floor and needed to run them unobstructed up and over the seat. so we removed pieces of the top horizontal supports and made slots for the belts.[/size]
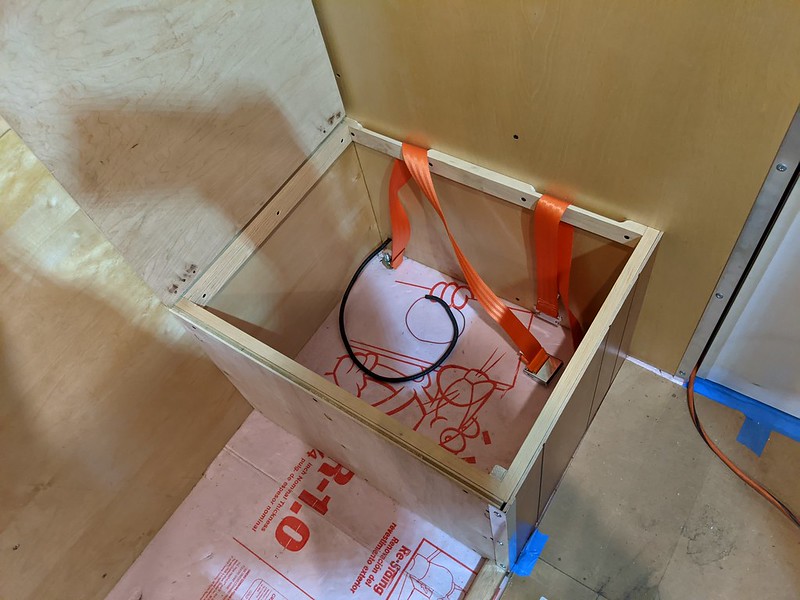
[size=small]Now you can store them under the seat.[/size]
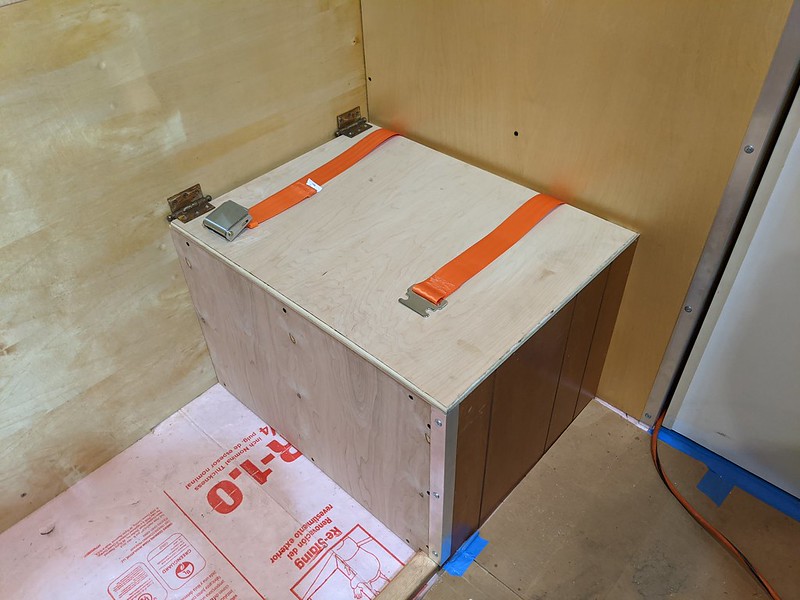
Or pull them up, close the lid, and now a person can use the belts. Just need some kind of flush latch to hold the seat lid down. We figured since Grumman is also an aircraft company, we should use airplane style seat belts!
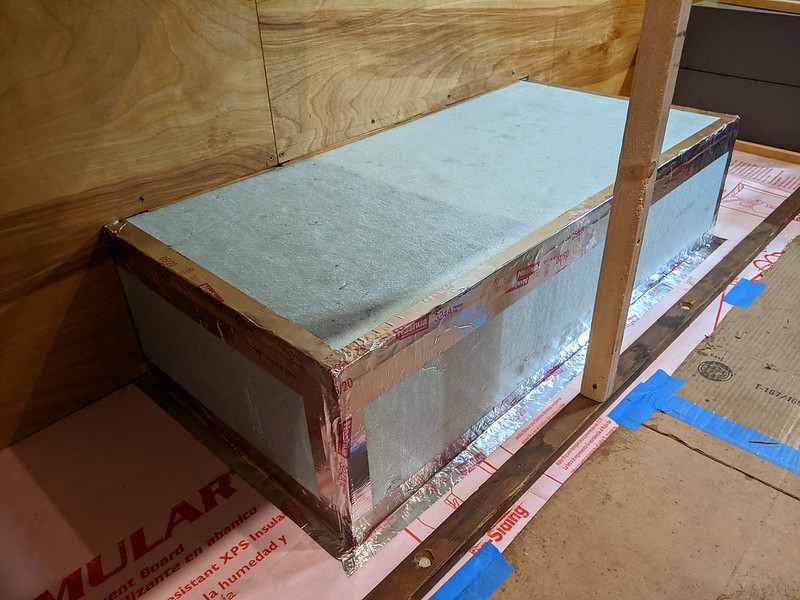
[size=small]Bolted the water heater into place. Ran a electrical ground now to where it bolts to the floor. This will be the ground for the water pump and heating system. Also insulating the floor more where we can.[/size]
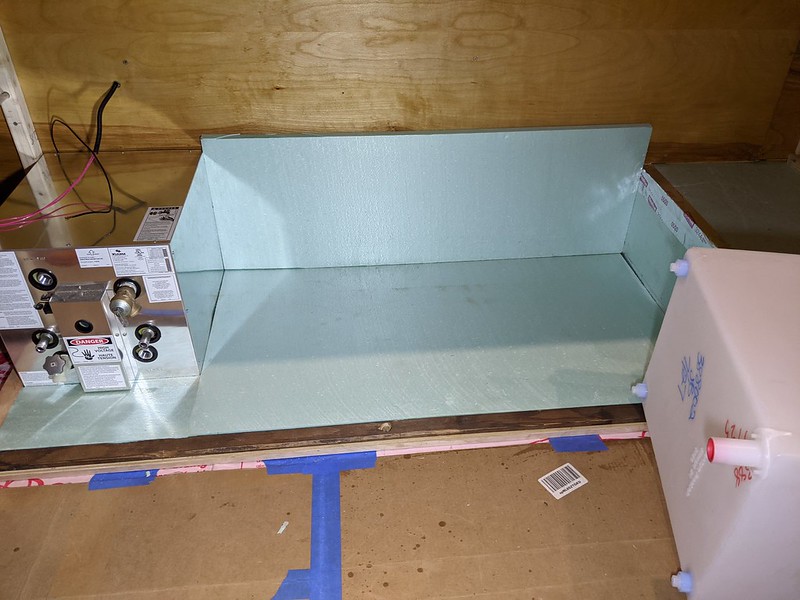
[size=small]The insulation will take up space we need so the water tank will clear the water heater. It's a tight fit but should be able to make all the connections.[/size]
[size=small]On the right side of the water tank we needed to do something with this useless awkward space. We're thinking it be a good place to have garbage/recycling and such.[/size]
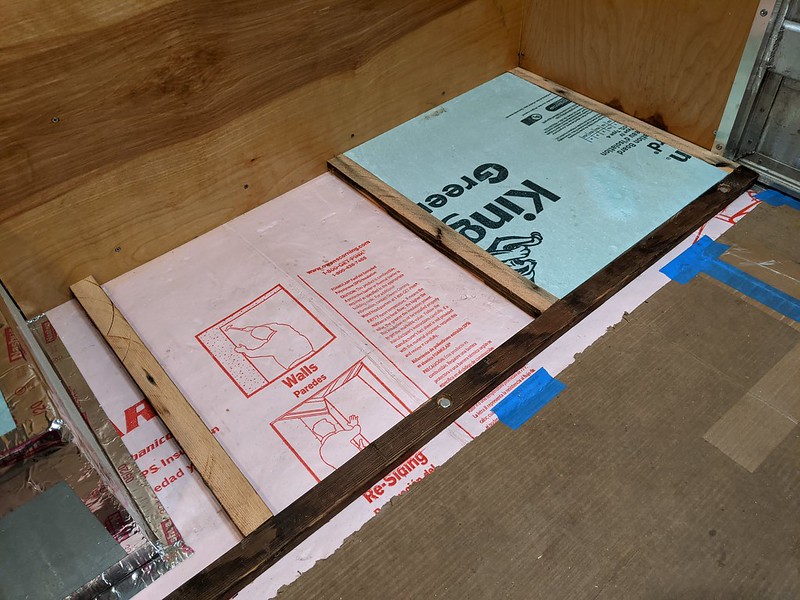
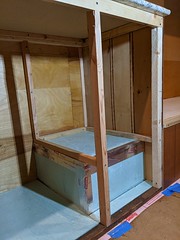
[size=small]Some more framing to hold the water tank down in place. It's a snug fit. But we also want the tank to be removable without fully disassembling the whole cabinet.[/size]
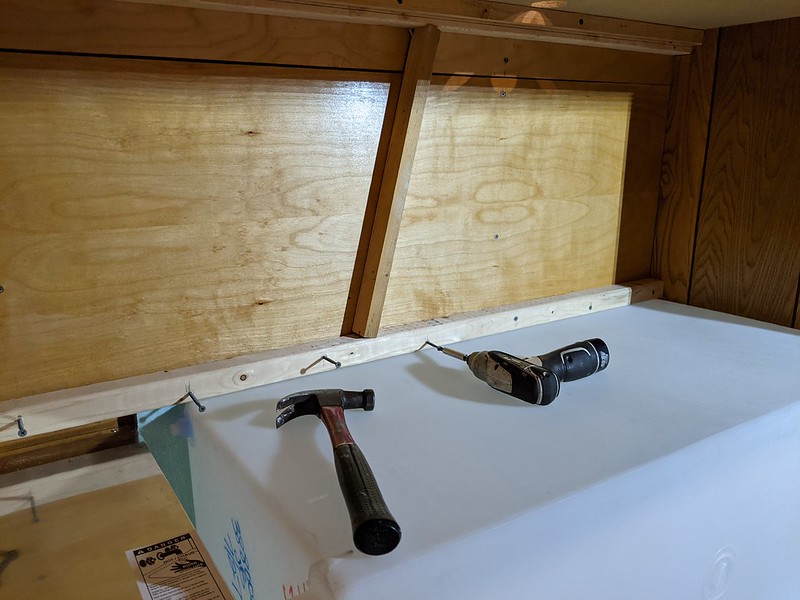
[size=small]So the center support for the kitchen counter will be notched and screwed in place so it can come out later in case the water tank or water heater need to be replaced or whatever.[/size]
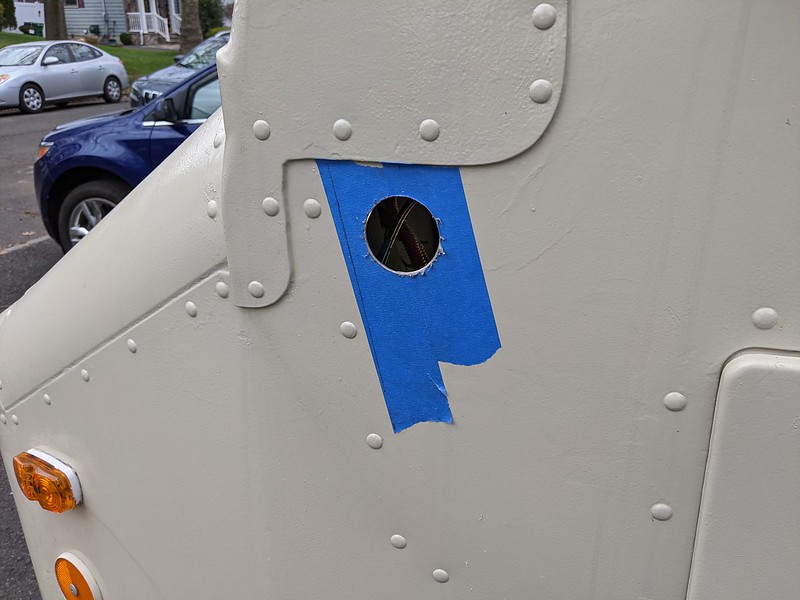
[size=small]Worked up more courage and made a thousand measurements. Made a hole for shore power port.[/size]
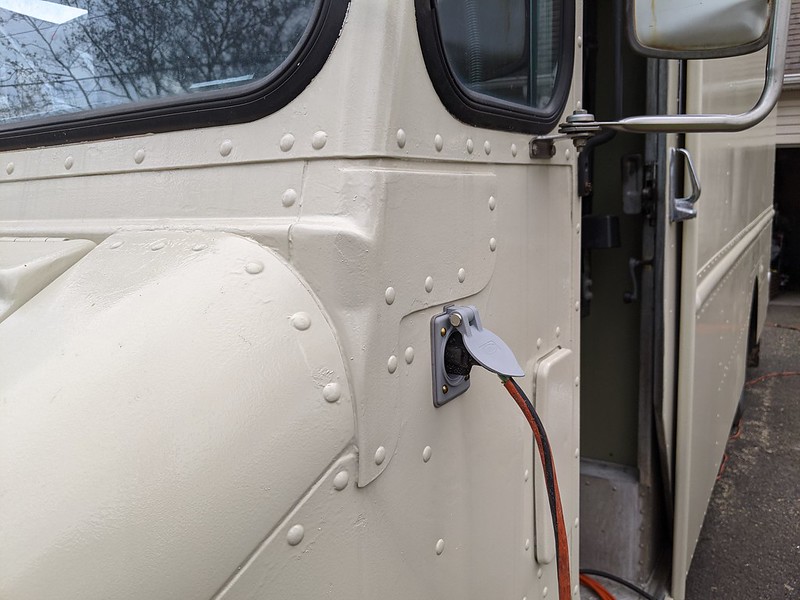
[size=small]We might not have the off-grid electrical components done yet, but at least we have some power in there now. It was getting old dealing with an extension cord through the door. And it's starting to get cold outside, so we'll be able to run a space heater inside while we work late nights.[/size]
[size=small]Bolted some seats to the floor and needed to run them unobstructed up and over the seat. so we removed pieces of the top horizontal supports and made slots for the belts.[/size]
[size=small]Now you can store them under the seat.[/size]
Or pull them up, close the lid, and now a person can use the belts. Just need some kind of flush latch to hold the seat lid down. We figured since Grumman is also an aircraft company, we should use airplane style seat belts!
[size=small]Bolted the water heater into place. Ran a electrical ground now to where it bolts to the floor. This will be the ground for the water pump and heating system. Also insulating the floor more where we can.[/size]
[size=small]The insulation will take up space we need so the water tank will clear the water heater. It's a tight fit but should be able to make all the connections.[/size]
[size=small]On the right side of the water tank we needed to do something with this useless awkward space. We're thinking it be a good place to have garbage/recycling and such.[/size]
[size=small]Some more framing to hold the water tank down in place. It's a snug fit. But we also want the tank to be removable without fully disassembling the whole cabinet.[/size]
[size=small]So the center support for the kitchen counter will be notched and screwed in place so it can come out later in case the water tank or water heater need to be replaced or whatever.[/size]
[size=small]Worked up more courage and made a thousand measurements. Made a hole for shore power port.[/size]
[size=small]We might not have the off-grid electrical components done yet, but at least we have some power in there now. It was getting old dealing with an extension cord through the door. And it's starting to get cold outside, so we'll be able to run a space heater inside while we work late nights.[/size]
flying kurbmaster
Well-known member
- Joined
- Oct 20, 2012
- Messages
- 1,677
- Reaction score
- 48
For every 100 pounds expect to pay an extra 3 to 6 cents per gallon.
PlethoraOfGuns
Well-known member

PlethoraOfGuns
Well-known member
More nausea-inducing holes and cabinet doors!
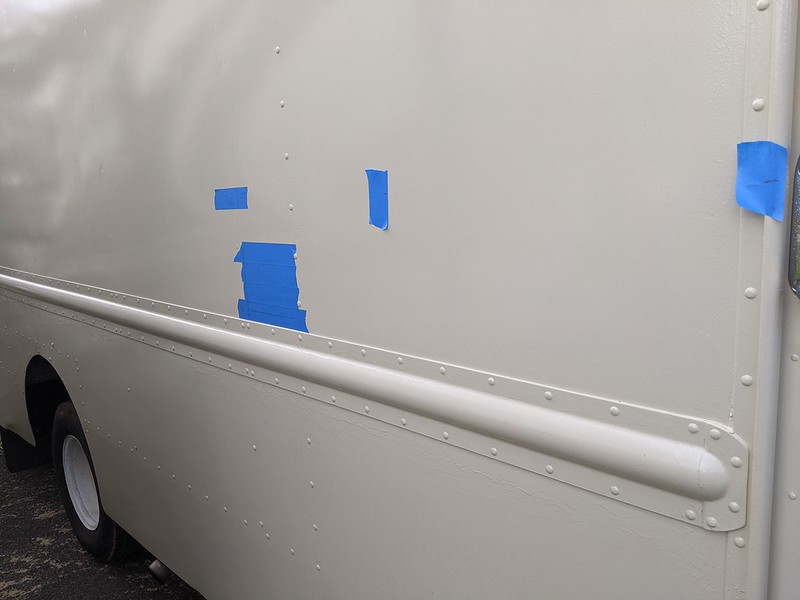
Measured a brazillion times here, trying to match the outside to where the hole is supposed to end up on the inside.
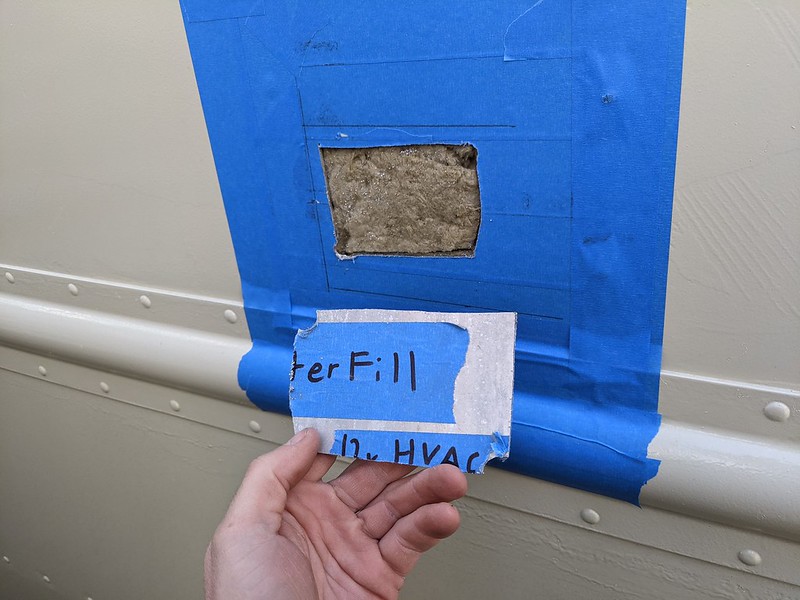
Ah, it worked! Got the hole right where we thought the water fill would end up during our planning stage before insulation.
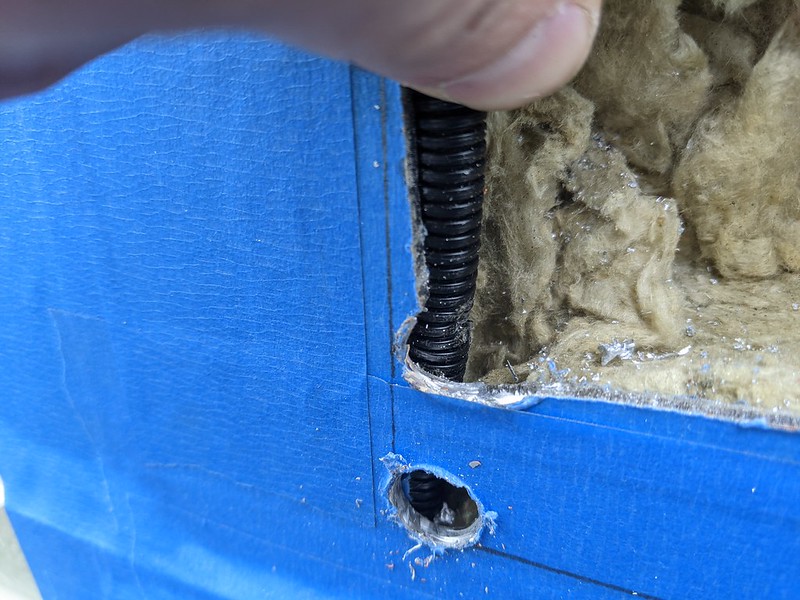
Good thing we protected all the wiring with wire loom. Boy that was a close one!
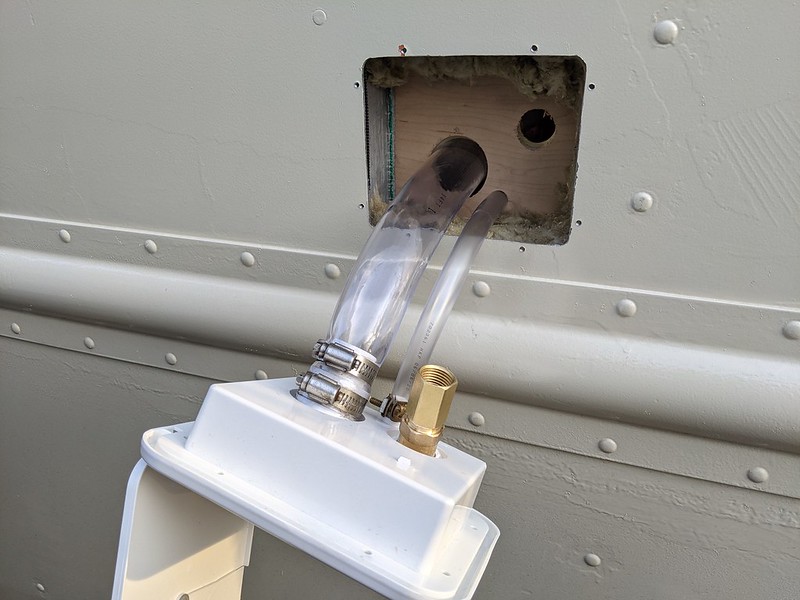
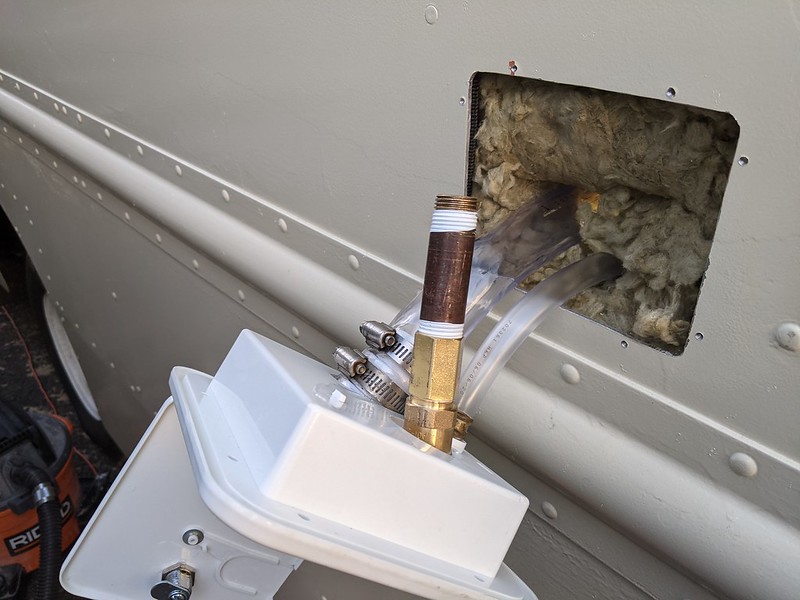
The big hose will fill the water tank. The brass fitting will be pressurized city hookup. And the small hose is a vent for the water tank. Test fit everything, then pulled it all back out.
To pressure test of course. I can handle leaks that I can see. Leaks inside the wall are probably not good.
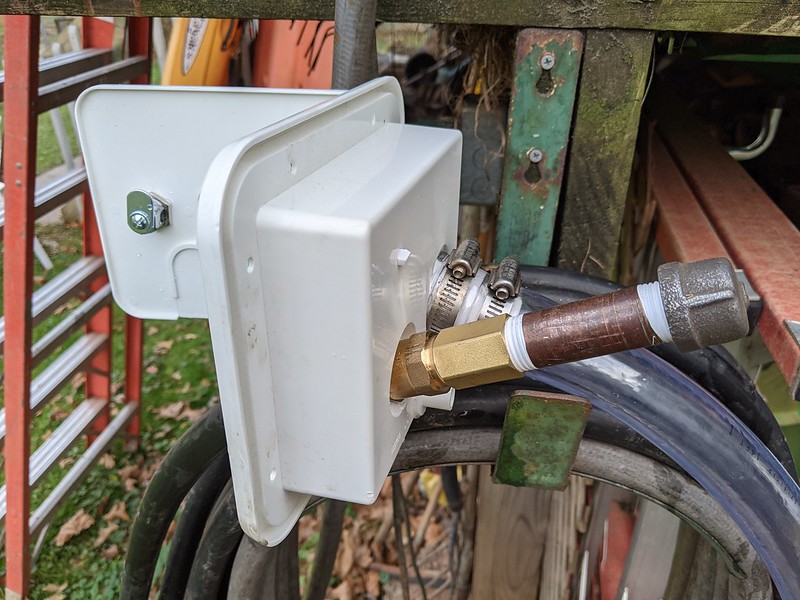
[size=small]And finally repacked with insulation and installed. To attach to body, we drilled and tapped the holes and installed all brass hardware.[/size]
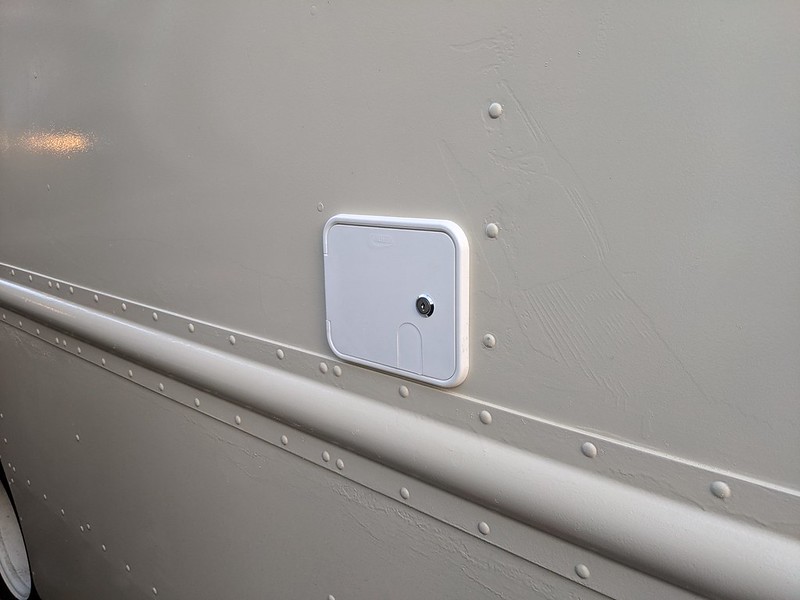
[size=small]Semi-discreet water fill access.[/size]
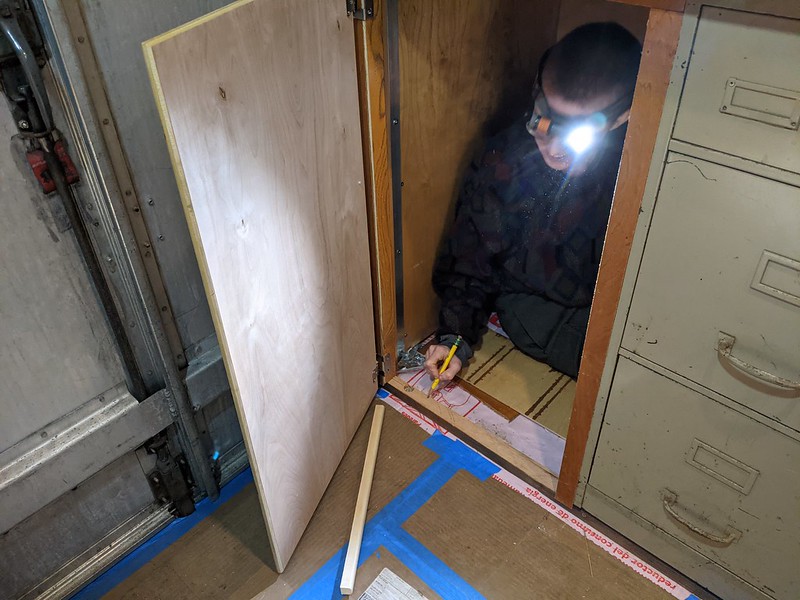
[size=small]Also made some simple doors. Voluntold somebody to go into the closet and mark the insides of the door that intersects with the framing.[/size]
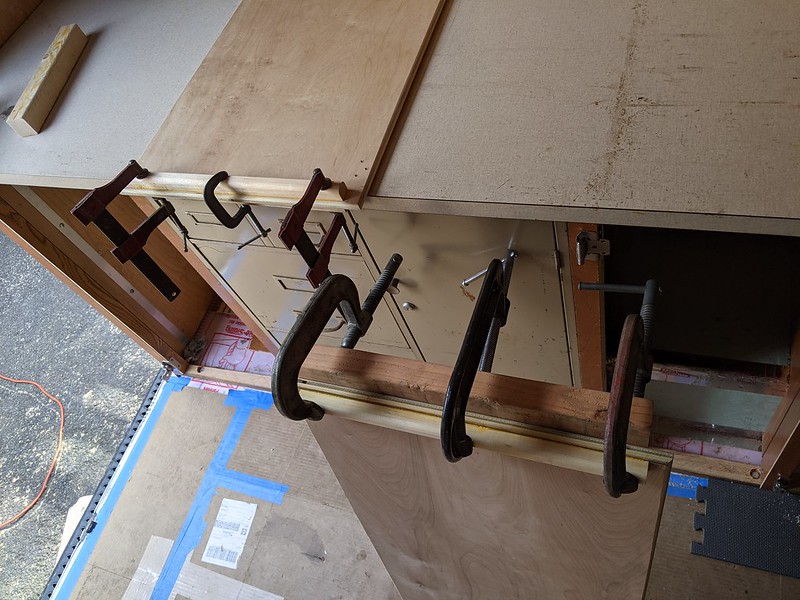
[size=small]Some glue and clamps and we have good bottom support for door. So when the door is closed, the weight transfers onto this horizontal wood piece and down onto the bottom wood framing on the floor. You know, because doors are heavy.[/size]
[size=small]And just like that, we have cabinet doors! Just need latches on them to keep them closed. Some doors even have slots for umm, ventilation! Also, this vise is coming in handy on all sorts of projects.[/size]
Measured a brazillion times here, trying to match the outside to where the hole is supposed to end up on the inside.
Ah, it worked! Got the hole right where we thought the water fill would end up during our planning stage before insulation.
Good thing we protected all the wiring with wire loom. Boy that was a close one!
The big hose will fill the water tank. The brass fitting will be pressurized city hookup. And the small hose is a vent for the water tank. Test fit everything, then pulled it all back out.
To pressure test of course. I can handle leaks that I can see. Leaks inside the wall are probably not good.
[size=small]And finally repacked with insulation and installed. To attach to body, we drilled and tapped the holes and installed all brass hardware.[/size]
[size=small]Semi-discreet water fill access.[/size]
[size=small]Also made some simple doors. Voluntold somebody to go into the closet and mark the insides of the door that intersects with the framing.[/size]
[size=small]Some glue and clamps and we have good bottom support for door. So when the door is closed, the weight transfers onto this horizontal wood piece and down onto the bottom wood framing on the floor. You know, because doors are heavy.[/size]
[size=small]And just like that, we have cabinet doors! Just need latches on them to keep them closed. Some doors even have slots for umm, ventilation! Also, this vise is coming in handy on all sorts of projects.[/size]
Similar threads
- Replies
- 12
- Views
- 2K
- Replies
- 22
- Views
- 1K
- Replies
- 12
- Views
- 1K