bLEEp-Mobile 2000 E450 shuttle build

Van Living Forum

Help Support Van Living Forum:

This site may earn a commission from merchant affiliate links, including eBay, Amazon, and others.
I have to do this soon, and something about the pics is throwing me off.

I think it's that I can't figure out what the negative (-) wires are doing? I expect to see them running out of the box to the device (light), but as close as I look they don't seem to be doing that..?

Nice job on the wiring...I spent the day crimping little terminals and was surprised how much that slowed me down...
 
This is just the pre assembly.  The box has not been mounted yet.  This is wireing the fuse block to the switches.  

There will be a 2G wire  coming from the battery bank on the bottom into the large fuse.  Also one the same size going to ground from the top of the fuse block.  When the devices are wired in, it will be using a double wire.  One POSITIVE off the switch, and one to the GROUND at the top of the block.  

Once things are mounted and wired, the last step is to install the fuses to fit the needs. .  

The end result is a way to be able to shut everything down in seconds if needed.  The switch can be left on to allow constant power to the device, and it will operate as usual with the built in controles.  

All switches are numbered and labled as they are put into use.  

The front of the box is a master control panel. The switch is lighted when turned on. 

It also has 12 Volt outlets (one cig, and one dual phone/tablet) operated by the switches closest to them.
 
Gargoyle: "NEVER a straight wall in a vehicle (unless its a box truck)."

Oh yeah, baby!! :)

bLEEp: "The damn thing reminds me more and more of a whale everyday.... Maybe I'll change my name to Jonah."

Funny. Had similar thoughts about my box truck, but slightly different thoughts about my relationship with it. So, I have dibs on the name "Moby", but that would be for my rig, not me.

Tom
 
I did it!
Resized photo, figured out the curved wall thing and figured out a way to open the handicap access door from inside!
:cool:
 

Attachments

  • IMG_0640.JPG
    IMG_0640.JPG
    109.7 KB
bLEEp said:
I did it!
Resized photo, figured out the curved wall thing and figured out a way to open the handicap access door from inside!
:cool:

Working on this kind of a project, with the endless challenges involved, even those small successes can seem really big. Good job!

Tom
 
looking good is that a plastic box, got a link? thanks Got Smart you are a good man. highdesertranger
 
highdesertranger said:
looking good is that a plastic box,  got a link?  thanks Got Smart you are a good man.  highdesertranger

Here is the product number and all that stuff....

[font=Arial, sans-serif]BUD Industries NBF-32026 Plastic ABS NEMA Economy Box with Solid Door, 15-47/64" Length x 11-51/64" Width x 6-9/32" Height, Light Gray Finish[/font]
[font=Arial, sans-serif]Amazon[/font]
[font=Arial, sans-serif]bLEEp[/font]
 
A fine looking scribe cut !
Now you can install cabinets anywhere.
 
bLEEp said:
I did it!
Resized photo, figured out the curved wall thing and figured out a way to open the handicap access door from inside!
:cool:

         :)    YOU DONE GOOD!    :)

Jewellann
 
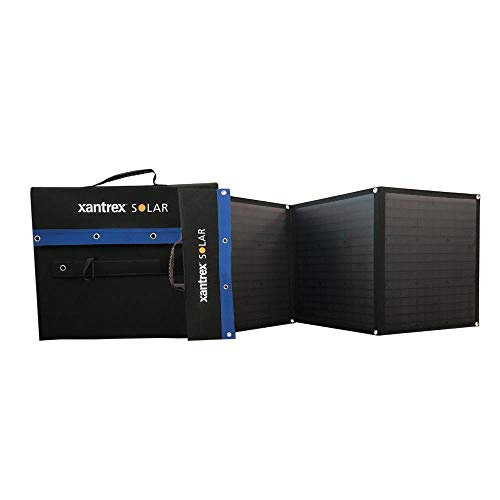
Today the fed ex man brought 3 Renogy Eclipse 100 watt panels, commander MPPT 40A with tracer and temp sensor and a 1000 watt continuous Inverter.  I'm so happy!
Plus all of the words and doo dads, but they are not as much fun to open as the panels and other Neato toys.
Off to go see a Beatles tribute band with my wife's buddy (she loans me out occasionally) hahaha
Have a great night all
Lots of love from the 
bLEEps :heart:
 

Attachments

  • IMG_0649.JPG
    IMG_0649.JPG
    74.1 KB
NICE!  Now all we need is a warm sunny day to mount them.  :D
 
There will be a quick update tomorrow. Today was a very long day, Got Smart has the patience of a saint and has helped Toni and I so much through this process.
Today we framed in what is to be the bed and "trunk area directly behind the bed. I went with a full size mattress so we can move in and out through the handicap acess/rear door.
Tomorrow Toni and I will size the kitchen out, hopefully finish the trunk and maybe dive into the dining area that will fold into a spare bed area. I even looked at flooring today, it's cheaper to put laminate around the bed, counters and closets heheheh.
We are staying within budget which is a huuuge blessing for us, we might even be able to buy antake or two of fuel ;-)
Wish us luck as we meet a possible candidate to adopt our big fur baby Sophia tomorrow. We are both pretty upset by the ida, but she would not/will not travel well, she does not care for other animals too much. People she loves em all and is marvelous with children but gets vicious with any other animal, weird. Anyhow we think we found her a new forever home with someone who will benefit from knowledge of special needs humans as she signals me for siezures.
 
Very exciting news about your build! Sorry about the dog! My dog has the same issues, so I'll probably have to muzzle her when we're around other dogs... I still need to get her fixed and praying that solves some of the aggression issues, but I'm not optimistic as she's very alpha... so alpha that she lifts her leg to pee!

Looking forward to more updates!!
 
bLEEp said:
  I even looked at flooring today, it's cheaper to put laminate around the bed, counters and closets heheheh.

Just a thought ~~~ The aluminum trim piece that is making the bed frame rock should be removed since you will be putting another layer of floor down.   :idea:

That means no shims needed.   :D
 
I am still trying to light a fire under bLEEp to have him take the time to post his update; He has done a lot.  but in the meantime ~~~

We set up his controle center.  

On the electric distribution box ~~~ We have switches with blue tape next to them for Mama to write what she wants that to control.  So far there are 7 different wires pre set for various purposes.  The wires are mounted and the grounds are set.  All it takes is for the hot lead to connect with what ever switch Mama wants, and the proper fuse put in. The lose red wires are the unconected labled hot leads.  The ground goes directly to the frame.

To the right is his controler, and under is the inverter.  He can tell you what he got and so forth. 

All that is left is to hook up the batteries and the solar, and he had no electric bills.  :D
 

Attachments

  • Bp5.jpg
    Bp5.jpg
    63.7 KB
  • Bp6.jpg
    Bp6.jpg
    71.4 KB
This electrical box is a nice idea!

The electrical stuff is the part that I have most respect of, but I will have to face it... soon.
 
It's all parts and wires.  Take it one step at a time.
 
Ok, finally.
As some of you may know I am about 65% disabled (according to Uncle Sam).  I used to be a very active man with travels, backpacking, camping, I set stone and was a nursery manager at a large outfit in Ohio, then here in Missouri, got into the chef game when there was not much plant care work in the winter after my first child wasn't born and so on.  I was in what should have been a fatal car accident in 2008 had emergency spinal fusion and a traumatic brain injury that caused quite a bigness of cognitive damage, depression and so on.  Point is that I have not been as active as I once was.  When I a man done working on the bus a ton the end of the day I am pretty well cashed.  
ANyhow, yes progress is definately being made.  The last two seats were pulled, all wires are fished through, added lights above front and rear entrance, John and I have the electric pretty much done.  40A Commander Controller, Tracer, 1000 watt pure sine inverter, all renogy.
The kitchen area is ready to be prepped and bolted in and the counter top cut from an old oak burl table circa 1969 :).  Toni is making curtains and I am working on window tint the next few days, then it's onto the solar panel installation (300 watts renogy Eclipse) and installing the batteries, looks like I will buy Trojan.  I have some free time today so I will resize some photos and post them as well.
We are on budget and pretty close to on time as well.
Again a huge thanks to GotSmart for all of his kindness, friendship and help with this project, as well as everyone here who I have gone to school from.
Enjoy the day everyone.
The bLEEps
 

Latest posts

Top