FALCON'S Aventuremobile conversion thread.

Van Living Forum

Help Support Van Living Forum:

This site may earn a commission from merchant affiliate links, including eBay, Amazon, and others.
dvdchris said:
Thats pretty much what I did for my bed. 

Wow, that must have been a lot of work with that floor...don't take this the wrong way, but I see a lot of people do this, overthinking the installation of floating plank flooring, which I found to be the easiest single part of my conversion. They are designed to interlock easily and not designed to be nailed down for a number of reasons. A pull bar and tapping block is extremely helpful.

Also, beware the Reliance 7 gallon Aquatainer. The newer ones have a lot of spigot problems and the actual seam on the container has been known to fail, a disaster in a van with laminate flooring.

I think maybe the flooring I had was of poor quality, and the pieces did not fit together as well as they should. Cutting some of the interlocking parts off and nailing them down actually made installation a lot easier and quicker. I don't remember how long it took in total, but it was less than I expected. A piece of wood worked well for a tapping block. Once I got started with the first piece against the other wall, I was wishing I had a pull bar for a few minutes. But I got used to it quickly, and I think because I only had the interlocking parts on the one side, it was easy to just hold the new piece tight against the old with my fingers while I lowered it to the floor. I do need to get something to use to hammer the nails down further into the wood so they don't annoy me.

And yeah - the Kreg jig is great. I'm getting a ton of use out of it! Also, I like the Kreg screws because they work well with my drill (which only has one speed when on - full speed!)
 
As always, thanks for the feedback and input!


NEW TIRES
I ordered some new tires from Walmart and got them installed last weekend. I wanted tires that were slightly bigger to increase the ground clearance a bit. I expect to spend a lot of time on unpaved roads and sometimes off roads completely. I don’t plan to be rock-crawling or doing the kind of driving that 4-Wheeler guys do just for fun, but I want to be able to get to a lot of remote spots. My modifications to support this are these new tires, and the planned installation of a lunchbox locker in the rear which should be a huge improvement over the factory open differential.

The stock tire size was 225/75 R16. These were 29.3” in diameter. I liked what I read and saw about Goodyear Wrangler Duratrac tires, so I bought those. I got them in size 245/75 R16. That’s a 30.7” diameter. Here are the size changes:

Diameter: 1.4” increase
Ground clearance increase: ~0.7”.  (plus a bit more right now because these have much more tread than the tires I replaced)
Circumference increase: 5%
Speed difference, at 60mph: +2.9mph
Rear end gearing change: from 3.92 to 3.73  (I’m sure this is not an entirely correct comparison, but it’s a ballpark figure to consider)
Weight of tires: increase from ?? to ??

(I should have weighed the spare before getting the new ones put on! I don’t know how much more they weigh, but I think it’s a significant increase. The tread pattern on the previous tires was a simple, road-only design. I’m not all that concerned at the moment with this weight increase, because it serves an important purpose)


REMOVED EXTERIOR PARTS
When you’re taking something and making it your own - it isn’t just all about adding things. An important consideration is: what is useless?

There were some parts on the outside that I didn’t see the need to keep. First was the trailer hitch. I don’t plan to tow any trailers. The hitch and support brackets looked quite solid and heavy. Second were the running boards. The main reason I removed them was that the front and back of the running boards extended quite far and was one of the closest things to the tires. Since I increased the tire size, I want to make sure I have room for them. Also, while I would indeed use the running boards, I don’t think I will really miss not having them. If I do want to have a lower step to get into the van, I’ll look for some of those supports that are just in the place you need them rather than having running boards that span the entire length of both sides of the van - and where I only actually step on like 5% of their total lengths. Looks are a very minor concern for me, but I think the van looks a little better without them.

Before, and with old tires:
19251660786_475dc0e645_o.jpg


With new tires and running boards removed:
19277617335_61f5d8e720_h.jpg


(The angle of the picture exaggerates the difference in ride height)

I weighed all the things I removed:
  • Running boards and mounting brackets: 28 lbs
  • Trailer hitch and mounting brackets: 48 lbs
  • Plastic pieces from footwells: 6 lbs
  • Middle section of front rubber mat: 9 lbs*
TOTAL: ~90 lbs

I also removed the two rear radio speakers, and the rear dome light. So that's probably another 5-10 lbs - and a nice round total of about 100 lbs.

(Are the hitch or running boards worth trying to sell? I’m imagining very few people with Dodge vans would be buying accessories now… ?? )  

Parts removed:
19091495519_9faf4d8216_c.jpg


The only other thing I may remove is the air conditioner. As for weight savings, I expect that to be a MUCH more difficult job for the weight gained than these parts I just unbolted. But there’s also an engine efficiency gain that will come with it. Back when I was a teenager with a sports car I would drive the heck out of, I’d take off the air conditioner belt at times, and it made a noticeable difference (I mean a difference between driving with the AC turned off, vs driving with the belt removed). That AC was driven with it’s own V-Belt - which made it easy to remove - but may have also made a bigger power reduction than the AC in my van will, since it is driven by the one Poly-V belt that drives all other engine accessories.
 

-------------------------------------------------------------------
GALLEY CONSTRUCTION
-------------------------------------------------------------------


I got started on building the frame/box for the galley. My design includes three sections:
  • A “Stove” section, closest to the bed, much of which is above the wheel well box
  • A “Fridge” section - just the space for the Whynter 45q fridge - with one side against the wheel well box
  • A “water” section - where I plan to put the water system

    19251539506_b0641ce15f.jpg


    I’ve been thinking about simplifying the stove and water systems from what I initially designed. I have the stove decided: a Coleman perfect flow 1 burner propane stove - it is a bottle top stove that you attach to the top of a 1# propane bottles. I’m still brainstorming ideas of how to set up the stove and water systems. I was getting tired of drawing pictures and looking at water containers online, so I just went ahead and got started in the van.

    I got started on Sunday and built the “Stove” box, and the fridge platform. The stove box is just 4 boards of 5/8” thick plywood screwed together, and into the floor, wall, wheelwell box, and bed platform. It’s very secure. I’ll cut a hole in the front for a cupboard door, or make drawers or shelves or something. I elevated the fridge so the top of it would be flush with the tops of the “stove” and “sink” sections. I’ll probably put a layer of 1/4” plywood on top of the fridge so it will have the same kind of top surface. I think, initially at least, I’m just going to sand and put some kind of coating on the plywood and leave it at that.

    I made a couple mistakes that I’ve noticed already:
    1 - The fridge buttons and cord plugin are on the right side of the fridge, near the front. I cut holes in the side of the stove box for them - but I measured and cut them with the fridge on the floor. So I had to cut new ones higher to match up with the fridge on the platform. About half of the vent holes on the side will empty into the “Stove” box, and the other half are against the wheel well box. I think I will also cut a hole in the wheel well box to let the fridge vent into there…
    2 - The fridge platform height. I didn’t notice this until I was looking at the pictures, but in the picture it looks like I matched up the height with the tops of the “stove” box side boards - not with how high the top board would go to - so it’s lower than I meant to make it. That probably won’t bother me much. I wasn’t sure whether the fridge door would be able to sit open like in the pic below (because of that support rail - it is curved and comes “in” more the higher it goes). But it does. YAY! Making it lower than I meant to may have made this possible.

    There’s 4” of open space under the fridge platform, and I think that will come in handy. There’s also space behind the fridge, I’ll have to figure out what kind of stuff to put in there. Depending on what I put back there, I might want to make a small vertical wall at the front edge of that compartment to hold the stuff in.

    19251539496_4e2fae17de_h.jpg


    18657068593_974cab3a92_h.jpg


    19251540116_529b09211d_h.jpg


    19090021640_5d9498a431_o.jpg
 
As always, really great work!! But a couple of thoughts,

Whatever you do, don't compromise the air flow into or out of the compressor. I'd cut away all plywood that was up against the vents into the fridge.

I'd also say that you should add an inch of polyiso to the three sides of the fridge without the compressor and to the top and bottom.
Bob
 
akrvbob said:
As always, really great work!! But a couple of thoughts,

Whatever you do, don't compromise the air flow into or out of the compressor. I'd cut away all plywood that was up against the vents into the fridge.

I'd also say that you should add an inch of polyiso to the three sides of the fridge without the compressor and to the top and bottom.
Bob


I will cut away very nearly all the plywood that's against the vents. The question in my head is whether it's ok to vent into these small areas. The "Stove" box isn't all that small, and I could make some holes in it to allow that to also vent, so I don't see a problem there. But part of the vents are against the wheel well box, and even when I cut that, there isn't much room for the hot air to go into and be dissipated. I could also just put some space between the fridge and that edge of the stove box. If I notice that the stove box is getting hot or if I'm just worrying about it, I suppose I could also put some little fans in there - one right in front of the vents - blowing into the stove box, and then have a hole on the other side of the stove box, with a fan in that hole, blowing air out of the stove box and into the space under the bed.

I hadn't thought of putting more insulation on the outside of the fridge. I could definitely put some on the back side and on the bottom, and I'll think about putting it on the sides as well. The layer of plywood on the top would add a very small amount. But since I have the top lower than I planned to, there may actually be good space to put a layer of polyiso on top and put the plywood on top of that. It'd just be a question of whether the insulation would get compressed while I'm using the surface, and if so I guess I could just make some little vertical supports to prevent that from happening.

Putting it on the vent side might go along well with getting some space between the stove box and the exhaust vents.
 
Looking great Falcon. I am still in love with your lighting. Looking forward to more progress... Your van looks beefy with those tires and the rails removed. :)
 
I have those exact tires on my vans rear end. Great tires!! I kept stock up front so they wouldn't be loud and wear so fast.
Bob
 
dvdchris said:
Thats pretty much what I did for my bed. 

Wow, that must have been a lot of work with that floor...don't take this the wrong way, but I see a lot of people do this, overthinking the installation of floating plank flooring, which I found to be the easiest single part of my conversion. They are designed to interlock easily and not designed to be nailed down for a number of reasons. A pull bar and tapping block is extremely helpful.

Also, beware the Reliance 7 gallon Aquatainer. The newer ones have a lot of spigot problems and the actual seam on the container has been known to fail, a disaster in a van with laminate flooring.

I use these containers at my work and they are great.  Much better than the Reliance containers.

carboy with spigot from Uline
 

------------------------------------------------------------------------------------
PROGRESS ON “STORAGE” SIDE
------------------------------------------------------------------------------------


I’m building a box for bicycle storage, right behind the driver’s seat. At this size, it will fit a road bike with the seatpost (and obviously also the seat) removed and fit entirely in the box. There will also be room for the wheels and storing most or all of the bike related things I will have with me. I need to figure out how to cover the portion of the window that is within the bike area. I can’t lose much interior space by covering it.


Bike Box (from back)
19380117400_8376d15b50_h.jpg


Bike box (view from driver side)
19572351711_7c06e4d4a8_h.jpg


I went to “The Container Store” to look for drawers and some other things. They have a pretty good selection of plastic storage tubs and drawers. It’s expensive though. The plywood that I used for making these vertical boards was a bit bent/bowed. This was annoying while installing it, but it did make it so it worked well for fitting these drawers in. They fit perfectly. Very, very, VERY snug!

19561241532_627f0a4154_o.jpg


Drawer open. I’ll have to figure out how to keep these drawers closed. I’d love to get aluminum quarter turn latches like there are on some airplane cabinet doors (http://www.pacoplastics.com/products.php?n=1/4+Turn+Retainers&c=13)
19568059475_e6aa2847bc_b.jpg


I put in all the vertical boards on the storage side. The middle one will separate a storage/desk area from the electrical area (The electrical area would be in the third section from the bed, or the one right next to the bike box. I’m hoping it won’t take up that entire box).

I will put a top surface over these, extending from above the drawers that are in place (covering them) all the way over to the side of the bike box. It will be the same height as the top surface on the “Galley” side.

I got more drawers from The Container Store - the same style as the ones above the wheelewell box - to go in the section forward of the wheel well box. They are on wheels, so I can wheel them out of that area to make room for my legs and feet so I can use that section as a desk also. They don’t fill up all of that section as well as I would like, so I may either look for wider drawers, or attach something to the side of the drawers.

19568059795_5e77176a7e_h.jpg


19380116560_f6430fe3fe_h.jpg

(in the above picture you can see a metal mesh tray that fits into the space under the refrigerator. It’s pulled out in the picture. It can fit entirely underneath. There are two of them and they fill up most of the space. I’m also going to make a bottom platform in the bike box, and I got a larger metal tray that I’ll put under that.)

Painting the boards:
19381527279_cf7ea4fd47_h.jpg


Painted:
19381528409_96f811cf3f_h.jpg

I also painted the Reflectix that covers the gas fill line cover. I’m expecting that paint may not stay on it (I did use primer, but still.. we’ll see)

19381527669_a8bf215862_h.jpg


19572352271_d9e4f3e137_h.jpg
 
I like the color combination between your white wood and the foggy white of the plastic containers, it looks artistic! !! Congratulations on your van it looks very well designed! !
 
Lookin' good !
If the latex doesn't hold on the reflectix , add another layer and try krylon spray.........
Maybe small bungees to hold the drawers it ????
 
very nice. all plywood no osb, pocket screws. killer tires. looking good. highdesertranger
 

--------------------------------------------------------------------------------------
LUNCHBOX LOCKER INSTALL
----------------------------------------------------------------------------------------

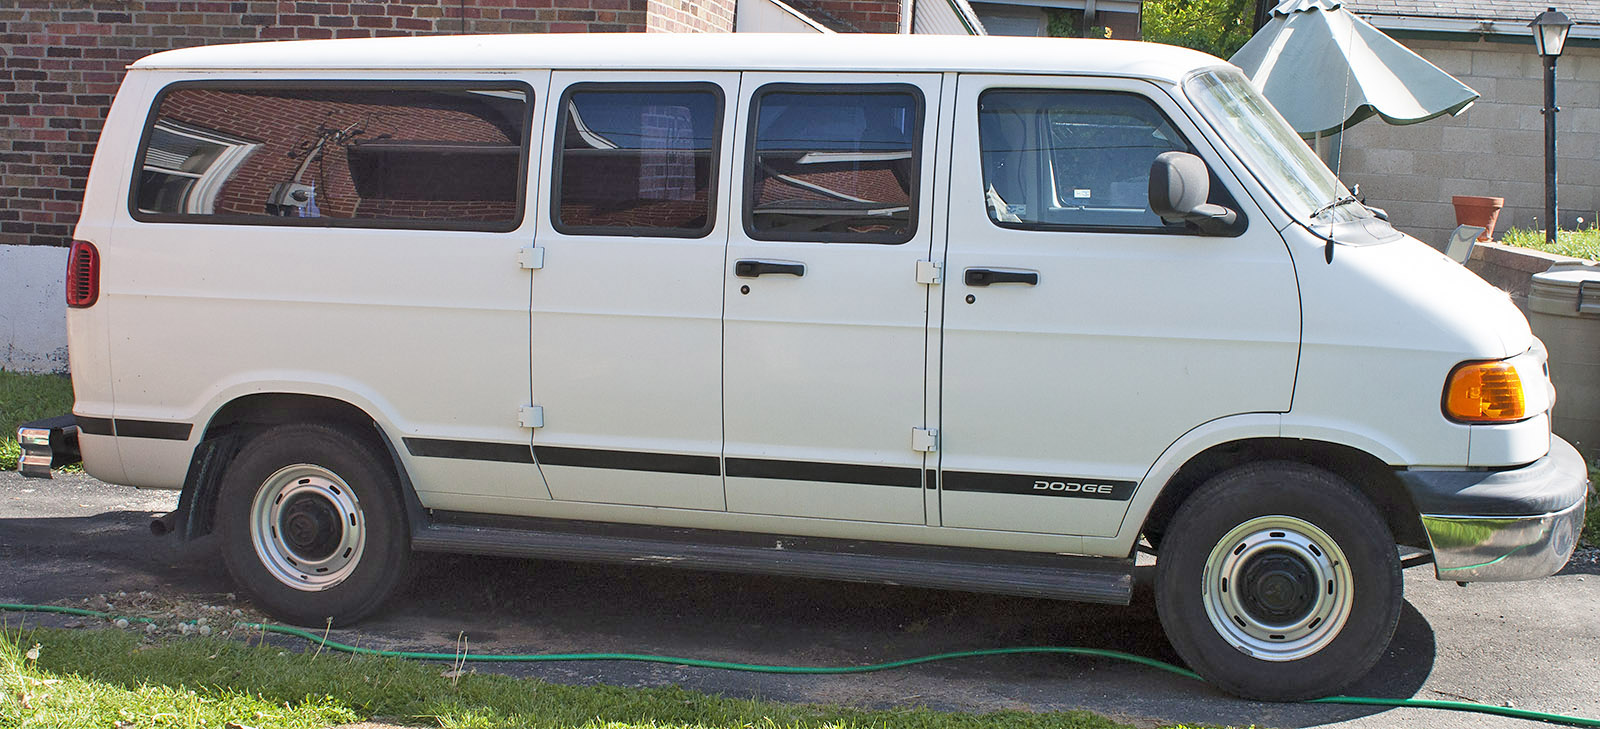
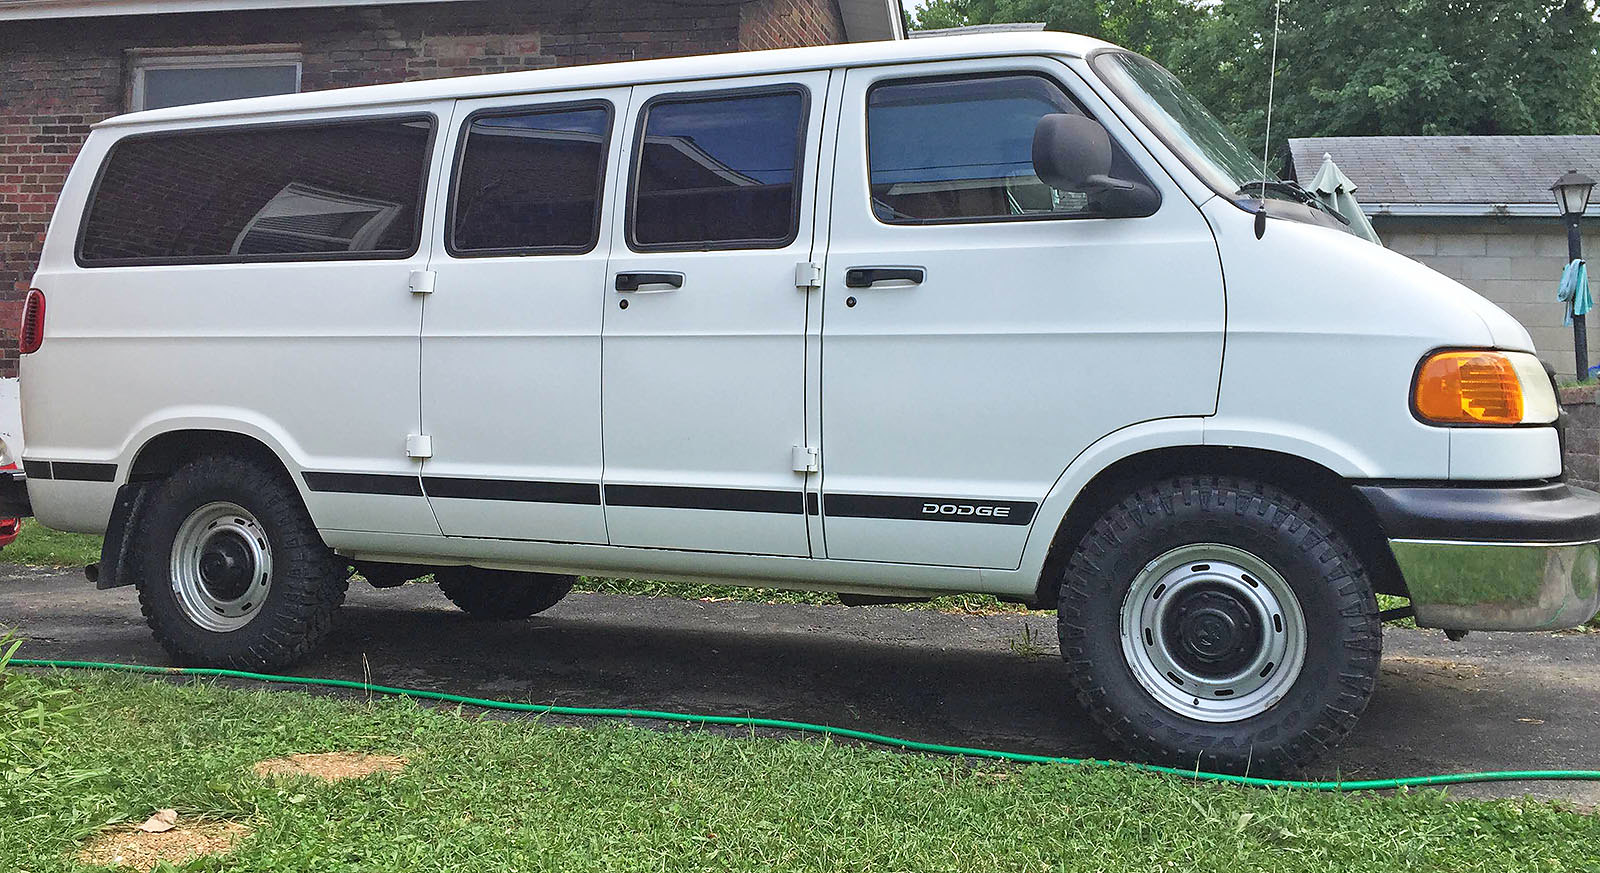
My van had an open differential. This means that when traction is limited, and one of the rear wheels begin to slip, all the power ends up going to that wheel that is slipping, and none to the other (basically the opposite of what you would want). This was very evident when driving in the rain. If I tried to accelerate going uphill on a wet road, I’d have to only use a very small amount of throttle or one of the rear wheels would just start spinning. That was compounded a bit by the fact that the tires didn’t have a lot of tread left, and the van was empty.

I plan to spend a lot of time camping off of forest service roads and in various types of terrains (rocks/gravel, dirt, grass, sand, etc.). If this is what happens driving the car on a ROAD, it wasn’t going to cut it on the other surfaces.

I was starting to think about looking for a Limited slip rear end to replace this with, or one to take parts out of to install inside mine (if that is even possible..). A poster on another forum suggested that I consider Lunchbox Lockers. I read about them and liked how they sounded. I bought one for my rear end (a Chrysler 9.25”). I bought a Power Trax Lock Right.

As I was researching rear end internals and the locker install, I was initially really worried about whether I would have to set things like gear backlash, bearing preload, etc. Those are much more complicated than I’m accustomed to doing. But with this locker, you don’t have to do anything to those parts. Installation required only removing the existing Pinion shaft and spider gears, and replacing them with other parts.

The locker installation was what felt like one of two most challenging conversion steps remaining (that and the electrical system install). This was also the last major change I needed to make to get the van ready for a trip out to see my family in August. They live out near the rocky mountains, and when I was last visiting them and discussing the van, I told them I’d bring it out in August to go with them on a trout fishing trip up in the mountains.


I spent about 2 full days researching locker specifications and design, and figuring out how to install it. (The manufacturer’s instructions are difficult to interpret because they are generic and are written to apply to all of their lockers, so there is a lot of “If your axles, have C-Clips, skip to section 2, if not …. blah blah blah..)

So anyways, I read the instructions a bunch of times and watched a bunch of videos on Youtube, and I re-wrote the instructions in entirety - in a checklist style so I could mark each step complete as I progressed with the installation.

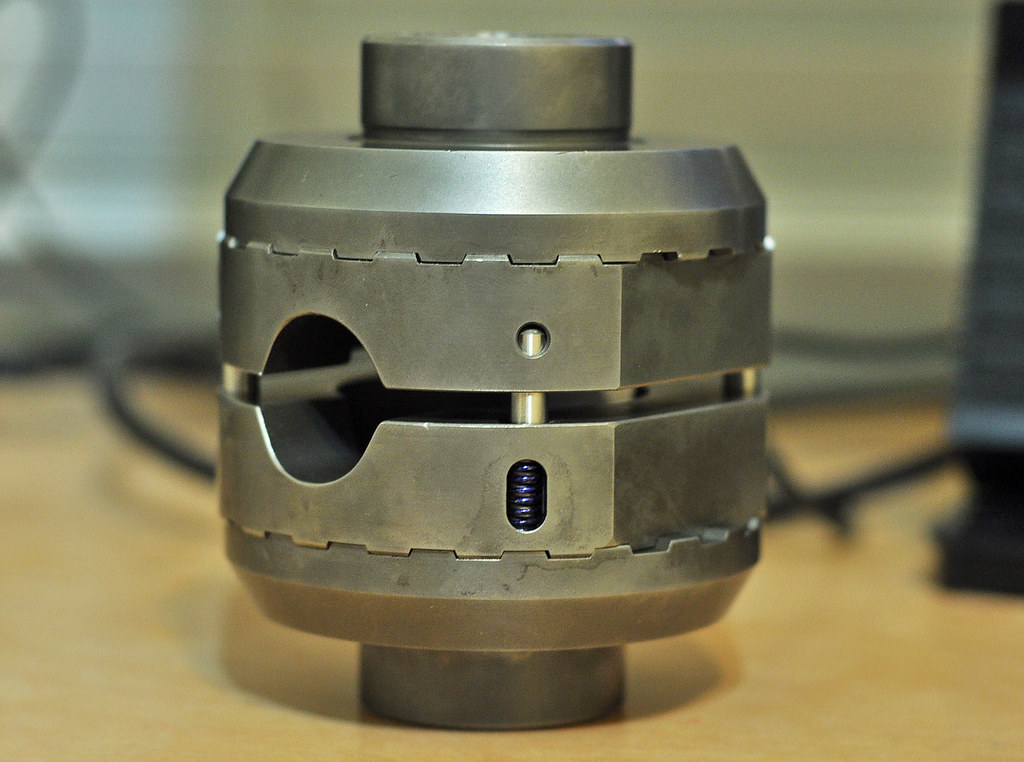
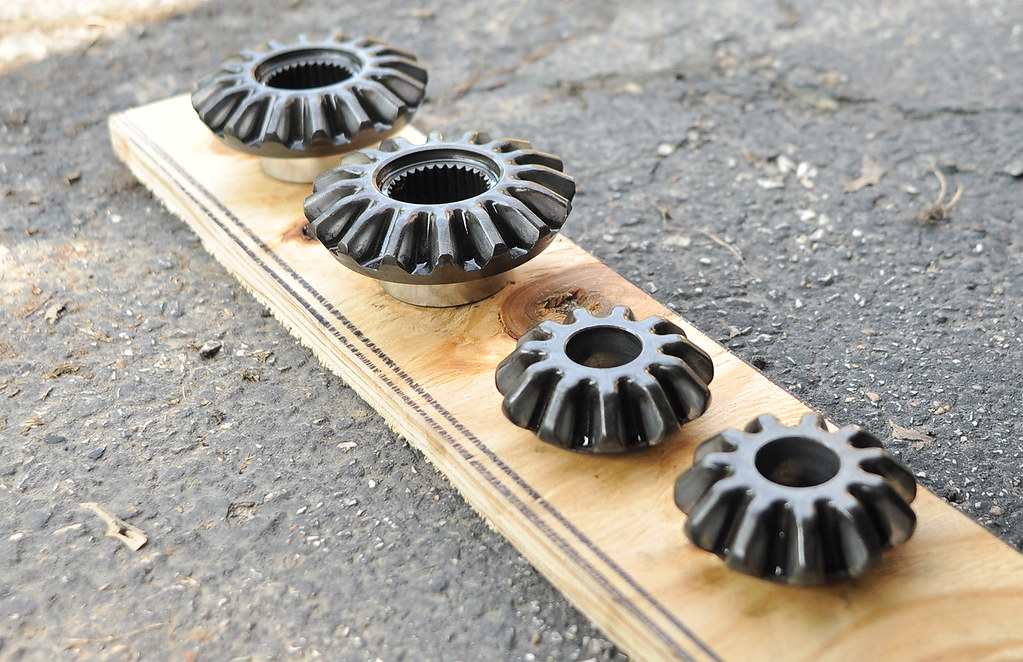
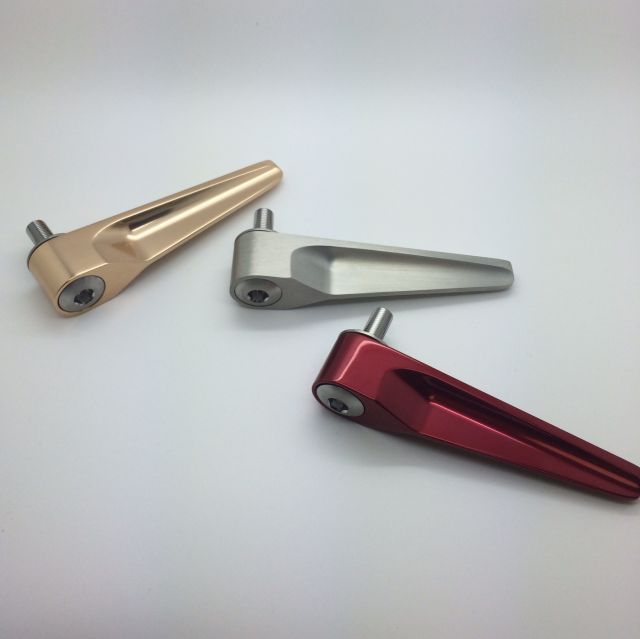
Here are the locker parts:

(this is everything except the Pinion shaft, which goes through the hole you see in the middle)

19572739971_96c81fa50f_b.jpg


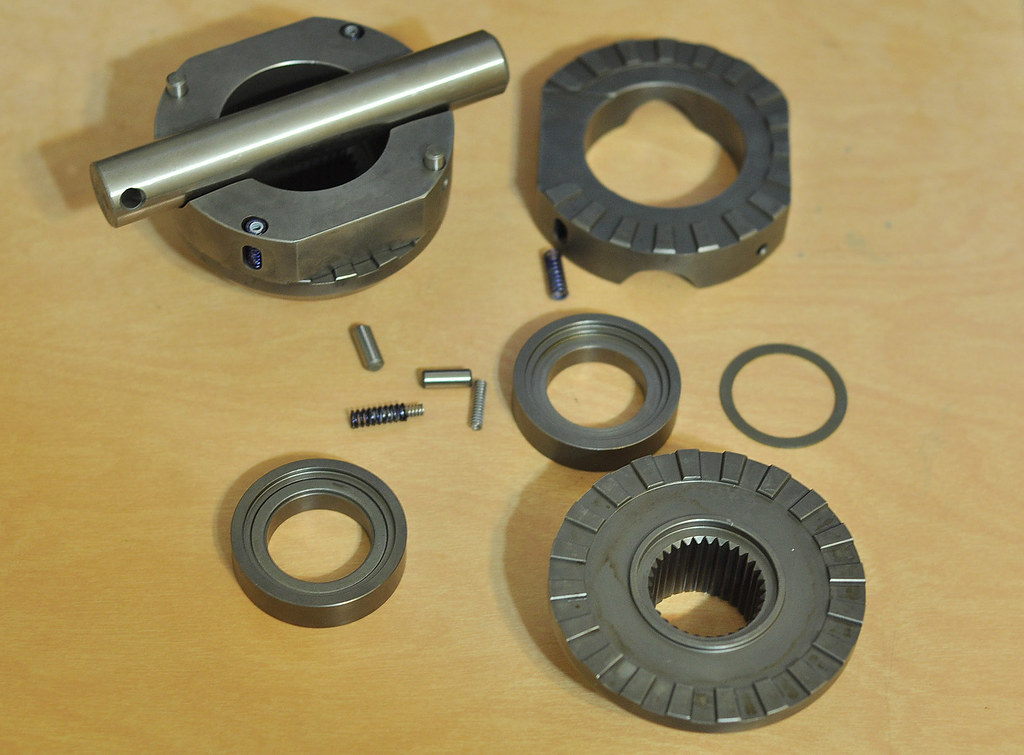
Here are all the pieces:
19568451015_17b830cf4b_b.jpg


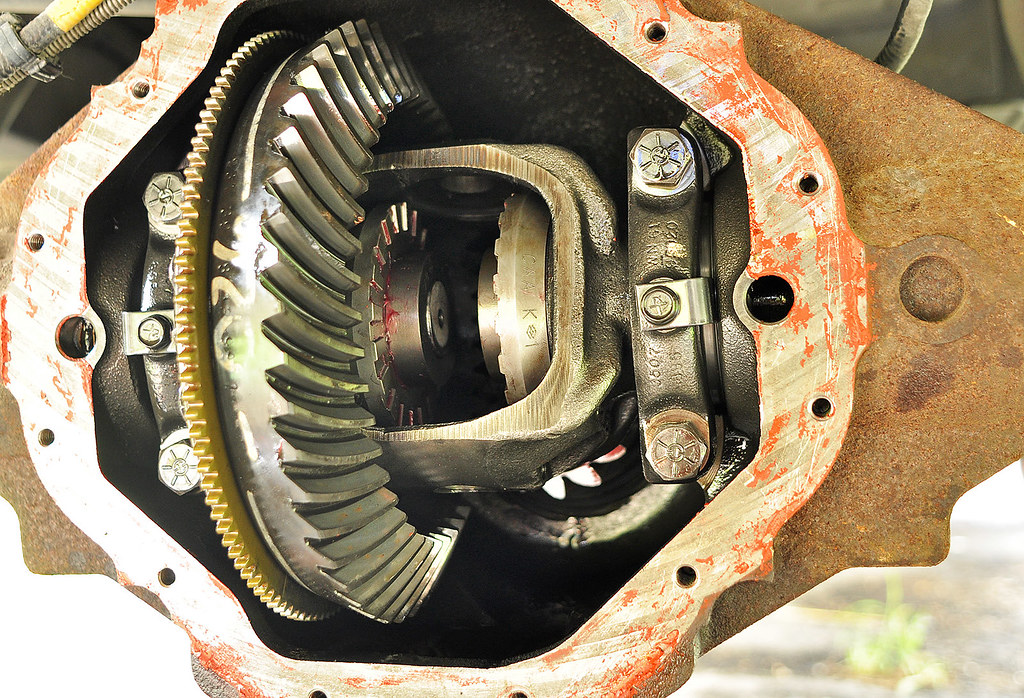
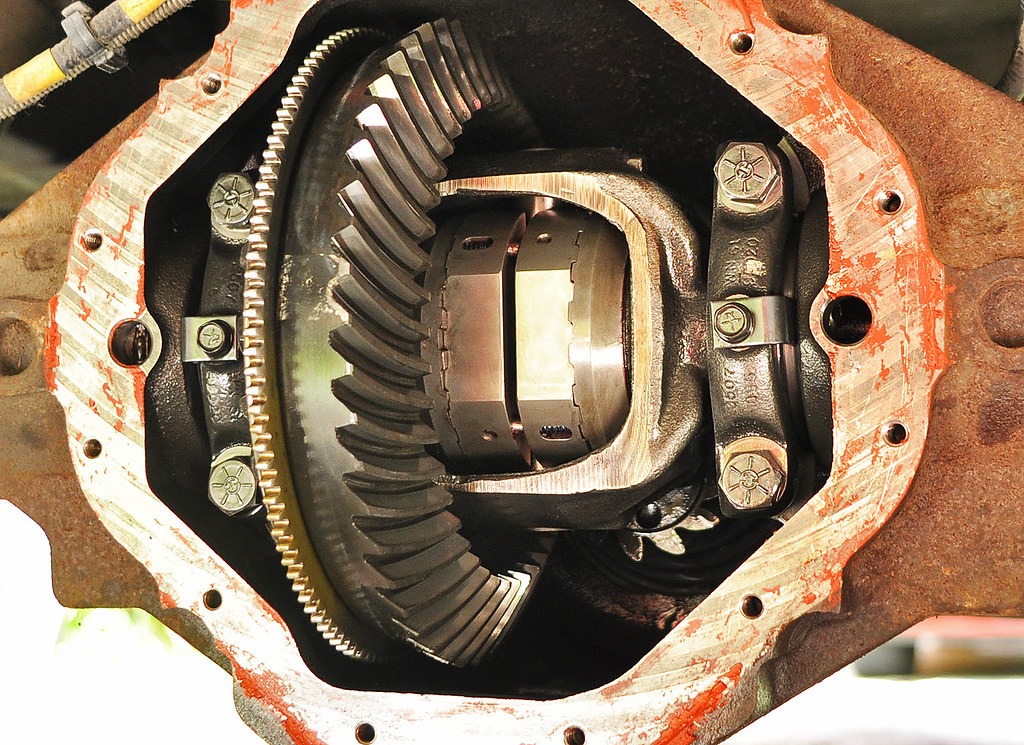
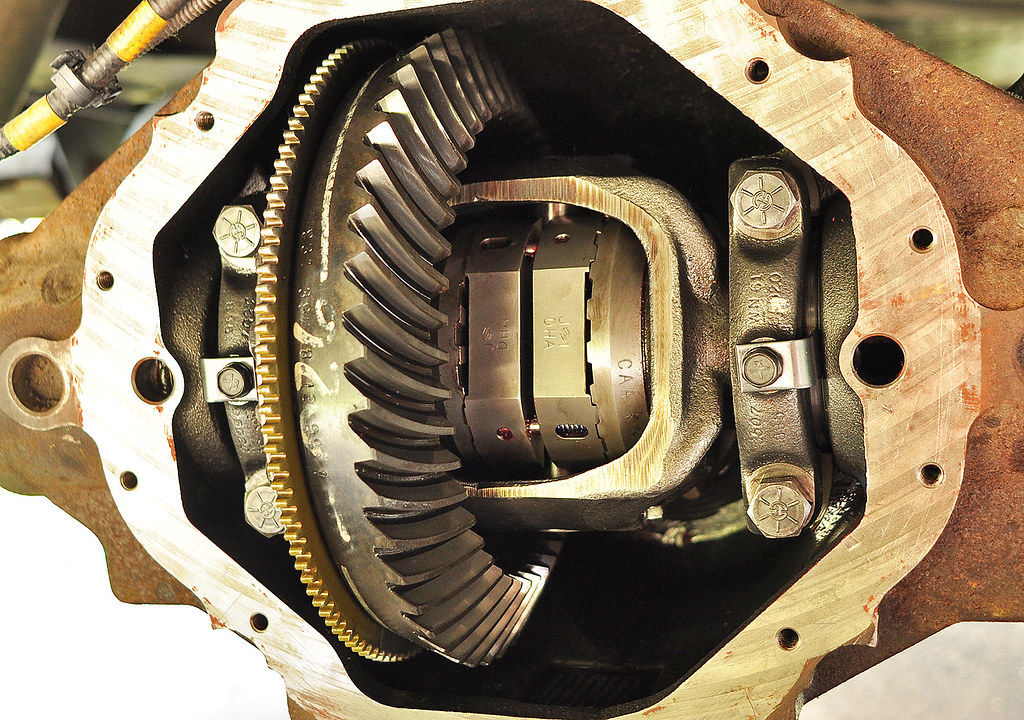
Here are the stock differential internals:

19381918359_12a4f0798c_b.jpg


Here are the spider gears and side gears that I removed:
19561632352_364c6d31da_b.jpg


Here are the outer pieces of the locker installed (the ones that mate with the ends of the axles)
19542307776_e513164803_b.jpg


And here it is entirely installed. The hard part is getting in the last C-clip. You have to put the last C-clip in while all the pieces visible here are in place. You move one of the inner pieces over to the other side to open up some space between the mating teeth of the locker, and slip the C-clip in-between those and into the end of the shaft. It’s hard to get it in there and even harder to tell whether you really have it in place.
19381918829_0142c4e003_b.jpg


This picture has the locker rotated to show the other side. You can see that the inner/driver pieces have no teeth on part of them. This is so you can fit the C-clip in.

19561633242_d6143e4119_b.jpg


I reinstalled the cover (and made a new gasket), refilled it with gear oil, and tested it out. Everything went great with the testing except that when I was initially going back and forth in drive and reverse, I ran the van into the retaining wall that is at the top of my driveway (the wall turns and my driveway extends up further. I hit the corner because the van wasn't aligned well enough with the part of the driveway that extends further up). It bent up the rear bumper. The back door still opens all the way. I may try to get it bent back to the normal shape.

Anyways, it drives well. The clicking of the teeth while turning is audible, but at most times, just barely. It won’t bother me at all. The inner rear tire slips some if I apply throttle enough while turning. This will make the rear tires wear faster. I don’t know how much. Overall drivability is changed very little. I’m happy with it - and happy that the installation went well!

Time to charge onward!! (With two wheels :-D )
 

-----------------------------------------------------------------------------
BIKE BOX PROGRESS
-----------------------------------------------------------------------------


When I was doing bike fit tests, I realized there was enough vertical room to have some storage space above or below the bike. So I built a platform at the bottom.I bought this metal tray from The Container Store. I put the wood pieces around the outside to support the platform.
19641012082_733c60bbb7_b.jpg


And here it is with the platform in place:
19027113813_941d2bb09f_b.jpg


The tray is 6-8” shorter than the bike box, so there is some room in front of it for shoes or something.
19461459449_961739357b_b.jpg


For covering the window, I wanted something that I could get in place that was not up against the window - so it would protect it from impact. I used the trusty plastic sheeting. This picture doesn’t show it all that well, but it is bent to match the curve of the window and the back of the bike box walls. It is ~1” in front of the window. It’s attached to the top van support bar, and to the part below the window. It’s also screwed into the bike box walls. I put a ninety degree bend in the plastic so it wraps into the bike box walls. I had to make a bunch of relief cuts in the plastic so it could bend and the edge stay flat.

I painted the back of the plastic with dark grey spray can primer. It doesn’t stick to the plastic all that well, but it should be ok - the back of it won’t be rubbing on the window. From the outside of the van, it looks like black or like nothing - like you just cant see in that part of the window. I didn’t think ahead to paint the back edge of the bike box walls, so you can see those more than I’d like.
19461459489_d3a4155e09_b.jpg


Test fitting the bike. This method requires removing the wheels, seatpost, and the left pedal.
19621878966_3d8e3f71d6_b.jpg


Found these hooks at Home Depot - exactly the sized I wanted!
19652524781_0b19671a53_b.jpg


And here the bike is in place on the hooks. No part of the bike touches the platform below (it’s held up entirely by the hooks.). I tied the handlebars to the top tube. If I didn’t do that, they would rotate and one of the brake levers would rest against the bottom (which would be a bad thing)
19461459149_29628921d1_b.jpg


Here’s what’s left for the bike box:
  • Put some kind of cushioning on the walls. (maybe some of the thin carpet pieces I have in my basement, maybe some of the extra Reflectix)
  • Put something in the top right corner of the bike box. Some way to store tools, helmet, etc..
  • Put at door/cover on.
 
very nice. I like that locker, almost the same as a Detroit locker that I just install. they do make noise when you turn but you will get used to. in fact that is how I got mine the guy who had it didn't like the noise. so I traded him a factory posi for the Detroit. anyways looking good. highdesertranger
 
FALCON said:
For the interior style - I'm currently leaning towards painting it white (or using white stuff). Something sort of like this:
17533285045_a15943f420_z.jpg


(I don't expect my first version of the interior will not look as neatly finished as this)

Wow!
 
Help!!

Does anyone know where you can buy things like these:

http://www.pacoplastics.com/products.php?n=1/4+Turn+Retainers&c=13

PE7232N.JPG


They are "1/4 Turn Retainers" - little latches that you can use to hold doors or drawers closed. They are very common on airplanes. I'd like to use these in a few places in my van, but I'm having a hard time finding some that I can buy directly. Part of my problem may be that I don't know what words to use in google.
 
Top