FALCON'S Aventuremobile conversion thread.

Van Living Forum

Help Support Van Living Forum:

This site may earn a commission from merchant affiliate links, including eBay, Amazon, and others.
Almost There said:
If you're removing the front rubber mat on the passenger side, what are you planning on putting in it's place?

That underlay is a sound deadener as well as preventing heat from both the road/parking lot when parked and from the drive train.

I agree that they tend to soak up moisture if the rubber is damaged but unless it's wet or you can find something to replace it, you probably want it in there.

As of now, I'm not planning on putting anything else on top of it.

Once I get the bedliner in, I'll see how much difference I can notice. In the worst case, I'll put the rubber mat back with all it's current insulation. I'll have plenty of time to figure it out.
 
For the interior style - I'm currently leaning towards painting it white (or using white stuff). Something sort of like this:
17533285045_a15943f420_z.jpg


(I don't expect my first version of the interior will not look as neatly finished as this)
 
Wow! I really like that clean interior plan. As for the bedliner, I have friends that did the same thing in their truck. It was carpet and they definitely didn't want that. They eventually bought a replacement sound pad and rubber mat. It was just too loud. Before you cut up your good mat I would try it with the bedliner for a bit first, in case you decide the same thing. It could save you some money in the long run. Regarding the Craigslist drill, lots of us old heavy tools still work well. ;)
 
In dismantling my old 1986 Econoline E150, for parts to repair my 1988 E150 Conversion van, I find that the old cargo van's headliner (Full length of the entire body) has a thick insulation pad between the metal roof and the headliner, in approximately 2'X5' sheets. I am removing these to consider using for insulation of the '88. Yes, I know the 'common knowledge' regarding possible moisture in the blanket type insulation. My choice. Still a good choice for cheap insulation materials, already designed for vehicular use. I can envisage using such a mat for underfloor use too.
I am thinking if someone wanted to go this route, there are tons of old Ford cargo vans out there in the junkyards, and I'd expect Chevy/GMC and Dodge did much the same.
 
Thanks folks - you've been a great help so far..

Next question -- for the walls:

What is the point of Furring boards?
- Are they for attaching things to the wall?
- Are they for attaching the inner wall board to?
- ??

How do you install them? Screw them into the ribs? I want to conserve the space that I can, so I don't think I want them in front of the ribs - that would just be too much space. So if I use them, I think I'll want to install them flush with the ribs or even a little bit back (my side wall ribs stick out more than the thickness of my planned insulation and wall layer). I'm thinking that will be more difficult to do than to attach them to the front of the ribs.
 
(this 5-minute limit on editing is messing me up here...)

And another question - TOOLS. I'm making a list of tools to get to use for the conversion. What should I add or remove?

- Angle grinder (for cutting the roof vent hole)
- Circular saw
- Drill (already have)

- Wrenches and sockets (already have but may need to replace some I've lost)
- Saw horses and plywood for sawing/working table
- Clamps ??
- Counter-sink drill bits (so screws don't crack/split the wood)
- Big pieces of cardboard for making templates
- A multimeter ??


Some other stuff I already have:
Screwdrivers, wood saw, hacksaw, drill, dremel, extension cord, safety gear (glasses, dust mask, gloves, earplugs), wire strippers/cutter,
 
FALCON said:
Thanks folks - you've been a great help so far..

Next question -- for the walls:

What is the point of Furring boards?
- Are they for attaching things to the wall?
- Are they for attaching the inner wall board to?
- ??

How do you install them? Screw them into the ribs? I want to conserve the space that I can, so I don't think I want them in front of the ribs - that would just be too much space. So if I use them, I think I'll want to install them flush with the ribs or even a little bit back  (my side wall ribs stick out more than the thickness of my planned insulation and wall layer). I'm thinking that will be more difficult to do than to attach them to the front of the ribs.

Yes, they're for attaching things to. I'm putting mine at the top, the bottom and at the height that my bed frame will be so that I can screw through the paneling into solid wood to attach the various furniture components to them.

If all you are trying to use to attach wall panels and furniture to is the ribs, then you're limited to them for where your seams are going to be and where you can attach things to. Unlike the framing in a house, van manufacturers don't put the ribs where you need them. Horizontal fur strips take the place of good framing.

I'm using 1x3 to give me more adjustability. 1 x 2's will work as well, I just like having more play room. If you mount them behind the ribs then when you go to apply wall paneling the ribs are between it and the furring strips making it difficult to get things fastened down tight. The ribs don't look that thick but they will get in your way!!

The very back ribs in the Savana stick out at the top and bottom further than the more forward ribs do so I'm putting the furring strip behind the rib on those spots and in front of the rib elsewhere. It will give me a flatter wall in the end.

You just have to figure out how to achieve what you want to do. There's really no wrong or better way.

And yes, screwing them to the ribs is standard using flat head wood/sheet metal screws so they're not protruding when you go to panel.
FALCON said:
(this 5-minute limit on editing is messing me up here...)

And another question - TOOLS. I'm making a list of tools to get to use for the conversion. What should I add or remove?

- Angle grinder (for cutting the roof vent hole)

Not needed - jig saw with metal blade will work fine
- Circular saw

Helpful but if you can cut a straight line with a jig saw you don't need to spend the money. I'm getting H/D to do my big cuts for free so I'm not buying a circular saw...$$$$$ up here
- Drill (already have)

Most handy tool

- Wrenches and sockets (already have but may need to replace some I've lost)

Drill bits more so than wrenches and sockets

Don't be blaming the van on needing to replace sockets and wrenches...your better half shouldn't buy that story at all.... :p

- Saw horses and plywood for sawing/working table

I'm using a 2 x 4' old table that fits in the empty van for right now and milk crates for getting the large sheets of plywood up off the ground

Any kind of work surface will do

- Clamps ??

If you've got them already, don't need to go crazy on them

I'm using some plastic spring clamps like this:

http://www.harborfreight.com/1-34-in-nylon-spring-clamp-69291.html

to hold wood onto the table for cutting cause I've only got two hands

- Counter-sink drill bits (so screws don't crack/split the wood)

Pre-drill your screw holes and you don't need to countersink flat head wood screws

- Big pieces of cardboard for making templates

I bought a 10 pack of Bristol board at W/M for making templates, tape them together as needed, keep the smaller pieces for fine adjusting when you cut too deep... :D
- A multimeter ??

Probably, as long as you know how to use it


Some other stuff I already have:
Screwdrivers, wood saw, hacksaw, drill, dremel, extension cord, safety gear (glasses, dust mask, gloves, earplugs), wire strippers/cutter,

Miter box/saw
 
Falcon, others may pipe in but I think you would do better to consider a Jig saw for the sheet metal cutting. A jig saw will most likely be a more valuable tool in your endeavor than a grinder.
with a jig saw you can use it to cut many different kinds of material just by installing a blade for the material. I use one of these as it allows you to rotate the blade 360 but that's just a bonus feature and a plain basic variable speed Jigsaw will do very nicely like this one

As for counter sink drilling I really like these. One step drill and counter sink for the most common screw sizes on the cheap. 
 
Nice work so far... Look forward to the progress.
 
Times 3 on the jig saw. If you're not buying tools to have a collection of, and only want the basics to get the job done, it will serve you well. And for any other minor grinding you can get grinding wheels that will attach to the drill you already have.
One more thing to consider regarding furring strips. Metal is an excellent conductor of heat and cold. So by installing the furring strips over the ribs, it not only creates a flatter wall that is easier to cover, it also creates a thermal break of sorts - in other words, it slows the transfer of heat, and especially cold from the outside to the inside surface of your walls. In the cold, this can make a big difference, especially in cutting down on the frost accumulation on the inside while you sleep with the heat off. There are other methods to accomplish this, like lining the wall with felt under the interior surface, but this takes care of a couple issues at the same time. I know you lose 1 1/2'' of interior space, but in my mind it solves quite a few things at once, so it's worth it. Vans are too narrow for me to sleep side to side and that is the only time I think I'd notice the 1 1/2'' difference. If that is your concern, you can buy thinner material, it just costs more, is harder to source, and doesn't have as much structure to it so your walls will be flimsier.
 
FALCON said:
TIRES
I’ll be replacing the tires with some that will work better in low traction environments. Haven’t started research on what tires to buy. I can do this later on when I’m nearly finished with completion - or even after I’ve lived in the van for a bit. I think I’d like to put on larger tires to life the van. I’m guessing that I will need to remove the running board (is that what it’s called?), as that and the sort of mud flap at the front may be in the way — that front thing that looks like the mud flap is what the front of the running boards are attached to.
May I recommend Michelin LTX MS2's. You will get longer than the recommended 5 years out of them if you have to, and they ride much better than Wranglers. Your life depends on your tires...

Get them at discount tire, get the road hazard. These guys will take care of you. You can also negotiate price a bit.

...No, I'm not in the tire business.

akrvbob said:
I don't think the Reflectix is worth the cost or space it uses. Much better idea to just replace it with more polyiso. Polyiso is much better stuff to retain  heat.
Bob

Ditto. I think reflectix is expensive for what it is and a waste of money. It's silver bubble wrap. It is only effective in the windows, when it is EXPOSED. I used it in my GMC motorhome above the head liner and behind the wall panels at everyone's (GMC community) recommendation, and it did NOTHING. High density foam board (the blue stuff) and 3" denim insulation. THAT made my coach much cooler and warmer than everyone else's.

I only use some scraps of what I have left in my Travel trailer windows when I store it.
 
ZoNiE said:
Ditto. I think reflectix is expensive for what it is and a waste of money. It's silver bubble wrap. It is only effective in the windows, when it is EXPOSED. I used it in my GMC motorhome above the head liner and behind the wall panels at everyone's (GMC community) recommendation, and it did NOTHING. High density foam board (the blue stuff) and 3" denim insulation. THAT made my coach much cooler and warmer than everyone else's.

If you used it without any air gaps, the R value is only 1 or less (depending on which thickness of Reflectix you used). For it to work effectively, it doesn't have to be completely exposed to the sun. There just has to be an air gap between the shiny side of the Refelctix and the hotter side of the insulation system. (This is to prevent conductive heat transfer.. then the shiny part prevents radiative head transfer). If you use it with an air gap, the effective R value is around 4 or more.

From the Reflectix website:
17112176763_0d753d8f68_z.jpg
 

-----------------------------------------------------
PROGRESS UPDATE
-----------------------------------------------------


BOUGHT SOME TOOLS AND EQUIPMENT
  • Fantastic Vent fan - 1250
  • Lights - LED light strips and a holder, dimmer switch
  • Tools - multimeter, soldering iron, jigsaw, and other small things
  • Strongback chair. I thought this would be a good chair to have along in the van - but not I’m not so sure - it may be too big for my liking. It is comfortable though (and good posture)
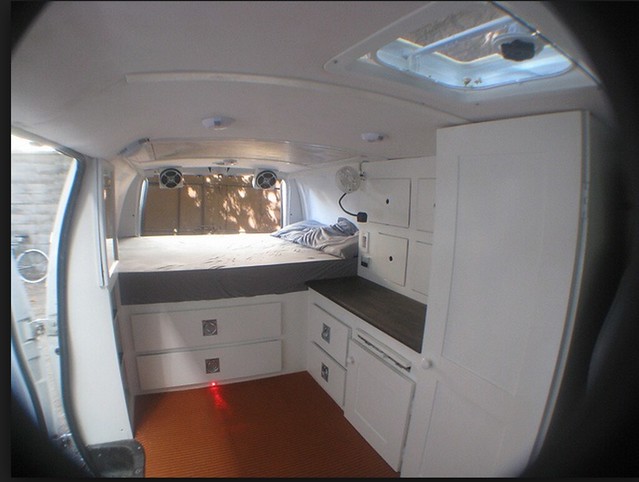
GOT SOME STUFF DONE

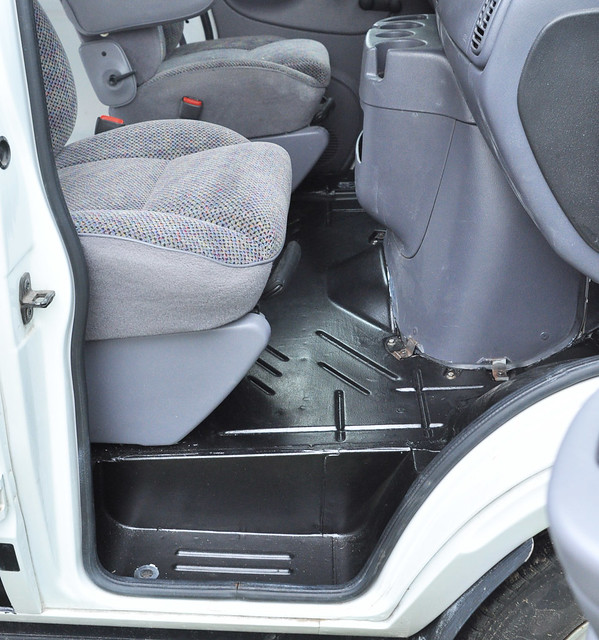
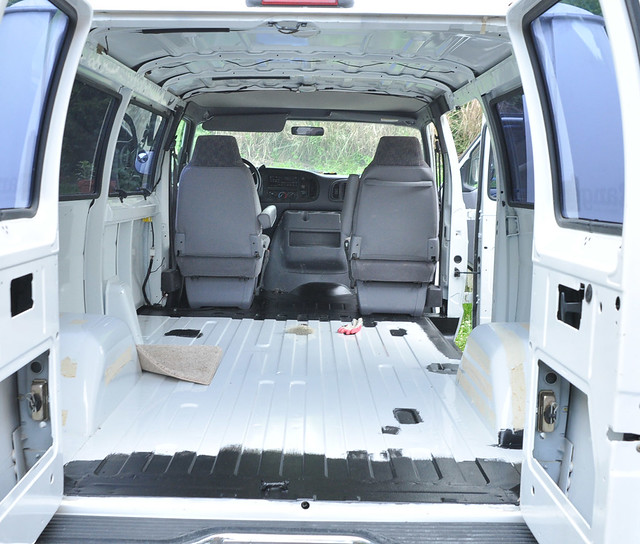
Applied bed-liner to the floor in the front:
17176064614_9735deb69f_z.jpg


I like how it turned out. Some day I will paint those brackets that hold down the center console/engine cover. Those bolts around the console, but not in the brackets hold on a metal heat shield. I removed them not knowing that there were some strange nuts on the bottom side (I also didn’t hear them falling down - they are really thin and don’t make much noise). So when I went to put them back in, they didn’t hold the heat shield. I thought I’d have to find some washers and nuts that would work, but I ended up finding all 6 of the nuts - 2 or three on the ground, and the rest in various spots on the suspension or frame.
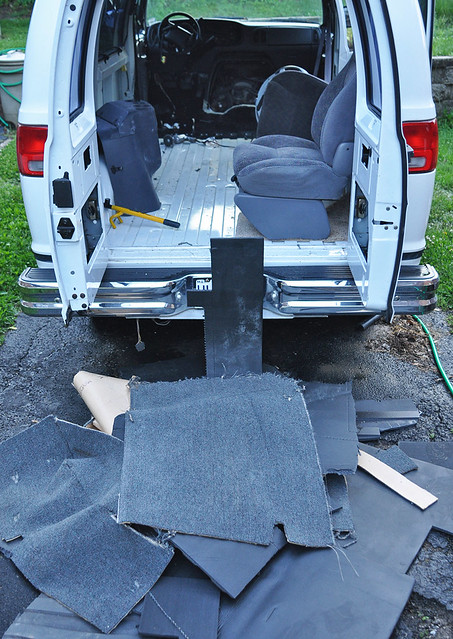


Removed the carpet.
17611020390_12d9b54e56_z.jpg


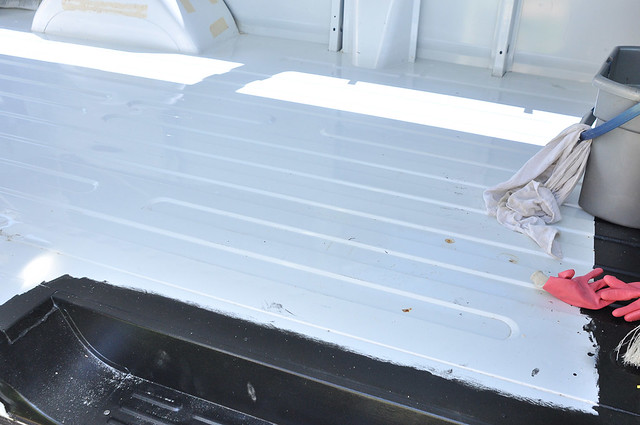
And cleaned the floor.
17799004581_c04d9db68b_z.jpg


I bed-lined some spots that had rust, including along the back (which I would’ve done anyways - but it did have some rust where the carpet end holder was)
17795802832_d3bbfe8925_z.jpg


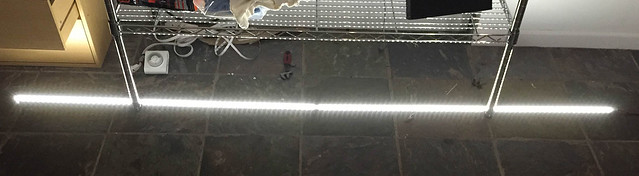
LIGHTS — I ordered some lights online from SuperBrightLEDS.com - some LED strips and a rail to attach them to, with a diffused cover. They were not cheap, but I think I’ll like how they work. I got 4 of them - 3 foot strips (the ones I wanted were only available in that length) and soldered them together to make two 6-foot strips. This was my first time soldering, other than maybe in high school, and it seemed to go well. I bought a pair of 6-volt batteries so I could test these lights and the vent fan. Everything is working well. I bought one dimmer switch, a Kick KR6, and I will wire the two light strands in parallel from the one switch. I’m planning to put the strips along the top of the van - one on each side at our near the corner of the walls and ceiling.

Testing, after soldering two strips together:
17178205373_48e0b2e0ff_z.jpg


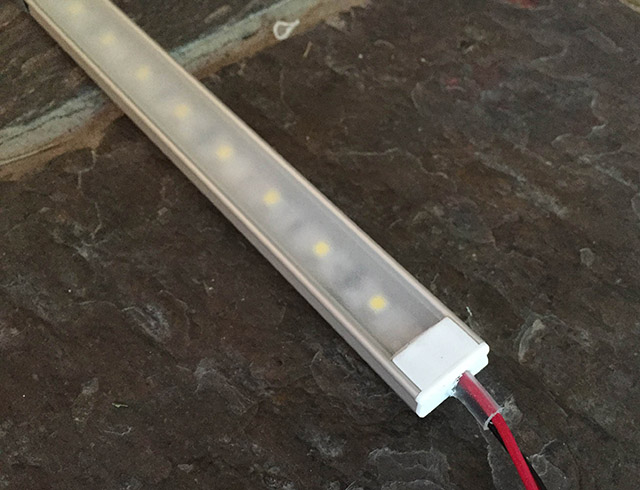
This is the rail and cover that I have them in:
17178206213_e6a016b11a_o.jpg


And here’s how they look, in the rail, lit up:
17612306079_3b1bca3a7e_z.jpg


I think the amount of light they put out will be right around what I’d want.


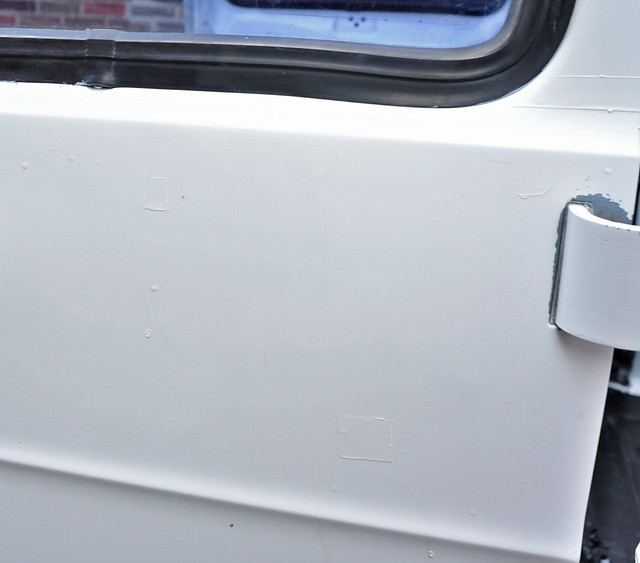
I also did some more touch-up painting. I wasn’t thinking and I taped off sections just leaving a small area around where the paint was chipped. So I ended up with very strange looking paint edges. I don’t know why I did it this way. I repainted a spot a couple weeks ago and did a great job with it. I just wasn't thinking.
17611020830_395443ed11_z.jpg


I also put way too much paint on. I’ll probably do some wet sanding to try to fix this.


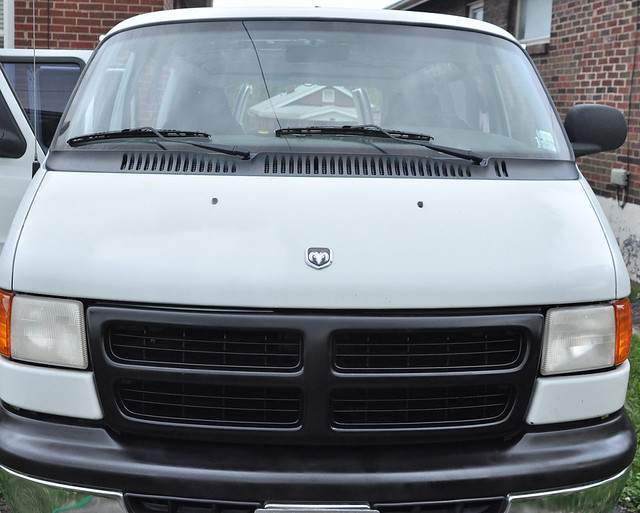
And last thing - I painted the front bumper and grill.

BEFORE:
17773006856_4129645b82_z.jpg


AFTER:
17799004031_5eee8b2ee9_z.jpg

The hood needed a lot of repainting. I did the bottom left corner a few weeks ago - which looks great now. Today I did a section along the bottom of the hood between the spot I did previously and the hood logo, and a spot on the bottom right corner. I also taped these off like an idiot and got bad lines. I salved these a bit by putting a lot of thin coats on. (You can see the paint difference in the sections I did today. As the paint dries/cures entirely, it will probably match better)

I think that’s everything. Next steps are:
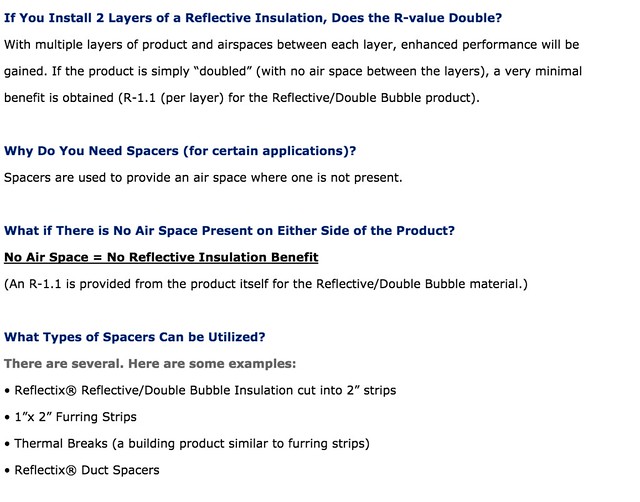
  • Decide how I want to use furring
  • Buy and install insulation - first, the walls and floor
  • Buy plywood and sawhorses. Maybe a circular saw. Get cardboard for templates
  • Install furring boards
  • Cut plywood for floor and install
  • Install vent fan
  • Install ceiling insulation
  • Decide if I want to run wires behind the walls and ceiling
  • Install plywood walls and ceiling panels
  • Start electrical system research
  • Continue rear end (lunchbox locker) research order one

That will keep me busy for a while. Two weeks from now, I have an entire week off of work, so I expect to make a lot of progress then. Otherwise it’s a bit here and there some evenings but mostly weekends.
 
Oh also - I discovered that some water is leaking in one of the windows. So I may have to reseal it. It's been raining like crazy here, and only a little bit of water got in. But I need to remember to reseal this before I cover up that window, if I end up doing so.
 
Guys - what kind of wood should I use for the furring boards? Are there some types that are less likely to absorb any potential condensation?
 
I seldom see it on most van conversions, but the furring strips could be painted with a good water-proof paint to prevent absorption. Indeed, I seldom see even raw plywood paneling being finished. In time it will warp from humidity.
 
You could try that plastic wood stuff made out of recycled milk bottles. It may be heavier, but won't rot like wood. Not sure if it will absorb moisture, but it is made for decking...
 
Warning :exclamation:
The plastic decking is very heavy !
But great stuff,won't absorb moisture or rot .
I've used it for lots of unusual things.
 
Top