FALCON'S Aventuremobile conversion thread.

Van Living Forum

Help Support Van Living Forum:

This site may earn a commission from merchant affiliate links, including eBay, Amazon, and others.
Wow, your build is just gorgeous, very impressed!
 
call the company and ask them, I am sure they will point the way. that company is about ten miles from me. highdesertranger
 
@highdesertranger: I'll call them this week and see what they say.

@Almost There: thanks. those might work in one place. For others, they won't be long enough. (I need some around 2+ inches long)
 

--------------------------------------------------------------------------------------------
PROGRESS - BIKE BOX & GALLEY
-------------------------------------------------------------------------------------------


19658707670_a70f91b1a1_o.jpg


19846726685_69dbedf7ee_o.jpg


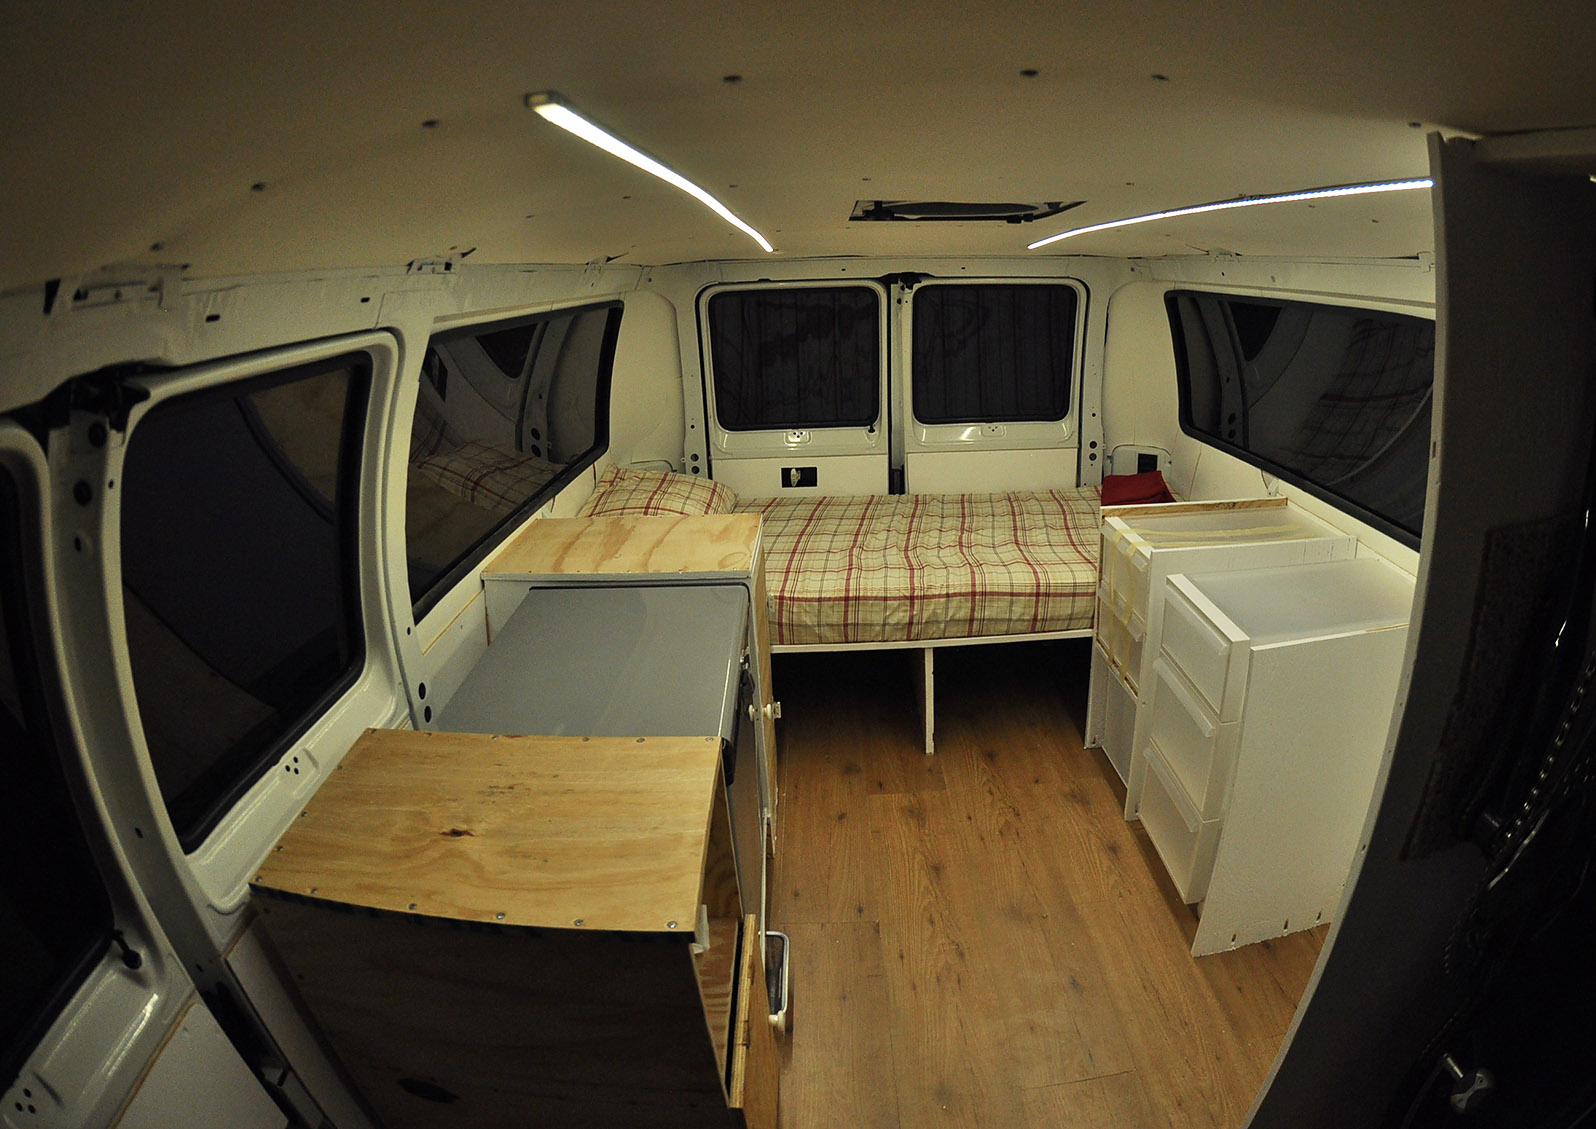
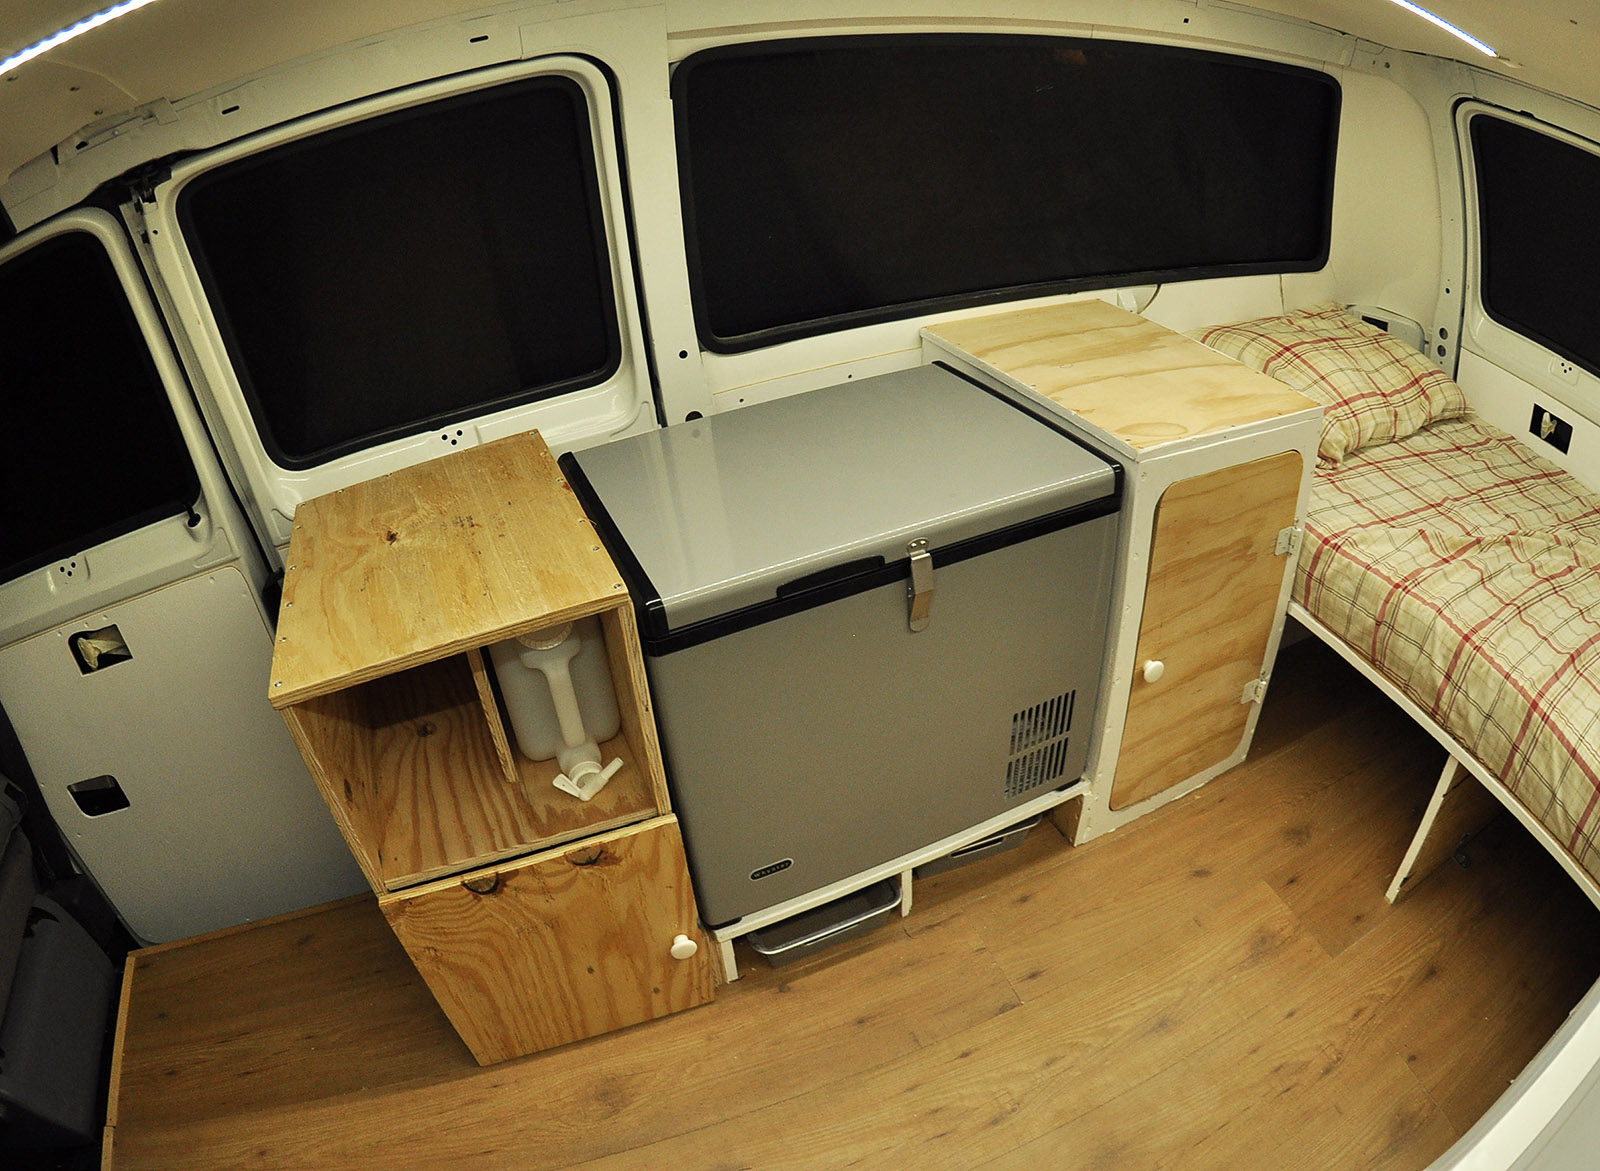
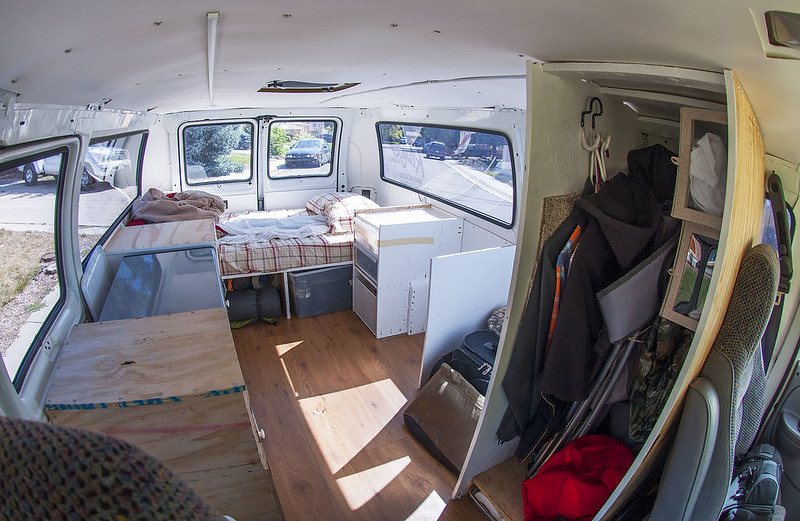
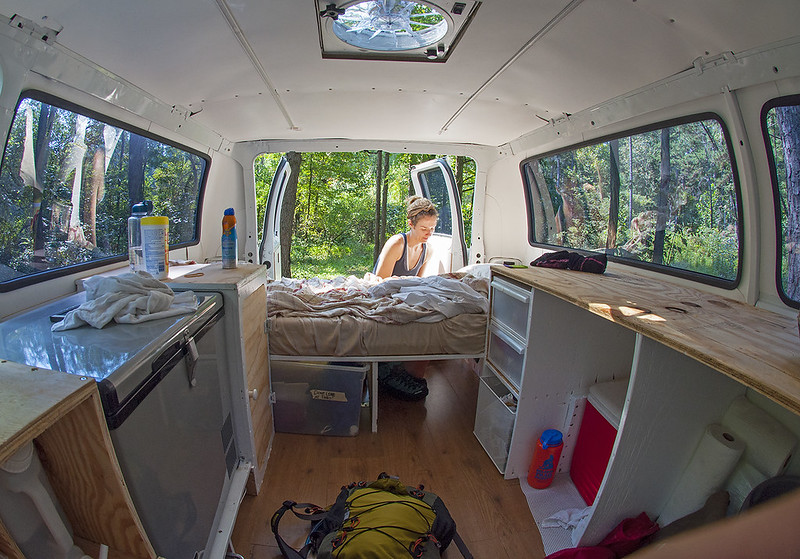
This is with the mattress in place. I’ve been sleeping on it in my house for a while now. I like it. It’s from www.thefoamfactory.com. It is 3” of high density foam, with 2” of memory foam. If I was buying another, I’d get 2” of HD foam instead of 3” - just because that seems like it would be enough for me, and it would give me more space for sitting on the bed. I can sit, but if I sit 100% straight up and with my neck sort of extended up, my head touches the ceiling. I think it will work out fine because I don’t actually sit that way all the time.
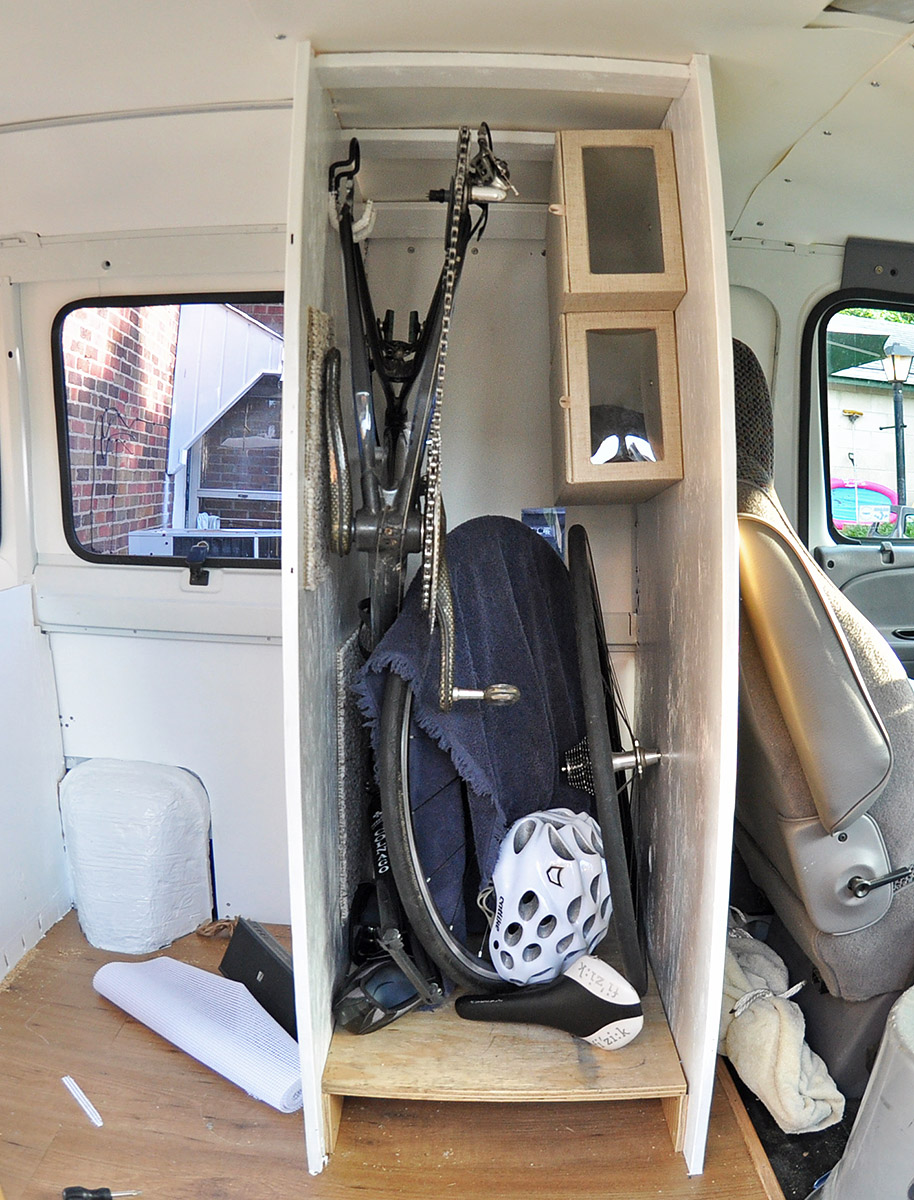


BIKE BOX
The bike box is nearly done. All that’s left is to paint the bottom platform, and to paint the front side of it (which is right behind the driver’s seat), and to cover the front. I think I’ll use the same fabric that I end up using to close off the front of the van from the back.

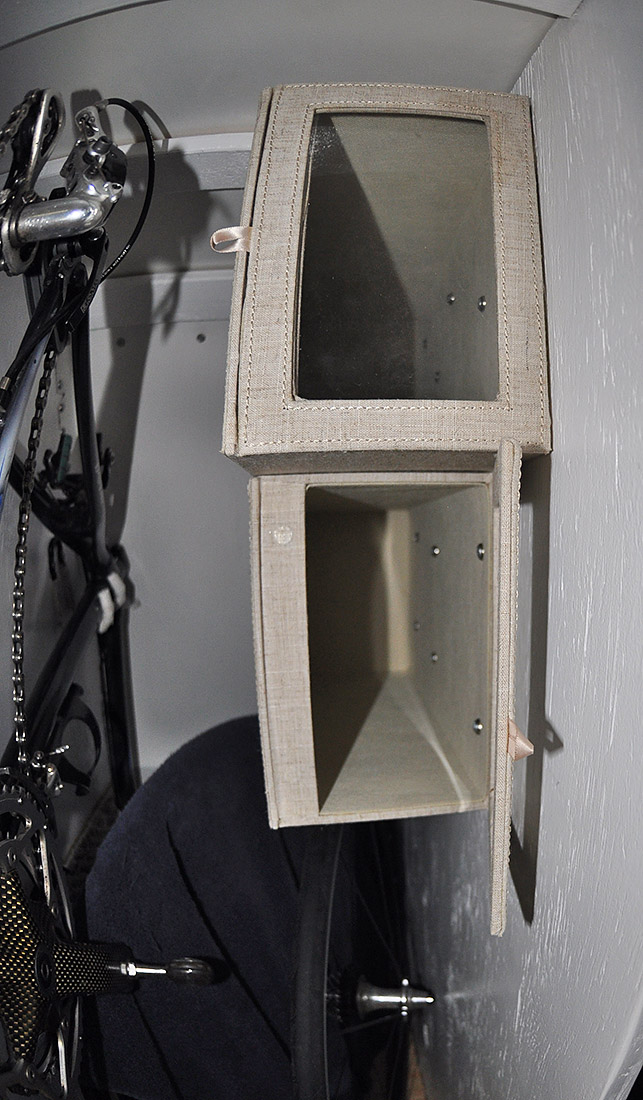
I got these boxes from The Container Store where the front swings open. They aren’t all that sturdy. I’ll put only clothes in these boxes so that shouldn’t be too much load for them.

I added some padding to the hooks that hold up the bike, and I also bent them so they would hold the bike closer to the wall, and so they reached up higher (so the bike couldn’t come off when going over bumps). The bike is very secure now. I also put some carpet pieces on the wall where the bike touches it.

19820517996_4fe160e901_o.jpg


19658708730_c0b420a3d5_o.jpg


It looks a little strange in this picture - like the top one is larger than the lower one. This is just because the top one is positioned farther forward, and also because they are both angled slightly, with the backs lower than the front.
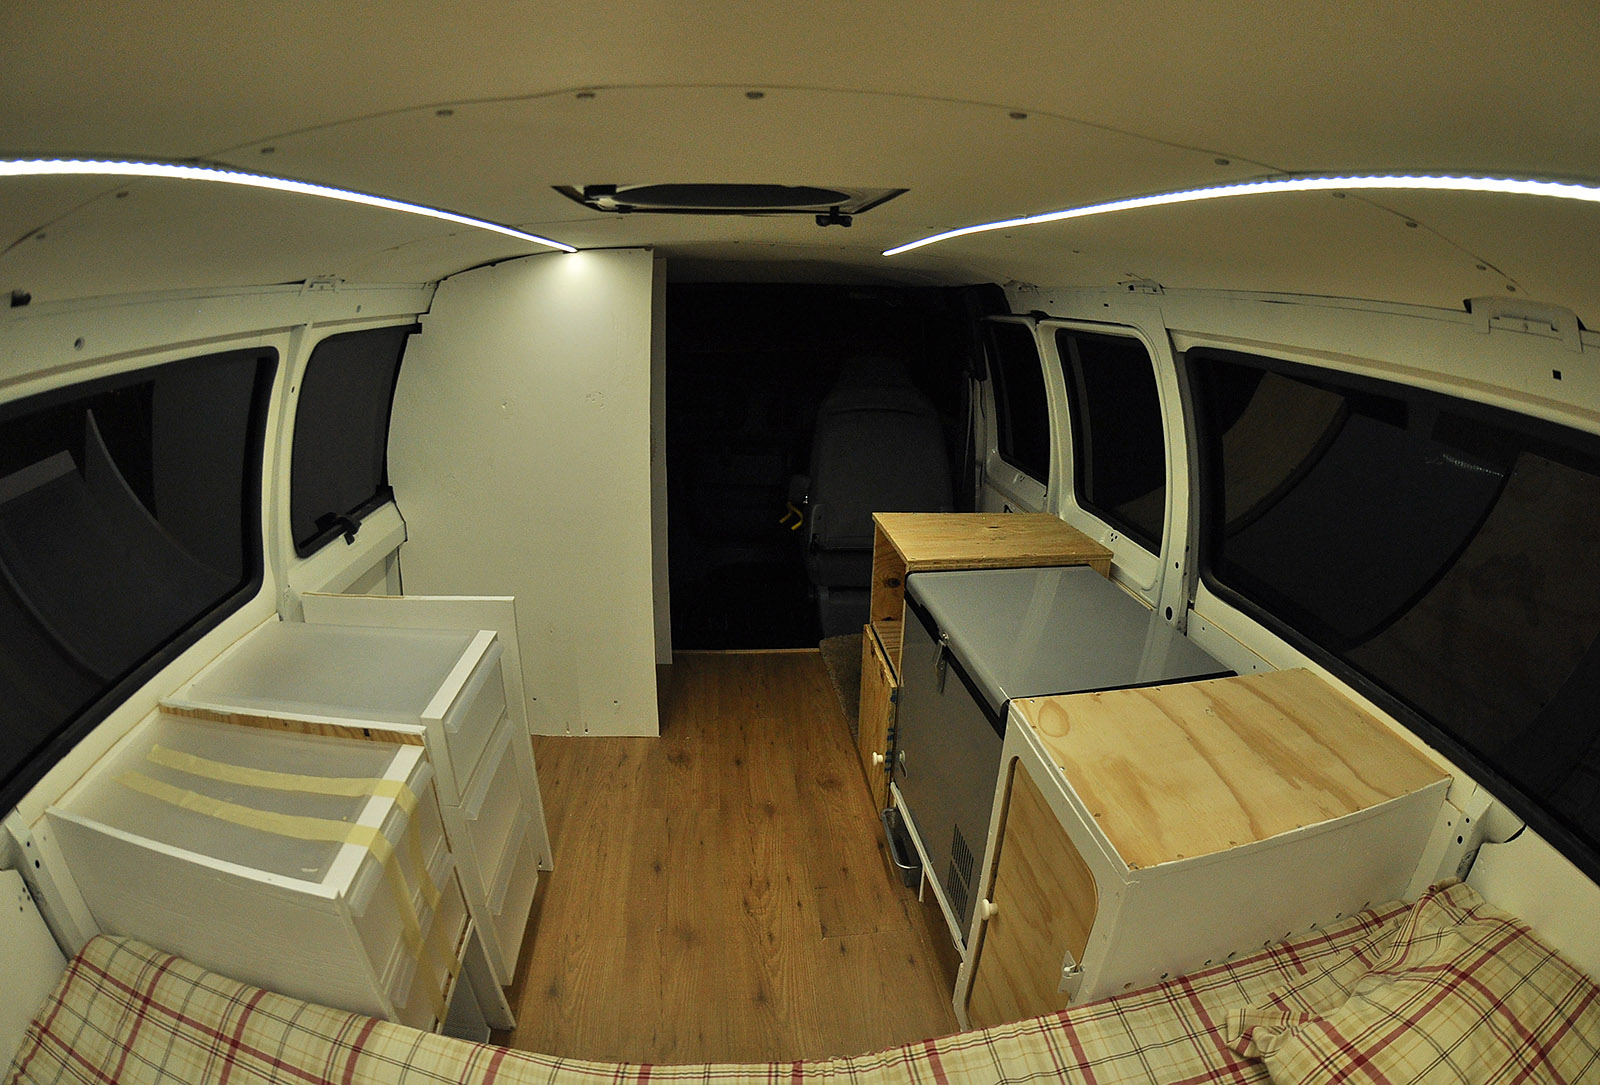
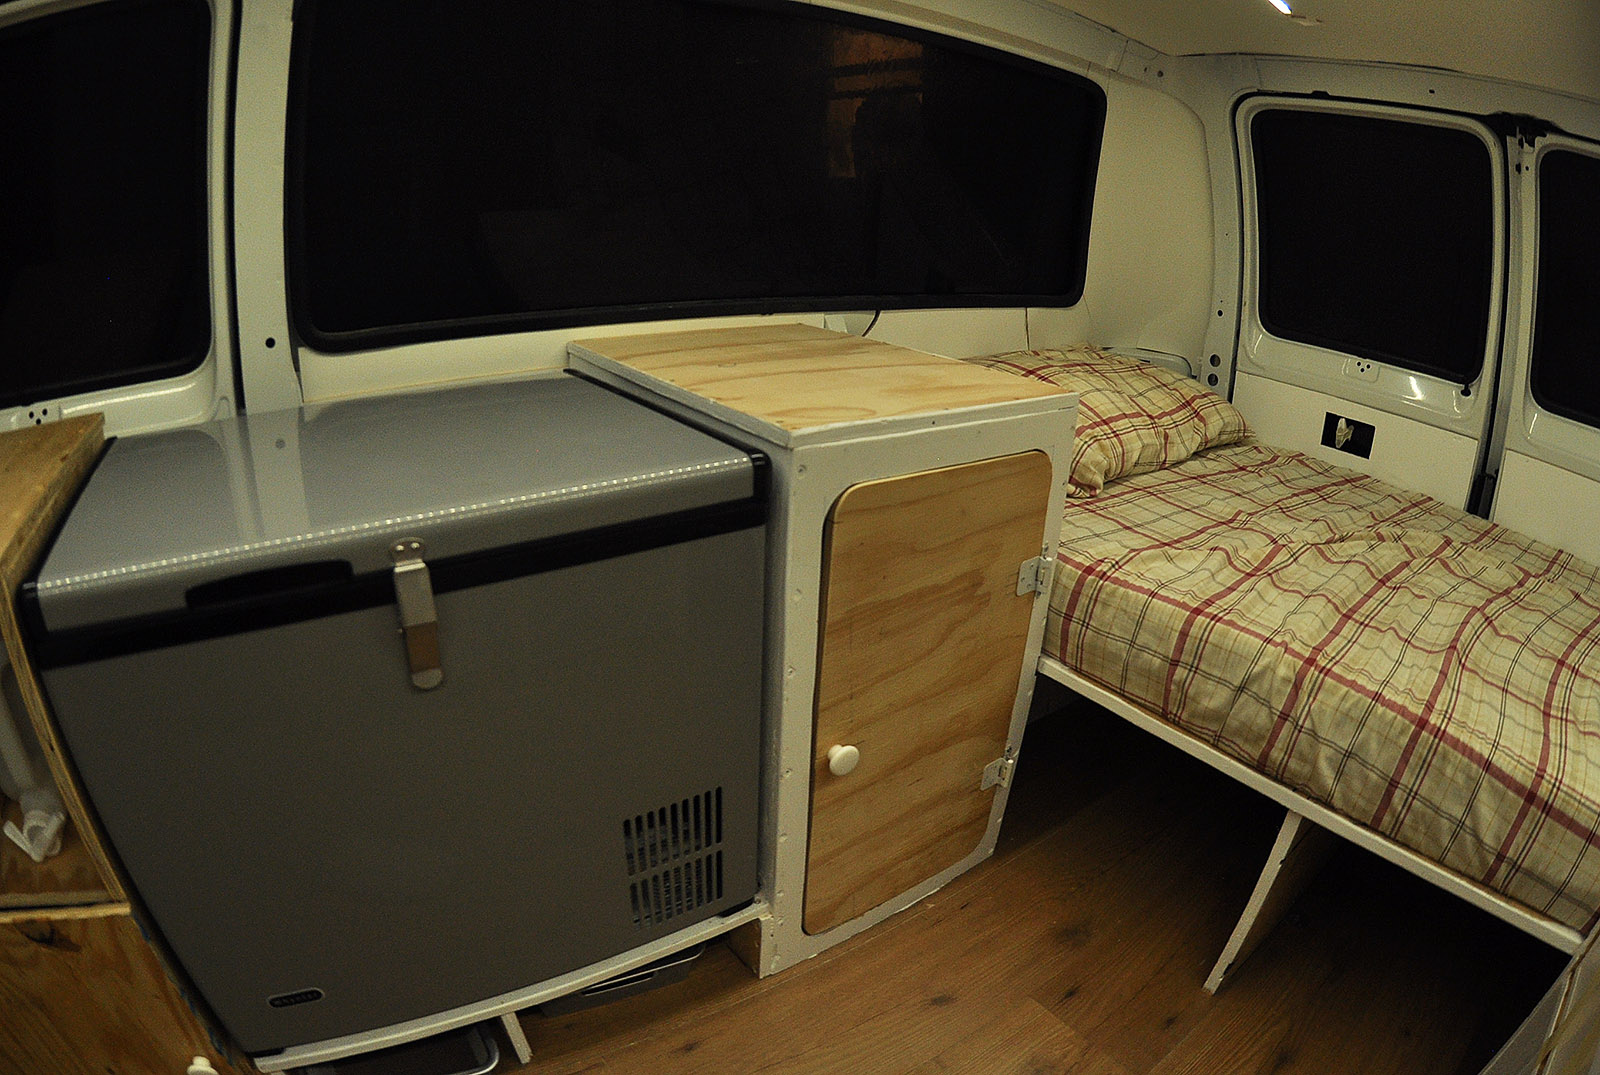
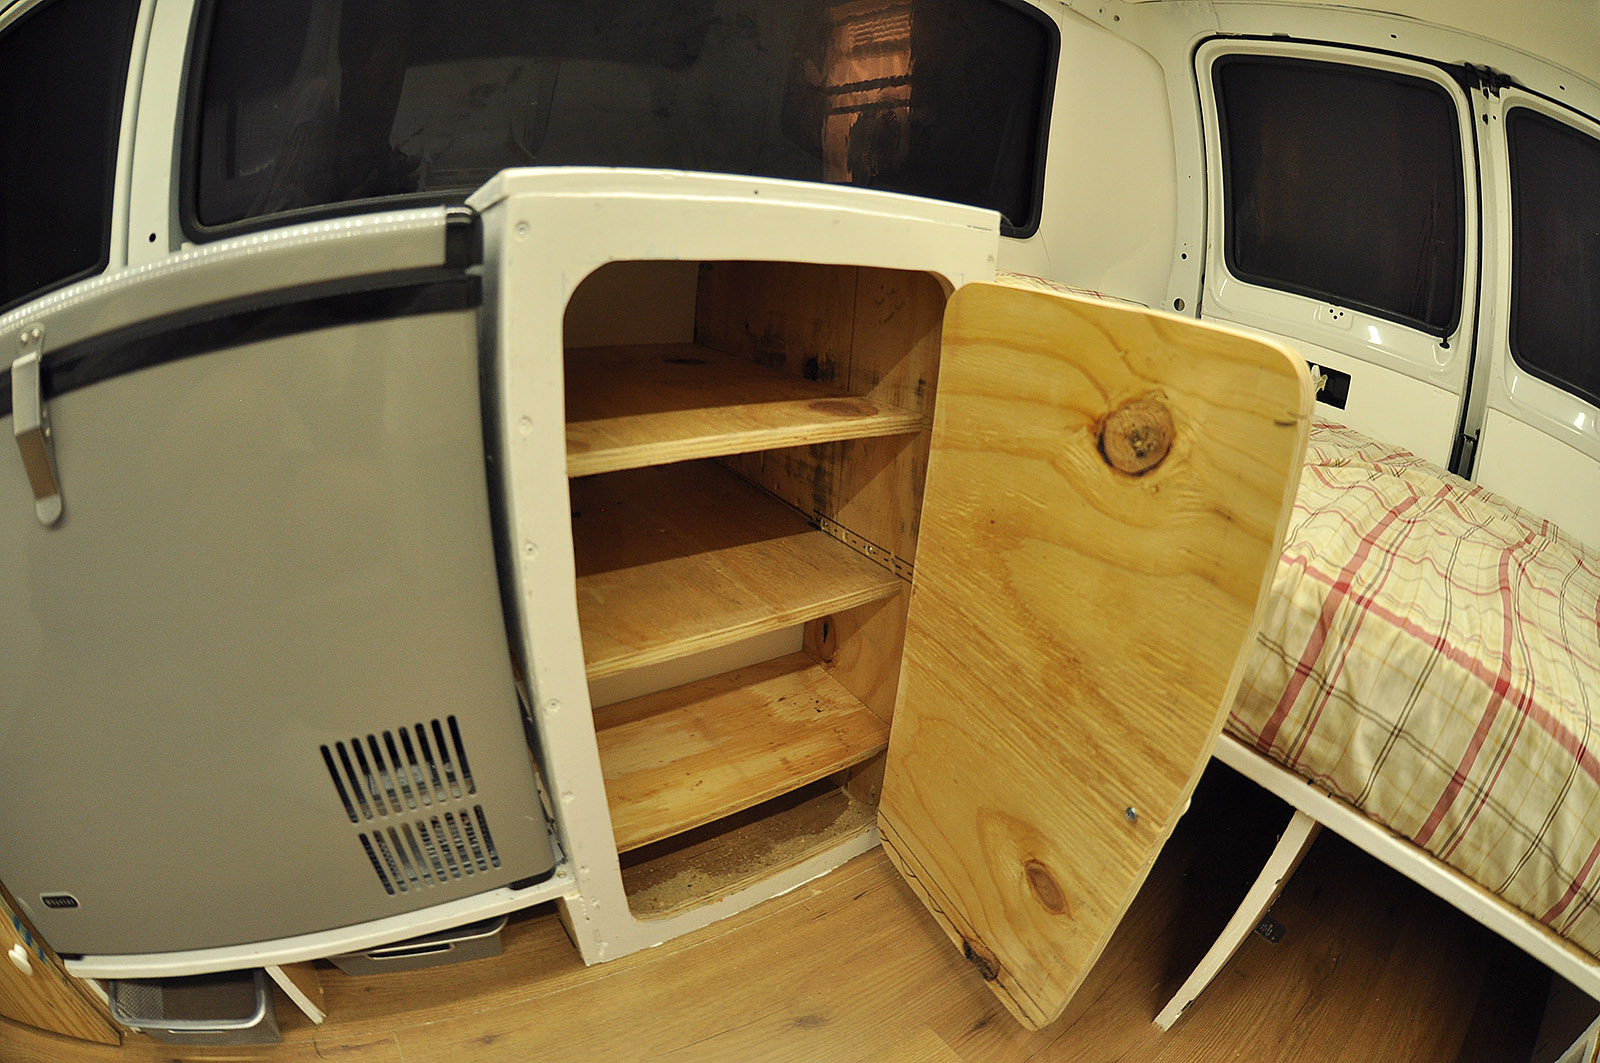
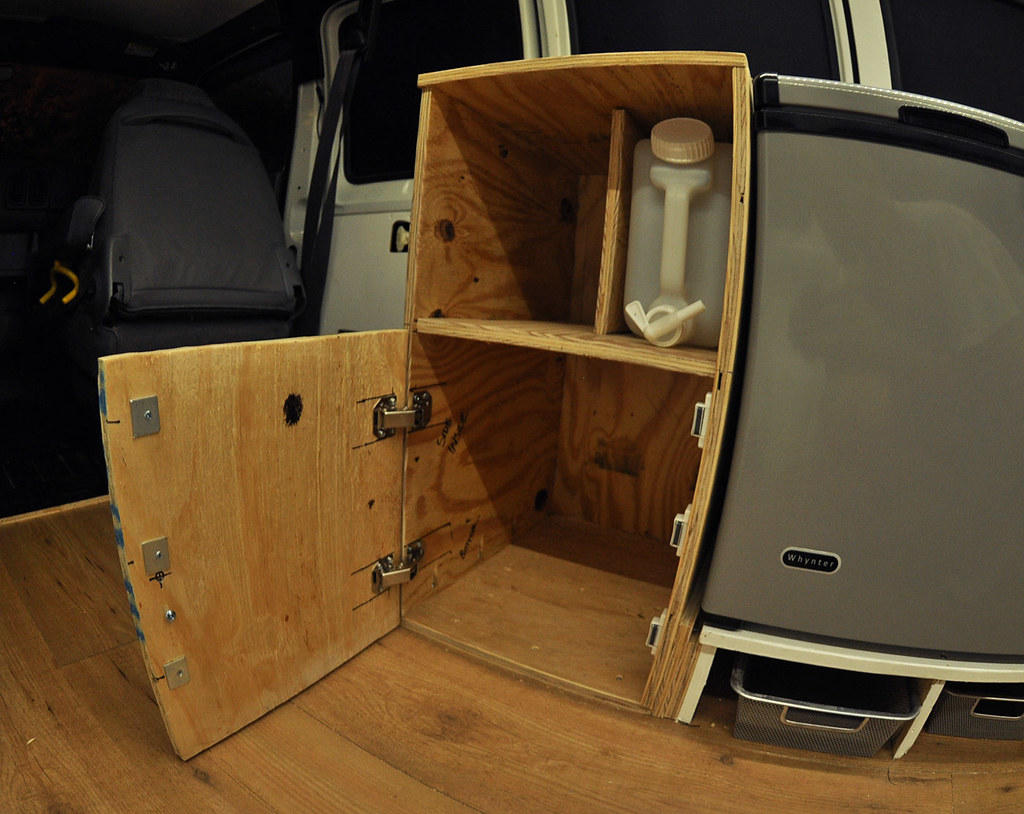


GALLEY


19839327192_8bb1188167_o.jpg


On the right side, I made a cabinet door, and some shelves inside. The door is flush. Right now, what keeps it in place are the hinges which have springs to push it closed, and there is some interference between the top of the door and the inner part. I think that will work well enough, for some time at least. I bought a little latch that I could add later if needed.

19846725935_5f4f0272fc_o.jpg


19846725535_b05c5b02b3_o.jpg


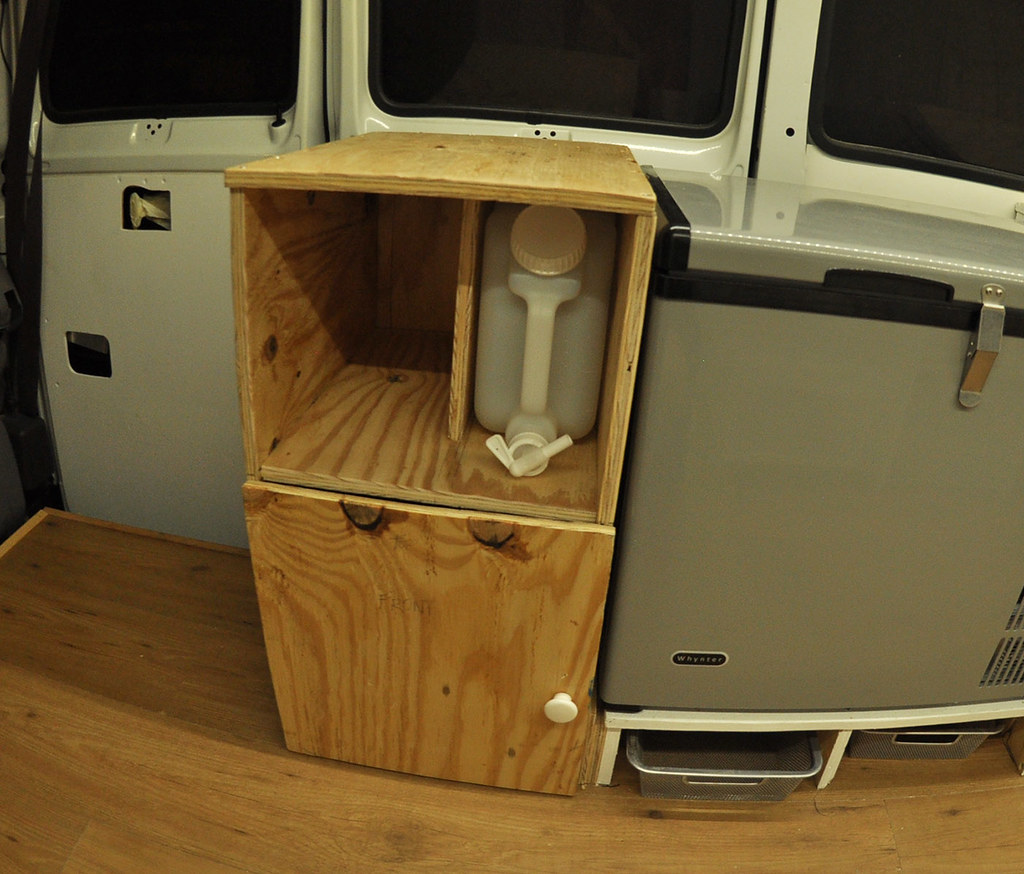
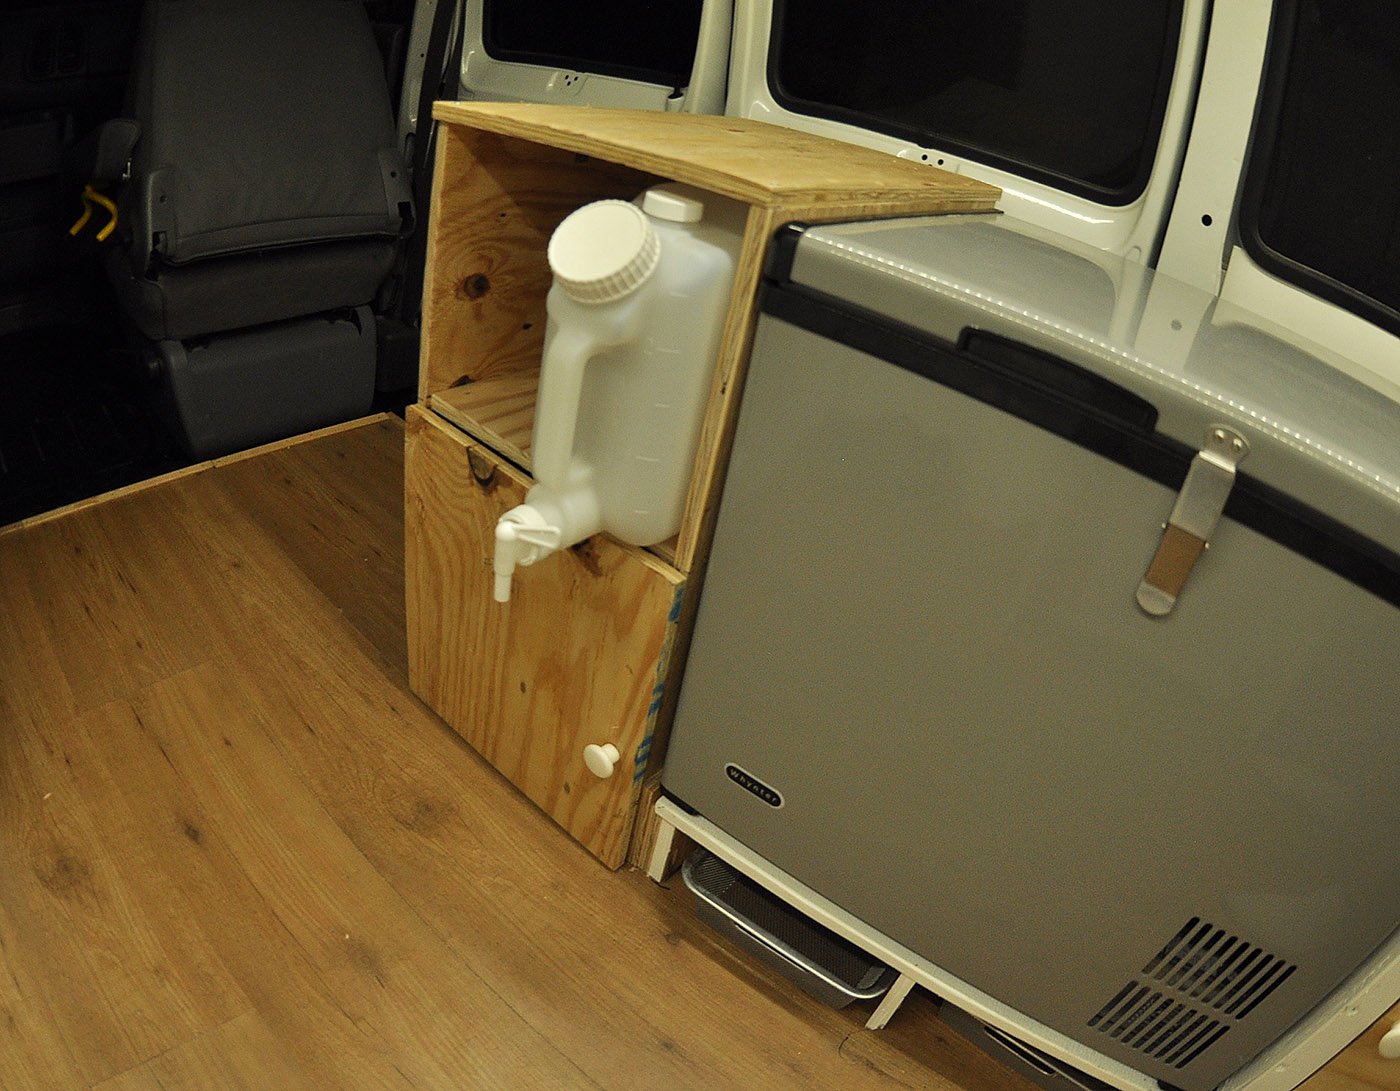
I added the box to the left of the fridge. That water container is what I’m planning to use for dispensing water. It is a 2.5 Gallon ULINE Carboy. I like it. It feels sturdier than a couple of other water dispensers I bought. One nice thing is that the dispenser handle and spout can rotate (without unscrewing it from the container), so it can be stored flat on the shelf, and then when I pull it out for use, I can rotate those parts to the right direction for dispensing water.

I’ve decided against an actual sink - for now at least. What I’m planning to do is use a smaller water container (maybe just 1-gallon milk jug). When I want to use “the sink”, I will pull that jug out of the cupboard below to position it below the dispenser. I’ll put a funnel (like the kind of funnel you use to put oil in an engine, or something similar) into the top of the jug, and that funnel will function as a sink. In order to get enough vertical space between the dispenser spout and the “sink”, I may need to use a short greywater container (like This one), or move the dispenser up to the top surface.


19225808923_70b31bb62e_b.jpg


19839327882_c65128b7a2_b.jpg


19851639351_f87aa93b7c_o.jpg


(I will be painting the outer surfaces white, except for the tops)
 
I  like the position of your Whynter fridge. Does this allow for good venting for the fridge? Jan
 
another question. what is the clear plane on your cabinets made of? Plexiglas? anyhow your van is looking good. highdesertranger
 
janncoo said:
I  like the position of your Whynter fridge. Does this allow for good venting for the fridge? Jan

I have holes cut in the side of the box that the fridge is against - for the power cord plug-in, and the buttons & display, and for the side vent.
 
highdesertranger said:
another question. what is the clear plane on your cabinets made of? Plexiglas? anyhow your van is looking good. highdesertranger

Are you asking about the things in the top right corner of the bike box? Those are just some kind of clear plastic that's not very thick. It also doesn't seem very durable (some of the other ones in the store were scratched.
 
ok, thanks. yes that is what I was talking about. let us know how I holds up. highdesertranger
 
I called (and spoke with the president of) http://www.pacoplastics.com/ to ask if/how I can buy a small quantity of their 1/4 turn retainers. He said they have some parts - just certain sizes/models. Today I emailed him the sizes I would need. We'll see if that works out.
 
Well, folks - here's the situation:

I have the van as ready as it needs to be for the first trip I'll make with it. In August, I'll drive it out to the Rockies to go on a couple trips with my family up into the mountains. We'll go up and camp and fish for a couple days at a time. I'm going to take some things along to store in one of my family's basements. So van build progress will be very slow for the next month or so. Right now I'm spending my time going through all the stuff in my home, categorizing and sorting into:
- Stuff to take in the van long term
- Stuff to take to store in family's basement
- Stuff to get rid of

It is a challenge deciding that to put in each category. I'm hoping I can figure it out and make just this one trip to store things.

In about a month I'll be back from the trip and then I'll get back to the van building.
 

------------------------------------------
TEST RUNS
------------------------------------------

I don't have a ton to say so I'll share mostly in pictures. I haven’t really gotten back into working on the van much since July. All I’ve done since the last post was order the main electrical system components, and mount a board on the “Storage” side for the top surface. I got back from Colorado a few weeks ago but have been busy with a woman that I started spending time with a couple months ago, and another test trip over labor day weekend. After being gone to colorado for 2.5 weeks, I wanted to spend a lot of time with the girl. I will get back to working on the van, but while I’m seeing her, I won’t progress at the same speed. This is ok and it is a deliberate decision. I can’t lallygag too much because I want to have the van done, and something more time critical - to have my house sold by next spring.  


COLORADO
The stars aligned pretty well for a trip to where my family live – out near the Rocky Mountains. I’ve been planning to use a family member’s basement to store my “stuff” that I won’t be bringing along in the van with me but that I don’t want to get rid of. I had these things sorted and set aside, and then this month, co-workers asked me to go along to that same city for work. Now I could load all the stuff in my van and drive out there and let my employer pay for the gas!

I was a little nervous about a trip of this length and up into the mountains – it would be MUCH more than I’ve driven the van so far. All the driving went well. No problems, and the locker and tires worked great up in the mountains.

I went camping up in the mountains the weekends before and after working. My brother went with me both times. Most of my other immediate family came up for part of the first weekend and that was very nice. It was great spending this kind of time with my brother. We had plenty of time to relax and bond and have some very good conversations. He has also gotten into much better shape over the last year so we were able to go on a challenging hike.

Here’s the van all ready to go for the first weekend:
21087885462_02f4da91e2_c.jpg


Camping spot, first weekend:
20911165159_34a5e707b1_c.jpg


Camping spot, first weekend (you can see the van on the right)
21087884662_e2c65d8f6c_c.jpg


WHAT DOES IT MEAN!?
20909871310_3c2ae8232f_c.jpg


We camped right by here (off the road to the left) the 2nd weekend.
20909863730_ae865e3871_c.jpg


21087876142_115d1c8286_c.jpg


21105652671_17c0e3f75a_c.jpg


21105644521_42d3a52e03_c.jpg


At the top of the hike. The air was smoky from fires out west.
20911155139_2a91b11762_c.jpg
 
SHAWNEE N.F.
I went out to Shawnee National Forest for Labor Day weekend. Once I got back from Colorado, I still didn’t work on the van much. I’ve been spending a lot of time with a woman that I started dating a couple months ago. She came with me on this trip to Shawnee.

You can see the storage side top surface on the right side of this picture:
20777037684_c2f1ef9aff_c.jpg


Camping spot:
21388876032_c210b11a86_c.jpg


Out hiking
21373510366_86f40181b5_c.jpg


Out hiking
21373510806_f4487c7f4e_c.jpg
 
very nice. your pics have such good color saturation. the sunset with stars pic is great. any secerts you want to share. highdesertranger
 
ahh thank you.

The colors:
- Shoot in RAW
- Use photoshop
- Adjust the lighting (by increasing darker, decreasing brighter, and overall brightness and contrast)
- Increase the saturation
- Play with the color balance to make it look better (or more like real life, because the camera and RAW tend to make it look like one color - like just all green) (I'm talking about using sliders on the Cyan-Red, Magenta-Green, and Yellow-Blue scales)


That picture with the stars was actually well after the sun had set. The horizon you can see is to the east of the camera and that light is just light pollution from Denver and Colorado Springs. In real life, the light pollution was much less visible. For that picture, I used a really wide lens (10.5mm fisheye), pointed it up, turned up the ISO fairly high for my camera, and put it on the longest exposure (30 seconds)

The other picture with the sun setting where you can see the rays was actually a very interesting one. It can be very tricky shooting a picture like that. Shooting in RAW is essential. Then you have to get the lighting just right so the sky is not entirely white, and the trees are not entirely black. If I posted the original version straight out of camera, it actually looks like the trees are all black and the sky all white. That one took a lot of saving and I was actually VERY close to deleting the original picture and not even try to mess with it. Then it turned out great.

21213430478_511271d445_c.jpg

This type of striking image transformation is rare, but I thought I'd share it as it was very interesting to me. It's a good example of how much shooting in RAW helps.
 
Top