Cummins Canoe (A Stepvan Story)

Van Living Forum

Help Support Van Living Forum:

This site may earn a commission from merchant affiliate links, including eBay, Amazon, and others.
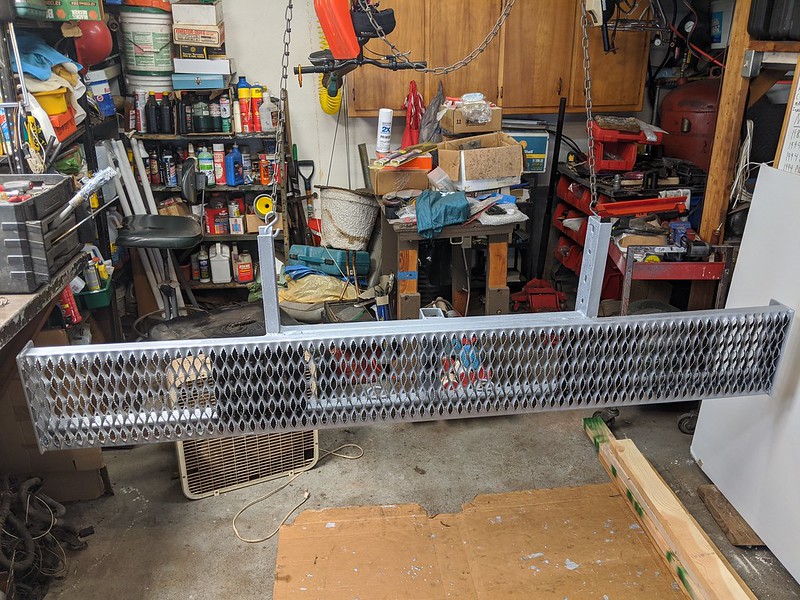
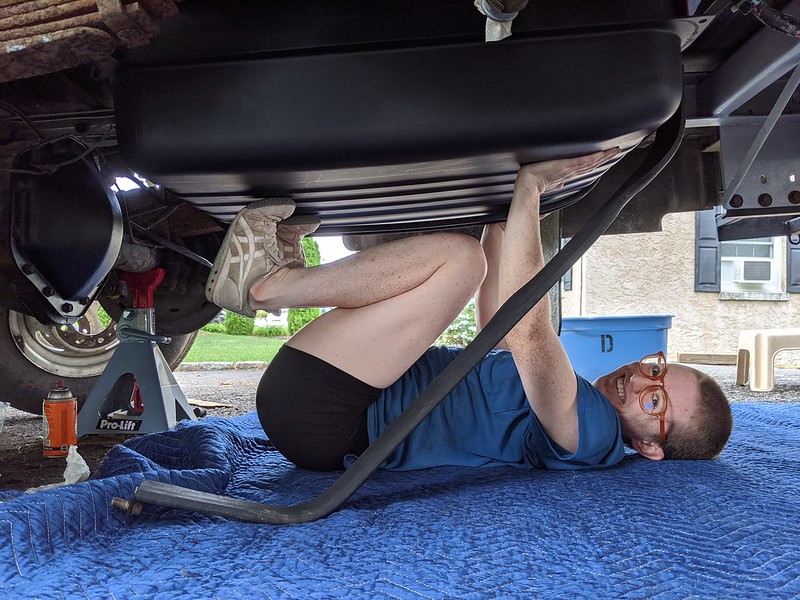
Waiting for chassis to dry and such. Got plenty more to do.

50550371201_a6779d737e_c.jpg

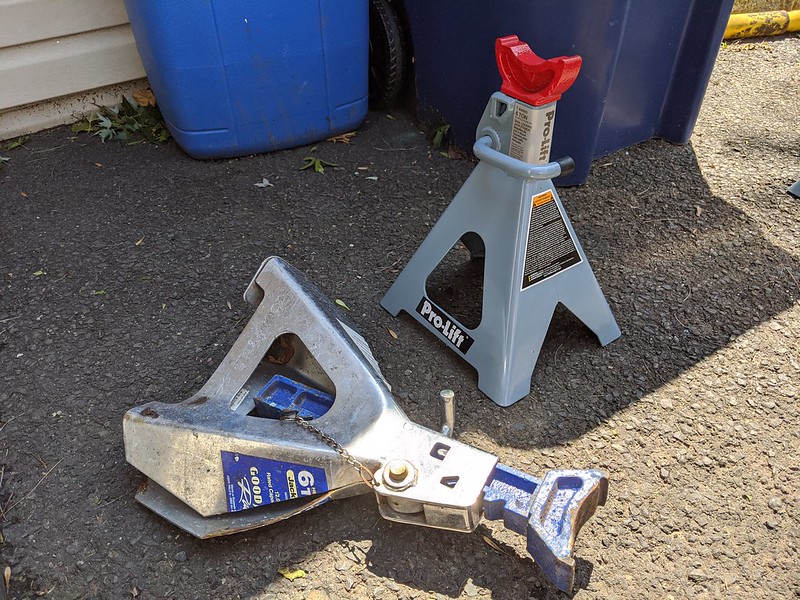
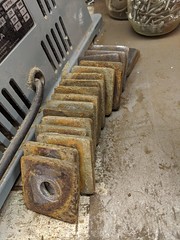
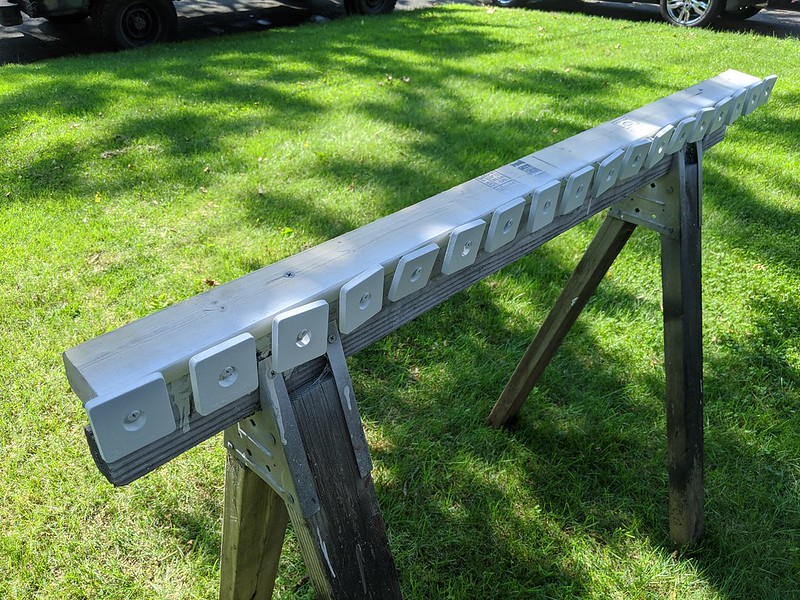
[size=small]Ordered some new jack stands. I don't think the old ones are salvageable.[/size]

[size=small]
50550371846_d9452f3b6e_m.jpg
[/size]

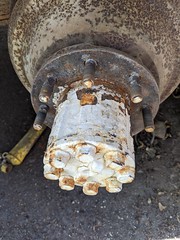
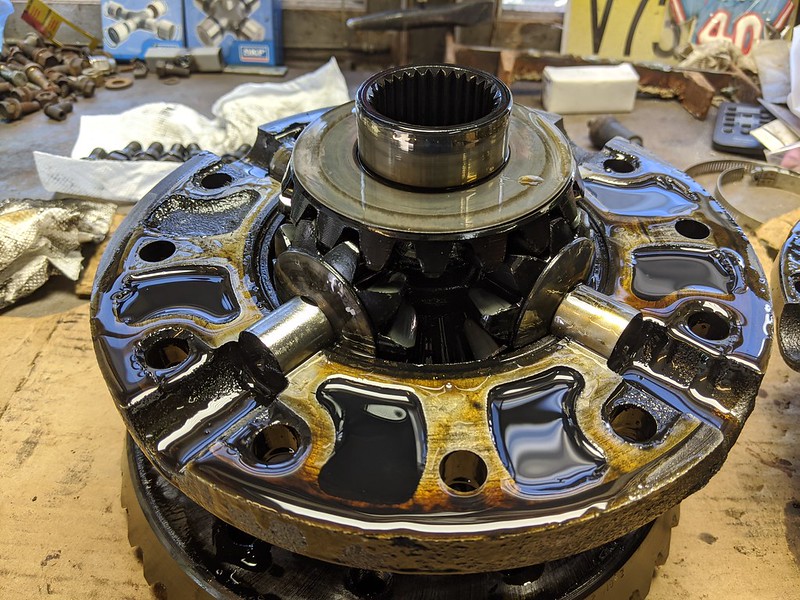
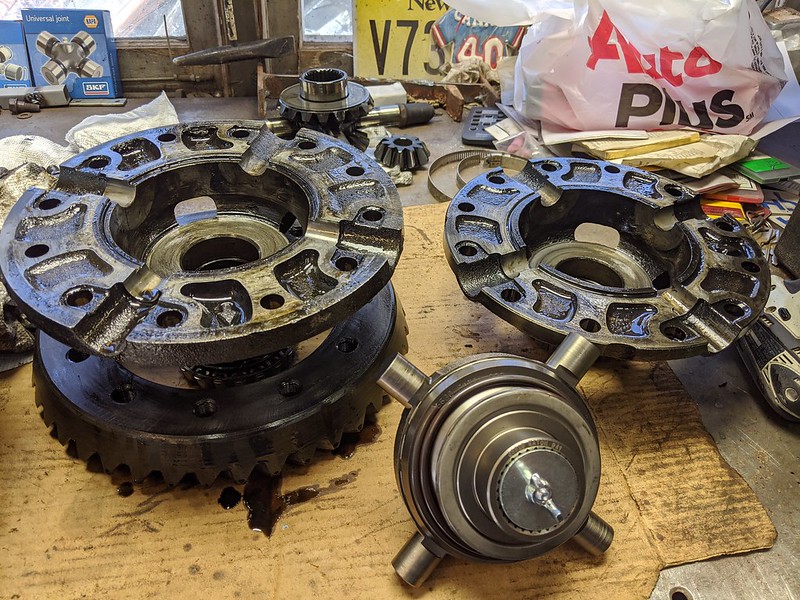
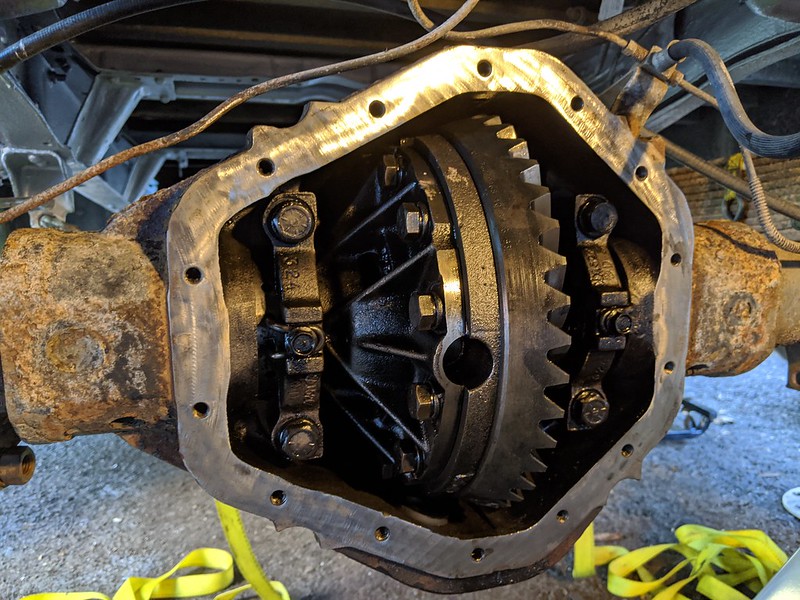
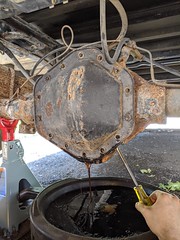
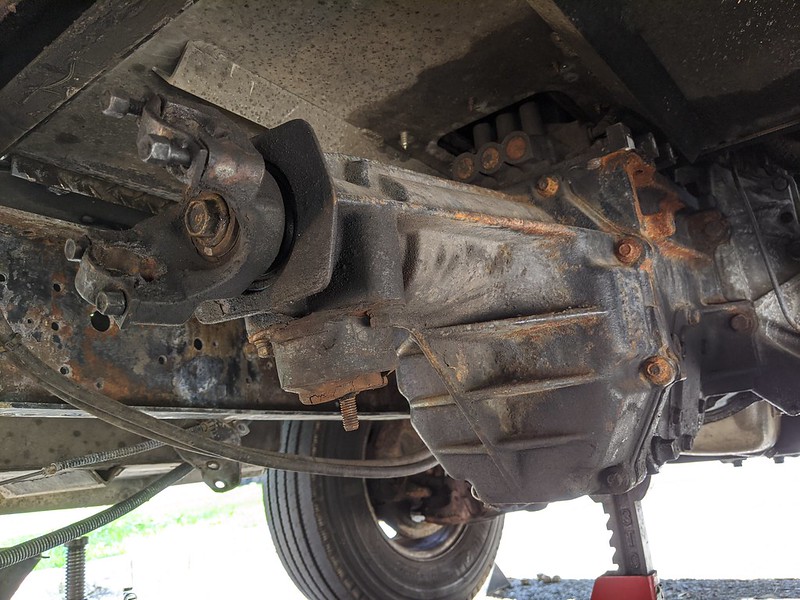
[size=small][size=small]While we wait, lets see what's in here.[/size][/size]

[size=small][size=small]
50549639128_d41d66e832_c.jpg
[/size][/size]

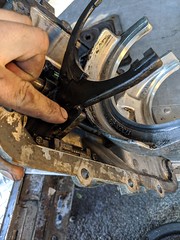
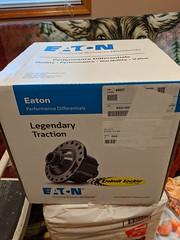
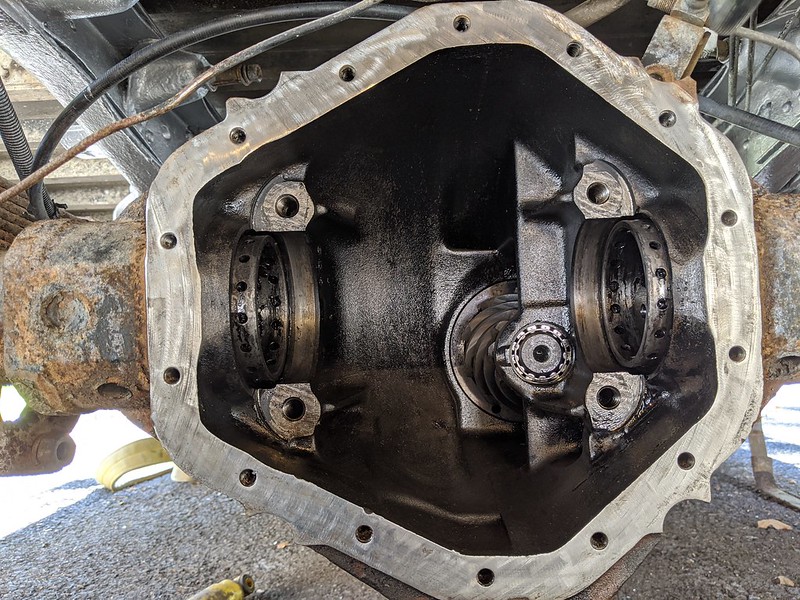
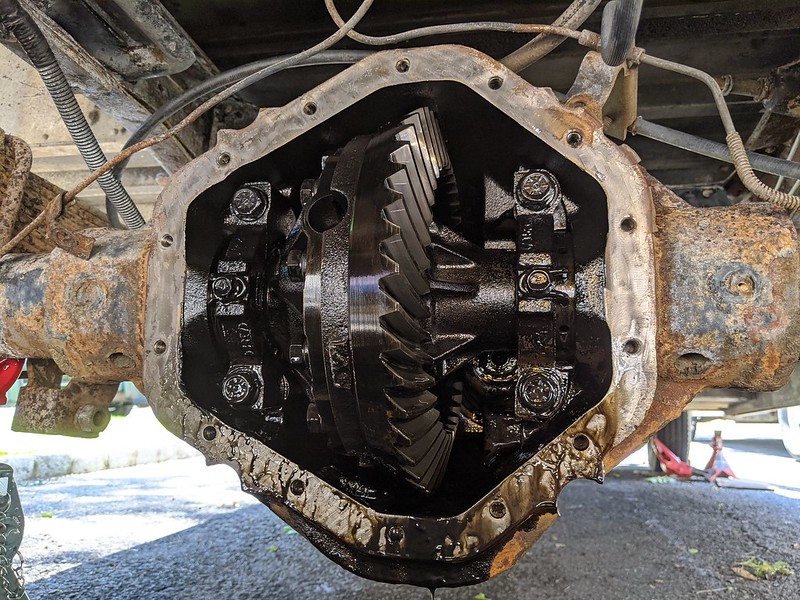
[size=small][size=small][size=small]Ah, just as I suspected, an open differential. We'll have to remedy that with something a bit more fun![/size][/size][/size]

[size=small][size=small][size=small]
50550372926_db835e5d8a_c.jpg
[/size][/size][/size]

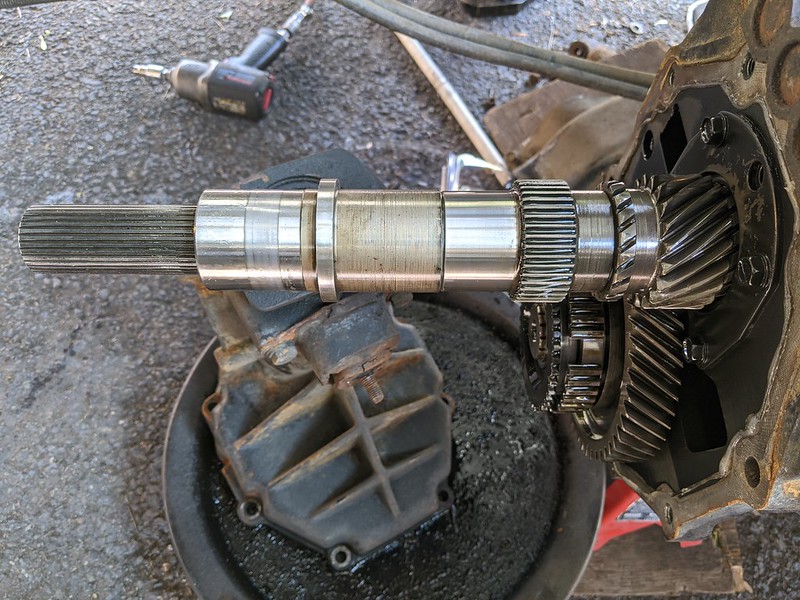
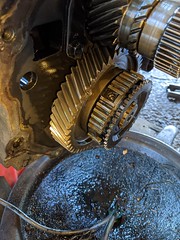
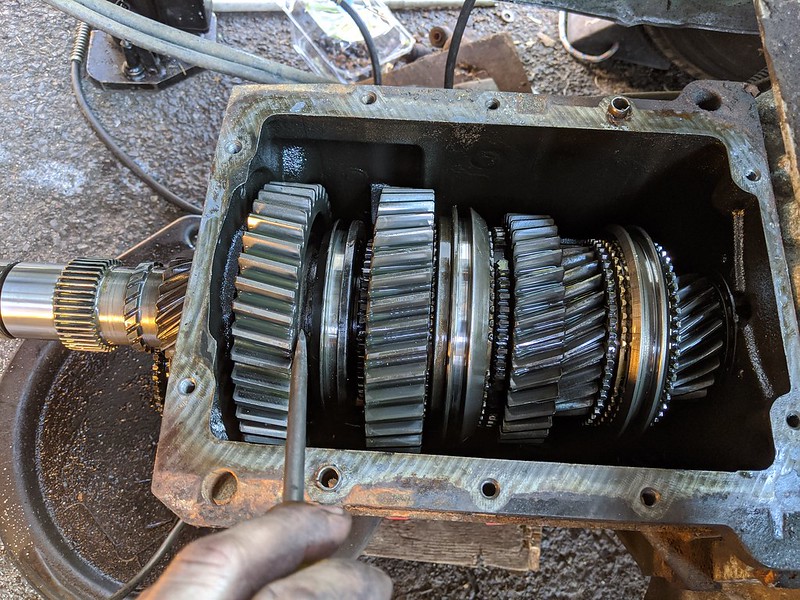
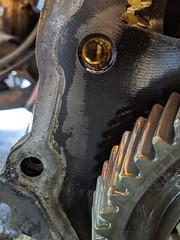
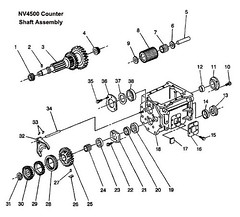
[size=small][size=small][size=small][size=small]We can also check what the deal is with the transmission not going into 5th gear. It's probably the famous NV4500 5th gear nut that backs off...[/size][/size][/size][/size]
 
Tore into the transmission. Oh boy, lots of questions and head scratching.

50555843463_ee35f55e97_c.jpg

[size=small]The 2wd versions of the NV4500 are fixed yoke, and have no nut holding the 5th gear on the main shaft. So that will never be a problem.[/size]

[size=small]
50555849408_a8062f6672_m.jpg
[/size]

[size=small][size=small]Looking carefully around the other side of the tail shaft area I notice some odd things. Some things are missing. We're missing quite a bit of parts. Like all the parts for 5th gear.[/size][/size]

[size=small][size=small]
50556725817_d896914d7e_c.jpg
[/size][/size]

[size=small][size=small][size=small]This transmission is supposed to come with overdrive from the factory. Taking the top cover off tells more of the story. It seems like overdrive was never here. Why could that be?[/size][/size][/size]

[size=small][size=small][size=small]
50556598041_68d0a21350_m.jpg
[/size][/size][/size]

[size=small][size=small][size=small][size=small]The shift fork for 5th/reverse is complete. But the shift rod engagement thing is missing, along with the shift shaft, and 5th gear shift fork, and gear collar, and even the synchronizer ring for 5th. I have a NV4500 in my Jeep, so I have something to fall back on and check.[/size][/size][/size][/size]

[size=small][size=small][size=small][size=small]
50556728487_a4bbb81c39_m.jpg
[/size][/size][/size][/size]

[size=small][size=small][size=small][size=small][size=small]Holes and such where parts are supposed to be. Everything with transmission is fine, just missing parts. I guess if we throw the right parts in, the overdrive will work.[/size][/size][/size][/size][/size]

[size=small][size=small][size=small][size=small][size=small]
50555865833_b02e8c9e81_m.jpg
[/size][/size][/size][/size][/size]

[size=small][size=small][size=small][size=small][size=small][size=small]So we spent a lil bit of time looking back and forth at parts diagrams and such and guesstimated what missing parts we needed. Ordered. Hopefully when they come, they go back in easy and it all works right. Fingers crossed.[/size][/size][/size][/size][/size][/size]
 
Time for chassis paint! Got the Rust Bullet and ready to go.

50558147738_1198a16eb8_c.jpg

[size=small]I'm like a real Michelangelo![/size]

[size=small]
50558148468_68246d0c06_m.jpg
[/size]

[size=small][size=small]This stuff looks pretty good. I't's a little bit thicker than POR-15.[/size][/size]

[size=small][size=small]
50559012587_a67a9b1cd8_c.jpg
[/size][/size]

[size=small][size=small][size=small]Did the rear bumper, and it all seems to work fine.[/size][/size][/size]

[size=small][size=small][size=small]
50559013877_9af916f231_c.jpg
[/size][/size][/size]

[size=small][size=small][size=small][size=small]And finally did the chassis. Wow, what a difference.[/size][/size][/size][/size]
 
A few posts back you can see me hitting it with an air chisel. It was just flaked rust that got trapped between the chassis pieces and expanded the metal apart. There was plenty of solid steel under all that rust. So we just cleaned it well and painted away. any spots we couldn't get all the rust out we sprayed with a rust converter before laying down the Rust Bullet. Will keep an eye on it and inspect from time to time.
 
what expanded metal? I am talking about the frame pic in post #25 not the bumper. highdesertranger
 
Yep, that's the rusted frame above the springs, behind the fuel tank. It pushed the two metal frame sections away from each other. Rust is powerful stuff.
 
I think HDR’s head is about to implode! Lol!!! Talk about a wing and a prayer! Manufacturers seldom over build. If they put extra support there it was for a reason. The truck was most likely designed to haul bread, chips or light weight materials, I can’t imagine your build will be lighter. The part that “flaked away” was part of the base metal and therefore part of the structure that kept the frame from bending or breaking. It’s anyone’s guess how much of the strength is gone. Painting and conversion only stops further oxidation, IT DOES NOT RESTORE THE STRENGTH OF THE METAL. You most likely have concealed any future damage as if it develops it will do so underneath or between the pieces of metal. You should have taken it apart or cut it out and reinforced the area to be as strong as it was when new in my opinion. Without X-ray vision you most likely won’t see new damage until it is too late. You are spending a lot of time and money on this project, why would you take chances short cutting the most important repairs? This is something a welding/fabrication shop should be able to do or as you first suggested the frame could be replaced. What changed your mind?
 
So those pictures and post 42 is where that grinding sound comes from that I hear often? Grind a pound for me.
 
Haha, don't let anyone's head explode! At first the frame looked rotted. But once I took it all apart, separated all the metal, cleaned it all down to bare metal, compared it to the thickness of the non-rusted frame, I decided that there was actually no damage to frame and it'll be fine.

If it don't shift, pound it into gear! A lil grinding never hurt nobody!
 
bullfrog said:
What changed your mind?
 
In defence of the OP, He has a Grumman -BOX- truck above that frame, not something flexible like a separate cab and box arrangement. The Grumman box is also much tougher than the competitor bodies that had been built with a lot of steel supports mixed in with the aluminum (they were corrosion bound)

I cut a Grumman up for scrap once (the one with hundreds of holes). People should not underestimate the strength of the unified body on top of that frame. Essentially, short of perhaps needing that rear rusty section to mount a trailer hitch, it's not all that crucial to supporting that body as the body pretty much sits nearly flat to the frame... certainly approaching 90% of it. It is not suspended up off of it on spacers.

Those upper aluminum extrusions that run the length of the body are as a rigid as anyone can imagine. They are 3 dimensional extruded supports that combined with the rigidly riveted side walls create a very rigid shell.

I cut both entire side walls out of a 12' Grumman right behind the front door rear uprights, all the way around the back. In other words NOTHING holding up the roof except the single door upright on each side and the front windshield assembly. I COULD STAND and bounce on the very back of the roof and it barely moved !! I and my friends laughed about that situation as we had created a mobile patio, placing our lawn chairs inside and taking a break under the hot sun.

Those older Grummans are fantastic. I have spent many, many hours with a needle scaler under them too. I'm JEALOUS of the OP's project. If I was not as old as I am now, I would chase down another one because they get in your blood.

OP should get real familiar with FLUID-FILM to squirt in all the nooks and crannies of that frame. It will protect and creep into all the areas he could not effectively paint.
 
I do recognize the strength of the Grumman body, one of the main reasons I picked it up over the other manufacturers. But in the back of my head I've been concerned about stress fractures in the aluminum. I have M1031 military maintenance truck, and it has an aluminum utility body on the back. I've taken that thing offroad, way past it's designed limitations and sure enough, the aluminum has cracked and ripped in many places where it is attached to the chassis via rubber body mounts. These of course needed serious repairs and repairing aluminum is not easy. I realize this was caused to the GM c-channel frame flexing more than the aluminum wanted to.

My concern is how will the Grumman aluminum body react when I beat the piss out of it on some of these dirt roads we'll be going to out west? We're not talking one wheel in the air kinda offroad, just the occasional washboard road or bumps here and there trying to get to that sweet BLM campsite. I know the body is bolted to the chassis in like 30 places, but still worries me as it still has a flexing GM c-channel chassis.

And Grummy, the Grumliner is one cool rig! I love step vans now, and I think I'll always have one. They do get in your blood! I wish people told me about them when I was younger. One day I'll probably get a smaller one for around the town stuff. I've heard of Fluid Film. Very popular in the northeast. That is the worst area for vehicles. The humidity and road salt destroys everything. I think I did a good job getting all the nooks and crannies on the frame. Time will tell though...
 
[quote pid='511788' dateline='1604344410']
>>> I do recognize the strength of the Grumman body, one of the main reasons I picked it up over the other manufacturers. But My concern is how will the Grumman aluminum body react when I beat the piss out of it on some of these dirt roads we'll be going to out west?
[/quote]

Well, Depending on what loads you end up with, you probably want to address that stack of leafs in the rear. I did not have the money some guys got to pay a spring shop to get some newer leaf stacks.... I must have pulled my spring packs apart 5 times each as I dialed in what I wanted for the load I was hauling.

These old spring packs are practically rusted into a shape and do not want to move and slide like they once did, even after you put some miles back on it after sitting so long.

I know I removed at least 4 leafs, leaving 5 total each side, cleaning up each one, and lubricating with Fluid-Film prior to reassembly. The trucks ability to let the suspension move rather than twist the frame was very obvious after that, and the ride became Cadillac like rather than like a cement block on steel wheels.

I need to get all the final interior pictures of the Grumliner back on line. It was way different at the end. They were up on a Tumblr Site, but for some reason when I did not acknowledge an email from them, it got removed. I sure miss that truck, but I have spent my idle time doing a simple 6x12 trailer: http://tnttt.com/viewtopic.php?f=42&t=70777&sid=88d7f3da4a47bd5306d6d9b45c16dd1c

I'll be watching your progress with interest !
 
Oh nice, I'll definitely add a spring lube job to my list of things to do!
 
Some more painting and prep work.

50563149096_f5ca0598a0_m.jpg

[size=small]Cleaned and prepped all these body mount spacers now that the body is off of the chassis.[/size]

[size=small]
50563149696_97a0d73bdd_c.jpg
[/size]

[size=small][size=small]Went easy on this. Just decided to screw some screws and through em up to paint.[/size][/size]

50563150296_99a1000e1b_c.jpg

[size=small][size=small][size=small]Just a few coats of spray paint, nothing fancy, nobody will even ever see them.[/size][/size][/size]

50562411203_f3c4db8f31_m.jpg

[size=small][size=small][size=small][size=small]And we got some sweet drivetrain stuff! 4wd anyone?[/size][/size][/size][/size]
 
Tearing into the rear axle. Might as well since the fuel tank is out!

50565558268_ea88e6a5fd_m.jpg

[size=small]It's been many years, and many coats of paint since these axle shafts have been taken out.[/size]

50566442597_fc8be89b86_c.jpg

[size=small][size=small]Gotta love the 14 bolt axle. Makes it easy to modify, especially for those that don't know what they are doing![/size][/size]

50566443332_8a68a9c580_c.jpg

[size=small][size=small][size=small]Out with the old spider gears.[/size][/size][/size]

50565559918_86ce6e87b4_c.jpg

[size=small][size=small][size=small][size=small]In with the new Detroit Locker.[/size][/size][/size][/size]

50566444617_9e81210abd_c.jpg

[size=small][size=small][size=small][size=small][size=small]Good thing for a big old vise to hold your 80 pound differential while you torque all the carrier bolts.[/size][/size][/size][/size][/size]

50565561163_fdabdb3e1b_c.jpg

[size=small][size=small][size=small][size=small][size=small][size=small]All back together! Hopefully it all works...[/size][/size][/size][/size][/size][/size]

50566309186_7f897814b9_c.jpg

[size=small][size=small][size=small][size=small][size=small][size=small][size=small]Didn't forget to reinstall and seal the axle shafts back in before we filled it back with oil.[/size][/size][/size][/size][/size][/size][/size]

50566310091_12a4be32ac_c.jpg

[size=small][size=small][size=small][size=small][size=small][size=small][size=small][size=small]Even sanded and painted the differential cover.[/size][/size][/size][/size][/size][/size][/size][/size]
 
While we wait for transmission parts, some other things can be done. The heater box was looking a little rusty, so time to look at that. It all works great, but rust is like cancer. Once it starts, it grows fast and can quickly become overwhelming. I wanted to just scrap off the peeling paint with a screwdriver and hit it with some spray paint, but I'm sure glad I didn't! I hate taking shortcuts and this was such an easy project!

50569766732_87693b0dd6_c.jpg

[size=small]Yep, this thing was looking pretty rough. The heater core is located inside this box, forward of the firewall. The blower is inside the cab.[/size]

[size=small]
50569767177_99225fa2bb_c.jpg
[/size]

[size=small][size=small]Now on a normal car, removing the heater core can take upwards of 8 hours to remove and the reverse to reinstall it. This one took about 10 minutes to get out of the vehicle. I love this thing![/size][/size]

[size=small][size=small]
50568884483_967cf1a43b_c.jpg
[/size][/size]

[size=small][size=small][size=small]Very simple, no fuss design.[/size][/size][/size]

[size=small][size=small][size=small]
50569632946_ccc3dd0a04_c.jpg
[/size][/size][/size]

[size=small][size=small][size=small][size=small]Oh boy...[/size][/size][/size][/size]

[size=small][size=small][size=small][size=small]
50569768397_acc46809ce_m.jpg
[/size][/size][/size][/size]

[size=small][size=small][size=small][size=small][size=small]Oh no...[/size][/size][/size][/size][/size]

[size=small][size=small][size=small][size=small][size=small]
50569634131_2854858e47_c.jpg
[/size][/size][/size][/size][/size]

[size=small][size=small][size=small][size=small][size=small][size=small]Lots of sanding and a light acid bath and all the box pieces are good more paint.[/size][/size][/size][/size][/size][/size]

[size=small][size=small][size=small][size=small][size=small][size=small]
50569634691_a7b14c8999_c.jpg
[/size][/size][/size][/size][/size][/size]

[size=small][size=small][size=small][size=small][size=small][size=small][size=small]Had some extra time so we reinstalled the rear bumper.[/size][/size][/size][/size][/size][/size][/size]
 
I’ll give you this, you certainly are fearless, I admire that, looks like you are doing a great job. I need to remove my fuel tank as my fuel gage is not working and a small leak when completely full but I think it has been like this since 2012 when chipmunk pulled the wire off on the trans Labrador highway. Get everything done that you can while you are at it is my advice, seems it is easy to put things off once you are living in it.
 
Thanks! We're doing our best while we have the time. Damn rodents! My gauge doesn't read because of the sending unit I think. I checked all the wiring and that all checks out. Just going to swap out to a new one, which we already just got installed. Anything I can do while things are apart, are getting done. These step vans are the easiest vehicle I have ever worked on. Looking forward to fixing all the things that will break down the road!
 
Since the axle is all back together, it would be a good time to get the fuel tank back in the rig.

50585085428_afa42e4b0c_c.jpg

[size=small]Got the tank all cleaned up and painted.[/size]

[size=small]
50585832506_3c3cd18baa_c.jpg
[/size]

[size=small][size=small]The fuel sending unit crapped out about 11 hours into the ride home when we bought the vehicle. So in goes a new fuel sending unit. Hopefully this does the trick. If this wasn't the issue, who cares. The 40 gallon fuel tank was down and out, just change the sending unit ya dummy![/size][/size]

[size=small][size=small]
50585086108_cacce08a25_c.jpg
[/size][/size]

[size=small][size=small][size=small]Got these nice new tank straps from NAPA! Even had the right size the first time. Found these strap rubbers as well. Gotta protect the tank from future rubbing.[/size][/size][/size]

[size=small][size=small][size=small]
50585952792_77deb3b20a_c.jpg
[/size][/size][/size]

[size=small][size=small][size=small][size=small]This new model tank jack works great too![/size][/size][/size][/size]
 
Top