You are using an out of date browser. It may not display this or other websites correctly.
You should upgrade or use an alternative browser.
You should upgrade or use an alternative browser.
Water damage, the good the bad and other upgrades
- Thread starter shadow
- Start date


Help Support Van Living Forum:
This site may earn a commission from merchant affiliate
links, including eBay, Amazon, and others.
Almost There said:Here's an alternative for the screw covers.
http://www.pro-dec.com/screw-caps-screw-covers/snap-caps
Looking at the picture of snap-caps, it looks like you would also see the white plastic bottom half after installation, not just the colored cap? I like the versatility of fastner option that would provide, but only if just the colored cap remains visible...
highdesertranger
R.I.P HDR
- Joined
- Apr 4, 2012
- Messages
- 22,892
- Reaction score
- 89
no you don't see the white bottom. the colored caps cover the bottom piece completely. highdesertranger
shadow
Well-known member
BradKW said:Looking at the picture of snap-caps, it looks like you would also see the white plastic bottom half after installation, not just the colored cap? I like the versatility of fastner option that would provide, but only if just the colored cap remains visible...
You don`t see any part of the white plastic bottom once its installed.
The snap caps I ordered will be here the middle of next week, I will post a picture of them installed.
VanKitten
Well-known member
BradKW said:Looking at the picture of snap-caps, it looks like you would also see the white plastic bottom half after installation, not just the colored cap? I like the versatility of fastner option that would provide, but only if just the colored cap remains visible...
Thank you for the post. I have been trying to figure out how to get that done ina neat manner.
You and others here have been a great wealth of info....it's been a benefit for me to be following in the path broken by others!
VanKitten
Well-known member
Almost There said:Here's an alternative for the screw covers.
http://www.pro-dec.com/screw-caps-screw-covers/snap-caps
When I was working on the interior of Lady Arabella, I bought my marine vinyl from a marine upholstery shop...got a better price than I could anywhere else. I also got the 1/8" closed cell foam from them for underlay between the vinyl and the wood backing panel. It made a whole lot of difference in the look of the finished panel.
Thank you for this info. this might be another idea I will pursue.


$12.99 ($1.30 / FL Oz)
$14.00 ($1.40 / FL Oz)
Bath & Body Works Cherry Blossom Shower Gel 10 oz
Home&Y


$25.99 ($0.29 / Ounce)
Gas One 6 Hour Chafing Fuel - Food Warmer for Chafing Dish Buffet Set - Liquid Safe Fuel With Wick & Lid Opener 7.4 Oz (Pack of 12)
Amazon.com


$50.49
$67.49
Amazon Basics 173-Piece General Household Home Repair Mechanic's Hand Tool Set with Storage Case, Portable for DIY
Amazon.com


$14.49
$19.95
The Van Life Cookbook: Delicious Recipes, Simple Techniques and Easy Meal Prep for the Road Trip Lifestyle
Amazon.com


$17.43
$19.99
How to Live in a Van and Travel: Live Everywhere, be Free and Have Adventures in a Campervan or Motorhome - Your Home on Wheels
Blue Rose Seller


$30.59
$40.00
The Van Conversion Bible: The Ultimate Guide to Converting a Campervan
Amazon.com


$22.27
$23.95
Van Life Cookbook: The portable, budget-friendly and sustainable cookbook for life on the go
Amazon.com


shadow
Well-known member
Weekend update.
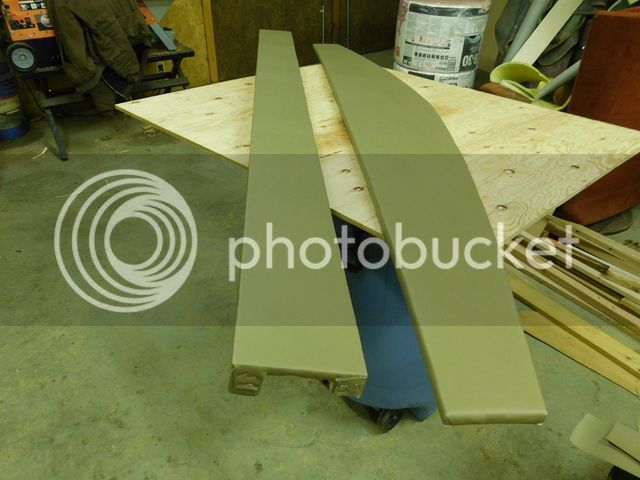
I got a lot done this weekend. I got two of the three large trim panels made and installed, and that took a lot of time because
I had to start from scratch, there was nothing left of the original trim pieces, so I couldn`t use them at a template.
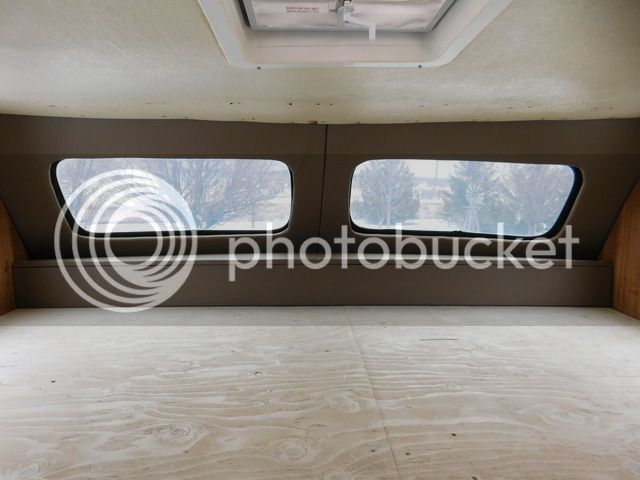
The front of the over cab bed area comes to a slight point in the front, so it takes a lot of cutting and fitting to get it right.
If the front of the rv was straight across it would be very easy to make the pieces.
I was also surprised when I got home from work Friday, the snap caps had arrived in the mail, so that helped put the finishing
touch on what I have done so far.
I will have to take the over cab trim pieces out one more time, because I have to replace the front clearance lights and wiring.
Then I will have to figure out how to trim out the corners ?. The center should be fairly easy to do.
It is still very cold here, so it will be a month or so before I replace the front clearance lights. Its just to cold to be outside
for a long period of time.

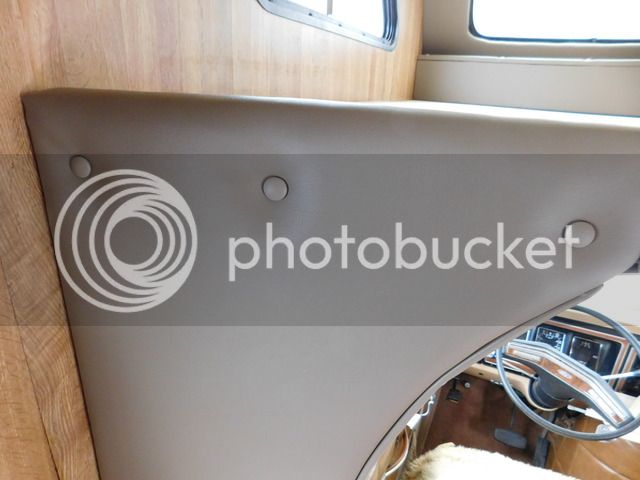
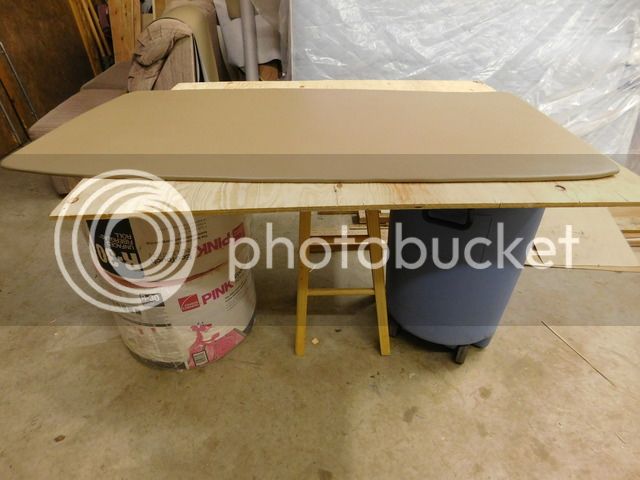
These are the two new panels I had to make, they are seven feet five inches long.
Here they are installed
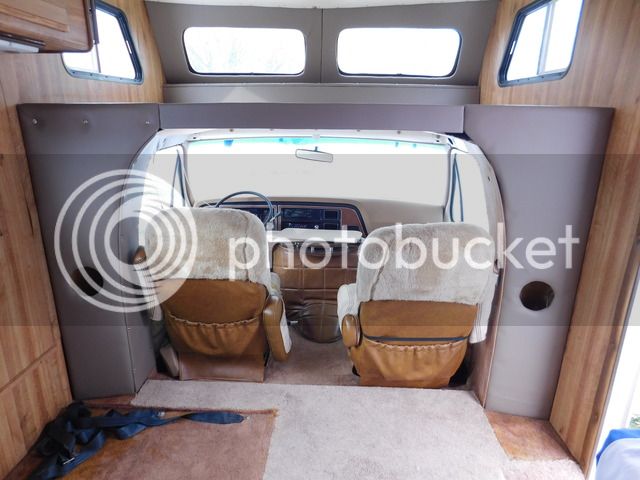
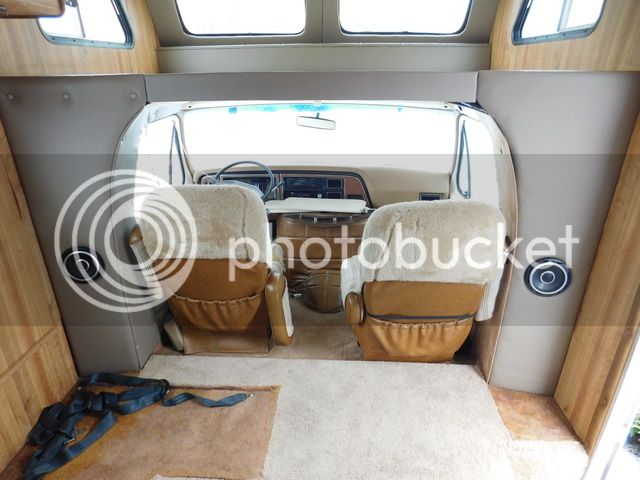
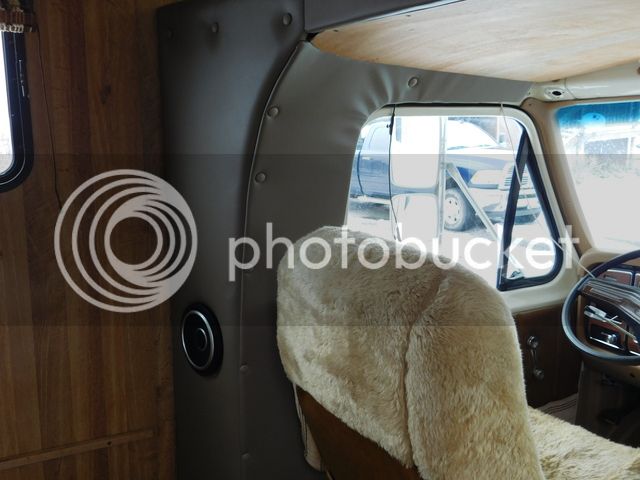
These are the new speakers I bought.

Here they are installed.
Here are the snap caps that add the finishing touch.

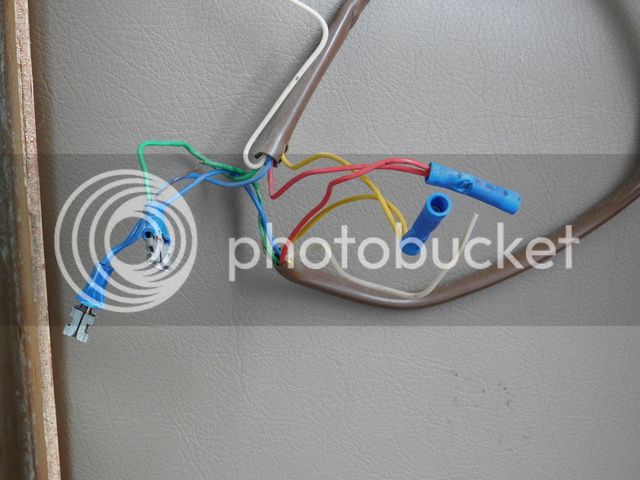
How do you like this for speaker wire ?, They used telephone wire for speaker wire.
More to come next weekend.
I got a lot done this weekend. I got two of the three large trim panels made and installed, and that took a lot of time because
I had to start from scratch, there was nothing left of the original trim pieces, so I couldn`t use them at a template.
The front of the over cab bed area comes to a slight point in the front, so it takes a lot of cutting and fitting to get it right.
If the front of the rv was straight across it would be very easy to make the pieces.
I was also surprised when I got home from work Friday, the snap caps had arrived in the mail, so that helped put the finishing
touch on what I have done so far.
I will have to take the over cab trim pieces out one more time, because I have to replace the front clearance lights and wiring.
Then I will have to figure out how to trim out the corners ?. The center should be fairly easy to do.
It is still very cold here, so it will be a month or so before I replace the front clearance lights. Its just to cold to be outside
for a long period of time.
These are the two new panels I had to make, they are seven feet five inches long.
Here they are installed
These are the new speakers I bought.
Here they are installed.
Here are the snap caps that add the finishing touch.
How do you like this for speaker wire ?, They used telephone wire for speaker wire.
More to come next weekend.
shadow
Well-known member
I still need to make the right side inner trim panel, and finish the headliner.
I still have a leak up there, and I think it is coming from the side window. When the weather warms up, all windows will
be pulled and resealed.
I still have a leak up there, and I think it is coming from the side window. When the weather warms up, all windows will
be pulled and resealed.
shadow
Well-known member
rvpopeye said:You'll get tighter bass and more power to those shiny new drivers with fatter wires,,,,(what were they thinking? Oh yeah "what's the cheapest wire we can use?")
My icicles are on the back !
The speaker wire will be replaced in the future for sure, just need to get the more important stuff done first.
") You are doing such nice work! It looks so much better than the original too. I started smiling when you started pulling out the rotted wood in the cabover area. Not that it was funny or anything like that.
You are doing such nice work! It looks so much better than the original too. I started smiling when you started pulling out the rotted wood in the cabover area. Not that it was funny or anything like that. It reminded me of when my son was about 12 or 13ys old. A friend had given me a 1964 cabover camper and I bought a small flatbed trailer to mount it on for camping trips. It also had rotten wood in the cabover bed area. I explained to my son that we needed to fix that before we used it. That first we would take out all the [plywood] rotted wood then we would replace it. He wanted to take out the wood himself......no power tools and I said OK and went to work. He was so happy when I got home. "Come see what I did Mama" over and over until I could get changed and get to the south 40 [backyard}. There was more damaged wood than I knew.........Still I wasn't ready to see the ground when I stepped up and looked in the bed area. I was just happy the 2x4 side frames hadn't been rotten too!
I'm waiting to see your window work as I think that's something my van needs. Come on Sunshine! I wore shorts and sandles to mess with my van today and Queenie went nekkid
Jewellann
shadow
Well-known member
Txjaybird said:
It reminded me of when my son was about 12 or 13ys old. A friend had given me a 1964 cabover camper and I bought a small flatbed trailer to mount it on for camping trips. It also had rotten wood in the cabover bed area. I explained to my son that we needed to fix that before we used it. That first we would take out all the [plywood] rotted wood then we would replace it. He wanted to take out the wood himself......no power tools and I said OK and went to work. He was so happy when I got home. "Come see what I did Mama" over and over until I could get changed and get to the south 40 [backyard}. There was more damaged wood than I knew.........Still I wasn't ready to see the ground when I stepped up and looked in the bed area. I was just happy the 2x4 side frames hadn't been rotten too!
I'm waiting to see your window work as I think that's something my van needs. Come on Sunshine! I wore shorts and sandles to mess with my van today and Queenie went nekkid
Jewellann
The weather is holding me up on resealing the windows and replacing the front clearance lights, but I still have a lot to do inside the rv.
I have had enough of the snow and cold, so I will be more than happy when the warm weather gets here.
shadow
Well-known member
Weekend update
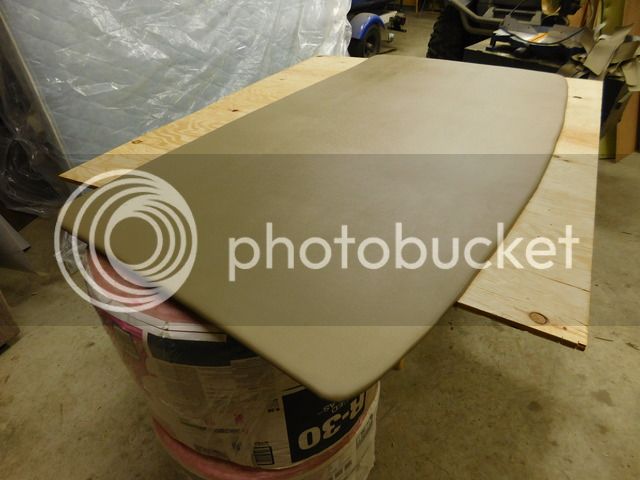
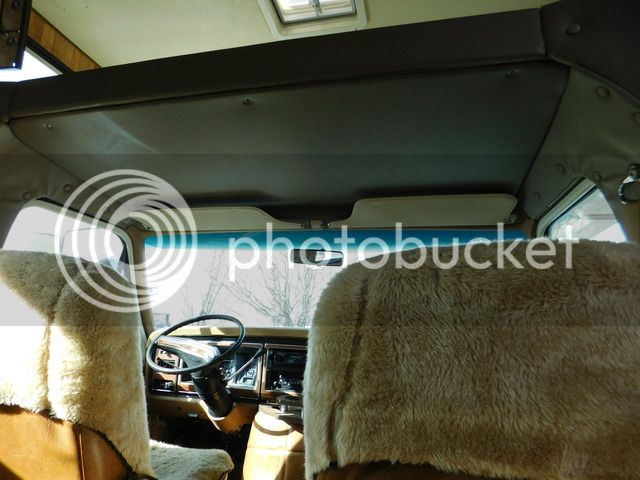
I got the right side trim pieces done and installed, and I also got the headliner done.
It was to dark to get the headliner installed once it was finished, so it will have to wait until next weekend.
The headliner.
I also ordered a new roof vent, a new range hood, and some more dicor.
I am making progress, one weekend at a time.
shadow
Well-known member
Weekend update.
I got the headliner installed, but it seems that no matter how many times you measure and re-measure, something always comes up short some were. Not the headliner itself, but one of the right side trim pieces is about an inch and a half to short.
I`m not going to do anything about it right now, but I will probably make another panel later on, because its one of those things that will
bug the hell out of me if I don`t.
I also removed the range hood. it was the original range hood that was very dirty and rusting in places.
The range hood was one more thing that had me scratching my head. It was a 20'' hood that was off set to one side so that it only covered two thirds of the stove ?.
I ordered a 24'' stainless steel range hood, and it will be centered over the stove as it should be, when I install it.
I will also be replacing the original microwave with a new stainless steel unit as well.
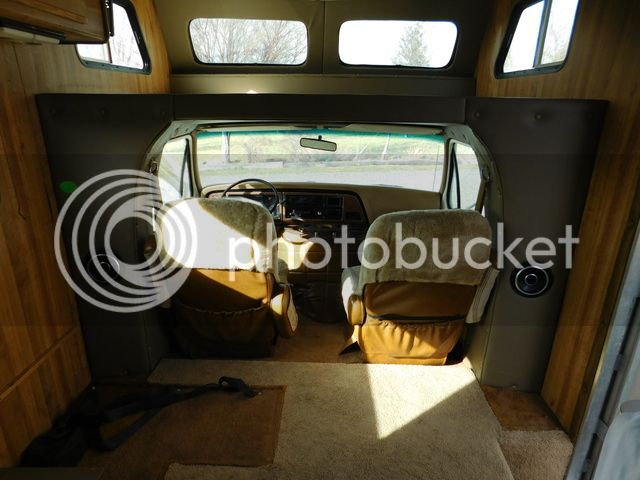
The new headliner and all trim panels installed
The nasty original range hood.

It was late in the day when I took the pictures, so they are a little dark. I will do better next time.
I got the headliner installed, but it seems that no matter how many times you measure and re-measure, something always comes up short some were. Not the headliner itself, but one of the right side trim pieces is about an inch and a half to short.
I`m not going to do anything about it right now, but I will probably make another panel later on, because its one of those things that will
bug the hell out of me if I don`t.
I also removed the range hood. it was the original range hood that was very dirty and rusting in places.
The range hood was one more thing that had me scratching my head. It was a 20'' hood that was off set to one side so that it only covered two thirds of the stove ?.
I ordered a 24'' stainless steel range hood, and it will be centered over the stove as it should be, when I install it.
I will also be replacing the original microwave with a new stainless steel unit as well.
The new headliner and all trim panels installed
The nasty original range hood.
It was late in the day when I took the pictures, so they are a little dark. I will do better next time.
VanKitten
Well-known member
Very nice! I am just about to start on the overhead in the cab area too. Plan shelves there.
Watching you rebuild that has been an inspiration to me.
Watching you rebuild that has been an inspiration to me.
shadow
Well-known member
We are finally starting to get warmer weather here, but it is supposed to rain for the next week or so. Once I get the over cab clearance lights replaced and rewired and the side windows resealed, I can finish trimming things out, and be done with that part of it.
shadow
Well-known member
Weekend update.
Lots of rain here this weekend, so I spent some time in the rv cleaning the walls and the ceiling, and they were filthy.
I started out with a clean old white t-shirt rag, and when I was done it was dark brown.
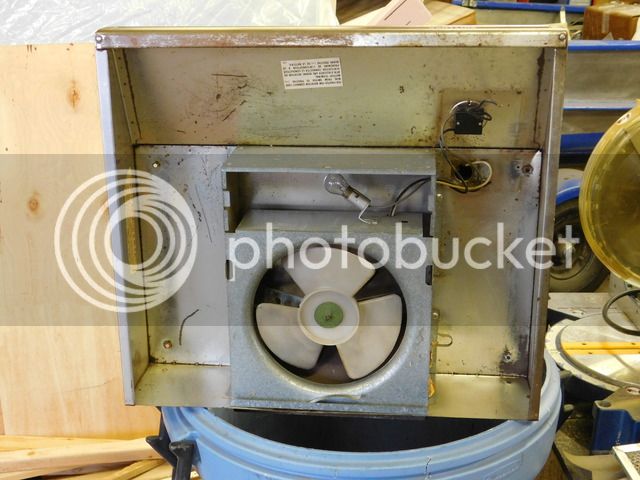
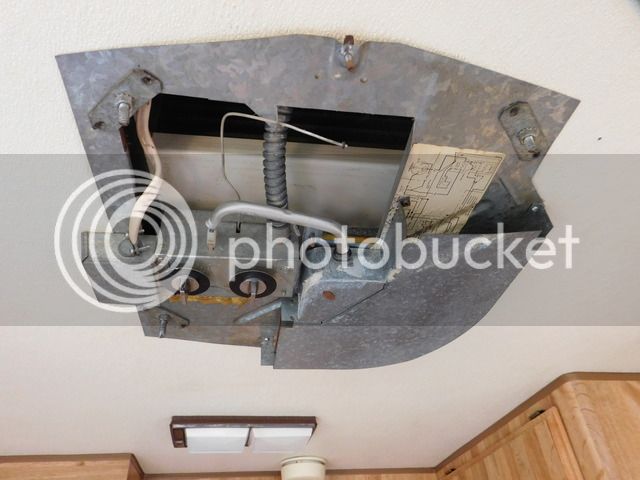
I also removed the ceiling mounted a/c cover, and I`m glad I did. Not only was it filthy dirty, the dust filter was dry rotted
into many pieces, so I will be ordering a replacement. I also noticed that all of the a/c mounting bolts had either backed out, or
were barely hand tight. I am hoping that by tightening the a/c back down that - that might fix the roof leak that I havn`t been
able to find ?.
The a/c with the cover removed. You can see the mounting bolts in each corner that were loose.
The a/c cover that I still need to clean
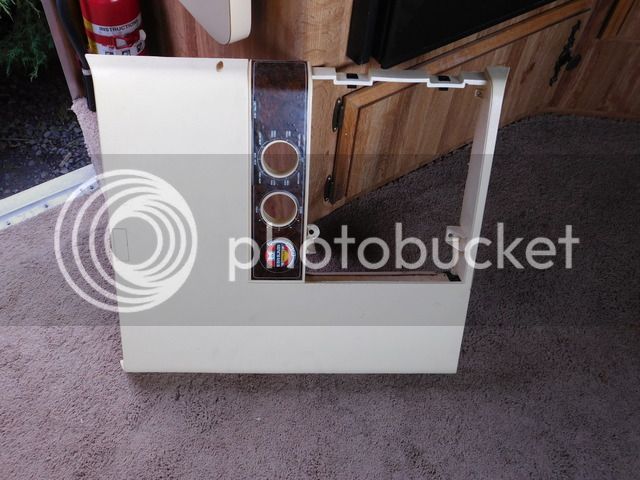
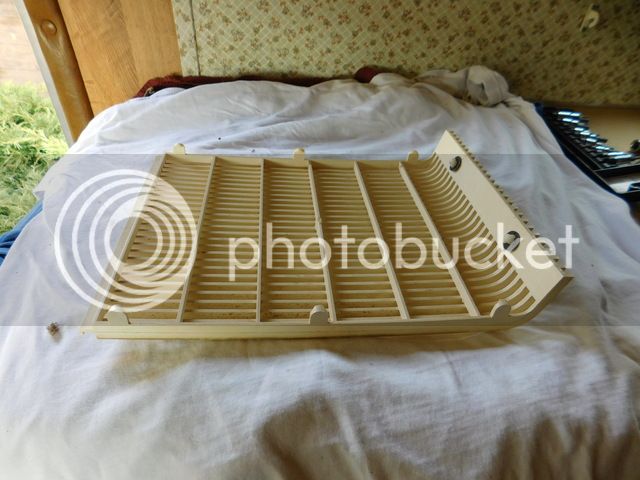
This is the filter cover.
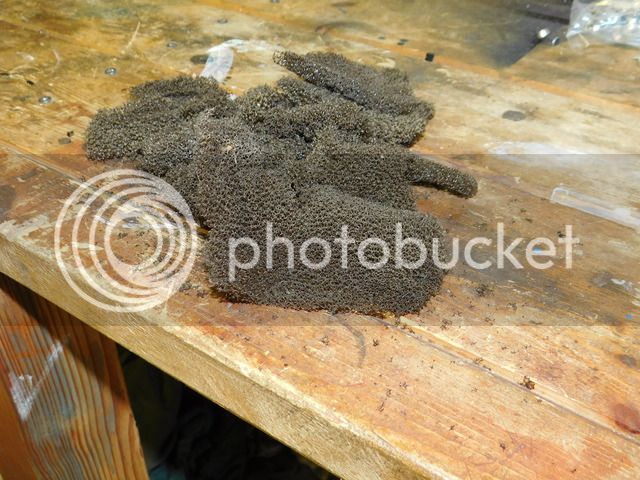
This is what was left of the dust filter.
Lots of rain here this weekend, so I spent some time in the rv cleaning the walls and the ceiling, and they were filthy.
I started out with a clean old white t-shirt rag, and when I was done it was dark brown.
I also removed the ceiling mounted a/c cover, and I`m glad I did. Not only was it filthy dirty, the dust filter was dry rotted
into many pieces, so I will be ordering a replacement. I also noticed that all of the a/c mounting bolts had either backed out, or
were barely hand tight. I am hoping that by tightening the a/c back down that - that might fix the roof leak that I havn`t been
able to find ?.
The a/c with the cover removed. You can see the mounting bolts in each corner that were loose.
The a/c cover that I still need to clean
This is the filter cover.
This is what was left of the dust filter.
Ballenxj
Well-known member
- Joined
- Sep 4, 2012
- Messages
- 3,211
- Reaction score
- 15
It's a good thing you spotted it before you needed the A.C.shadow said:Weekend update.
<----snip---->
I also removed the ceiling mounted a/c cover, and I`m glad I did. Not only was it filthy dirty, the dust filter was dry rotted
into many pieces, so I will be ordering a replacement.
<----and snip---->
This is what was left of the dust filter.
Similar threads
- Replies
- 5
- Views
- 962