Cummins Canoe (A Stepvan Story)

Van Living Forum

Help Support Van Living Forum:

This site may earn a commission from merchant affiliate links, including eBay, Amazon, and others.
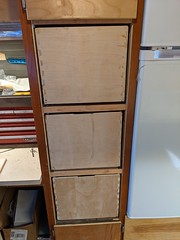
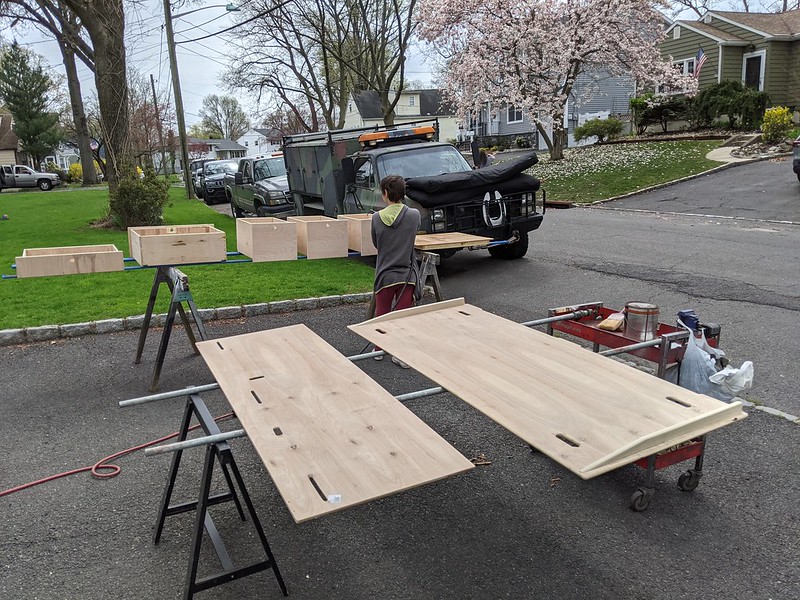
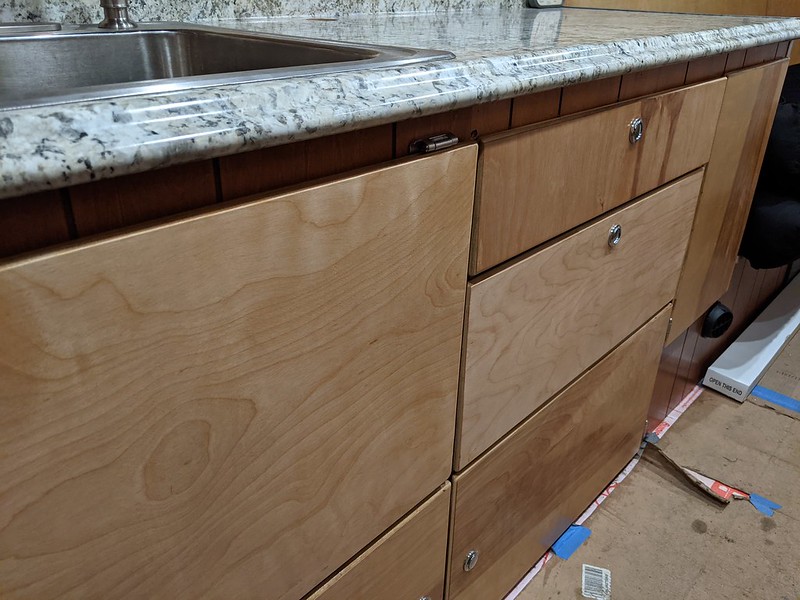
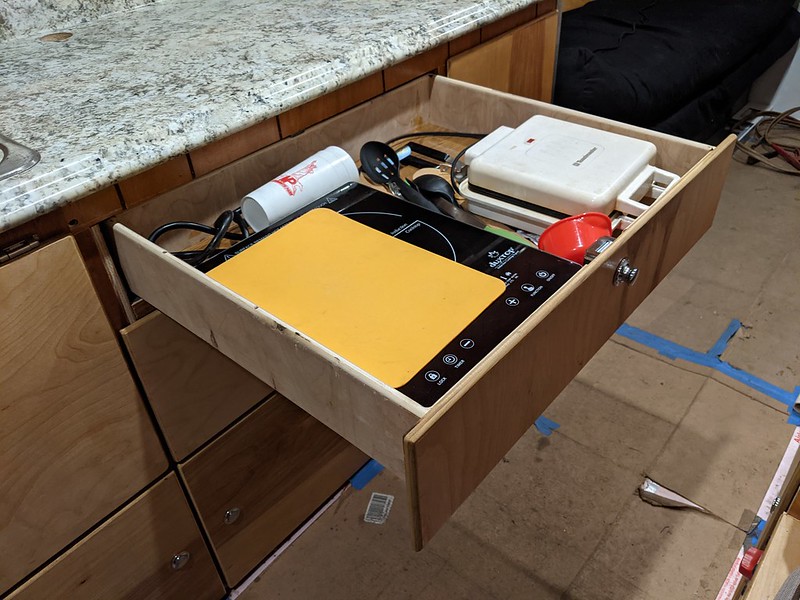
Drawers can definitely be art. I have much more respect for carpenters now! There is a reason we buy all our furniture/cabinets from Home Depot and Ikea. All that cheap crap is made on a computer and built from particle board. Real carpentry costs too much, as the labor is crazy. We definitely didn't want any particle board stuff in the build, it would just fall apart. Real trades takes skill, and skill costs money. Like when you call a tradesman to come to your home and complete something for you, and you complain why you have to pay so much, as they completed it in so little time. You don't pay them for the time they take to do the job, but all the time it took for them to craft their skill.
 
I remember watching skilled woodworkers build custom pieces and wondering how come they made several of each piece at the same time. The answer was because wood changes with time and humidity you can only get a near perfect match by cutting it at all at once. They would cut extras in case they messed up one as they would have a near perfect replacement. One reason I like working with metal better than wood as it is more stable. When I helped my dad make jewelry boxes with nearly invisible drawers a five piece drawer might take 6 or more pieces to get it to his standards. I could build sometimes a dozen nice looking jewelry boxes out of all the leftovers as long as I didn't put his brass name tag on them! LOL!!!
 
Finishing up the drawers we made.

51137412596_865293fb19_m.jpg

[size=small]After some tweaking, they fit very well. Needed to make some face panels and do lots of corner routing and sanding.[/size]

51137412881_5f7b0995e3_c.jpg

[size=small]Once the drawer face panels were made and sanded, we did a polyurethane batch.[/size]

51138525365_8ba9498518_c.jpg

[size=small]Everything assembled great.[/size]

51138532235_e5fc609dff_c.jpg

[size=small]And drawers pull out so smooth! Still need to figure out drawer organization.[/size]

51138533075_30eb2bebe7_m.jpg

[size=small]The big pantry drawers work great too![/size]

51137427126_8396935406_c.jpg

[size=small]Before we attached the panel faces, we routed all the interior corners of the drawers.[/size]

51138534940_4cb17b19cb_c.jpg

[size=small]Here you can see the relief we cut in for the latch. Still need to polyurethane the interior or the drawers, but we used the last of our free gallon can of polyurethane.[/size]

51138535645_84b024566a_c.jpg

[size=small]And the sweet hidden drawer slides. To remove drawers, just squeeze orange handles and remove. All in all, each drawer took about 6 hours of labor, but only cost about $5![/size]
 
Very nice. Do you have a link to those drawer locks? What's that in the grill of my truck? A toilet seat? LOL. Highdesertranger
 
Here you go, link for the latches I got. Once you figure out the math and measurements for the first one, the rest go smooth.
https://www.amazon.com/YIEKO-Keyless-Cabinet-Caravan-Motorhome/dp/B0854J5Y7G

Haha, yep. That's my homemade folding bumper dumper. Everytime you drive in the rain, the toilet gets an automatic cleaning! Which reminds me, we need a method of which to poop in this build, hmmm...
 
^^^ Wife made me get rid of mine even after I offered to put a seat belt on it years ago. I wonder what the world's record for height and drop time is now?
 
Sitting on the bumper dumper would be a great ride! It's like riding a motorcycle, but safer because of the seatbelt!
 
Your build is moving along quickly and looks great! The light at the other end must be pretty bright.

Looking good brother!
 
Thanks! We're getting there. When we started this thing, no way did I think it would take this long. Boy was I wrong. All those youtube videos shows people building a van in like a month. All lies! There are so many little details! And OCD doesn't help either, haha. But I think we're far enough we can start a finishing list.
 
Thanks for the link.

"All lies! There are so many little details!"

Ain't that the truth.

Highdesertranger
 
Bunch of newbees! You thought this was gonna be easy? LOL!!! Easy is not taking anything and knowing you need it all but not caring.
 
Haha, yea, I can see how these things would never be done. My last rig I started living out of part time almost 10 years ago is still not done! Hoping with this one to have a floor before we move into it!
 
Everybody poops! Right? Well we're going to try to be more civilized about that this time. Going to try to avoid using puns with this subject if I can.

51142196371_1b0e3983ba_m.jpg

On our last rig we used a folding bumper dumper I welded out of some scrap unistrut and some random commercial plastic toilet seat. Worked great, except in the winter or in places like Timesquare, NYC. Not our fault, they really should have public restrooms in that city.

51142175836_56de3ea1eb_c.jpg

So we planned to have a toilet inside, like civilized folk. Lots of research led us to composting toilets. But the ones you can buy are over $1000! Considering we blew our budget on rebuilding the engine, we ended up having to build our own. Under one of the kitchen table seats is where we'll put it. So after we found the proper containers to hold the "goods", we installed the bracing and installed yet another bulkhead fitting.

51141503217_0120f2c586_c.jpg

Once we were happy with everything, we sealed the entire area. You know, in case things don't stay where they are supposed to stay. We wanted low maintenance and easy cleanup.

51142958659_60beb59a39_c.jpg

Used an old computer fan we had laying around, drilled and tapped the bulkhead to mount fan to, and wired in a switch. The fan will suck out so any smells that do linger, go outside. Everywhere we read said that if you can separate the liquids from the solids, you don't get that sewage smell. But we're not 100% sure on that. Also, airflow will help the compost process.

51142394168_6dd3bf0116_c.jpg

The solids go into the big gray container. The liquids go into the small white container. That white container was a real pain to locate. It's a storage container like they use in laboratories. Very good plastic and durable to last many years. Would be terrible if that jug ever leaked. Space was a premium and we wanted something to fit exactly. When the door gets closed, the pee funnel goes right into the opening and seals pretty tight, minimizing the risk of pee not staying in the container. The bracing we installed earlier holds the containers in the perfect spot, every time. We can even store about 6 rolls of toilet paper down here as well. Kinda glad we didn't buy a manufactured compost toilet. This setup is a very efficient use of space.

51142961284_781cd55431_c.jpg

Here you can see the diverter, separating the solids from the liquids. It even comes with this awesome little piece of removable plastic between the two, in case your aim isn't the best and hits the center. That piece comes off and can easily be cleaned.

51142186806_fd8ff7366c_c.jpg

The company is Separett, out of Sweden. Spent more than we wanted to, but it is very well made and can understand why the price was what it is. Apparently, there aren't any American companies in this crappy market. Must be a European thing. Oh well, we found one. And according to the directions on the seat, men have to pee like women do. Again, must be a European thing.

51142964389_6392914bec_c.jpg

And that is toilet all closed up. The base of the seat is mounted on an angle since the rear of the seat is higher than the front. With the front higher, it is pretty much flush with the wood framing under your thighs when you sit, as to not dig into you uncomfortably. When you close the kitchen table seat on top of the toilet, it sits on top perfect, with zero clearance. Lots of measuring to get that right all around. Behind the toilet we have storage for peat moss/sawdust, which you sprinkle into the toilet after each use. This absorbs moisture and gets the compost process started. Also, you can see the fan switch all mounted up down on the lower right of photo.

51142190746_ac0b06e7ee_c.jpg

And that last batch of polyurethane we did also included the table. We added oak brackets for the table to sit on.

51142402353_3c75b7ee78_c.jpg

And make another bed! It's only 24"x72", so just one person. You lose your kitchen table when someone would sleep here, so this would be used for guests if need be. But this person might have the best bed, especially in the winter. Under the left seat is the electrical cabinet, and the under the right seat is the composting toilet. When both are in use, they produce heat. Heated seats and heated bed! Although you might want to sleep with your head over the electrical cabinet!
 
It takes me approximately 44 seconds from start to final concealment to in the words of the immortal George Carlin leave a leak and go about my business. If dogs can do it so can I....
 
Seriously. How the heck can you move so fast on this! Your progress and layout is amazing. Are you an engineer of some sort?

The toilet is great! What did you use as an interior box sealant?
Same sentiment about sitting to use the diverter...lol... I'd rather stand with a funnel and a hose attached to the wall.

.. I'm about to make the bed/bench area... Just an 18x18x72 bench with the front (leafe) lifting up to make wider...?? No idea yet.

I really like the ability to have a little table area. Your seats 18,18 and table 36? How tall do they sit? Maybe I could add a 12 inch +/- hanging leaf to the seats and table for a snug 2 person bed?

Loving the progress!
 
Oh, no no no, not an engineer. If I was, I'd still be making and revising my CADD drawings! This is all just a culmination of working with my hands since I was 12 or so. Also wouldn't call it fast. Just work on things until midnight everyday and have no social life, which is totally doable in a pandemic!

To seal the inside toilet area I used some old paint that was going bad. It went on nice and thick! Still not dry 2 days later. And I'm an American man, no way you'll catch me sitting down to pee! There is a reason the kitchen sink is down next to the bathroom...  :cool:

The kitchen seats are 19.5" deep, 24.5" wide, and 17" tall, without any cushions. The table is 30.5" tall. 36" is countertop height, far too high for a table. RV's pretty much always have the kitchen table fold down into a bed. That's where I got the idea from. 30" sounds very tight for two people, unless if the other person was a pretty lady! Because you two will surely be spooning at night! My upper cabinets stick out from the wall 18", and we slept up there before finishing the cabinets and it was barely doable. I think 22" would be my minimum width I'd have for a bed. 30" would be plenty good.
 
30" x 80" is down right spacious which is what I always make mine as 4 totes (20" x30") fit perfectly underneath.
 
Top