Cummins Canoe (A Stepvan Story)

Van Living Forum

Help Support Van Living Forum:

This site may earn a commission from merchant affiliate links, including eBay, Amazon, and others.
The Sharkbite fittings? Yes, they are pretty nice. It was very convenient to remove some of those fittings to fix a leak. And we might add a pressure accumulator tank, so paying extra for these will pay off when we change things on the road.
 
All this sun we're missing out on! Lets harness some of it!

51012283620_ed080c19dd_m.jpg

These panels have been sitting around since Black Friday sales. Lets finally get them out of storage.

51081562622_f071f97b43_c.jpg

Have a plan to build a frame for these solar panels. Unfortunately, they don't readily sell 16' sections of aluminum angle, so took some 8' ones and welded them together.

51012288535_192b6a06c5_c.jpg

Lots of measuring and hole drilling.

51081477641_37d0363a4f_c.jpg

Got these aluminum self-sealing nutserts. A whole bunch of them should hold the solar panel frame securely.

51080792648_d07db10fac_c.jpg

Nutsert installed and stainless hardware ready to go. Don't worry, we added copious amounts of sealant to the threads and surrounding area during install.

51081585727_9d96273864_c.jpg

We thought this was a 2 person job, boy were we glad to get all the extra help!

51080798798_0e9ea01306_c.jpg

This probably voids the panels warranty, but whatever, this is a great way to mount our panels. Drilled frame and added some nutserts to bolt to roof frame.

51081498356_915c468353_c.jpg

Panels all installed! We decided to put the panels all to the drivers side. This keeps them away from tree branches when driving down the road and the passenger side dips down towards the gutter/curb. We also have lots of roof space for all kinds of activities!

51080802663_6c2cc34844_c.jpg

We wired all the panels in series. Made sure to test them and everything seems to work properly!
 
You are going to have to be aware of shading from those vents, I understand a partially shaded panel cuts efficiency of whole system substantially, also with fairly small area under the panels with limited air movement i have been told that an overheated panel also cuts the efficiency. However I have stick on panels and only 140 watts worth and find them adequate. Just a heads up in case one day you are watching your meter and wondering why on a sunny day you are not charging much. Perhaps all it will take is lowering a vent a bit. Looks good
 
Yes, one of the downsides to wiring in series if the negative effects of shading. But these are decent panels with bypass diodes so the shading is not that big of a deal. One thing we could do is always try to park with the driver side facing south so the vents never shade the panels. We left an inch of air gap under the panels. Hopefully that's enough? I had 180 watts of solar on my last rig, and it just barely wasn't enough to just run the fridge. Granted that was a 120v dorm fridge. We're really hoping 600 watts will be enough and with some cushion so we don't have to think about it much. We'll see. Maybe we'll be able to run an electric induction stove in this one!
 
Your inch air gap should be fine. My flexible panels just have coroplast between them and the roof.
 
I think the manufacture said to have more air gap. Gotta find a compromise somewhere. Coroplast between flexible panels and roof seems like a good idea. I'd only be concerned about that material breaking down from the elements. But I guess it's ok because it's protected by the panels, haha.
 
I've used Sharkbite fittings successfully...it's the naysayers one has to be alert to at all times...they come in all manners of disguise...
 
Yea, the Shark bites are great! Time will tell, but they should be just fine. I wouldn't use them in a finished wall in a house, but everywhere else is fair game. I might be worried about what happens to them after a few years of road vibrations. Again, time will surely tell.
 
I had a plastic shark bite freeze and then leak afterwards. It had been good into the low 20's but got caught off guard with a 16 degree night. It was replaced with a metal one. Hopefully I don't get any more nights in the teen's.
 
The SharkBites are damn expensive. Like 10 times the price as crimp fittings. Highdesertranger
 
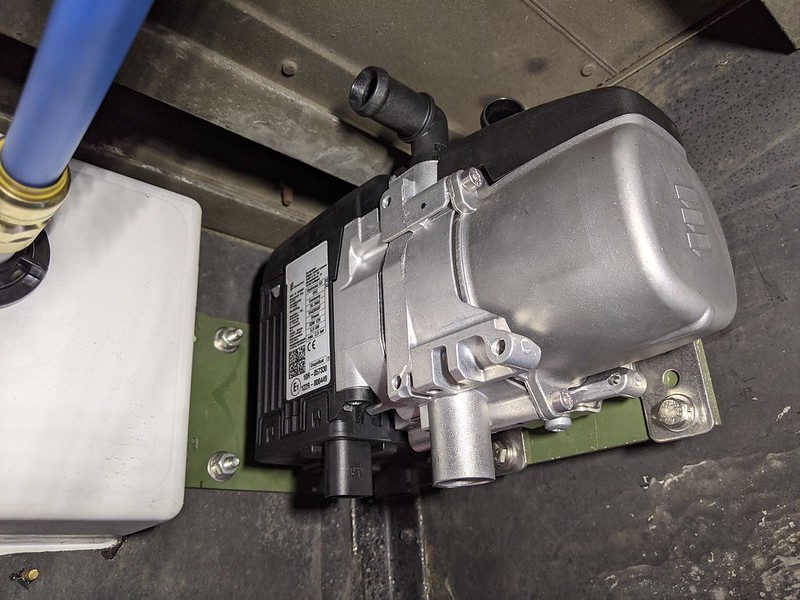
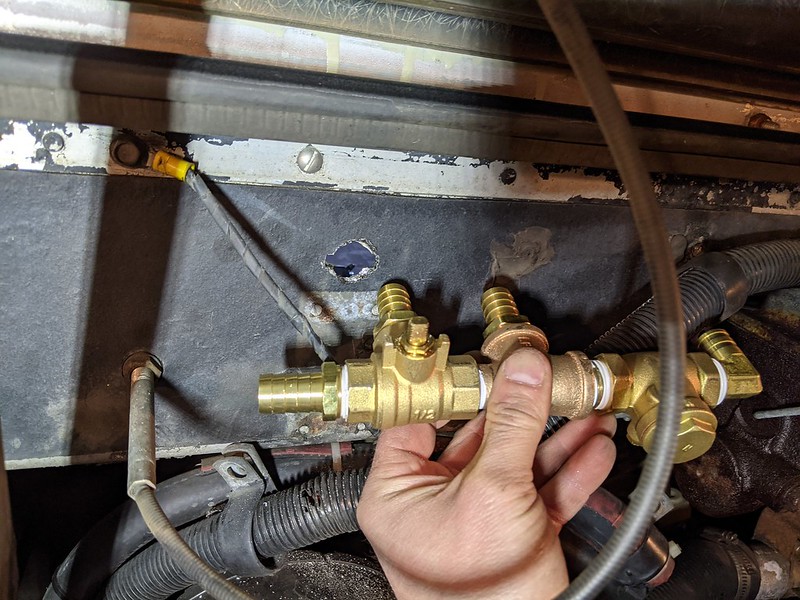
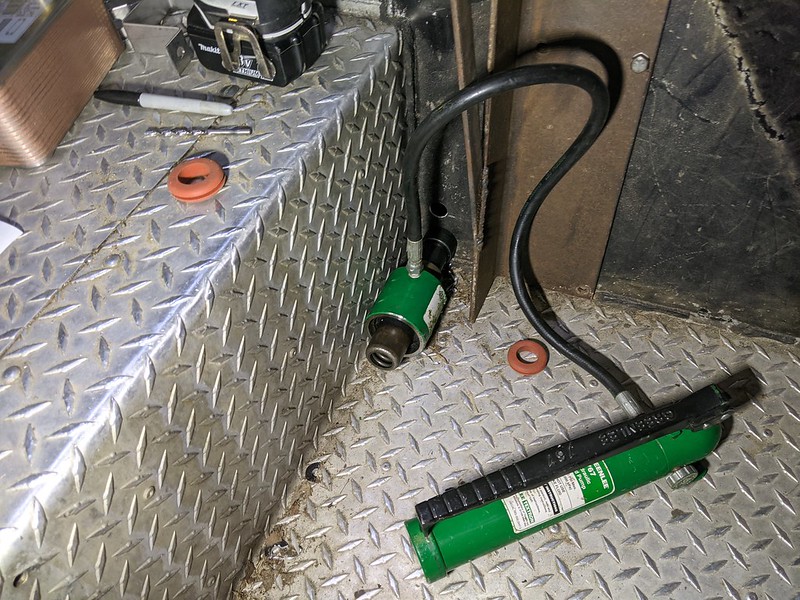
Ice is powerful force. Even the metal ones would crack under the right conditions. Yes, they are very expensive. For the same price I could have either gotten all the Sharkbite stuff like I done did, or get the crimper and crimp fittings. My brother mentioned the flexibility of changing things around on the road or repairs/maintenance, the Sharkbites would be a benefit since they can easily be removed and reused. I already had a leak and had to remove like 6 or 7 fittings to fix it, so that was nice. Most of the piping is in one very small area, and getting a crimper in there might have been a challenge. If they hold up, the shark bites were the right move I think.
 
Solar work continues. Can't wait to finally get all the wiring done!

51081500611_3dd95db59b_c.jpg

[size=small]Drilled yet another hole through the roof. Luckily, this hole is in the cab area and we don't care if that leaks because it's not finished and fancy in there. Simple pvc junction box, pvc pipe, and some waterproof connectors for the wires.[/size]

51081501511_a448e84d5d_c.jpg

[size=small]Don't forget the Dicor. In, on, under, and over everything. Can't have too much of the stuff.[/size]

51080805903_a6c57e0d51_c.jpg

[size=small]All done. I know, they make those fancy aerodynamic cable entry boxes for solar installs. But c'mon, have you seen this van? This box is the least of our worries. It's also what we had laying around.[/size]

51088835282_93028eb8dd_c.jpg

[size=small]Pipe extends down past all the sharp metal and connects to the interior wiring. We already have circuit breakers mounted in the back for the solar equipment, but with these wires traveling to those circuit breakers through the interior walls makes me nervous. So we added an additional fuse on the positive leg. What I tell all the girls, wouldn't hurt to have extra protection. Because you know, football is dangerous. This area is up above the driver seat. At some point we'll build a cabinet or something up there where those wires will be up in.[/size]

51088750226_ee30db4eff_c.jpg

[size=small]And look at that. We're finally charging the batteries![/size]
 
Nice. That is exactly how I ran mine but I came in from the front of the trailer not through the roof. Highdesertranger
 
Plumbing, check. Electricity, check. HVAC?

51094091511_19dee08574_c.jpg

[size=small]Oh boy, here we go. What we have here is most of the components to do a fully integrated hydronic heating system. We got an Eberspacher 17700 btu 12v diesel boiler. The boiler will heat a coolant loop through either the engine, or the water heater, forced air heater blower, hot tub heat exchanger(details on that future project later), and cab heater core, all in that order, plumbed in series. Over our heads? Maybe a bit, but we're going with it. Took it very slow and drew lots of napkin diagrams.[/size]

51094635218_c0ff328179_c.jpg

[size=small]First things first, easy inside stuff. Snaked some wires and such. Glad to see our insulation is still doing good.[/size]

51094174229_ea7e704ef4_c.jpg

[size=small]Got the air heater thermostat controller installed. With the boiler running in idle, turning the thermostat up will kick fan on. Fan will blow air through heater taking heat away from coolant loop. When low temperature coolant returns to boiler, boiler will kick on automatically until coolant reaches high enough temperature so boiler can kick off and go back into idle. In idle mode, the boiler is off but a circulation pump is always running on low, keeping coolant moving.[/size]

51094637363_91d65dce34_c.jpg

[size=small]Forced air heater installed. Basically a heater core, but to heat the rear living area. Had to run and solder all our own wires. Cut out the original wiring harness that came with this stuff as we're repurposing it for this mess of an idea. The circuit box in the upper lefthand corner is the speed control box for the fan.[/size]

51094907495_f2b4120a52_c.jpg

[size=small]Mounted the controller for the boiler on the wall next to the sink, where it is easy to get to from either the rear, or the cab. Primary function of the boiler will be for hot water and air heat, but we're going to somehow plumb it into the engine to preheat that up on those super cold days. Basically a block heater without having to plug in to an outlet. Although technically we could also run the block heater off the inverter. But these boiler units from Germany were originally designed for commercial trucks to preheat the engine in the morning before starting the work day. The controller has a timer function, but we're going to use it on infinite automatic mode.[/size]

51096875958_e958a5abb7_c.jpg

[size=small]The boiler system needs diesel from somewhere. Options were to install a separate fuel tank, tee off the fuel line going to the engine, or install our own pickup tube in the existing fuel tank. Since the new sending unit read 1/4 tank too low, it was a no-brainer to drop the tank since we had to bend the float wire anyway. A huge unfortunate thing we had to do was remove the fuel tank, again! The gauge in the dash said it was empty, but when we unbolted it, we had to catch the tank onto our chests with 15 gallons in it! Nice little surprise. We emptied the tank before reinstalling it. It has been very annoying with the gauge reading empty, but you still have 15 gallons in the tank...[/size]

51096877353_6304686c04_c.jpg

[size=small]Drilled a new hole in the new sending unit we installed months ago and installed new pickup tube. Ran the boiler fuel line and encased it in wire loom for extra protection.[/size]

51096431257_49f554d3d9_c.jpg

[size=small]As soon as we left the fuel tank we installed the fuel pump for the boiler. Up next we'll be running a complex system of coolant lines all over the place.[/size]
 
Hydronic heating system continues. Figuring out this Eberspacher boiler heater. After dozens of hours of research and tinkering, I now consider myself an expert. Feel free to contact me if you have any questions and I'll surely try to help you out as best I can.

51102643301_6b84dedcf1_c.jpg

[size=small]One problem with all these components from Europe, is that none of it is in English! We've had this stuff sitting around for awhile and have really been dreading this project due to the complexity and language barrier. But going slowly and using a Polish friend who speaks some German and labeling things once we figured out what it does, we got this.[/size]

51102746467_4351a74042_c.jpg

[size=small]Welded up a mount for the boiler using some scrap aluminum we had laying around. Mounted it up under body, next to the shower box, behind the passenger seat. None of this stuff is plug and play. It's all very custom stuff. You've been warned.[/size]

51103751555_b88c6d6f21_c.jpg

[size=small]All that being said, the Eberspacher stuff is extremely well built high quality. The coolant hoses go to the top. The air intake and exhaust go to the bottom.[/size]

51102721214_0097fdb719_c.jpg

[size=small]Valve assembly #1. Didn't get the right setup until assembly #3. Lots of trial and error. But basically I wanted a way to switched the hydronic heater from heating the rear auxiliary stuff to heating the engine block just by switching one valve. Oh, and when the engine is running, have the engine heat up the rear auxiliary stuff too. Oh boy, this created many headaches. But it is possible. Need the proper plumbing routes, some tee fittings, a 3 way valve, and a correctly placed check valve. Several schematics and many nights of lost sleep, but we got it![/size]

51102721564_5d80e021f1_c.jpg

[size=small]The engine will always heat up everything when running. This valve is just to control the coolant flow when the Eberspacher boiler is running. It's right on dash, above the engine cover so it can easily be reached from in the cab.[/size]

51102885063_d18ceb3c03_c.jpg

[size=small]The 12v circulation pump. When the boiler system is on, this will always cycle coolant. It throttles up and down depending on the temperature of coolant. When the system is on, but the temperature is high enough and boiler kicks off, this circulation pump cycles very slow. If heat is taken out of the coolant loop from either the water heater or air heater or heat exchanger, cool coolant will reach the boiler, which senses the low coolant temperature and kicks the boiler back on automatically, throttling up the pump.[/size]

51102749227_487695cc90_c.jpg

[size=small]Got the old hydraulic hole out. This makes nice, smooth holes in the thick aluminum body. We'll be installing grommets to run in some coolant lines.[/size]

51102885938_3de82b25f9_m.jpg

[size=small]These lines are for the heat exchanger under the passenger seat. This will be part of the hot tub/water pump station we're going to do at a later date.[/size]

51102648171_99587dac4b_c.jpg

[size=small]Oh gee willy, there are a lot of coolant lines in this vehicle now. All those lines equal heat loss! So we insulated a bunch of them. Got this awesome pipe insulation, with sticky stuff to close up the joint, and a sticky flap to go over the whole joint. Don't think this will ever cause us a problem.[/size]

51102887463_4d27af8db8_c.jpg

[size=small]All the lines ran and insulated. We have so many hoses going every which way, we had to label all the ends to match the schematic so we didn't get something confused and plumbed wrong. In total, we used about 70' of coolant hose to do all of this. Yea, I don't where all that hose went either.[/size]
 
Very cool, looks like a great unit. I just installed a Propex it works great. Highdesertranger
 
...I think the line ..in space no one can hear you scream...came from situations similar...
I've used miracle stop with successful results.
 
We'll see how it goes. The weather is too warm to really test out the heat now. Next winter we'll really get to try her out. Otherwise, we'll have to get the winter sleeping bags out!

What is miracle stop?
 
Top