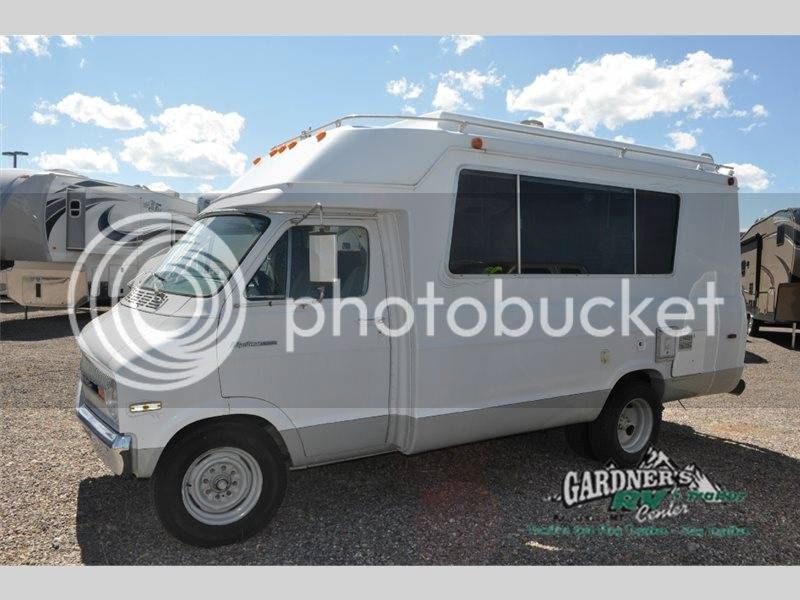
The Fat Van

Van Living Forum

Help Support Van Living Forum:

This site may earn a commission from merchant affiliate links, including eBay, Amazon, and others.
Status
Not open for further replies.
highdesertranger said:
I would never depend on a over bored 400 engine.  highdesertranger

I agree.  The 383 option is a fine torque laden motor.  The vortec heads sounds like a good idea, but I have not done any research on the concept. 

OP:   sweet little RV, enjoy!
 
roof sealed,working on side things,fun with clear silicon,the stuff is brutal,either falls right off or holds on for dear life
dont see a need for caulking pics

but here is the next project

002_1.jpg


not only rusted but looked at them when it was raining and water was pouring off of them,the wiper fluid line grommet is gone plus whatever else,got to seal that up and move them to a safer location
need to power up and see what works or not


some future fun

004_2.jpg

006_2.jpg


no comment at the moment,will have plenty every time i burn myself cutting it out
but by far the worst thing i have seen so far


bonus pic
green shag
005_1.jpg


and a nice little furness if it works
 
Not sure what pic is showing, all I see is a little surface rust?

That green shag is sweet...were you able to resist rubbing and fluffing it? I remember one of my weekly chores as a kid was raking the shag carpet with, what I assume must have been a carpet rake. Woe to the sibling that left footprints before mom could see...
 
I hope they didn't weld that hitch to the frame I hate it when they do that. another thing get rid of that Scotch Lock wire splicer. those are problems just waiting to happen. highdesertranger
 
I passed on a nice 73...... I wonder if I chose poorly...... I really like how these things look! .......


Dave
 
highdesertranger said:
I hope they didn't weld that hitch to the frame I hate it when they do that.  another thing get rid of that Scotch Lock wire splicer.  those are problems just waiting to happen.  highdesertranger

kinka,nothing i would call a bead,complete hack job,under if its as bad as it looks they didnt get no depth and might be able to pry bar and hammer it out but on the bumper they gooped it on thick,im sure a prefab bolt on shouldnt be hard to find

scotch lock? the weird blue connecter?

just took a look and the small wires are someone in the past chopping into a wire relay under the dash for trailer lights and there are more of those connectors under there too,the solenoid wiring looks original

so i need a new solenoid and the fuse? looking bus to the right?

and clean up the trailer wires
 
Mount the pump on a vertical surface, with the motor end up, so when it leaks, it doesn't rust the motor...
 
005.jpg


cant ask for better than this just some minor scaling around the doghouse bolts
001_2.jpg


looks like i have most of a quart on brown enamel and will paint right over those speaker wires
004_3.jpg


all done,used the flexible vinyl paint on the doghouse
005_2.jpg


still have to clean/fix some gauges and the gear selector is loose and wobbly so a trip inside the steering column in the future but found a pretty significant mechanical issue to fix next,will get some pics when its not raining
 
The doghouse really looks great...link the product please :)`
 
Nice job on the cab. The before and after shots say it all.
It's good to hear your not shy about pull'in stuff apart and fixing it. Dad always said if you want to know your vehicle from stem to stern your gonna get greasy dirty, paint-primered fingers a few times a week. If you don't then you'll pay someone else for the pleasure.
 
as you can see my wheels dont line up with the wheel wells,same on both side
001.jpg

made for dodge? a medium between dodge and chevy?


so i was under looking at stuff and looked at my slip yoke at the carrier
002_2.jpg

and thought "thats a lot spline showing"in fact about the same amount as my rear end is off

took off the tires
003_1.jpg

this is with next to no load on,with a load they look to be bowed the wrong way,didnt see anything else that was obvious so maybe just the wasted springs are the cause???

anyways,the rear end is coming out FAT VAN DOWN,FAT VAN DOWN

rear end seemed tight and no movement at yoke but the seal is leaking and both wheel cylinders but wont know for sure untill we look inside

searched around and found these
http://www.generalspringkc.com/product_p/22-709.htm
mine are 28-24 so this is a large as i can get with out custom,the shipping is $100+

i can drive here
http://www.benzspring.com/
will call them tomorrow

and we will see if i am cheaper or lazier  

so hdr what do you think about the mark the yoke bolt,remove and replace seal the return bolt to mark not changing the crush sleave way of changing front seal?
 
Gary,
I've spent a lot of time looking at and driving older Chinooks over the last couple years and have not seen any with the rear axle that far back.
I'm really interested is what's going on with yours. The two photo's below are of 1977 versions.
77 Chinook Concourse 1.jpg
77 Chinook.jpg
 

Attachments

  • 77 Chinook Concourse 1.jpg
    77 Chinook Concourse 1.jpg
    85.7 KB
  • 77 Chinook.jpg
    77 Chinook.jpg
    19.6 KB
yea,i looked up some pics and all were centered,and as you can see from the wheel well this is been this way for a while,but logically,with the front spring mount being fixed,if you add a bow it would shorten the length moving the axle forward,the 1-2 inches i need? we will find out
 
yes Gary you can mark the pinion and get it back in the same place. however this is harder to do then you think, usually when you back the nut off it erases the mark. plus if you loosen the nut and take it off you should put a new nut on. the new nut will not tighten to the same location. so what to do. if you have an inch pound dial torque wrench and a dial indicator you can check back lash and rotational force before you disassemble and get it back to the same spot. another option would be to get a new crush sleeve. another option would be to get a crush sleeve eliminator. but then you have to exactly measure your crush sleeve and set the eliminator the same, also you must check the backlash and rotational force to make sure you are within spec. don't let all this get you down it is not hard to get it back in the same place. the trick is when you get close go real slow checking for end play(in and out) when you get the end play the same as it was you are good to go. to get it exact you need a dial indicator. this page shows the crush sleeve eliminator. another note you said the axle seals were leaking, check out the upgraded hub seals on the same page, they are awesome and will never leak. ORD is a great company and I highly recommend their parts, they are top line. highdesertranger
 
yep,past this shade tree basic wrenches pay scale,i will search out a pro who will make quick and precise work of it,that's if my innards are good,only 77k so might get lucky

the fine tuning of your ring and pinion is very important and needs to be near perfect

wrenchin between down pours,yea
but a good mindless job to do while i ponder "why do i need 2 sinks? why do i need a sink?"
 
first impressions-

i want nothing to do with black tanks,dont want to clean it,dont even want to look at it,want nothing to do with it

when thinking back on a life time of poo,it wasnt where or on what but with what and that what is 6 ply quilted goodness which doesnt mix with black tanks

but keeping it gives me the self contained label which might come in handy some day so they stay

dont think i have enough hose to reach my septic tank so i might have to ask a neighbor if i can borrow their septic tank,cant wait to see the look on their face
 
thought i would keep track of the monies
$3000 purchase price $50 tubes of goo,paint,screws

total monies spent-$3050
 
I chuck my toilet paper in the trashcan, never flush it in the RV
 
Status
Not open for further replies.
Top