Starting our electrical install...

Van Living Forum

Help Support Van Living Forum:

This site may earn a commission from merchant affiliate links, including eBay, Amazon, and others.

galladanb

Well-known member
Joined
Dec 8, 2016
Messages
652
Reaction score
0
Location
Middle Tennessee
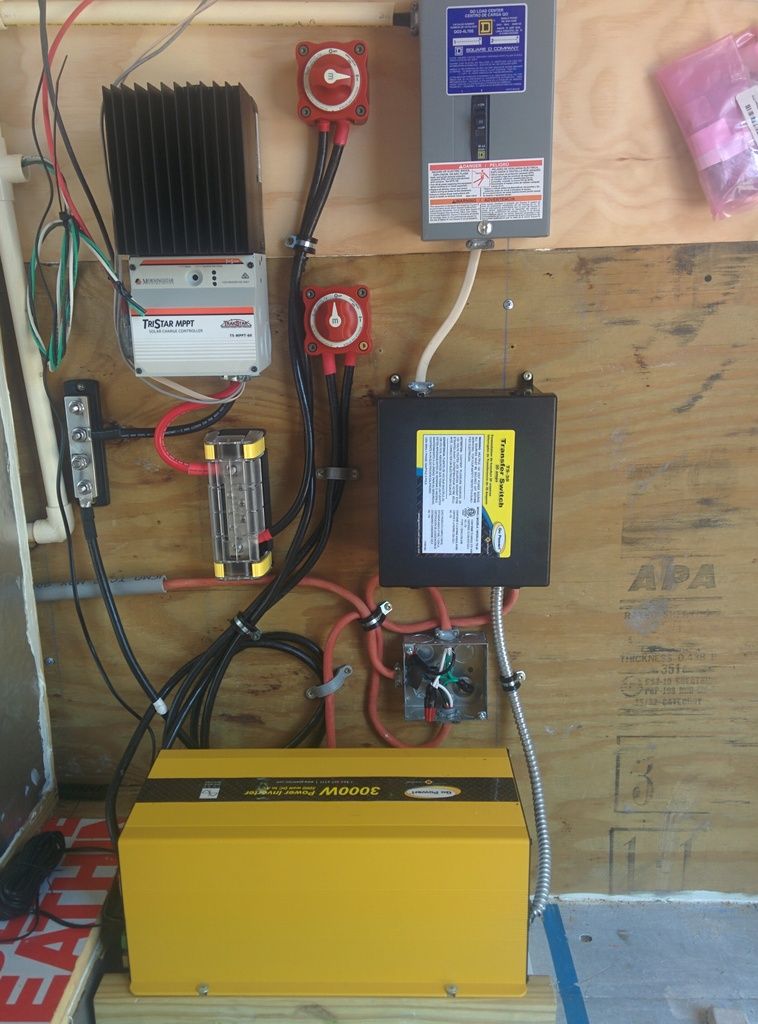
After several months of reading and learning from all of you, I think I am now ready to begin our electrical install...

Now, PLEASE read and answer as if you were starting out. PLEASE, PLEASE, no jargon, shorthand, abbreviations, or nicknames, OK?
AND I APOLOGIZE IN ADVANCE THE LONG WINDINESS OF ALL THIS...

If you want to comment on an issue, PLEASE do not hit the reply button, just copy and paste the specific issue into a new reply...
I really don't think anybody want to have to scroll thru this much typing for every new reply!!!

I think I already have a good understanding of what to buy and why, but I do have lots of install related type of questions...

1.) Battery Isolator install -- Best place to put it? up front under hood? Back by the batteries? Which is best Zero, 2, 4, 6, AWG?
Fuse close by the Isolator or by the alternator or both? Does the ground need to fused also?

2.) Battery initial charging and install -- I have my two 6v EGC2 batteries, I checked with a meter and got two that were closest to each other in voltage, at 6.3V each, both marked with a 1/17 stickers. Now the question is, should I charge each one separately? I have a charger I have used on the lawn tractor it can go either 6 or 12v, and has three modes, off, turtle and rabbit. (No kidding that's it as far how what it's doing...)
Or should I wait until my new bigger charger gets here next week? Should I hook them together and charge as a set of 12v's?

--- Also, when the system is completed, will the monitor/meter, (either the MT-50 or the trimetric?) tell me each batteries condition? Or will it be considered a set?


3.) Refrigerator wiring -- I am planning on putting the Engel Mt-45 on the driver's side and the battery bank will be on the Pass side. What gauge would I use to go up over and down the other side? I'm thinking 8AWG, but I wont have any way to crimp those sized terminals. I can do 10AWG.

--- Also, The 12v cord that came with it it 16AWG, and it has a very nice ciggie plug, it would be a shame to cut that up. But the refer side has a goofie, meaning a propriety plug... They sell a hardwire kit for $40 bucks...?
I'm sure it would void my warranty if I opened the box up and hardwired it, right?


4.) Co-ordination between 12v and 110v systems -- My plans are to install a external shore power plugin, (15Amp) near the rear in a traditional location.  Then route 10-3 wiring forwards to where the refer will be located and then routing a cord up and over to the the pass side power bay, where the battery bank, charger and inverter will reside. The 12v systems and wiring will start and end in the the pass side power bay.

--- Well that's the plan, and the goal is to have the charger kick in when it senses 110v, ( I have a switch that should assist with this). I plan on plugging the 110v line into the inverter, so that the outlets on either side of the van, will get their 110v power source from either shore or inverter, depending on whichever is energized at the time. I do not plan on both being active at the same time...

--- The questions is, does that make sense? Do you all foresee any pitfalls or hazards? I am way off track?

5.) Future planning -- I have toyed with the idea of leaving empty PEX lines or similar in place under the insulation and coverings for routing future wires as needed. Does that sound like a good idea or overkill? The walls and ceilings are going in permanently, and would be destroyed if they had to come down or open up for wire fishing later...

Such FUN!!!!!!
 
galladanb said:
.1.) Battery Isolator install -- Best place to put it? up front under hood? Back by the batteries? Which is best Zero, 2, 4, 6, AWG?
Fuse close by the Isolator or by the alternator or both? Does the ground need to fused also?.
A:  Isolator:  Solenoid or some kind of diode or even fancier gizmo?  With a solenoid, it really doesn't matter, except it's sometimes hard to find a place to mount it under the hood, everything is so tight on these modern vehicles.  With a diode type or fancy gizmo, I would say the heat under the hood would not be good for their longevity, so I would mount that back in the house where it's cooler.
B: Wire gauge:  Up to a certain point, the thicker the wire, the less voltage drop you have and therefore the more power is transferred.  But it can be taken to ridiculous extremes.  Plus the amount of amps available from your alternator will be limited to whatever is left after the power needed to run the ignition, lights, heater/ac, etc. comes off the top, and the voltage will be limited by the vehicle's voltage regulator.  Because of that, I would think 4 gauge should be plenty, unless the house battery is mounted very far away from the engine compartment (you didn't say how far) in which case I might bump it up to 2 gauge.
C:  Fuses:  If you are going battery to battery, both sides need to be fused.  If going alternator direct to the isolator, no fuse is needed on the alternator, only on the house battery.
The reason for the difference, if you are curious, is that if the battery shorts, it can produce extremely huge amounts of current - hundreds of amps.  An alternator will never produce more than it's rated output, even into a short, and a 4 gauge or thicker wire can handle that much current safely.
There is no reason to fuse a ground.
 
galladanb said:
2.) Battery initial charging and install -- I have my two 6v EGC2 batteries, I checked with a meter and got two that were closest to each other in voltage, at 6.3V each, both marked with a 1/17 stickers. Now the question is, should I charge each one separately? I have a charger I have used on the lawn tractor it can go either 6 or 12v, and has three modes, off, turtle and rabbit. (No kidding that's it as far how what it's doing...)
Or should I wait until my new bigger charger gets here next week? Should I hook them together and charge as a set of 12v's?

--- Also, when the system is completed, will the monitor/meter, (either the MT-50 or the trimetric?) tell me each batteries condition? Or will it be considered a set?

Since both batteries are new, and at 6.3 volts fully charged or very close, I can see no advantage to charging them separately with a 6 volt charger.  Wire them together in series and treat them as one 12 volt battery.  Charge with a 12 volt charger.  And yes, your monitor will also treat it as one 12 volt battery and not give you individual readings on each battery separately.
 
galladanb said:
3.) Refrigerator wiring -- I am planning on putting the Engel Mt-45 on the driver's side and the battery bank will be on the Pass side. What gauge would I use to go up over and down the other side? I'm thinking 8AWG, but I wont have any way to crimp those sized terminals. I can do 10AWG.

8 gauge sounds like massive overkill, considering that they supply 16 gauge.  I would cut all but a few inches off that goofy proprietary plug and splice 10 gauge wire to it.  They make special butt splices for doing that kind of thing, they take 16/14 gauge on one end and 12/10 gauge on the other.  Or use Anderson Powerpoles.  And yes, you will void the warranty if you start messing around inside.

https://www.amazon.com/16-14-Step-D...8-1-spons&keywords=butt+splice+16+to+14&psc=1
 
galladanb said:
5.) Future planning -- I have toyed with the idea of leaving empty PEX lines or similar in place under the insulation and coverings for routing future wires as needed. Does that sound like a good idea or overkill? The walls and ceilings are going in permanently, and would be destroyed if they had to come down or open up for wire fishing later...

Pex tubing is flexible.  I'm not sure how easy it would be to fish a new wire through what is essentially a hose.  I believe I would use PVC pipe.
 
Can someone post a picture of these fridge Proprietary plug and its receptacle with some sort of size reference in the photo?


Getting some sort of connector, even if individual wires to mate, and entirely bypass the Cheesy 16awg provided connector, Should be easily doable.  The risk is reversing the polarity, but the fridge might be protected against this anyway.

Just becaiase a fridge comes with 16 AWG, does not mean one can simply use mroe 16awg to mount it further from the battery.  16awg is an insult and is ikely used as most Ciggy plugs come with this, or thinner wire.  The Danfoss compressor manual does not allow for ANY wire thinner than 12AWg feeding their compressor controller, no matter how short the length, yet all portables sold as such come with a cheesy 16AWG ciggy plug connector in direct contradiction to what the compressor controller says should be used, and this is asinine, and only done as portable things need a 12v  plug, and the shitty 12v connector  Ubiquitous standard rarely comes with any wire thicker than 16AWG, as such a Shitty connector could never handle the 38 amps that 12AWG can pass, and the 21 amps that 16awg can pass is well above what the fridge can ask for. But fighting voltage drop on this circuit is highly desirable, or the low voltage cut outs on the fridge might cut out way too soon, and cause food spoilage when the battery still had way more than enough juice to keep powering it.

The Sawafiju swing compressor is not as sensitive to input voltage as are the Danfoss which have a higher start up surge  My meters show my fridge draws about 30 watts, but as high as 56.5 watts surge  on start up.  8 awg might be overkill, depending on the length of the circuit, but even if the fridge only draws 2.7 amps, and 8AWg is overkill for 2.7 amps, It will only hurt one's wallet to use 8awg.

Your new batteries, as 6.3v each, are not quite fully charged.  I would hope for a little over 6.4v.  

If you have the series cable, charge them as a 12v battery.

If you do not have the series cable then top charge each 6v battery separately, for now, just to get them at full charge while you set things up.  The hydrometer will tell you when they are fully charged.  Specific gravity at 77F should be 1.275+.

See if 24 hours after removing from charger, if they maintain 6.4v or higher.

Batteries self discharge, and while they 'Should' leave the factory fully charged, full charge takes time, and time is money, and Executives want more of it, in their pockets, not yours.

So while you consider how to set up your system, get your batteries top charged so they are ready to deliver their full capacity  for when you insert the fuses into your fuse panel and click GO.
 
John, thank you for your excellent answers! U roc!

So, 4awg it shall be... The power bay will be just behind the passenger side rear cargo door, so approx 13 - 15 feet from engine bay....

I just looked, and the red wire from the battery to the alternator seems to be kinda puny, maybe one quarter inch, hard to see, but still puny...

Sternwake, I will get a picture up on here in a few minutes! Yes sir!!!
 
So, I should go ahead a charge them overnight, individually, right?

Then check voltage after an overnight rest period? Right?

Here is the plug along side the ciggy plug...

image.jpg

And here is a shot of the awg label...

image.jpeg
 

Attachments

  • image.jpg
    image.jpg
    994 KB
  • image.jpeg
    image.jpeg
    1.5 MB
galladanb said:
4.) Co-ordination between 12v and 110v systems -- My plans are to install a external shore power plugin, (15Amp) near the rear in a traditional location.  Then route 10-3 wiring forwards to where the refer will be located and then routing a cord up and over to the the pass side power bay, where the battery bank, charger and inverter will reside. The 12v systems and wiring will start and end in the the pass side power bay.

--- Well that's the plan, and the goal is to have the charger kick in when it senses 110v, ( I have a switch that should assist with this). I plan on plugging the 110v line into the inverter, so that the outlets on either side of the van, will get their 110v power source from either shore or inverter, depending on whichever is energized at the time. I do not plan on both being active at the same time...

--- The questions is, does that make sense? Do you all foresee any pitfalls or hazards? I am way off track?

5.) Future planning -- I have toyed with the idea of leaving empty PEX lines or similar in place under the insulation and coverings for routing future wires as needed. Does that sound like a good idea or overkill? The walls and ceilings are going in permanently, and would be destroyed if they had to come down or open up for wire fishing later...


I think I want to raise a "hazardous Off-Track flag" here, but it may just be I'm interpreting you wrong. So lets just say that shore power/ 110v has the ability to fry your inverter if not completely separated, or not protected with a automatic transfer switch. 

I just installed
 
galladanb said:
4.) Co-ordination between 12v and 110v systems -- My plans are to install a external shore power plugin, (15Amp) near the rear in a traditional location.  Then route 10-3 wiring forwards to where the refer will be located and then routing a cord up and over to the the pass side power bay, where the battery bank, charger and inverter will reside. The 12v systems and wiring will start and end in the the pass side power bay.

--- Well that's the plan, and the goal is to have the charger kick in when it senses 110v, ( I have a switch that should assist with this). I plan on plugging the 110v line into the inverter, so that the outlets on either side of the van, will get their 110v power source from either shore or inverter, depending on whichever is energized at the time. I do not plan on both being active at the same time...

--- The questions is, does that make sense? Do you all foresee any pitfalls or hazards? I am way off track?

5.) Future planning -- I have toyed with the idea of leaving empty PEX lines or similar in place under the insulation and coverings for routing future wires as needed. Does that sound like a good idea or overkill? The walls and ceilings are going in permanently, and would be destroyed if they had to come down or open up for wire fishing later...


I think I want to raise a "hazardous Off-Track flag" here, but it may just be I'm interpreting you wrong. So lets just say that shore power/ 110v has the ability to fry your inverter if not completely separated, or not protected with a automatic transfer switch. 

I just installed a Go Power! TS-30 30 Amp Automatic Transfer Switch for this very purpose. I also bypassed this switch with one plug/outlet that is only for my 'fridge...reason being that I don't want it running off of 110v when inverter is going, which it would do...my understanding of dual/triple voltage 'fridges is they will always choose the highest voltage available to power themselves.

IMG_20170305_162418_zpsuj2sat4y.jpg


In this picture you see the my 110v shore power is the red cords...I chopped up a used 12/3 extension cord... and the external feed is the one coming up from behind the inverter. I goes into the metal junction box, where it splits...one going up into the Transfer Switch (black box/yellow label), and the other going left into the gray PVC conduit which is the 'fridge plug.

You also see the inverter out (armored BX cable) going into the Transfer switch, and then the one Romex from switch up to 110v breaker box. Inverters that are made to be hardwired are nice...many are, and they also have plugs.

As for future-proofing, I'd say that's a great idea...but probably PEX isn't the best product. Rigid PVC would be better for straight runs...but either way, once just One wire is inside conduit, pulling additional wires becomes exponentially more difficult. Which is why I'm building wire chases into the design, either along floor or soffit corners, where with a little work I can expose it in spots to aid fishing new stuff through.
 
IN another thread, this item was suggested when I was asking about auto switching.

https://www.amazon.com/Enclosed-AC-...e-Bounce.+Screw+Terminals.+120V+Trigger+Input.

I may have misplaced the directions, but I'm thinking it would be used to switch after the shore power drops out...

I'm thinking it would be NC or normally closed with shore power and open when no power available. That would allow the ... Ok, I'm trying to remember now...

Be back in a few minutes, gotta figure it out...?
 
Yeah, that is basically the same thing in principle I think. I don't quite see how it would work with combining 2 AC inputs (inverter + shore) (inverter + generator) into one AC output to a fuse box though. I could see how it'd work to isolate the 'fridge for example, but not how it could protect an inverter on same circuit. So in my case, instead of just bypassing the transfer switch for my "only shore power" 'fridge plug...err, wait...now I got confused.

Sometimes I've ended up spending more money on things than I probably had to, simply because it was clear that something would do what I wanted and/or was being used as intended. Or I ran out of patience trying to figure shit out ;)
 
Regarding the plug pictures, well the one showing 3 holes, I believe the two Eyes are power and ground and the third is a dummy to insure proper alignment and spread the Physical load on 3 prongs on the fridge's receptacle, rather than just 2.

Can you take a picture of the 12v receptacle on the fridge itself, showing the size and shape of the Pins/prongs?

I think a regular insulated quick connect could be pushed on and form a pretty good connection, but I might find a terminal which was designed for the pin prong for the perfect fit.

If you coulfd say the Pin shape is rectangular and 2MM long and 3mm wide, or numbers like that, it would help find whatever contact is inside the provided proprietary plug.
Then it is just a matter of finding which wire is +, then putting a piece of red tape closest to that contact to prevent accidental reverse polarity.
 
OK, there is a bit of a complicating factor here.  The "cigarette plug"  contains a THERMAL FUSE.  The replacement wiring harness that Engle sells to hard wire the fridge to the battery has a built in holder for this thermal fuse.  This is NOT the same as a regular fuse, and I think we should assume that the Engle engineers know what they are doing and that we NEED this thermal fuse.  Next step would be to see if this glass fuse will fit ok into an inline fuse holder from the auto parts store.

https://en.wikipedia.org/wiki/Thermal_cutoff#Thermal_fuse

http://www.engelaustralia.com.au/2products_details.asp?pid=13&productid=21442

http://www.engelaustralia.com.au/2products_details.asp?pid=13&productid=21579
 
OH, sorry guys, I flaked out and crashed for the night!

Stern, I will def get you those numbers and a picture, but it will be later this morning.
And you got me to thinking, what if a regular spade terminal will fit or not?
I'll check that in a bit....

And the thermal fuse looks to be exactly the same size as a normal glass type.
I could drag out the dial caliper and check, or maybe I will just try it in a regular ciggy.

But it will be a little bit. I usually have a full schedule on Sunday mornings, lol!
 
Regarding the thermal fuse inside the Ciggy plug itself.


Installing a thermal fuse inside is basically saying, look we know this shitty half assed ubiquitous connector is destined to overheat and fail at some point.  Since the plastic will melt and could cause a fire well before the fuse trips, lets install this thermal fuse instead of a normal fuse


 as extra protection.

When no Shitty Ciggy plug or receptacle is used, the problem of it overheating, requiring a thermal fuse, is eliminated.

As far as I am concerned this thermal fuse is adding even more heating potential inside the ciggy plug, leading to its necessity

This plug failed somewhere between 60 and 90 watts. It got hot enough that the spring steel lost its sprung and the metal looks charred, and the plastic surrounding it is melted.

012copy_zpse14190f3.jpg

  Also Kind of unrelated, but Cheap ass inline fuse holders and Chinese Fuses can also be a death trap.

005copy_zpseea8d993.jpg


That Was for the Hvac Blower motor circuit whose motor should only be able to draw 18  amps at full speed against resistance of the vents.  So much voltage drop was occuring on the whole circuit that the more amperage filled the gap.

I rebuilt most of that circuit from the speed selector switch to resistor to blower motor, and use an 8 AWG Maxi fuse at 20 amps.  The original OEM fuse holder was burnt out of the Van before my ownership.

Don't cheap out on Fuses and fuse holders, and friends don't let friends use ciggy plugs on any important circuit.
 
Hey, Sternwake, I posted the plug image over in the Engle fridge sale thread....

But here it is again, just for you!

image.jpeg
 

Attachments

  • image.jpeg
    image.jpeg
    1.7 MB
I wondered why they were using a thermal fuse on a fridge freezer.  Your explanation makes perfect sense.  Thanks!
 
Charged one of the two for almost 15 hours.

The charger's green light came on, and the voltage reads 6.74.
I'm going to start the other one until tomorrow about 9am

That would be about 14 - 15 hours each.
I will check the specific gravity of the first one at 9am
 
The green light came on......
Grrrrr.......

You trying to poke me with a stick?

;)

Just Kidding.

Really, the battery should be fully charged, especially after 15 hours.

But did it get upto 14.8v? If not, was this lesser unknown voltage high enough that 15 hours was indeed enough to top charge this new battery? We don't know, so we put a lot of faith inthat green light, masochistic liars that they usually are, but more so on deeply cycled batteries, as opposed to a new battery slightly undercharged

New batteries tend to behave a bit strange the first few charge/ discharge cycles before they develop a pattern the interested observer with an ammeter and voltmeter, and hydrometer, will be able to eventually forecast with varying degrees of success..

You could check SG now, and see if it changes after 12 hours rest too, also hope voltage stays above 6.35v 12 hours later. It should. Full charge resting voltage can range from 12.6 to well over 13.1 on some AGM batteries, so it is good to establish that baseline now when new.

I never really noticed Specific gravity improve any noticeable amount with time at rest, at least on the batteres I got intimate with by dipping my turkey baster into its cells like a sulfuric acid pervert.

If you are not familair with using a hydrometer, wear old clothes, use eye protection, and baking soda dissolved into water will instantly neutralize spilled acid. Do not get any baking soda solution into battery. I do not remove hydrometer from cells when reading the float, but leave it in place and move my magnified eyeballs close enough to see. Removing the tool to bring to ones eyes will drip acid on battery top and anything in between.

Make sure no bubbles are sticking to the float. Assuming use of the OTC4619, Give the thermometer time to reach to the electrolyte temperature and declare how much to add or subtract. -8 means subtract 0.008 from the reading on the float. 1.288flaot level , -8 on the thermometer. Would mean 1.280.

One cell might always read lower than the others. Instead of dipping all 6 cells, one can just dip this lower cell in the future to save time, or dip all cells to satisfy their curiosity or get practice taking readings.


The battery cell in the middle is usually warmer than the ones on the sides.

Rinse hydrometer with water after use, let dry fully before protecting float and returning to packaging for safekeeping.
 
Top