simple/solo boondocking: Promaster 159 high roof

Van Living Forum

Help Support Van Living Forum:

This site may earn a commission from merchant affiliate links, including eBay, Amazon, and others.
The day every van owner dreads:  cutting a hole in the roof

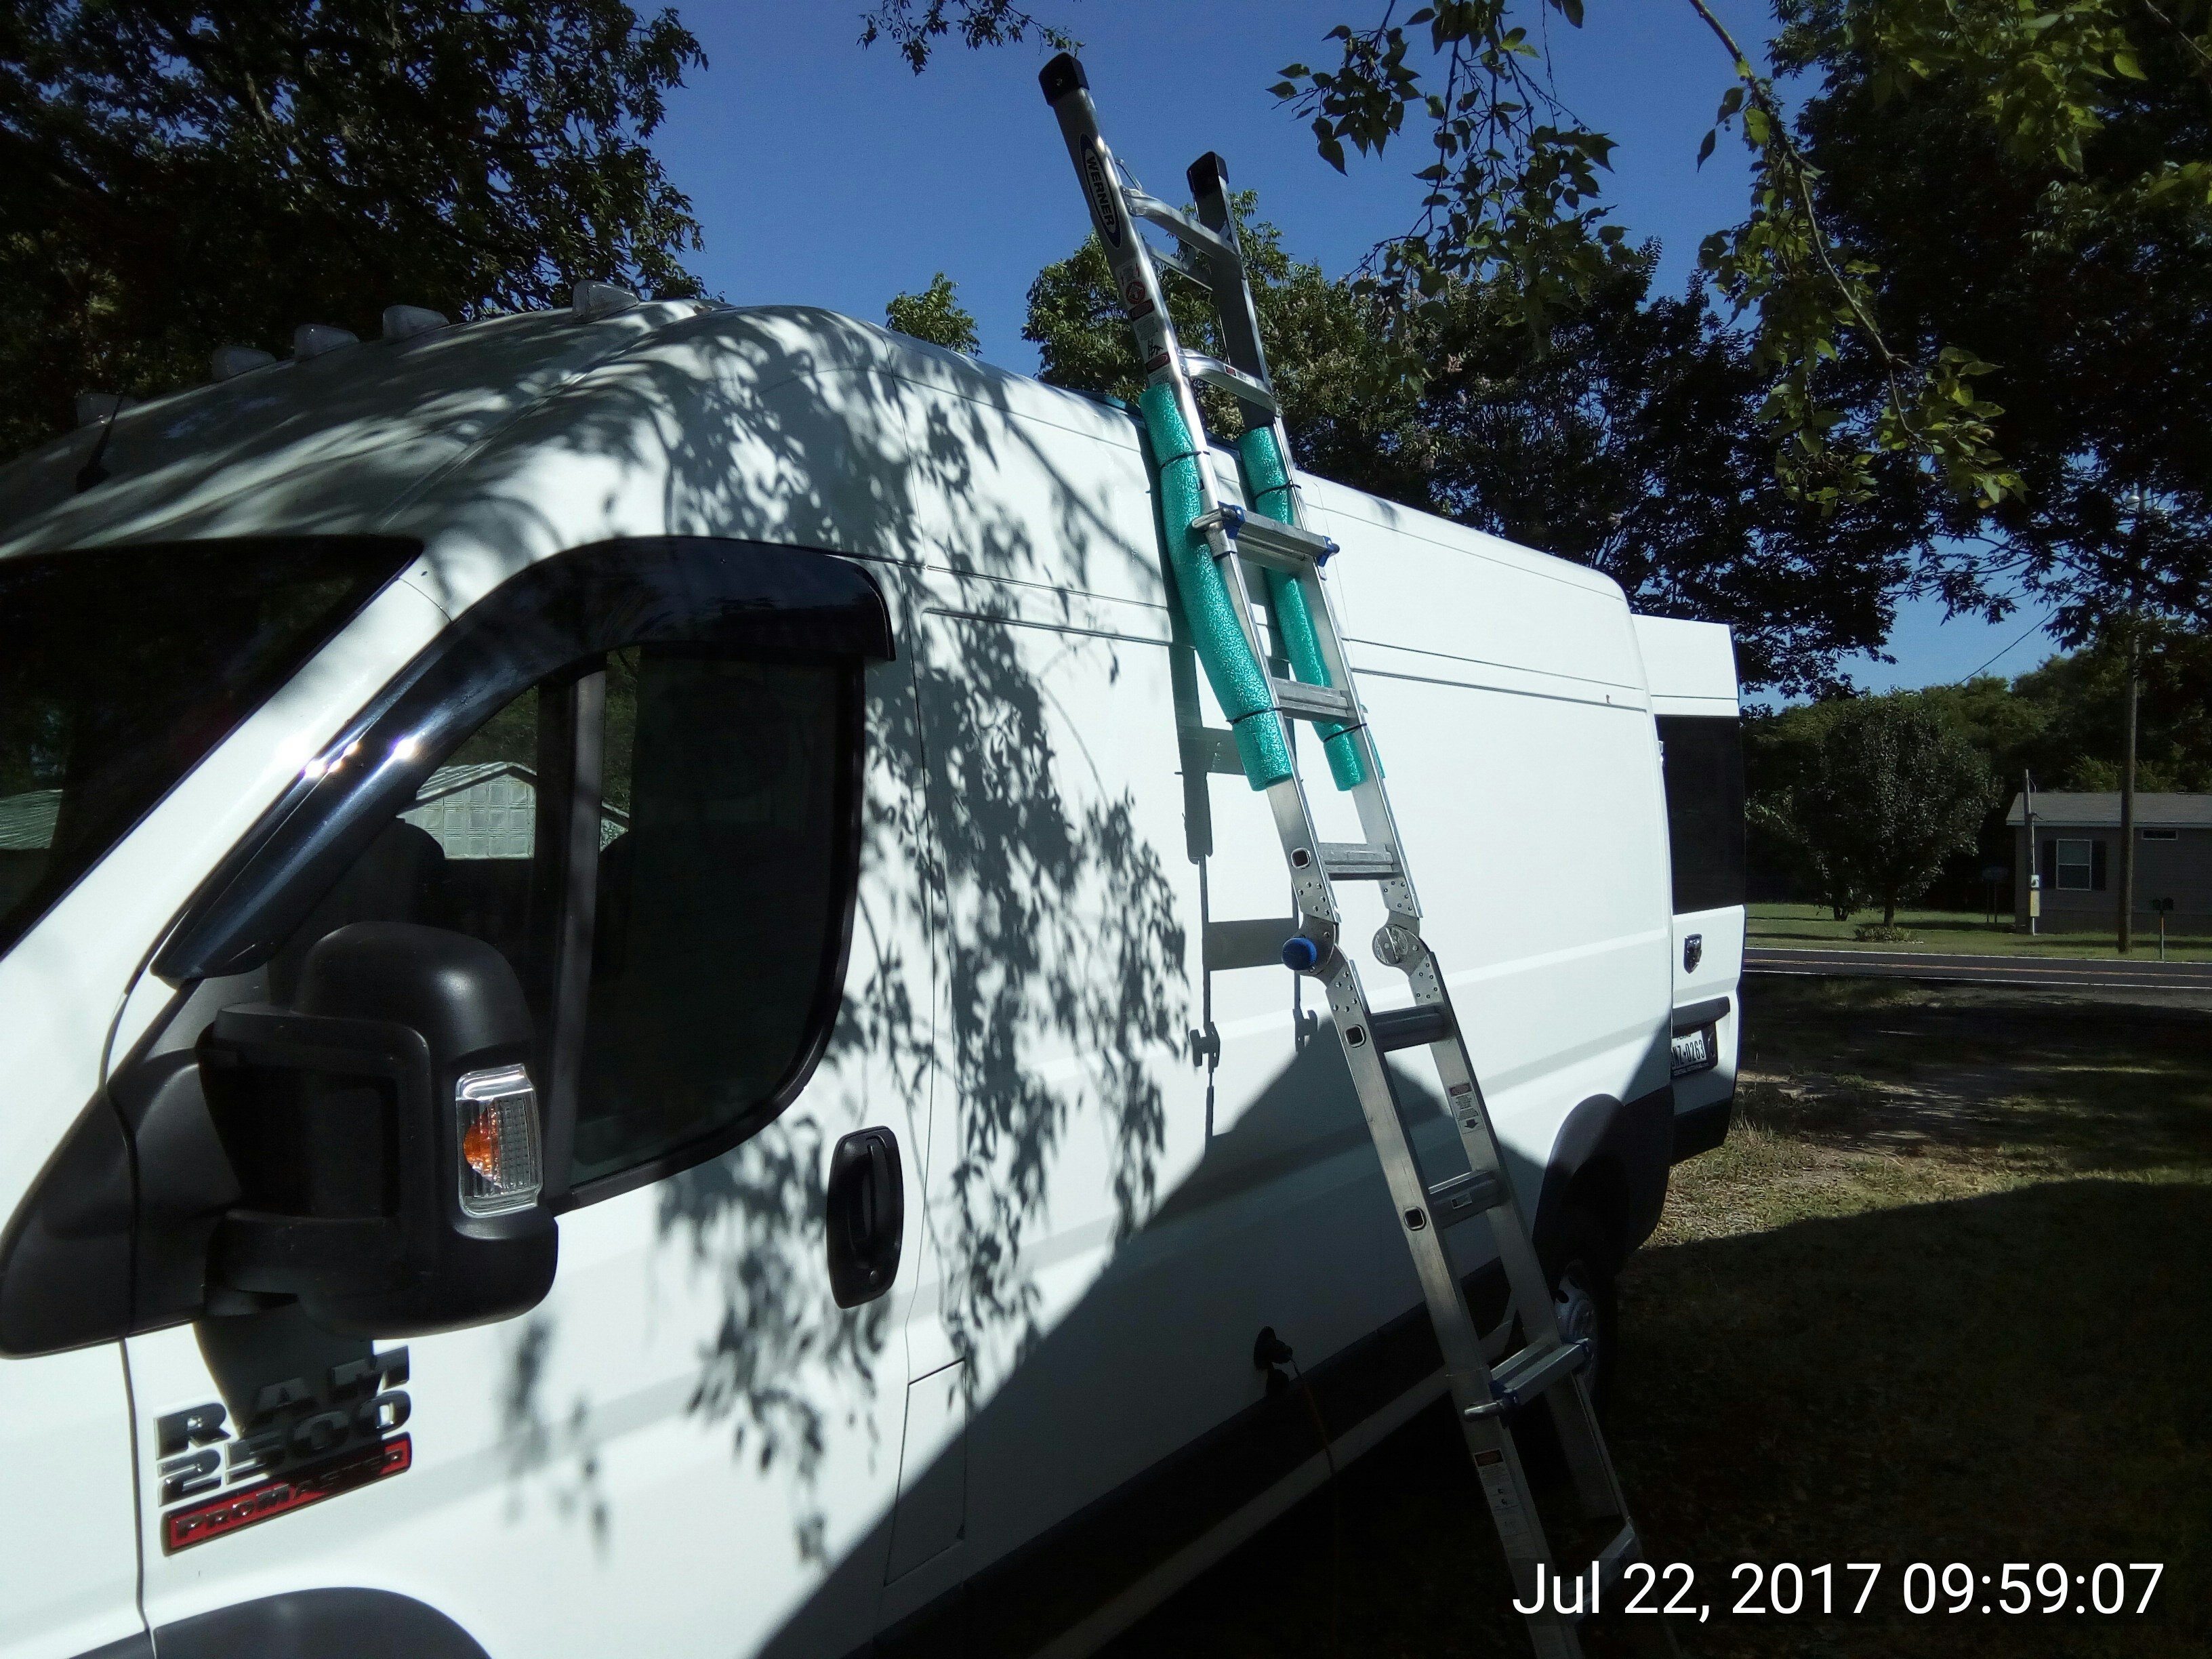
Pool noodles in place and my courage cranked up to the maximum, I head up top:


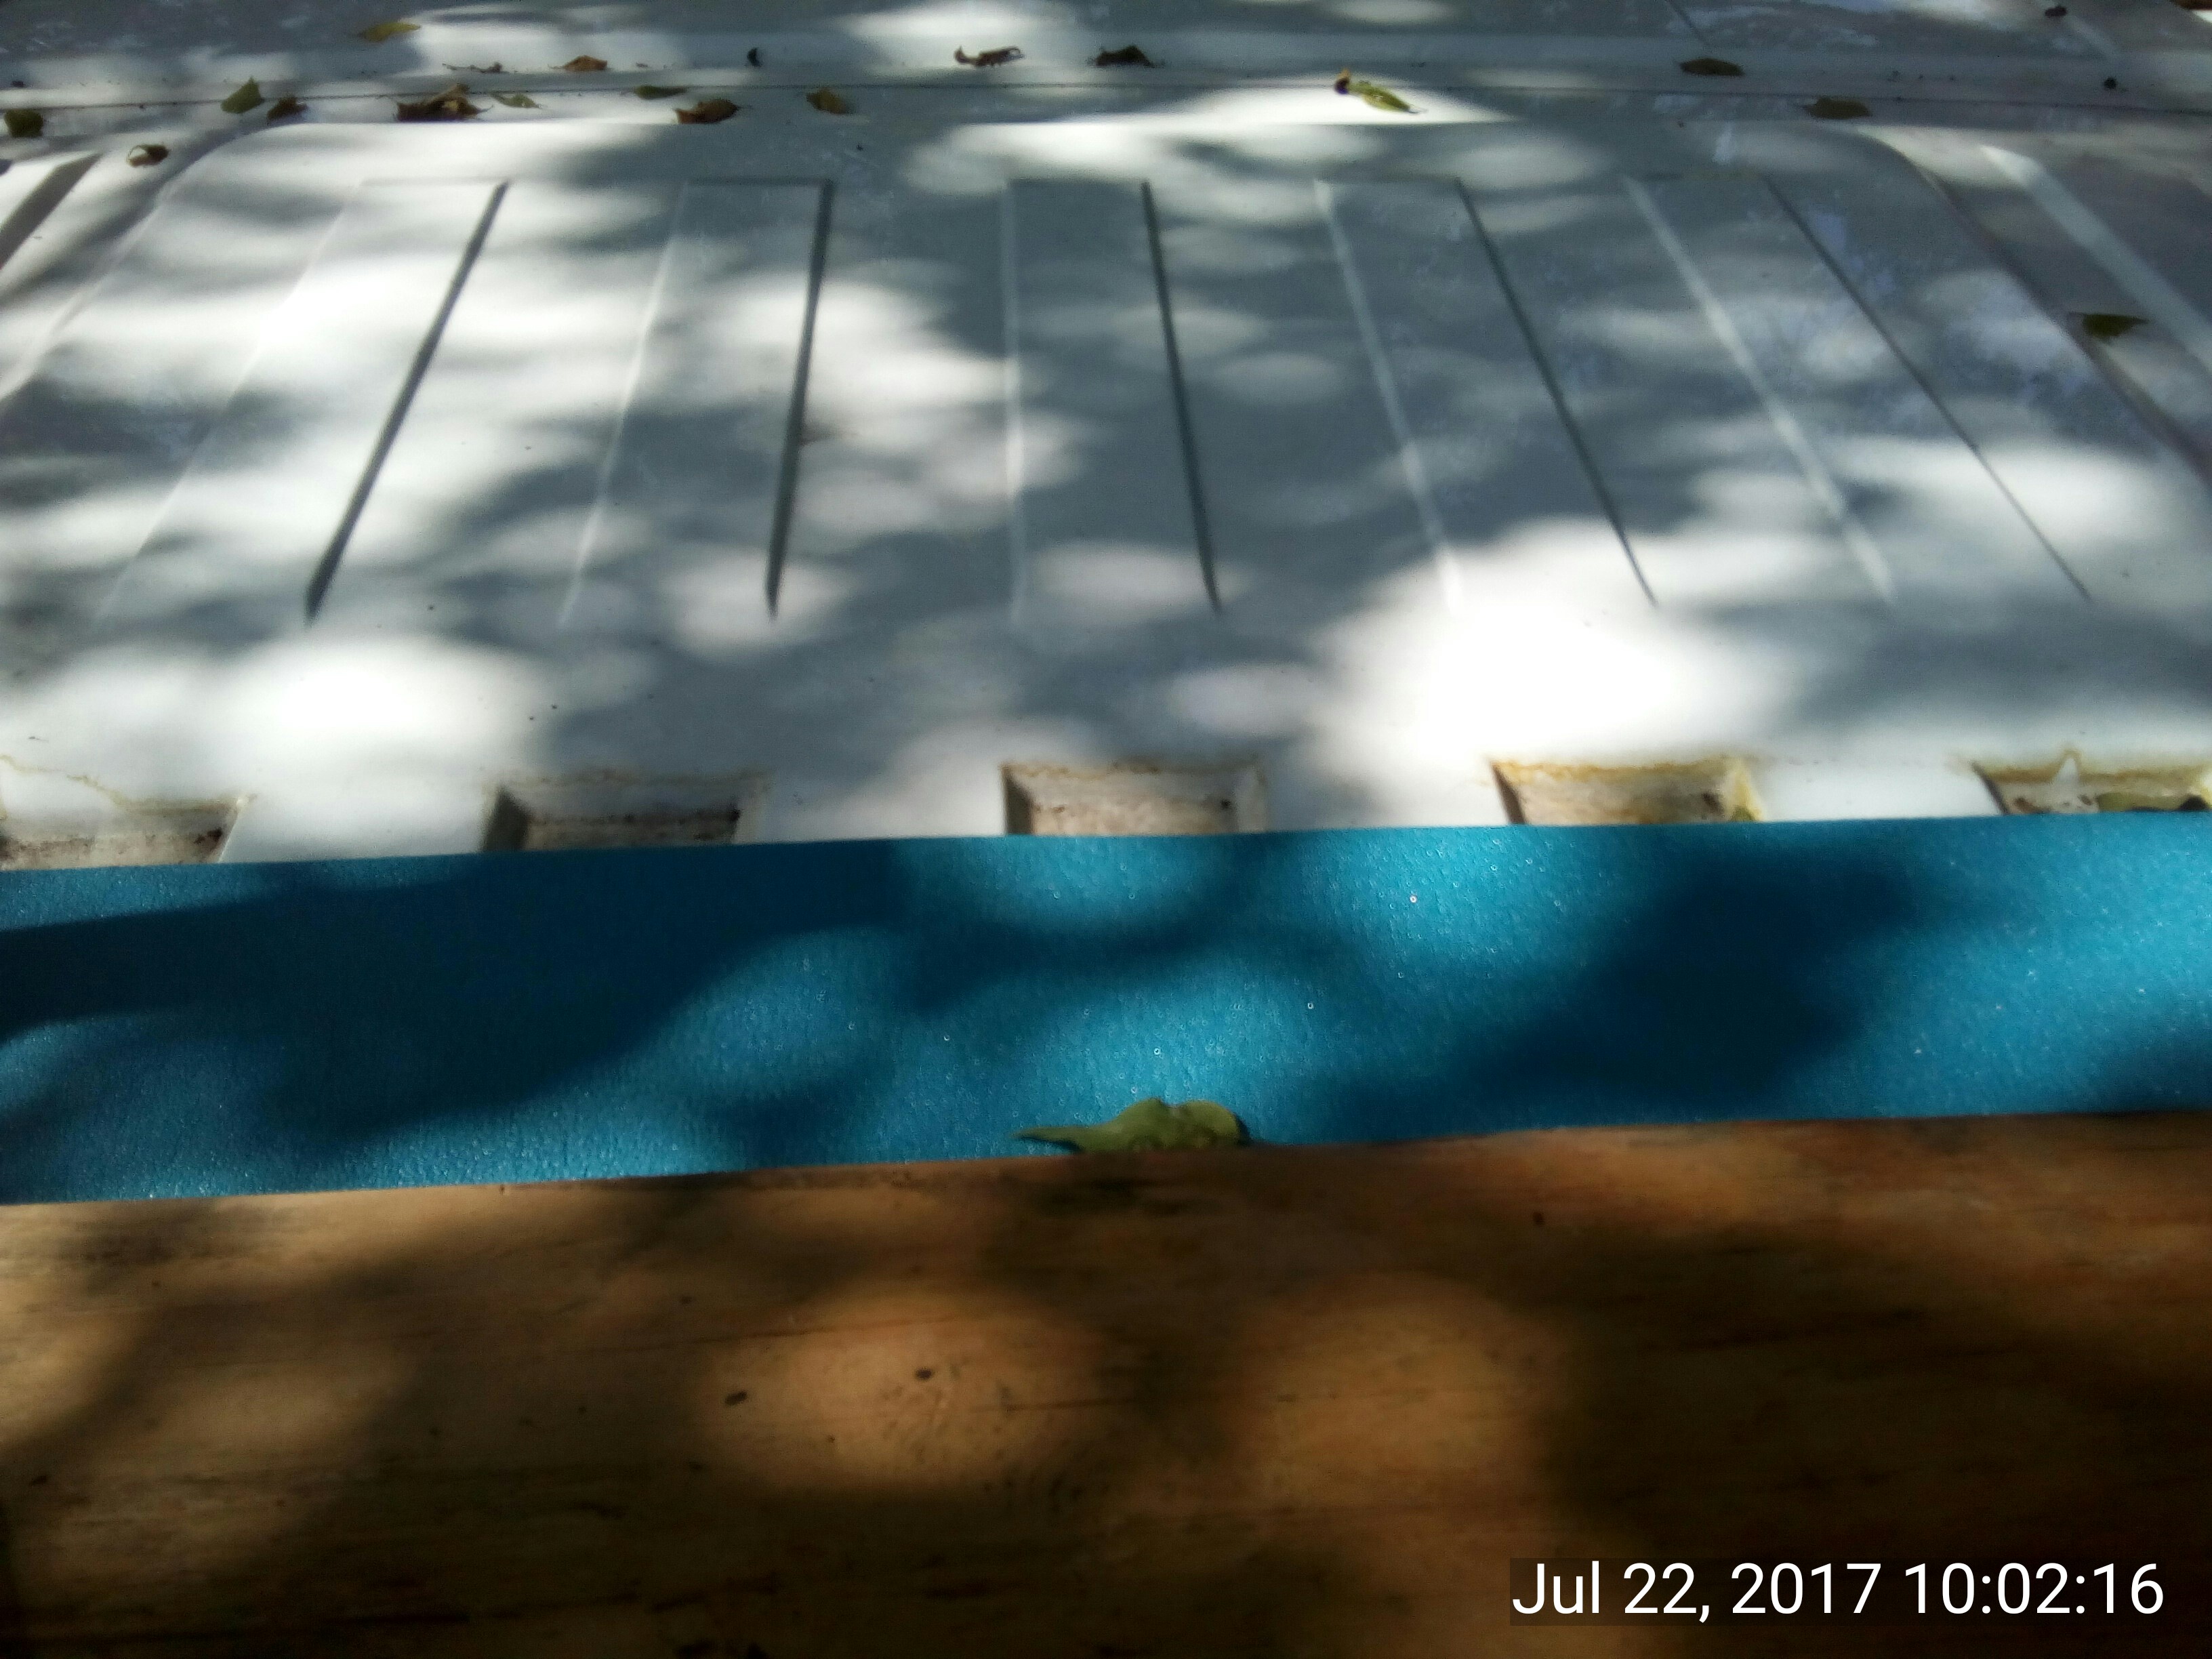
I threw a couple blue camping mats on top then a piece of plywood on that, hoping to spread the weight safely across the roof.  It worked:


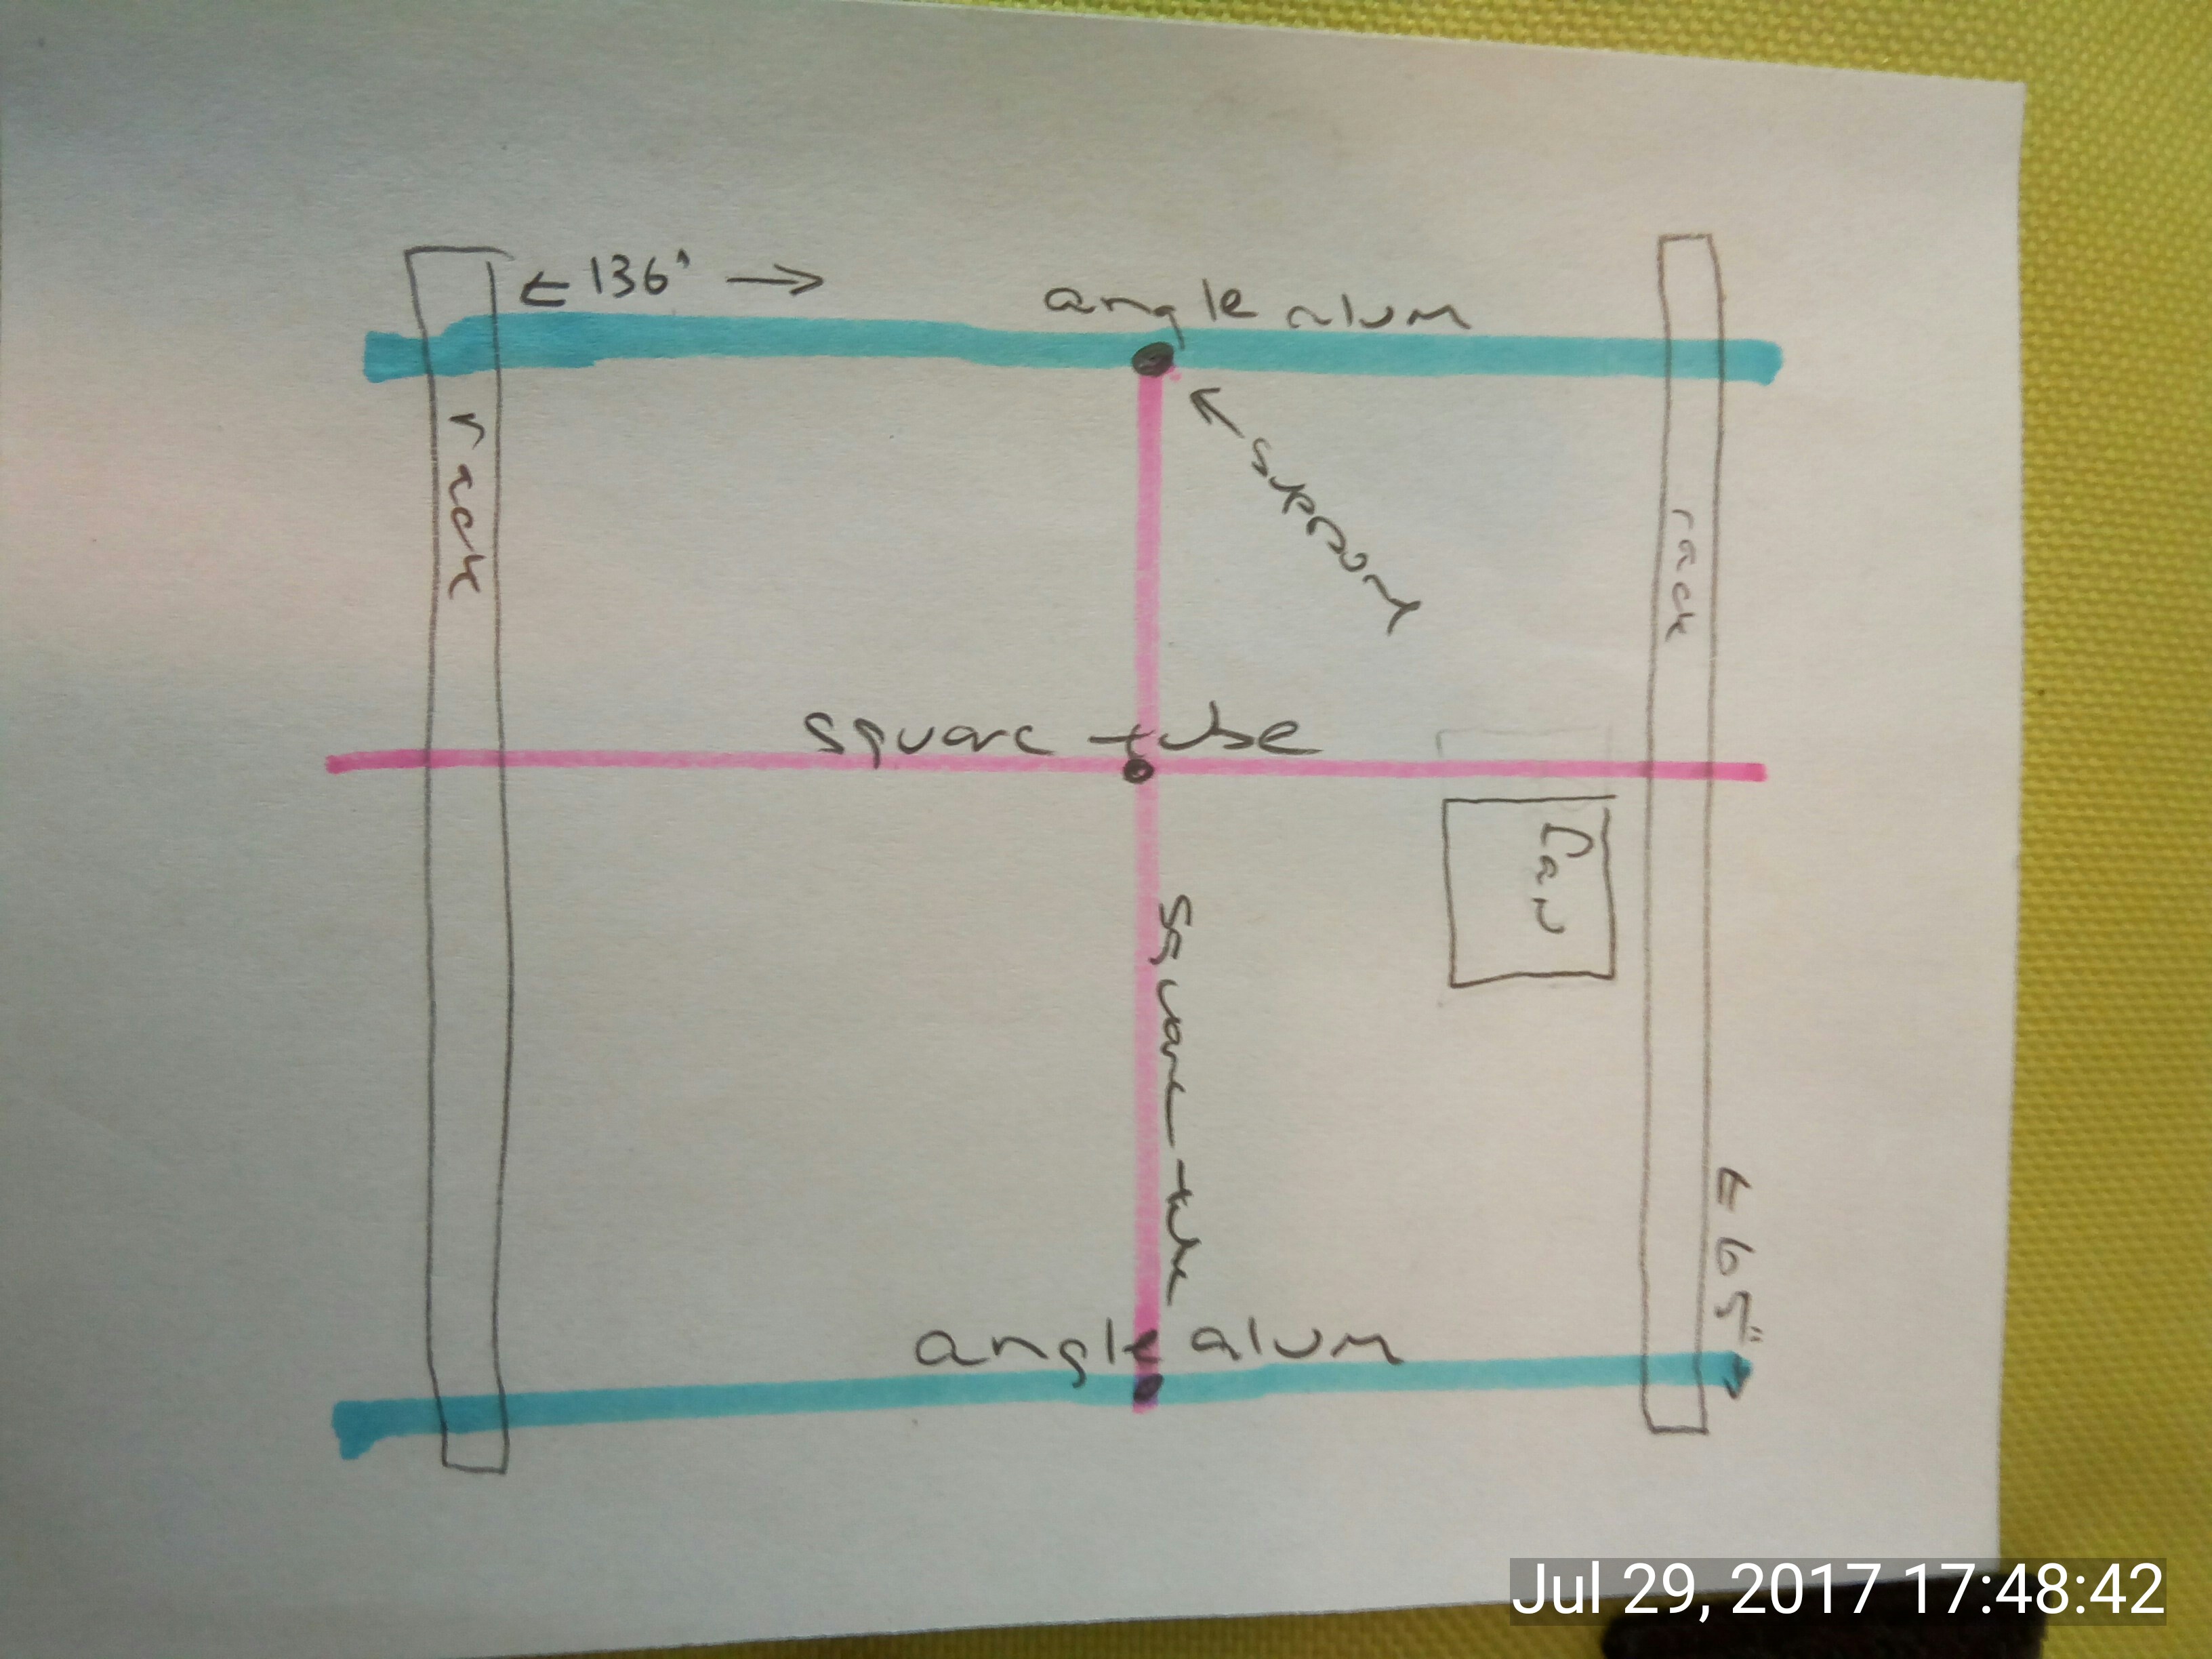
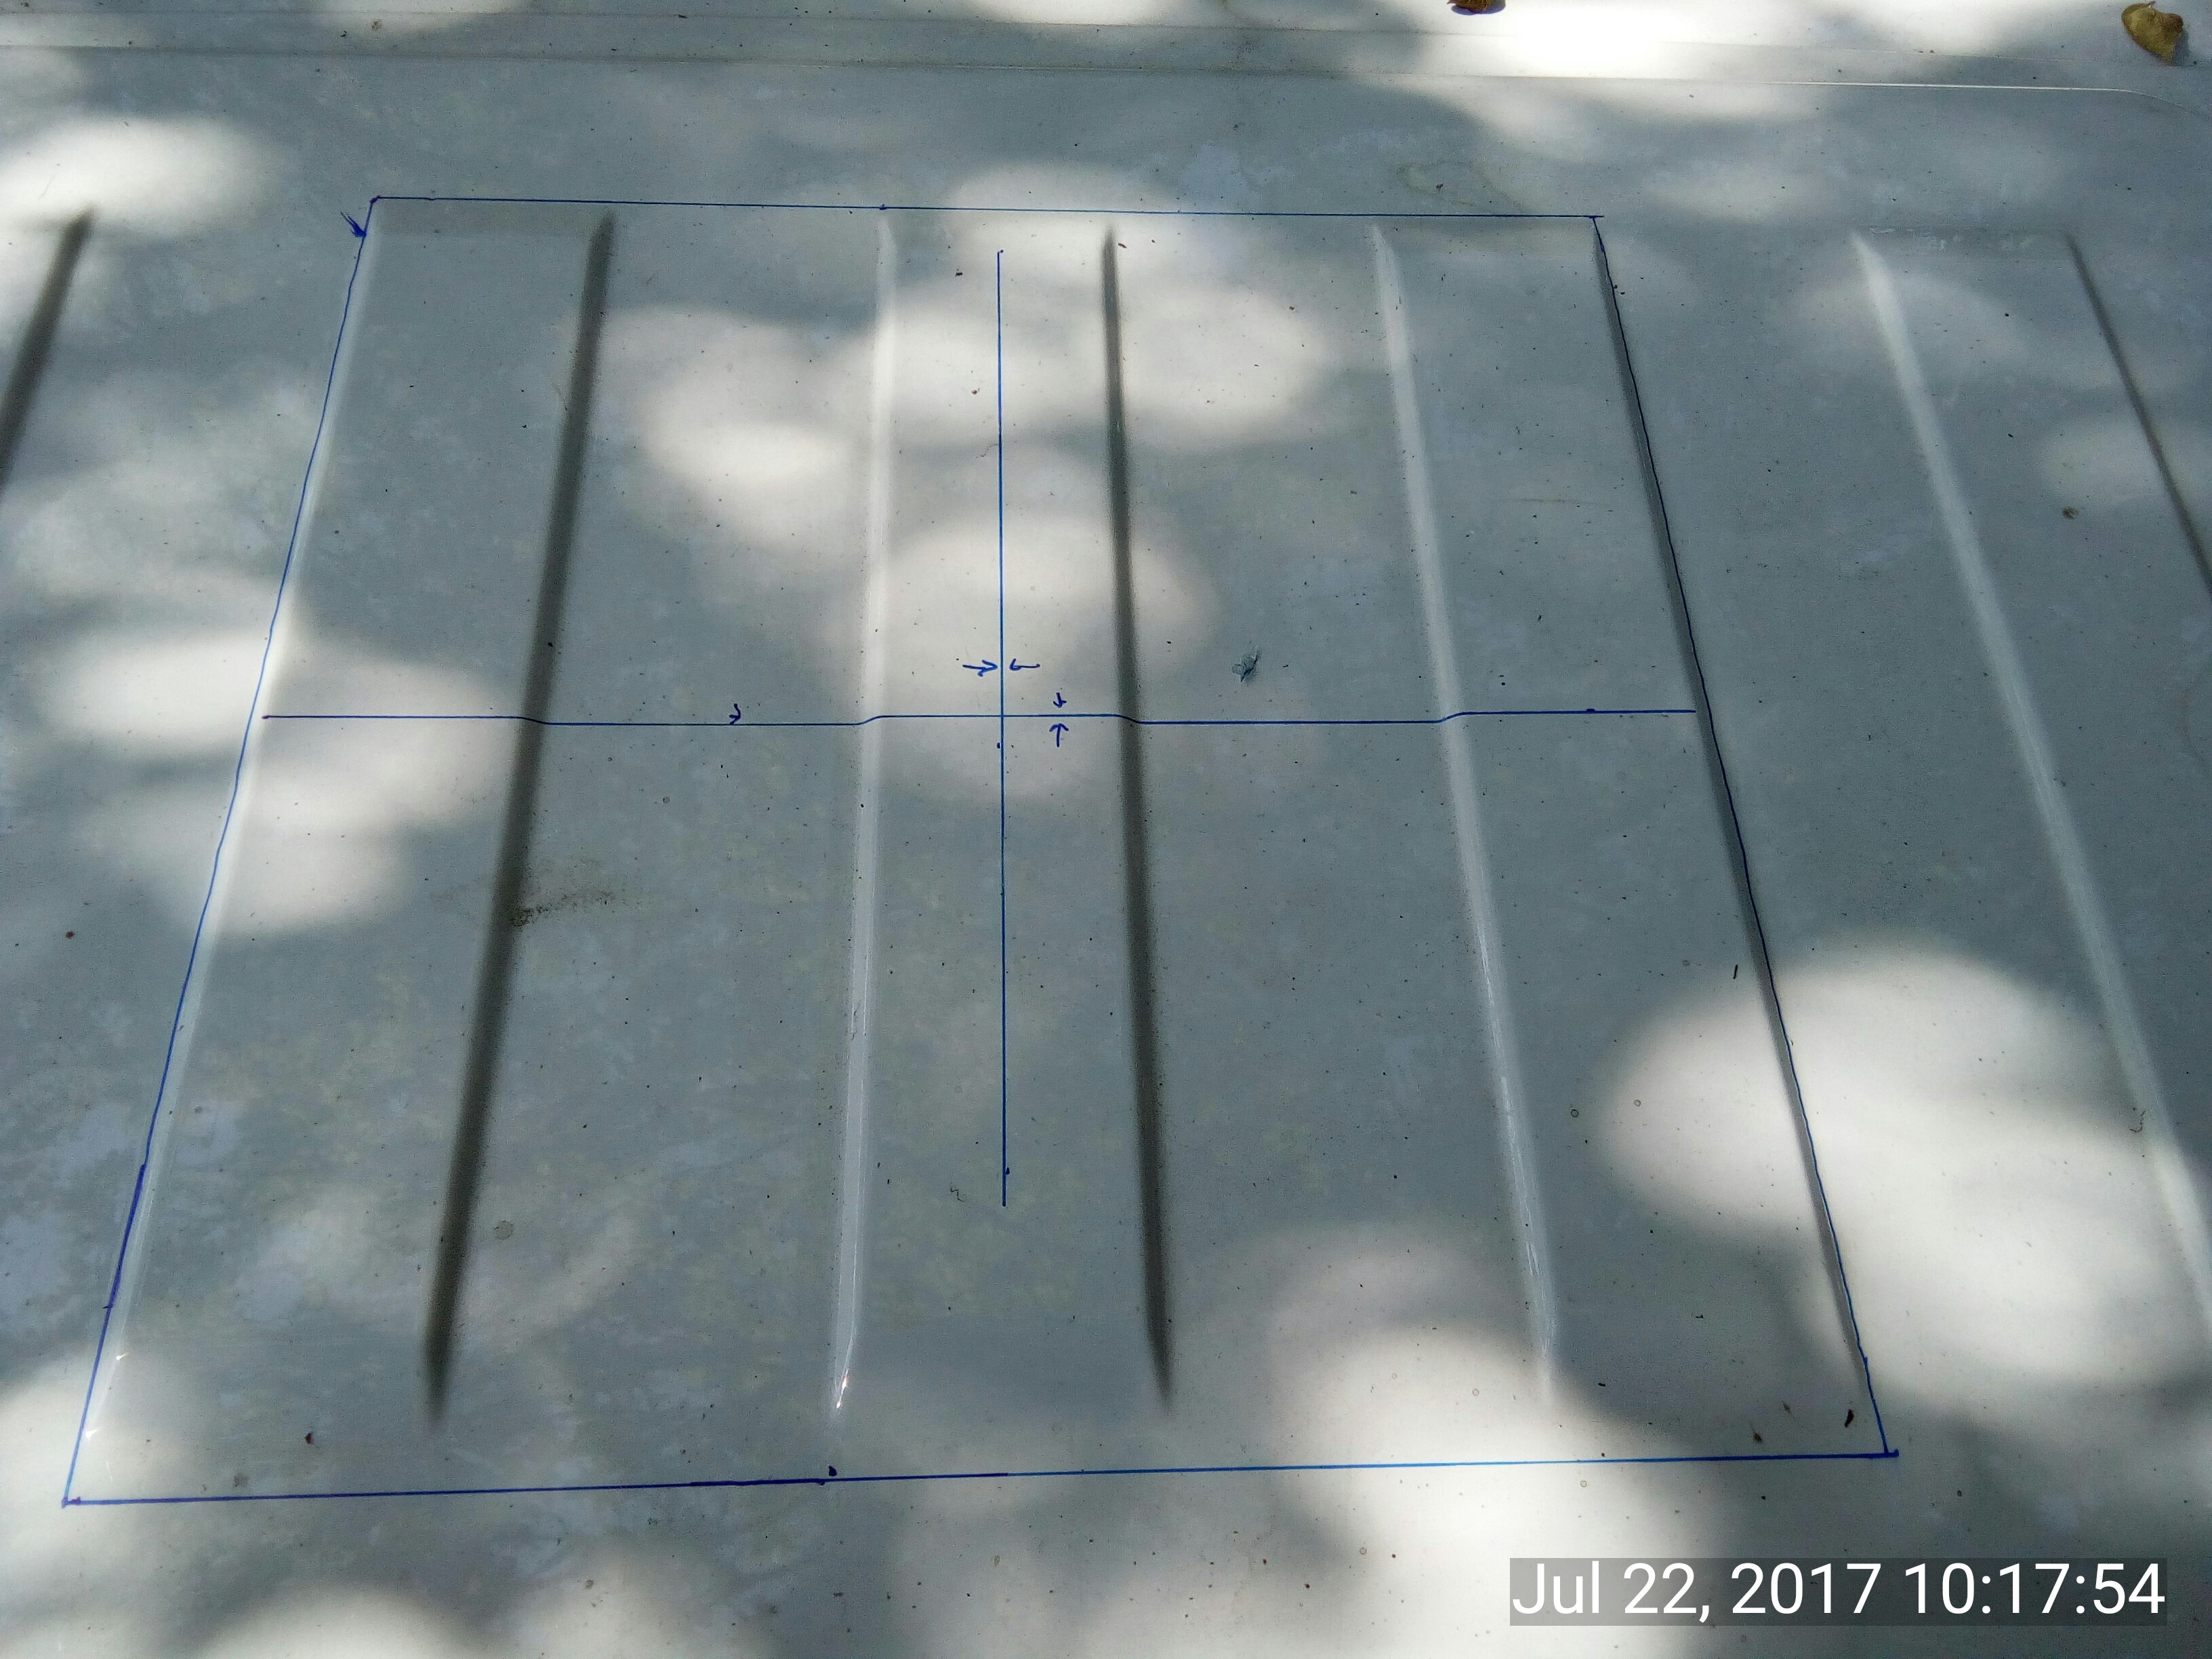
Then I did the geometry on the roof and sacrificed a chicken to the jigsaw gods:


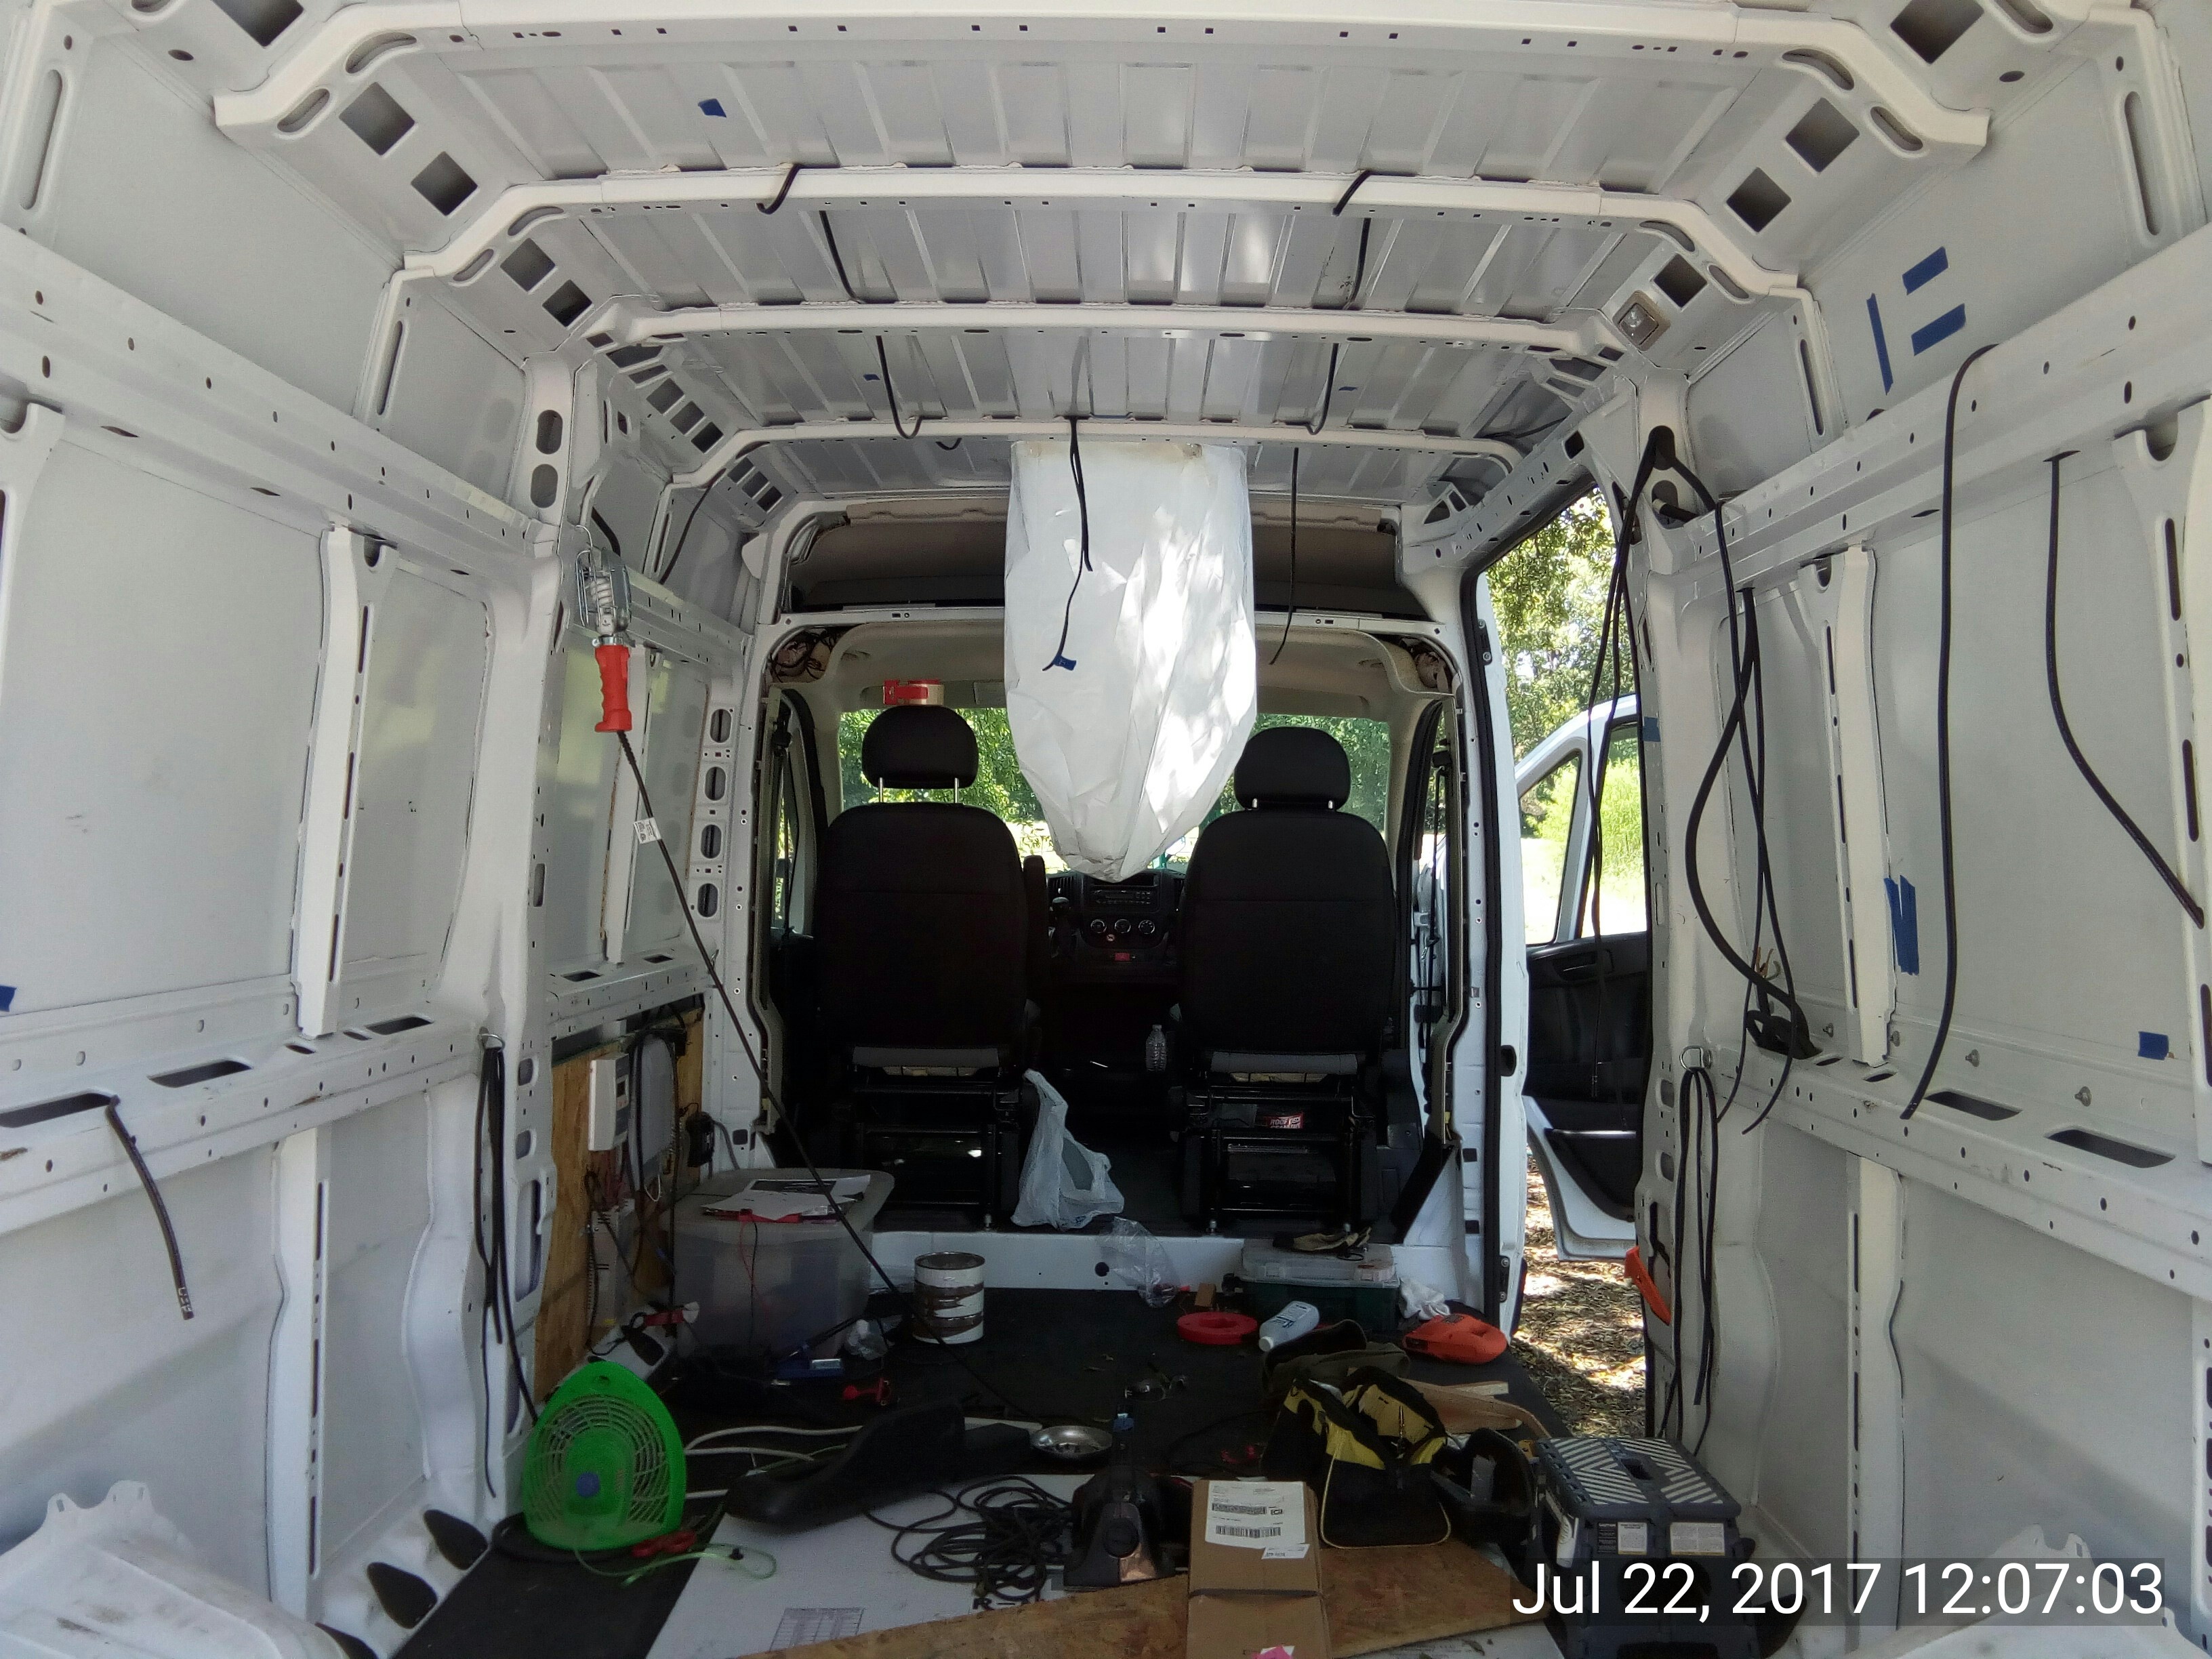
The actual cutting went well.  The jigsaw started to shudder a bit toward the end so I changed the blade out.  Debris fell into the bag taped underside, a fantastic tip I learned here.

[size=medium] [/size]
[size=medium][size=medium] [/size][/size]

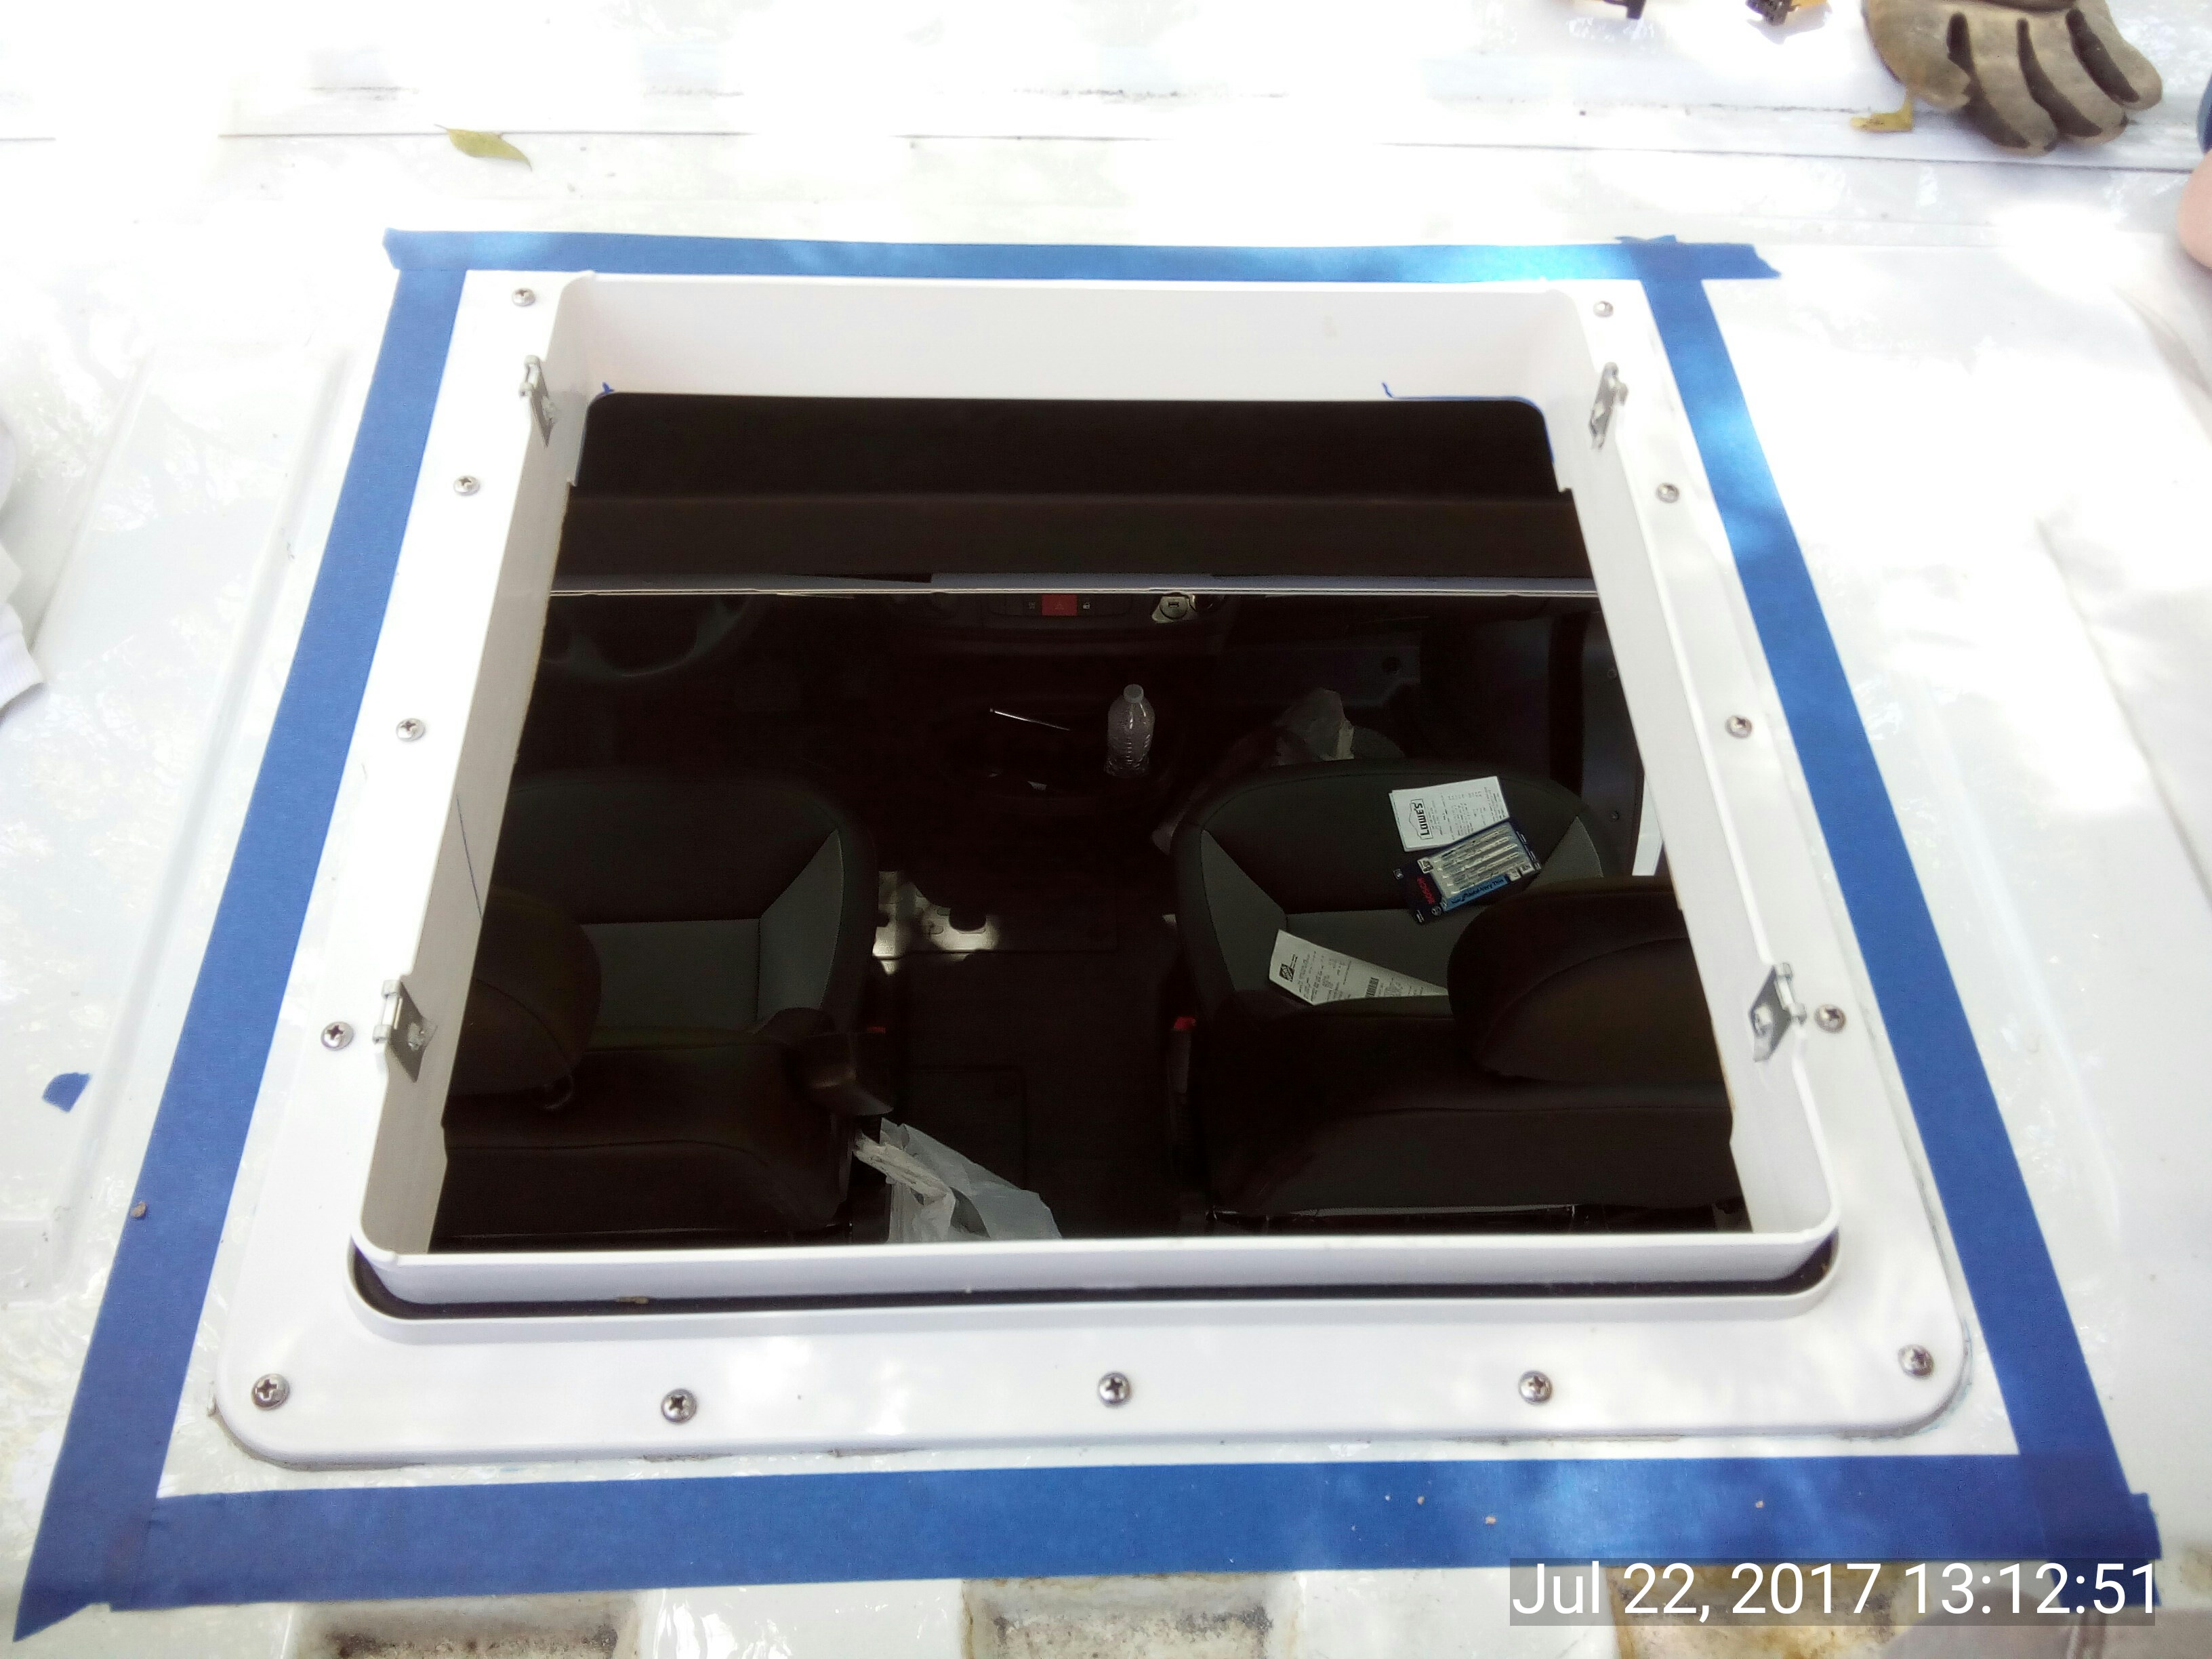
[size=medium][size=medium]Sanded, cleaned, and primed the cut edges.  Applied butyl tape to the underside of the Maxxfan insert and screwed it down through the roof and into the repurposed sink frame.  Taped around the periphery to try to tame the flow of Dicor lap sealant.  Application of the Dicor to the screws and edge happened right after this pic:[/size][/size]

[size=medium][size=medium][size=medium] [/size][/size][/size]
[size=medium] [/size]

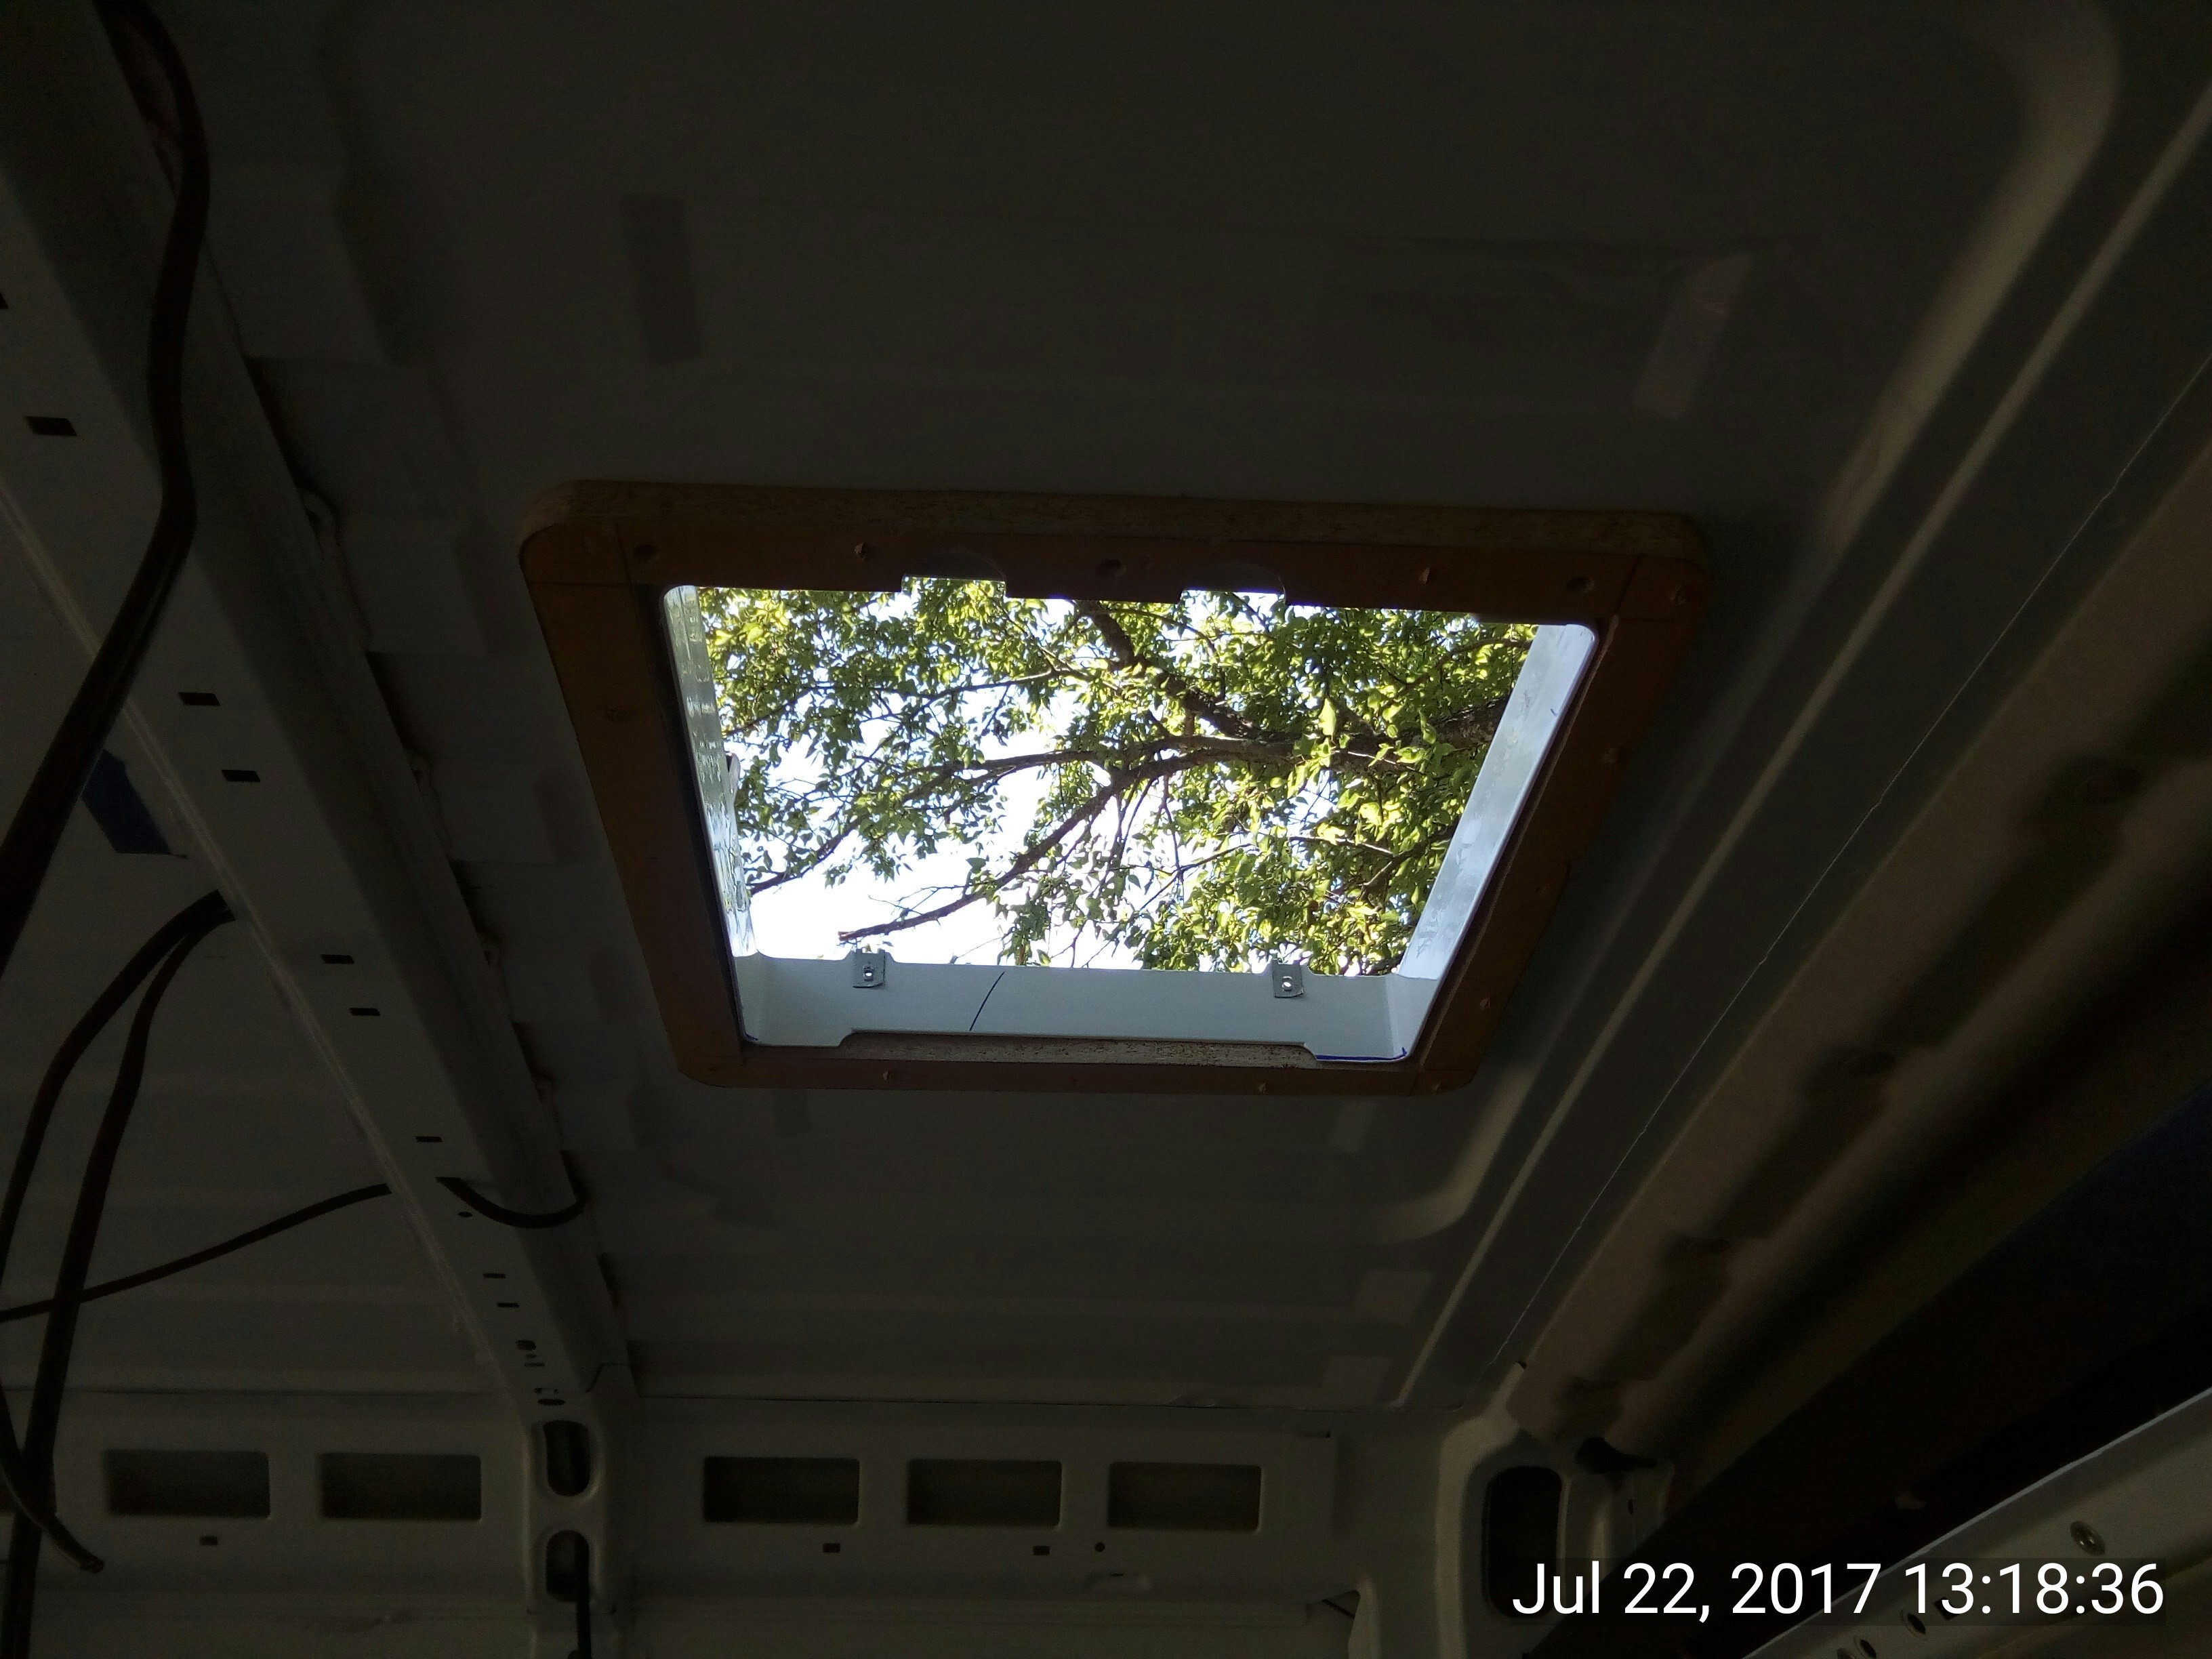
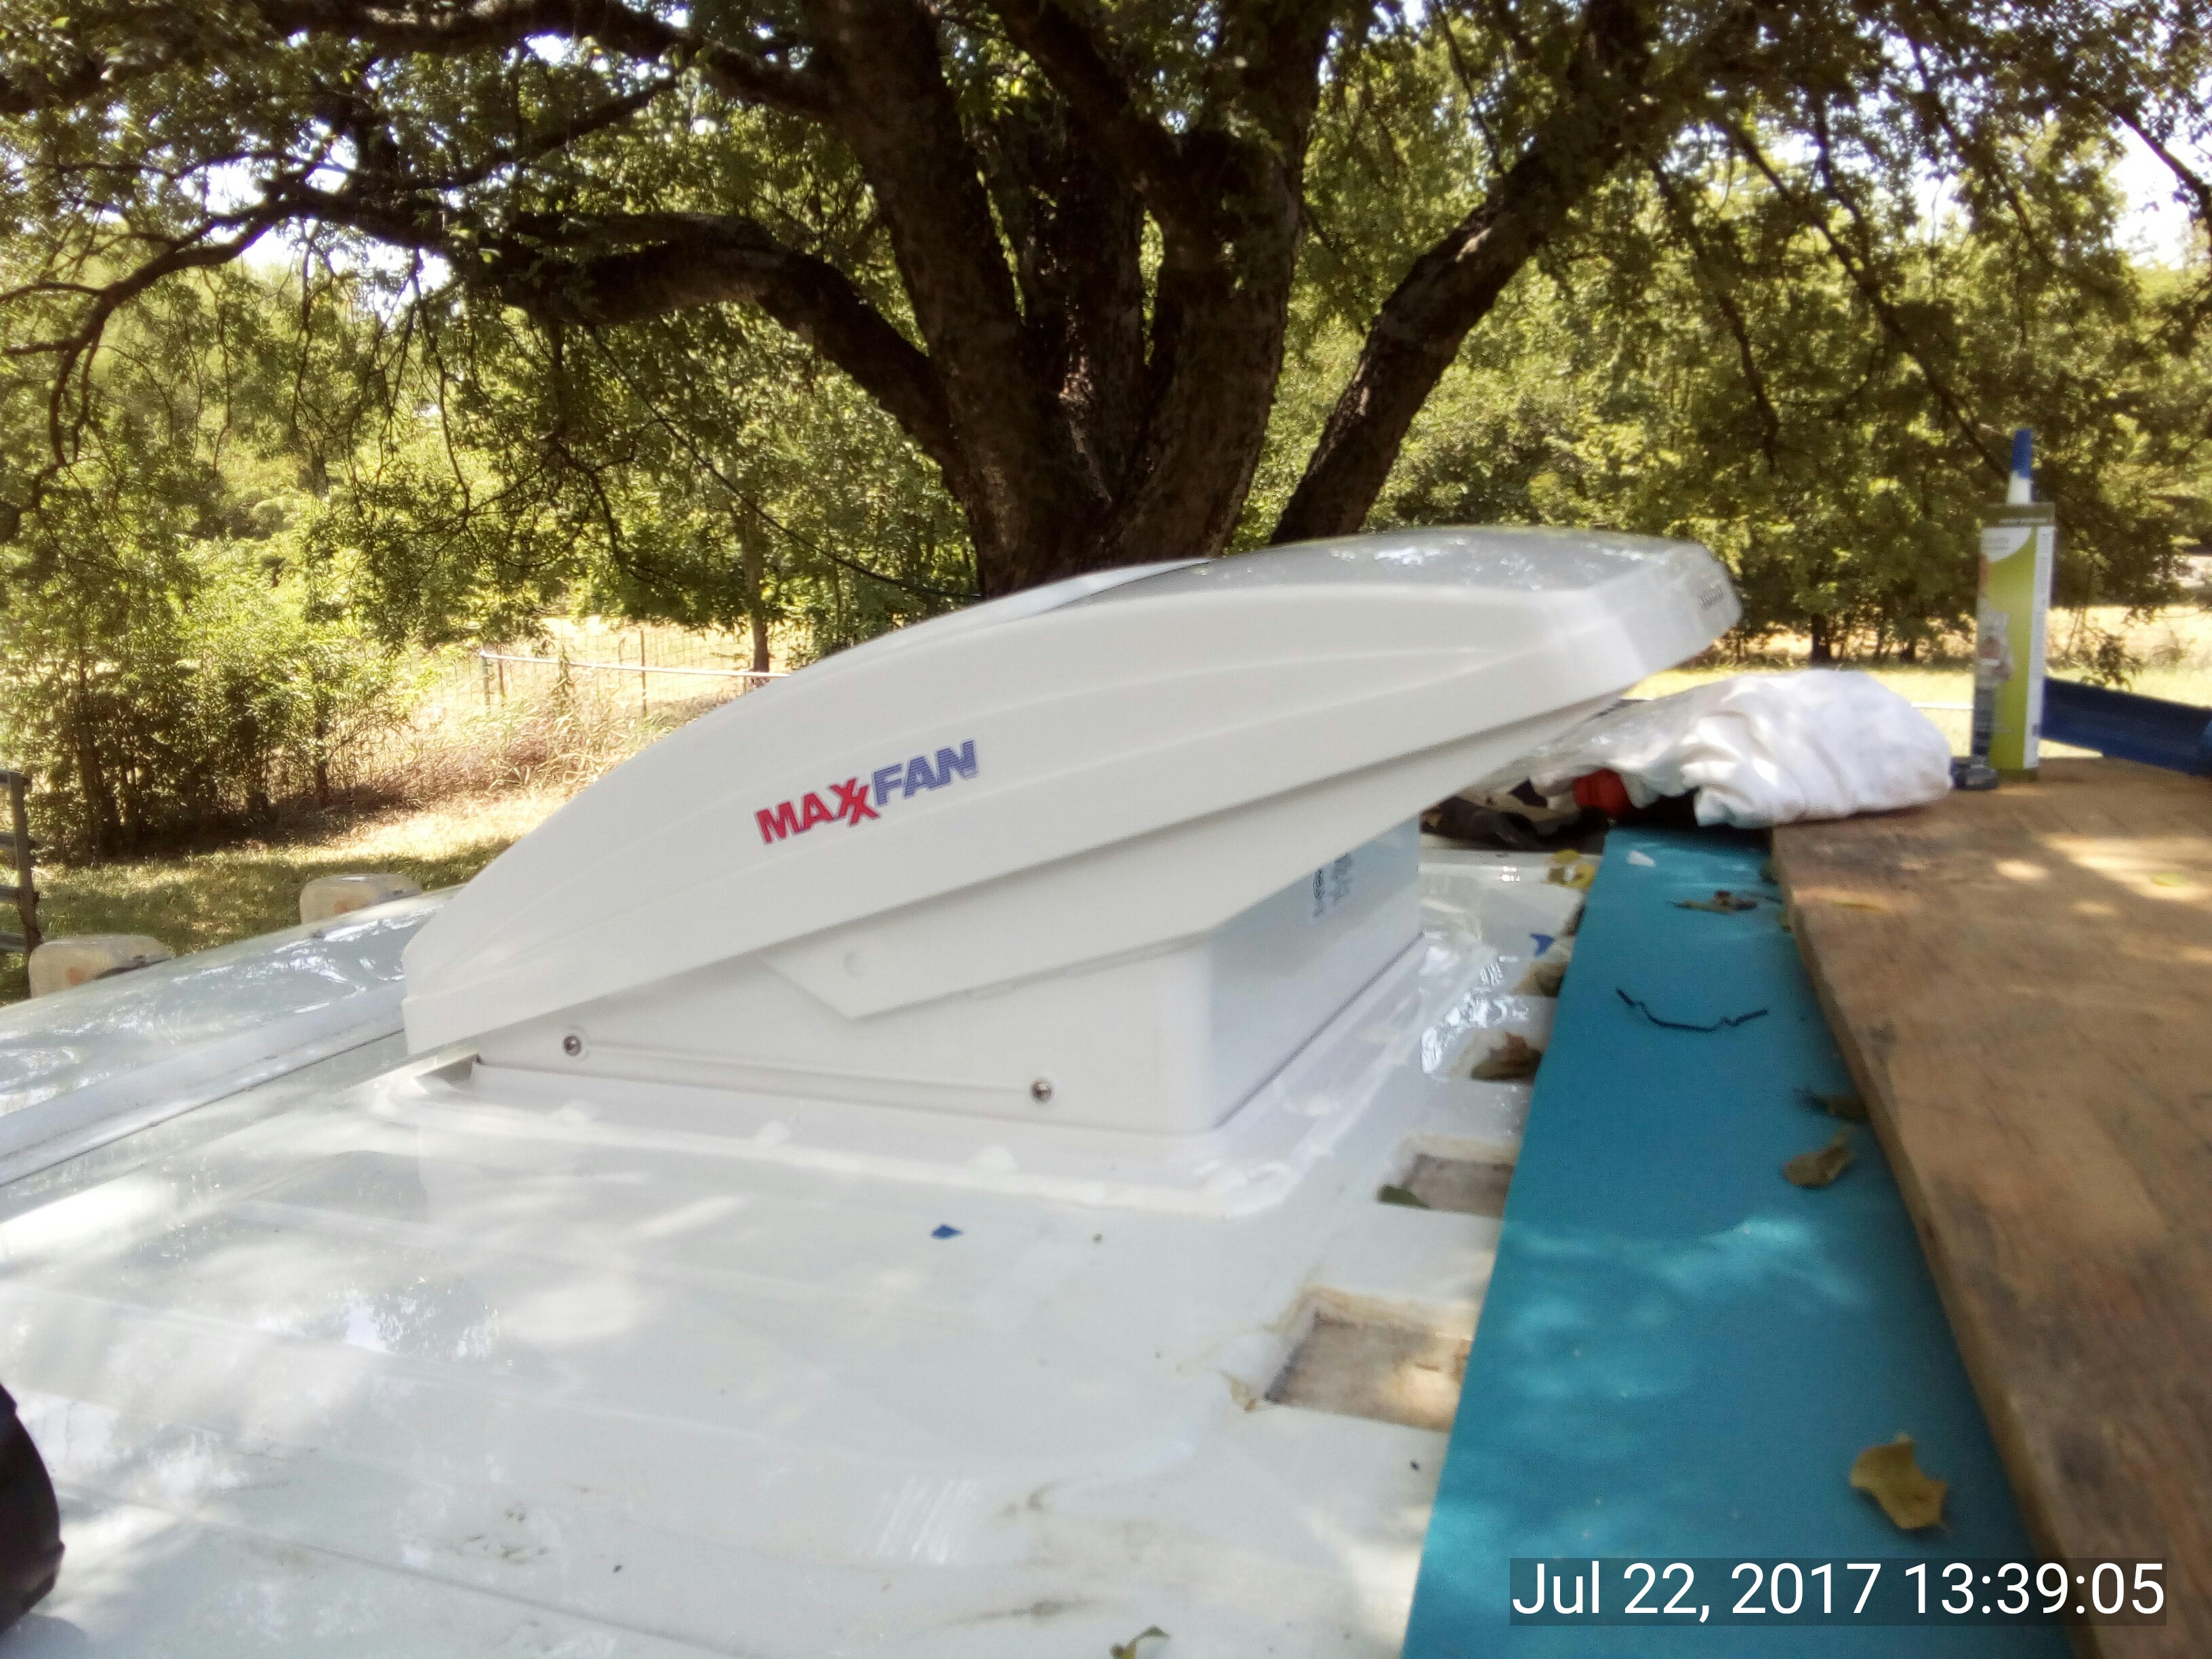
[size=medium]Ta-dahhh!!![/size]

[size=medium][size=medium] [/size][/size]
[size=medium][size=medium][size=medium] [/size][/size][/size]

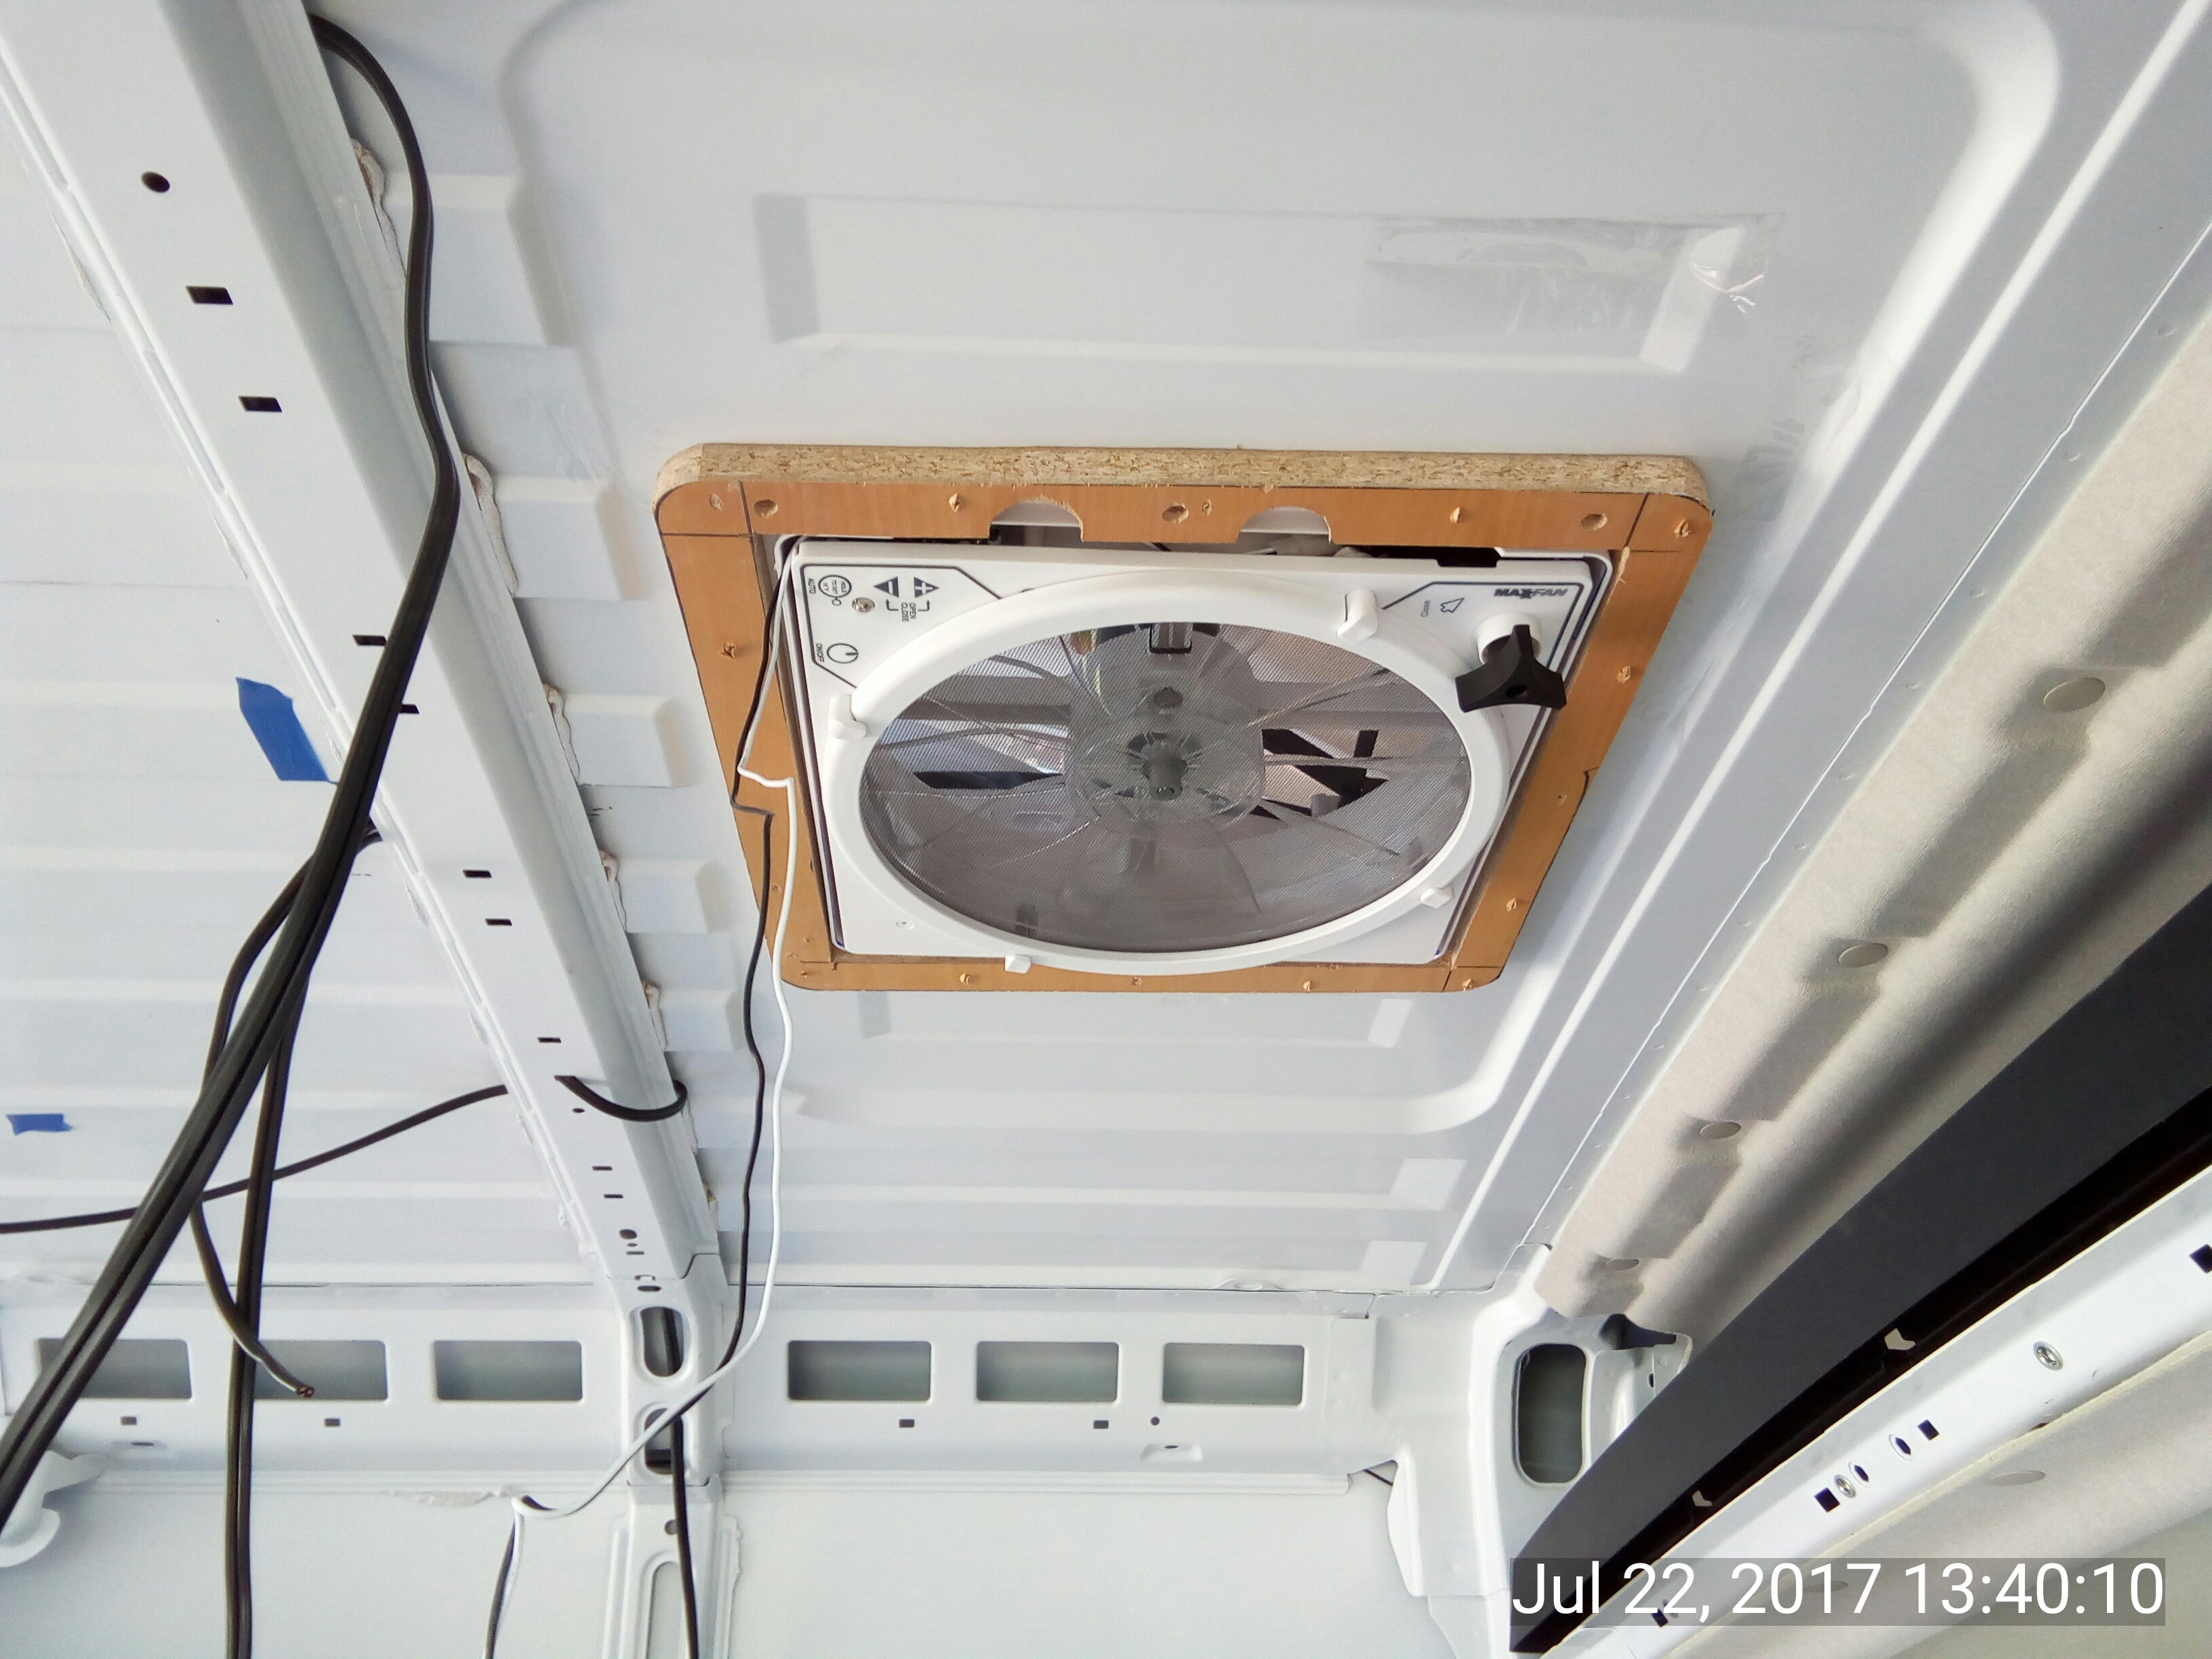
[size=medium][size=medium][size=medium]Won't install the trim ring until the ceiling is finished.[/size][/size][/size]

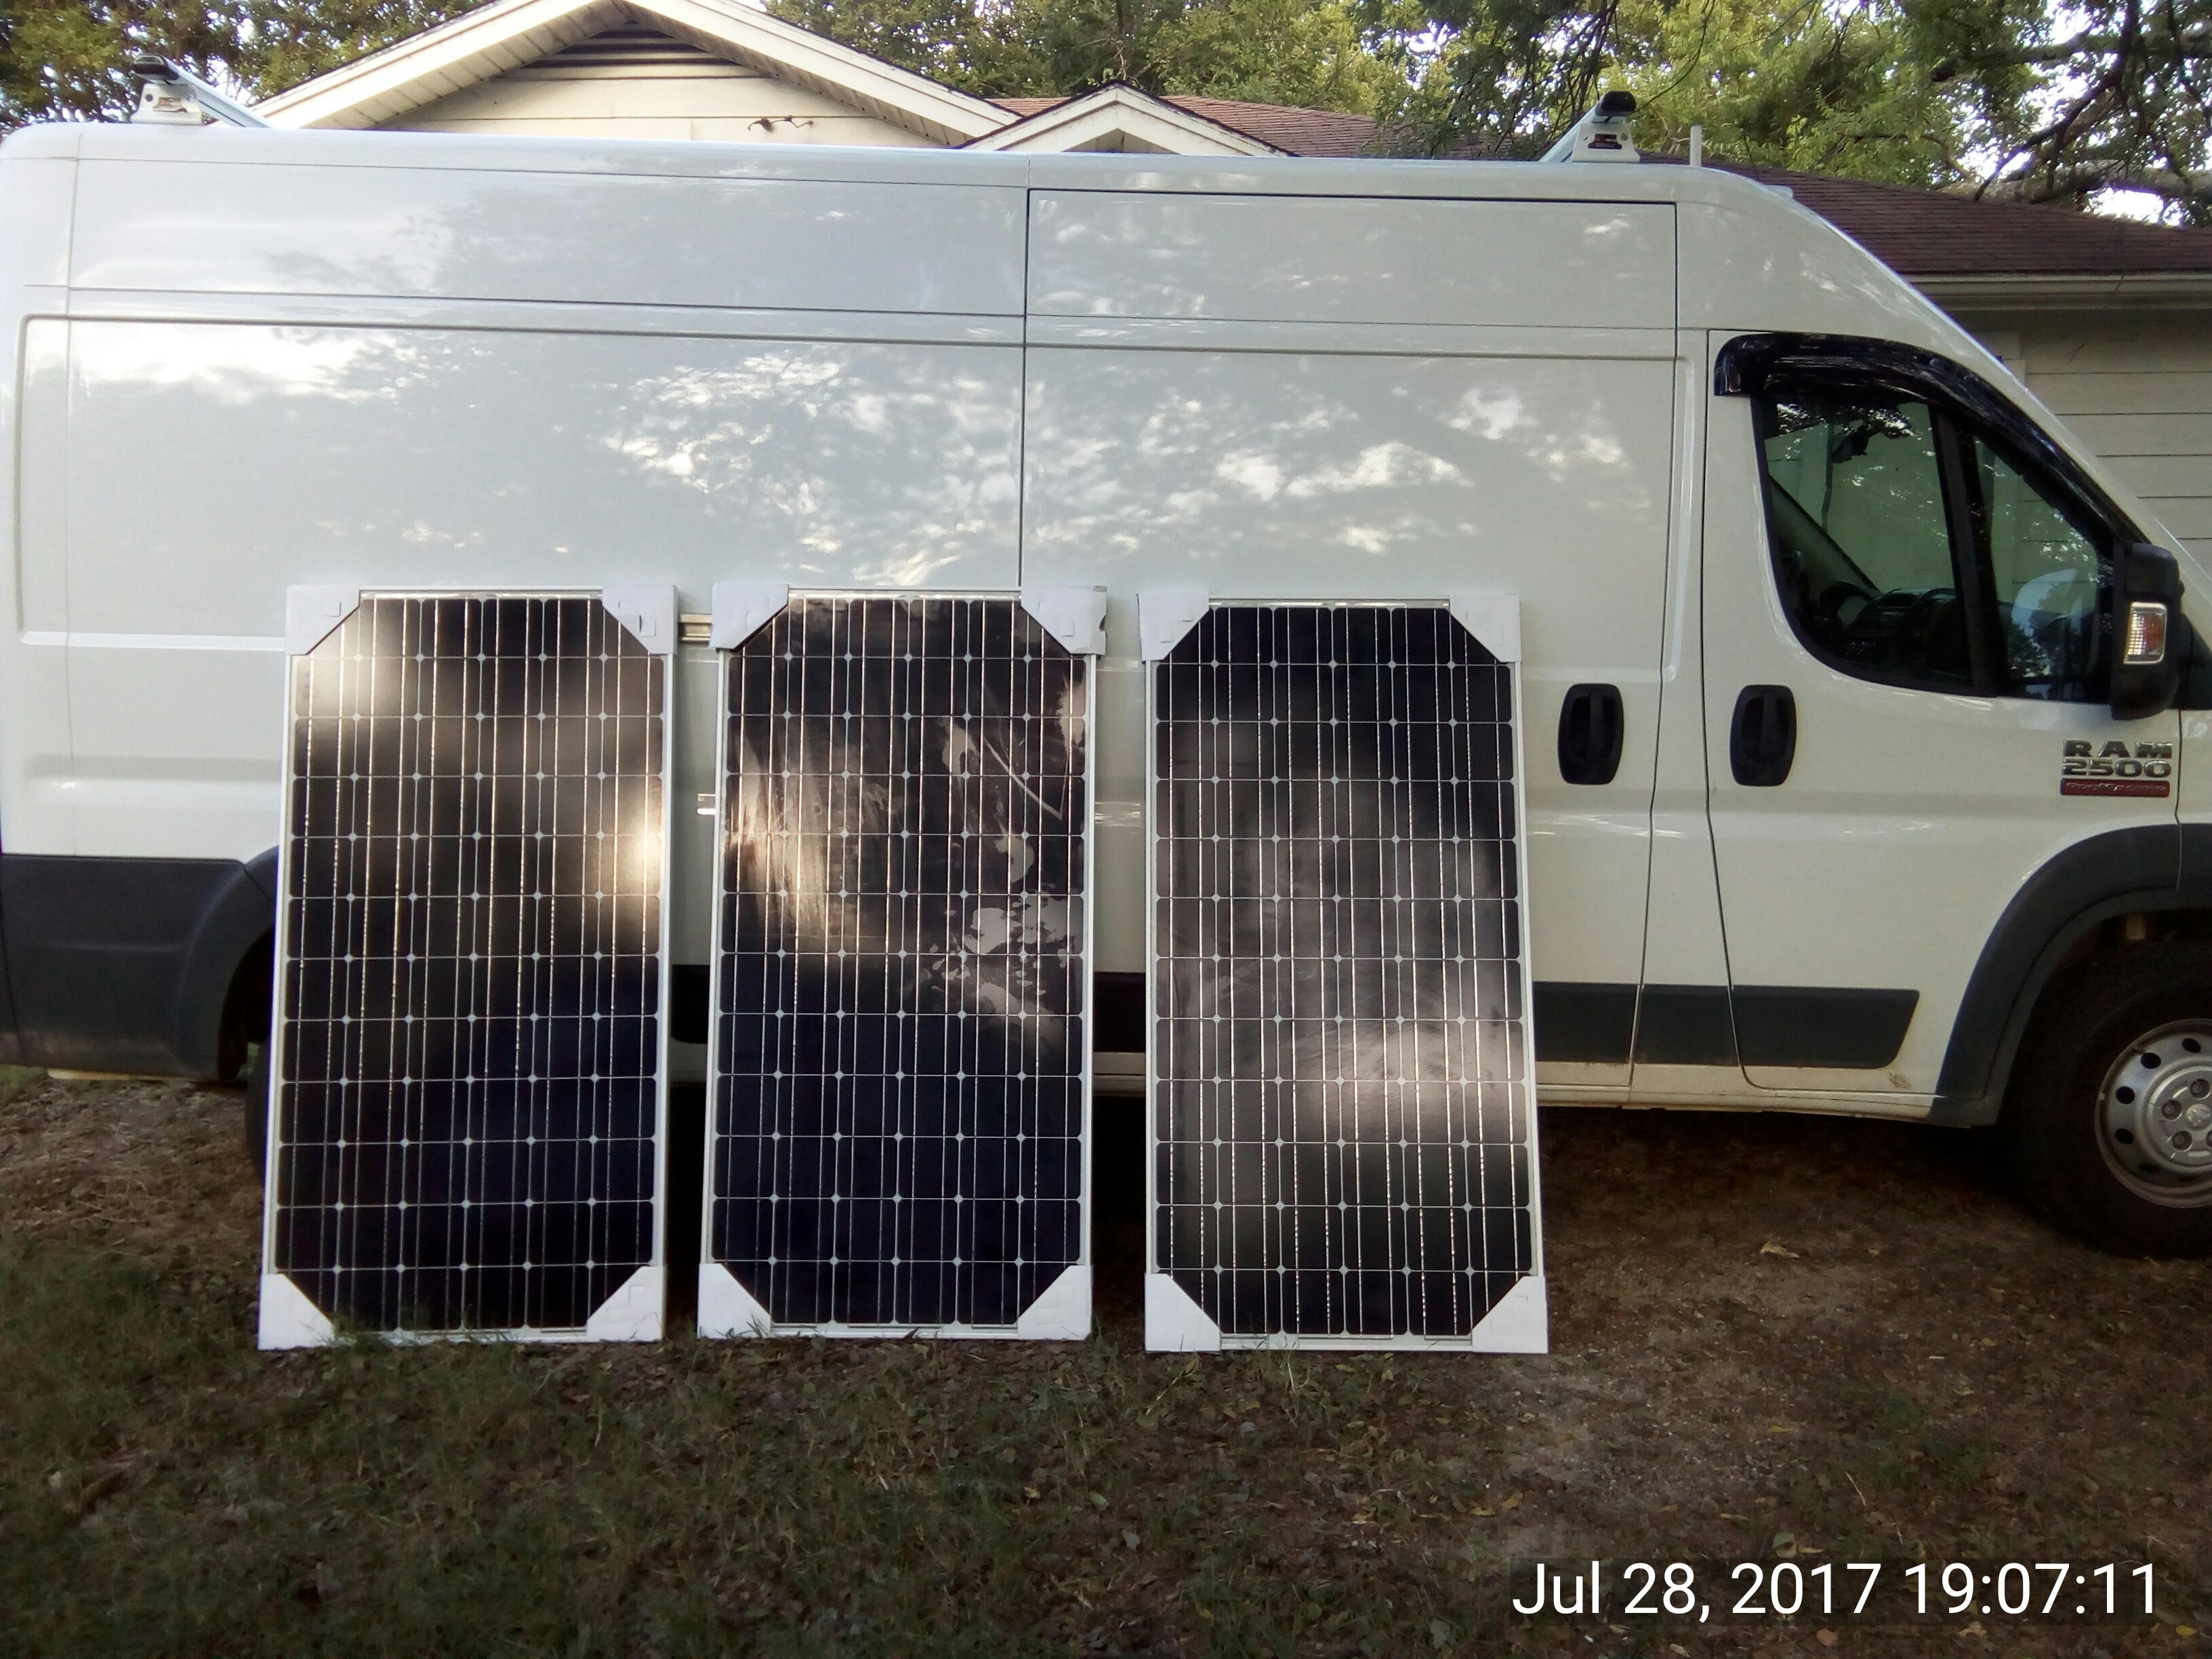
[size=medium][size=medium][size=medium]While I was up there I installed a vantech h3 2-bar rack at the extreme ends.  Just clears the fan at the front.  Starting out in this position to test my ideas on DIY awning and solar mounting.  The panels will be flush with teh level of the rack bars, not on top.  I might even just use the bar mounts and not the bars since nothing will be on top of them. [/size][/size][/size]

[size=medium][size=medium][size=medium][size=medium] [/size][/size][/size][/size]
 
[size=medium][size=medium][size=medium]Off to a well-deserved shower.  Was outdoors all day in 100F heat and not a hint of a breeze.  [/size][/size][/size]
 
House and opportunity power is now live to the passenger side of the vehicle, and distribution points in place.  

Took a while to figure out how the delay timer works and set it up to start power when we think Absorption has had a chance to start shedding current.

Data points:  
  • Right now I am not deep cycling the batteries so I am running a 13.2v Vfloat.  When off grid I'll bump that up to 13.8v.
  • LOAD set to turn on 0.1v lower than Vfloat, which activates the timer
  • per manufacturer Vabs is 14.6v
  • per SternWake absorption duration is maxxed at 120mins :)  Yes, I have a waterer.  
  • charging is currently being handled by a 10A DIY converter <-- sized that way so I can run it and any 110vac loads over 15A shore power.
  • during testing I was consuming a little more than 4A with both the maxxfan and another fan running full blast, etc, leaving ~6A for charging.  Note:  I also have 80A of alternator charging installed, but no panels yet.  In normal scenarios the small converter won't be doing much.  RIght now It's all that runs charging when the van is sitting in the driveway.
  • During bulk mode it took less than 10 mins (not watched closely) from time time it hit Vfloat setpoint until it achieved Vabs.
  • During absorption mode it took 7 minutes for battery acceptance current to drop enough to free up 5A previously used for charging
Based on this info I set the delay timer to ~30mins.  So in this scenario:

12.1v - starting point, charging begins
13.1v - converter LOAD circuit turns on, activating the delay timer
14.6v - Vabs attained, charging current starts to drop.  Delay timer activates a relay that powers the opp circuit.  Better to wait too long than to jump in before acceptance current drops sufficiently.
 

Attachments

  • 41YFv2IL5JL._AC_US60_SCLZZZZZZZ__.jpg
    41YFv2IL5JL._AC_US60_SCLZZZZZZZ__.jpg
    1.6 KB · Views: 226
It rained a few inches the day after I installed the roof vent; I am happy to report there was no leaking. :)

Started shopping for solar panels. Leaning toward 2x 60cell panels of >= 250w each. 60s up to 65" fit comfortably lengthwise across the PM roof. That's the width of the roof racks I have mounted.

I was originally thinking 3 panels but if 2 meets my needs I'll stick with it. It's not an arms race.
 
I found an ebay seller reasonably close to me selling panels. 3x190w 72 cell mono = 570W nominal. All things being equal I would have preferred 60 cell poly but these are a good size for my mounting options.

Price is $0.66/watt which isn't crazy good but there is no shipping since I am picking them up this afternoon. The aggressive prices online came to about $1.00/watt after freight.
 
Just took them out of the A/C van and set them outside for a pic.  Dew immediately formed on them from the humidty, but you can get a feel for the overall setup.


If you lifted the panels and laid them down on the roof that'd be the basic configuration.  The combined size will be 96" front to back and 62" across;  this leaves a few inches spare in both directions.  I will have to climb up there and think about things to come up with a mounting plan.   I'll be using the racks or rack mounts -- there will be no new holes other than the one for the cable gland.

BTW, it was an hour drive back from the seller.  After I unloaded the panels I looked at bank voltage;  alternator charging held the house bank at 13.4v.   I am feeling pretty good that alt + solar + shore power options will be able to keep the 220AH bank safely above 50% DoD in my usage.
 
I see you have roof rack/cross bars already, as I have. to mount my panels I got length's of aluminum "L" from  online metals in Grand Prairie (they will cut to your required length for free). mounted my panels to the aluminum using stainless hardware and nyloc nuts. Put old towel's on roof and with assistant got the Assembly aligned so I could mark location to secure "L" channel to the cross bars using Stainless "U" bolts. 
My Transit has sealed plugs in the roof which allowed me to VHB tape a gland box and pass the cables into the van very close to my Solar Charge controller, no leakage at all.
The only problem I found was bad wind noise at freeway speeds, fixed with a Yakima air dam/deflector.

MM
 

Attachments

  • KIMG0305.jpg
    KIMG0305.jpg
    163.7 KB · Views: 39
Awesome information, thanks!. I was just talking over this very thing with my Dad in the driveway, the use of aluminum, the underslung mount so the panels are flush with the rack, etc.

I have also noticed increased noise. I installed the fan and the rack the same day so I don't know which is causing it. Will check out the deflector and the grand prarie metal folks. I'm in the dallas area already most weekdays.

Edited to add: The panel junction boxes are on the controller side of the van, and entry point for the gland will be close to directly over the controller's position. So the wiring run will be minimized.
 
Looking at their website now.  Barrage of questions:  

  • Is that 1.5" x 1.5" 6061-T6 aluminum?  
  • Do you remember the thickness?
  • what is the distance between your rack crossbars?
 
frater secessus,  Yes mine are 1.5'' by 72'' could be longer if required, for example adding an awning. I got 1/4'' thick but I'm sure 1/8'' would have worked, after your panels are installed very rigid. Not so obvious but my panels are 1/2'' below cross bars so I could in theory still load a kayak if required.
With just the rack and bars there wasn't any wind noise, but with panels mounted it was bad over 55mph and unbearable at 80mph. but now is good with the Yakima deflector.
 
Thanks for the info. My span will be almost 12' so I will make supports at the midpoint, making the effective span 6' like yours.
 
I picked up some flashing tape; it's basically a wide, single-sided butyl tape kind of thing.  

Saw it at the hardware store for cheap ($8?) and thought it might help dampen cargo van boominess.  I tried to offset the pieces and place them a bit randomly to fight resonance.


Oh yeah, before throwing those pieces on the panels I primed any dings where paint had been scraped off.  

After dinner I'll head out and start back on insulation.  I'll be starting with the aft end where the bed platform will go, since I want to start thinking about that more closely.
 
Ok, ordered stuff for mounting panels from the H3 rack.   Coming from Online Metals with the SAVE10 10% discount coupon Priceblink extension found..  All 6061-T6 aluminum.  Will pick up next week from their Grand Prairie, TX location.

The stuff

  • 2x 136" angle for sides; the panels will sit in the "L" as is traditional
  • 1x 136" square tube to support the center of the panels.  This will have to be offset since the Maxxfan is in the middle. I'll run it on the driver's side;  the panels will be slightly heavier on that end with the junction boxes and cables anyhow
  • 1x 72" square tube mounted supported by the roof and running transversely under the three long pieces near the middle over a roof rib.  This will reduce the span length.  Will cut to length, since it was about $4 cheaper than buying the exact length.  
This is the basic idea (front of the van to the right).  Panels will be parallel with rack bars.  


My current status:

[size=medium] [/size]
 
bed ideas

Insulated both sections at the end of the (future) transverse bed.  The area is 74" by 33", with a maximum diagonal of 83".  
a couple of 2x4 will span the distance and sit on the side ribes, and be bolted down.  I have some .75" plywood I'll make the deck with.  The platform will sit something like 35" off the floor.  Seems high, but I am building in a bench that will allow me and the furkids to climb into bed. 

solar mounts

Here is what I am thinking about.  

The panel area below is transparent yellow so we can see the underlying supports.  There are 9 support points in this plan and the panels weigh a combined 102 pounds.  So an average of 11.3 pounds per support, though it will vary because of the offset.


I know the off-center axial support is not optimal.  But it reduces the unsupported span of the 72cell panels down to about that of 48 cell panels, and those are usually only mounted by the ends.  I could put another transverse support behind the fan and cut down the center square tube to fit that space.  Will think about it.

 
The extrusions were due to be ready on the 1st, so I drove over to pick them up. Not ready. :-(

Some of it was being moved between warehouses so it won't be ready until monday. Oh well. More time to think.
 
I installed polyiso at both ends of the sleeping platform (in the cubby between ribs) so I could mock up the platform with real dimensions.  There is 76" of room sleeping straight across:


I'm 6' even.  In this shot the toes of my relaxed feet in shoes are brushing the passenger side and there is 4" headroom on driver's side.  I had 10 seconds to start the timer, climb up there and lay down so I am not centered (and the camera wasn't level).

I wanted to get a feel for sleeping position so I could figure out where USB and 12v outlets go by the bedside.  It would also help me feel like I was getting something done since the solar panel mount stuff isn't ready yet :-(

Also stopped at a salvage yard and picked up some steel angle [bar? bracket? channel?  stuff?] in case I decide to take the stock H3 bars off the rack mounts.  I can drill and modify that stuff easier than the complex extruded vantech crossbars.  Got 12' of two different kinds for $10.  Will be able to make front/rear crossbars out of both types and see what i like.  
 
This reminds me, maybe you know but for others, make sure any stuff extending across the body "floats" at least a little, to account for the flexing.

The distance between two pillars is always changing, and anything trying to "lock it in" will create stress maybe break something.
 
An excellent reminder. I have fought that battle before when building a platform in a truck bed.

In this case the 2x4 are sitting on ribs that have sloped tops and the boards are trimmed to match that slope with play at both ends. So they are like extremely flat trapezoids. This allows them to ride on the ribs without being tied to them.
 
giphy.gif
 
Top