Putt

Van Living Forum

Help Support Van Living Forum:

This site may earn a commission from merchant affiliate links, including eBay, Amazon, and others.
Man, it feels like I've had this ceiling job hanging over my head forever.

:)

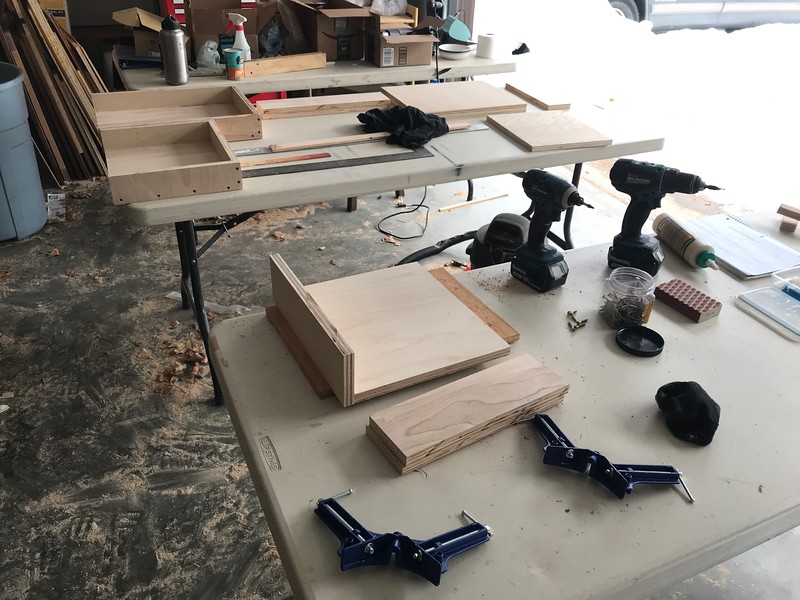
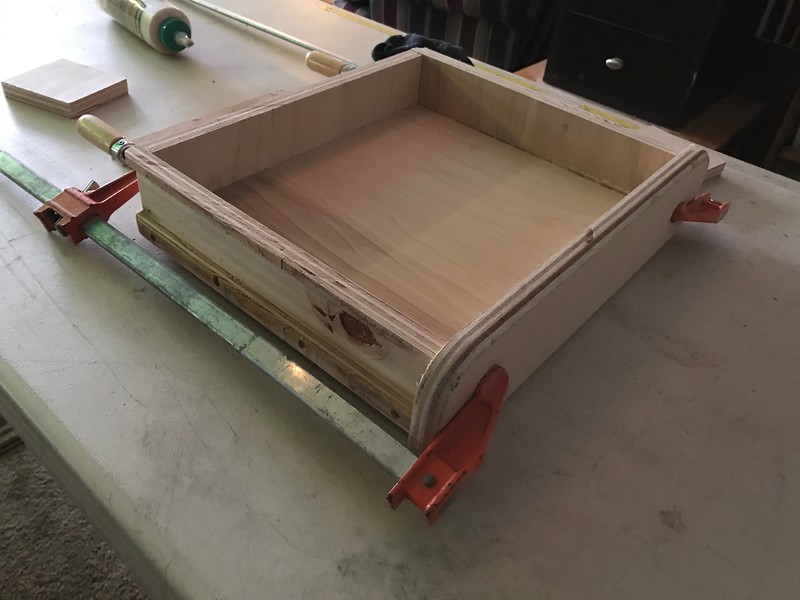
Once the panels were all fit, they were all removed for paint and insulation.

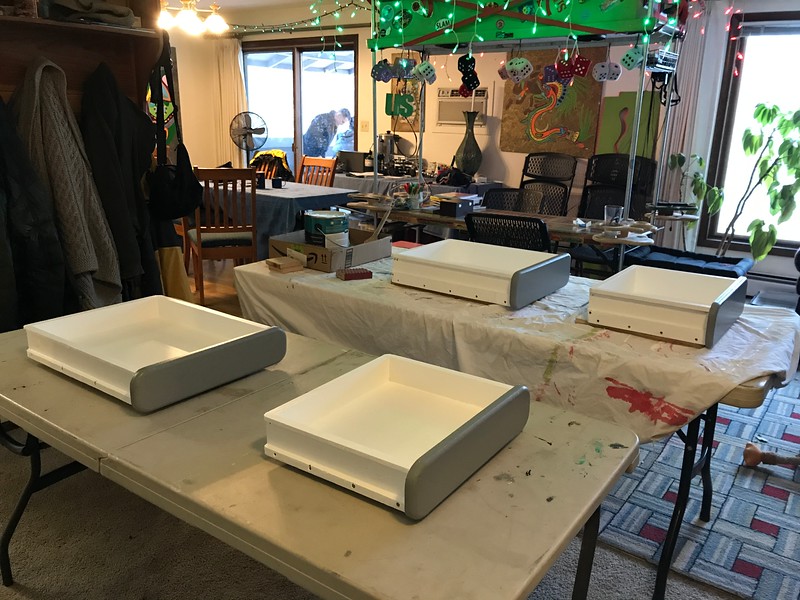
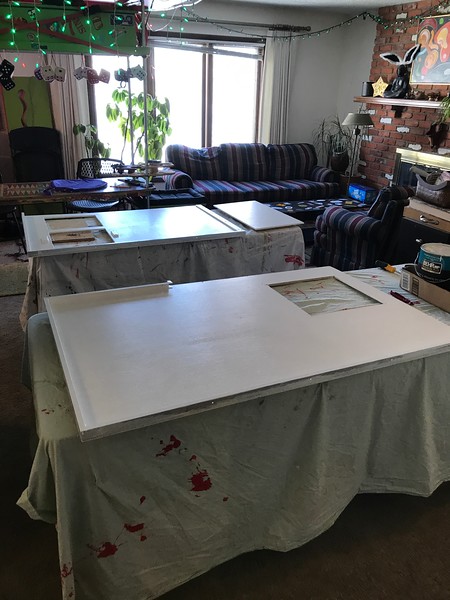
Doubled up on the tables in the living room.

IMG_2232-L.jpg


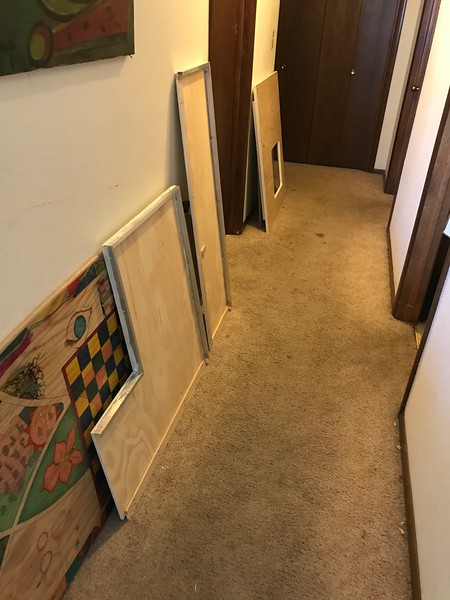
More awaiting in the hallway.

IMG_2233-L.jpg


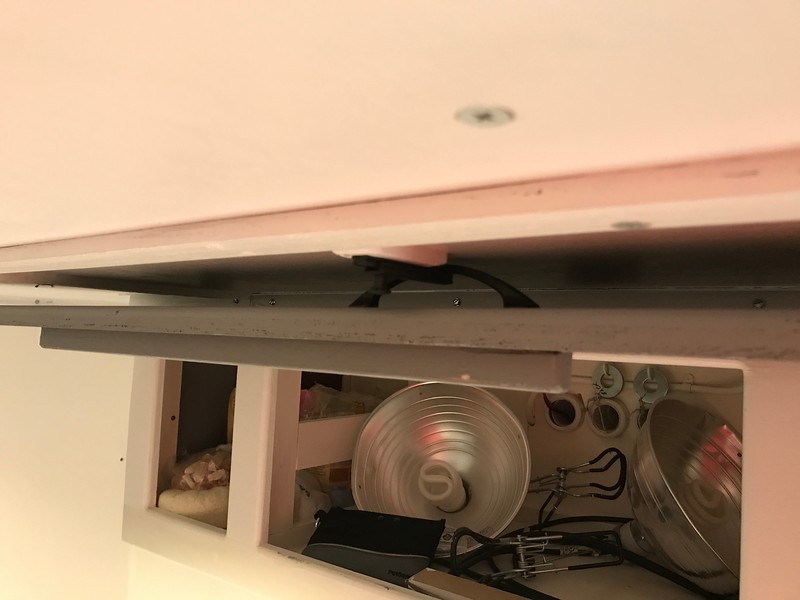
While the paint was drying I ran the wires for the ceiling lights.

IMG_2234-L.jpg


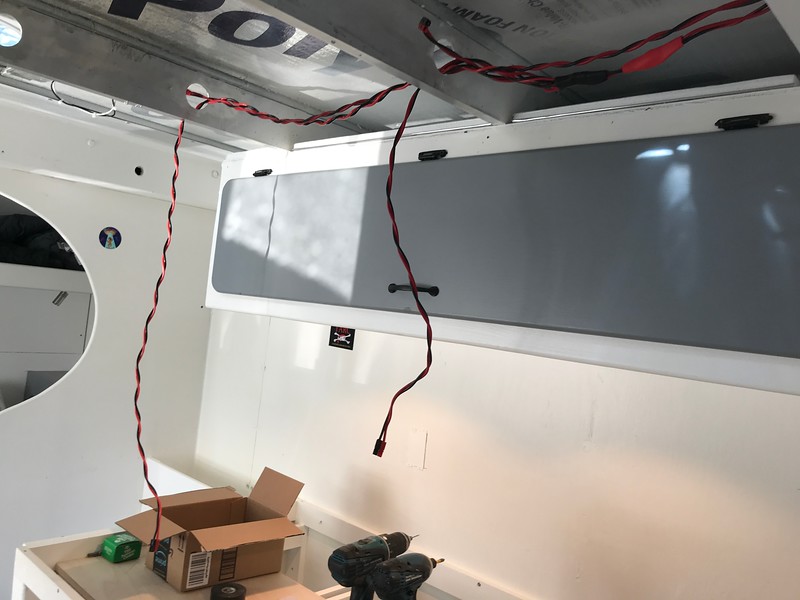
One wire from the fuse/switch block, then you can see the heatshrink around the three way split to run the lights in parallel.

Of course, I don't want those cables chafing in the holes through the aluminum rafters, so they got a nice nylon cover.

IMG_2235-L.jpg


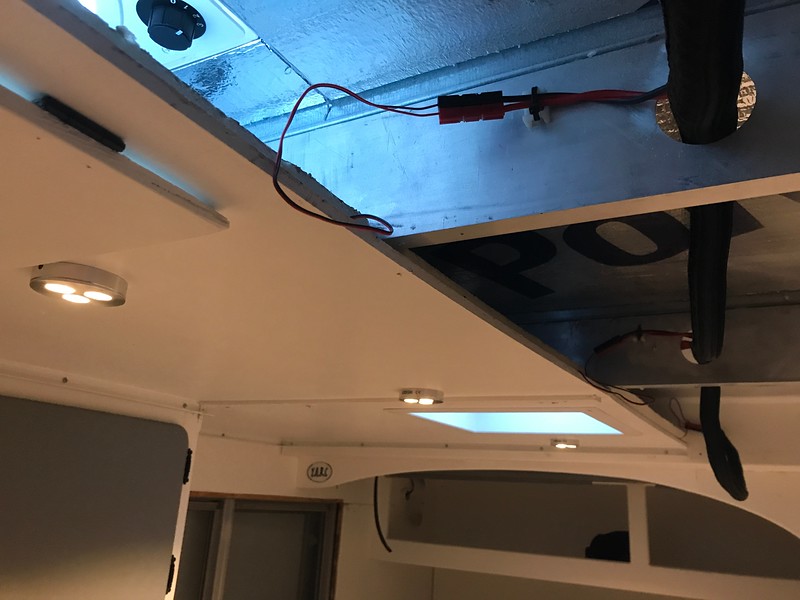
I used Anderson Powerpoles for connectors.  Good stuff.

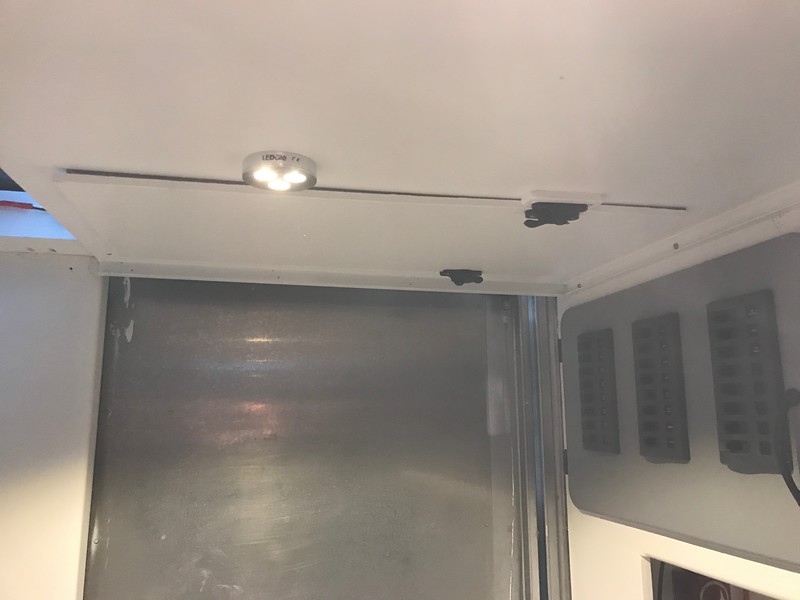
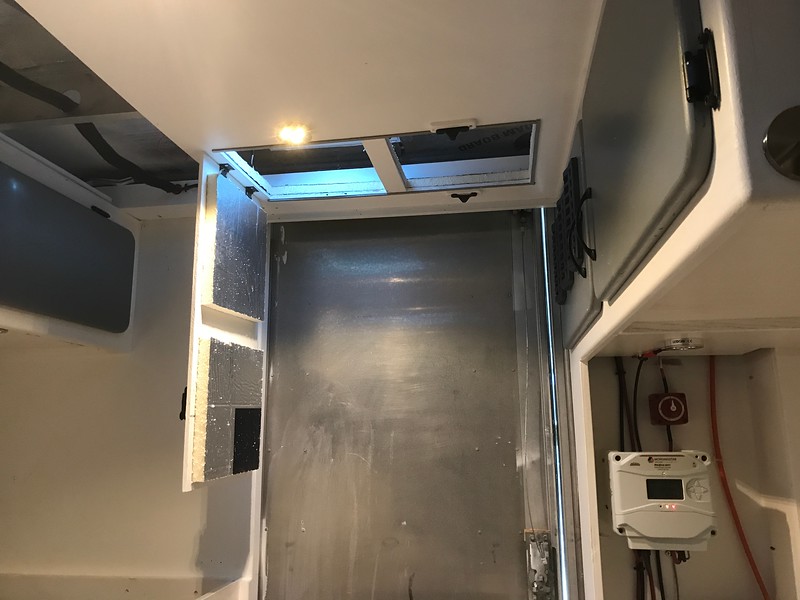
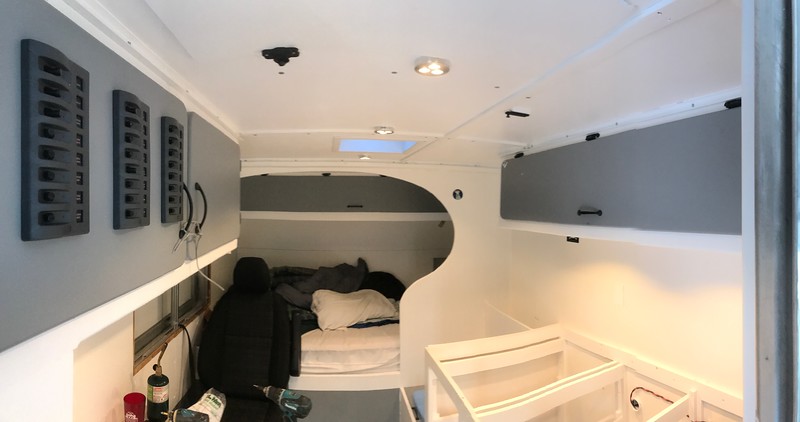
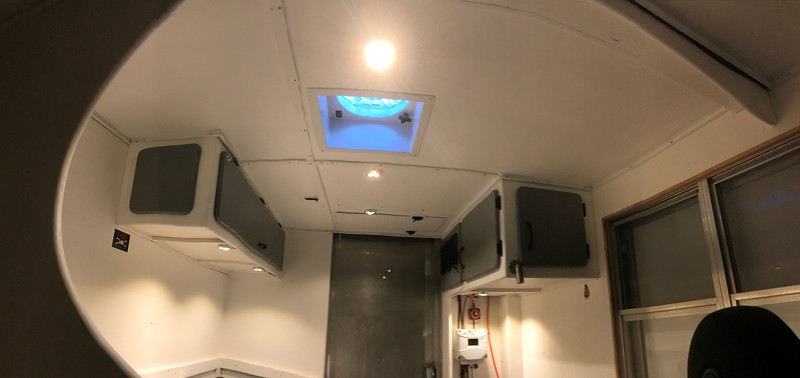
Put up the ceiling panels that had the lights in them, connected them up, hit the switch....let there be light!

IMG_2236-L.jpg
 
Had to put a hatch in the ceiling to get to the front fan---the one that evacuates the heat from the walls and ceiling---and to run cables through the cable trough over the door.

IMG_2237-L.jpg


And opened.

IMG_2238-L.jpg


Up go the panels on the other side to finish it off! Plenty of light in there; I'm glad I decided to paint it white.

IMG_2246-L.jpg


Up on the ceiling to the right and a bit down from the first ceiling light you can see a little black latch mounted to the ceiling. The latch catches the kitchen cabinet handle to hold it open.

IMG_2248-L.jpg


View from the bed.

IMG_2245-L.jpg


Phew. Kitchen drawers next!
 
When I pass wiring through holes on metal like that , my trick is using a piece of appropriately sized tubing , cut down one side of it and place the cut party over the edges of the hole with a little goop inside and ,,,never had a short. :p
 
Howdy Putts,

I remember way back when this was just a dream in your mind, I lost track of what you were doing when I quite the other forums where it was being discussed, I really like what you have done. Here's hoping our trails will cross again and we can share a camp fire, tall tales and beverages.

Dave
 
Mr. Cob said:
Howdy Putts,

I remember way back when this was just a dream in your mind, I lost track of what you were doing when I quite the other forums where it was being discussed, I really like what you have done.  Here's hoping our trails will cross again and we can share a camp fire, tall tales and beverages.

Dave

Cob! You crusty old bastard, good to hear from you. Heck yes, I'll make a point of looking you up and sharing a campfire on of these days. Your toy hauler looks in fine fettle, hope you're enjoying your travels!

Alrighty then, on to the kitchen cabinet drawers. I had initially planned for four.

What I came to realize is that I had been thinking of the drawers as kitchen drawers, but the truth is they're the only drawers in my whole household. I'm going to need an everyday junk drawer for starters. A headlamp, flashlight, a knife, pens, pencils, ruler, who knows. One drawer, probably the bottom deep drawer on the right hand side will be mostly cleaning supplies and extra green propane bottles. Anyway, six drawers, even if some are a bit shallow, will give me a lot more options than four.

And that's what this last week has been about. We'll title it "Stupid...stupid...stupid...genius!"

So, the drawer rails that I mount the sliders on are 15 inches apart. The drawer sides are 3/4". That means that the drawer bottoms and backs need to be 13.5" in width to fit between the drawer rails. Off I went to cut wood.

IMG_2249-L.jpg


It was at about the point you see above when I took one of the drawers out to Putt to check the fit. It fit perfectly with a mm to spare between the drawer rails. Um...but what about the sliders!? Damit...damit...damit! I forgot to add a half inch on either side for the drawer sliders.

baldy.gif


Fortunately, the sides of the drawers are 3/4" plywood and I have a dado blade for my table saw so before I put the drawer faces on I hogged out a 1/2" deep groove in the sides of the drawers for the drawer sliders. The genius part is that this is probably the best way to do these drawers. 3/4" is overkill, the 1/4" left is plenty to mount the slider, just had to use nuts, bolts, and washers instead of wood screws. But the big advantage is that my drawers are a full inch wider than they would be if I had built it the way I had planned.

IMG_2253-L.jpg


Glued the drawer faces on and did a bunch of painting.

IMG_2256-L.jpg


Fitting the sliders and installing the drawers was a bit finicky, but it turned out just fine in the end.

IMG_2258-L.jpg


The set to the left is 18" deep, and leave room behind for water filtration and water pumps eventually.  The drawers on the right are 10" deep and leave room behind for the sink and gray water tank.

IMG_2257-L.jpg


Next step: Now that I have the top drawers in I can measure exactly how much room I have for the deep bottom drawers underneath and build them.
 
While reading your post I noticed the drawer dimension calculation and went .........
Ruh RO :huh: ,,, well , probably too late to say anything so just kept reading to see what you ended up doing................ good thinking , and it looks great !

Ya know , the sign of a good carpenter is how well he can hide mistakes. ;) ......
YOU PASSED A+ ! Well done. :cool:
 
Looking awesome, Putts! Been away a while and missed a bunch of your build, ready to roll this Spring?
 
Hey! Hiya Queen! I almost PMed you yesterday to say howdy...glad you stopped by.

Currently I'm thinking my actual launch date will be in August, but I've already begun moving into Putt.  I'm sleeping in there every night; Dart seems to be enjoying it. I've also just barely begun moving stuff in. Got one of the large drawers done and now have my cleaning supplies and green bottle single burner propane stove in there. Bought my cookware and dishes so I could build the last drawer, which may have some special slots for things so they don't rattle around too much. Bought some bins for the cabinet above the bed so I could start moving my clothes in there. Basically I'm one drawer, three countertop pieces, and the dinette table away from really moving in. My guess is I'm a month away from completely moving out of my bedroom and cleaning/painting it for the house sale. 

Got LOTS to keep me busy for the next six months.

"Six months..." man, that sounds good.
 
It's inspirational to see you continue. Glad to hear you're sleeping in it. My step van sits in my backyard and I rarely use it now. I need to whittle off some of my other projects so I can focus on this one.

How's the driving experience with Putt? Can it maintain freeway speeds uphill?
 
Hiya, Bud. Thanks, I remember when I was starting the build 2.5 years ago and wondering if I would really get through to the end of it. It seemed like an overwhelmingly huge task. One thing I've learned in the process is that if you are embarking on a big project like this don't be looking at the top of the mountain, just keep plodding on and knocking off the tasks one by one. They climb Everest like that...one step at a time.

Driving Putt? It's big and lumbering, but it's got torque to spare. If by freeway speeds you mean 60MPH it does pretty well. I've only done a few passes in it, but it seems to pull strong. Can't really accelerate going up a steep hill, but it seems to maintain as much speed as I need for the most part. I definitely pass semis going up the passes...though that's not saying much.

Personally, I love driving it. You sit up very high and have GREAT visibility all around. Those big windows up front are second only to riding a motorcycle. It can be a little tough around town with snowbanks narrowing the streets, but people see me coming and give way. :) Parking can be tough. Fortunately, if I can hang my rear end over the curb I can usually back into one normal parking spot.

It's loud. Fortunately I've got some Bose noise canceling headphones I wear usually.
 
tx2sturgis said:
Putts!

What part of 'minimalism' did you not understand?

:p


(beautiful work BTW)

Thanks, Tex. 

Ha! I wasn't shooting for minimalism, I'm shooting for a cheap and simple expedition vehicle. 

Compared to this....

Applied-Minds-KiraVan.jpg


...I think I've nailed it.
 
Pretty sweet deal, only six months!!
 
Putts said:
Thanks, Tex. 

Ha! I wasn't shooting for minimalism, I'm shooting for a cheap and simple expedition vehicle. 

Compared to this....

Applied-Minds-KiraVan.jpg


...I think I've nailed it.
Makes me wonder, where does he land his helicopter?
 
Wildtrapper said:
Makes me wonder, where does he land his helicopter?

That's for later, right now he's waiting on the motion-activated ramp to deploy so he can ride the bike up into the cab...
 
Woot! This was a job I've been fretting about, it's not easy fitting drawers.

IMG_2261-L.jpg


The little flapper door in the bottom left drawer is the garbage.

IMG_2262-L.jpg


They don't slide perfectly, but they slide well enough. I'm happy.

I've already started packing them.

IMG_2260-L.jpg


Bottom right drawer has all the cleaning stuff, green propane bottles, and my portable burner.

IMG_2259-L.jpg


Bottom left drawer is the pots 'n pans.

Next up: Counter tops and dinette table...once that's done I can start cooking in Putt.


rilla.gif
 
Nice clean results.

(Oh and great recovery on the drawer slides. Looks like it was part of the original plans.)
 
Matlock said:
Nice clean results.

(Oh and great recovery on the drawer slides. Looks like it was part of the original plans.)

Thanks. I guess it was part of the original plan...I just didn't know it.
 
Top