"Ghetto Fiberglass" Roof Repair

Van Living Forum

Help Support Van Living Forum:

This site may earn a commission from merchant affiliate links, including eBay, Amazon, and others.

squid

Well-known member
Joined
May 15, 2017
Messages
95
Reaction score
16
So I've decided to keep my 18.5' Class C until I find some other rig, for now this is fine to get me back on the road (though I'd debated getting a van to rehab blablabla).  When I bought it it was technically "totaled".  The family that owned it first when new, the wife ran it through a McDonald's drive-through and crumpled the top part a bit.  Of course I think this was just insurance fraud, but that's just my opinion. 
Anyaway I essentially bought a fairly new rig (on the insides) for pretty cheap but have been failing at attempts to patch the front right edge and the useless non-fan vent over the top bed where water puddles.    I've used eternabond, that pudding-thick rubber roof coating, I even gorilla-glued a white tarp up there with eternabonded edges, which worked spectacularly well for a year until one day at 70 mph it dramatically all ripped off and flew away to Oz on the freeway.  Once a depression starts, the puddling only gets worse.  I was going to just take out the top vent and plywood over the top and re-seal the edges with fiberglass and resin and fiberglass the plywood, which I can screw into the framework.   But all that fiberglass and resin is very expensive.  Then I came across what they're galling "Ghetto Fiberglass" in a few articles. 
Basically they use rigid foam board and cover it with fabric, like canvas or bed sheets, that is dipped in 50:50 Titebond II glue/water and spread out (to remove bubbles), then later it's "heat sealed" with a heat gun or iron, then later painted, and it's supposed to last years and years. 

I'm considering trying this.  I was thinking of using the Harbor Freight hot knife so I could cut grooves or kerfs to make curves, or generally just trim the foam board, which actually is quite the chore to cut with a saw.  So I don't know if this will actually work or not, just trying to salvage my RV for use.  

http://www.instructables.com/id/Poor-Mans-Fiberglass-make-nearly-anything-weatherp/
Here's a man (a "foamie") making a rigid foam kayak and covering it with Titebond II/paint.  There are also articles of folks making teardrop campers out of this stuff.  
I would think you could paint it and THEN resin it, and it would be extremely durable.  

FNCKK0AHR0AY66W.MEDIUM.jpg
FTP7WPHICJM0VJW.SMALL.jpg
[img=370x370]https://shop.harborfreight.com/medi...d08d6e5fb8d27136e95/i/m/image_22935.jpg[/img]
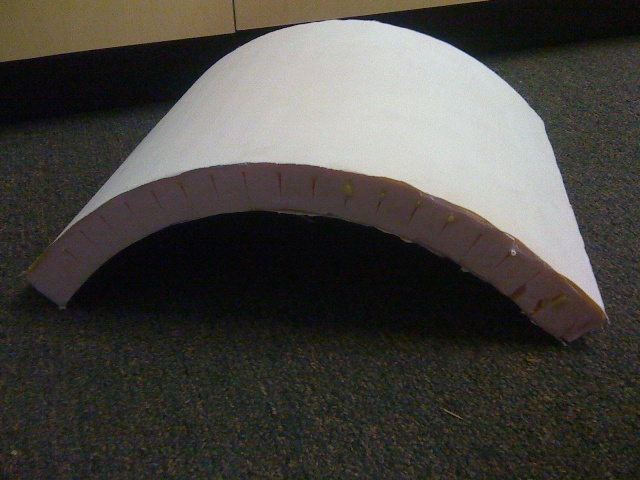
image.php
FK54RF4I1ETW0VS.MEDIUM.jpg
FR033ZKICZ4SX6J.SMALL.jpg
 
isnt that how they've made surf boards for decades?
 
bardo said:
isnt that how they've made surf boards for decades?

Hmm, don't know, would seem logical though I guess I thought the glue was kind of unique, I'd have thought they'd use fiberglass/resin.
Here's another youtube of a man building a trailer with it except here he's coating his plywood with the sheet dipped in glue.
 
my bad I read it wrong. I thought it was 50:50 cloth fiber or something. I dont remember resin being all that expensive. I know I have a few gallons sitting around from when I used to make motorcycle fairings.
 
I built an 11' x 6'8" x 6' tall box camper that I haul on a flat bed trailer 3 years ago. It's called Poor Man's Fiberglass (PMF) on the teardrops and tiny trailers site in the Foamies forum. I used the basic TightBond II and III glue Harbor Freight drop cloths and oops latex/primer semi-glass acrylic latex exterior white house paint over primmer painted masonite interior doors which I constructed it out of. I wanted something more ridged than foam but lighter than 3/4" plywood. One of reasons foam works so well is called the sock concept done by completely covering all surfaces and when it shrinks it has become much more ridged. Mine was ridged enough that I did not do the interior surfaces. It is very tough and easy to repair. I backed in to a 2" tree limb that had been cut off square dead on and broke it off. It dented but did not penetrate the surface. I dropped the corner of a steel platform that was more than I could lift as I was "walking" it towards the trailer and penetrated it about 1" if it had been aluminum siding it would have been several inches. I cut a piece of cloth, lightly roughed up the surface with 80 grit sand paper by hand, wiped it off with brakeclean on a rag, let it dry out, brushed on TightBond II glue in a thick even coat then brushed on the cloth using glue watered down enough to smooth every thing out. A day later I painted it with several coats of paint and let it dry. You can hardly tell their is a patch in bright sun light and it is stronger there than every where else. Making sure you have a good surface for the glue to bond to is important and I would over lap the edge by several inches as it does shrink. If you read the forum you will find all sorts of helpful info, even a hammer test! It doesn't shatter or crack like fiber glass. Using two thinner sheets of foam and heat you can make really tight bends but if you want to cut kerfs a soldering gun with 10 gauge wire does it with no dust.
 
If you put PMF over plywood I don't think you could break through the cloth as it can distribute the force over the whole surface. With fiberglass it would crack, with latex paint and glue it flexes and heat brings it back and it stays water proof. Build yourself a cooler and try it out.
 
bullfrog said:
I built an 11' x 6'8" x 6' tall box camper that I haul on a flat bed trailer 3 years ago.  It's called Poor Man's Fiberglass (PMF) on the teardrops and tiny trailers site in the Foamies forum.  I used the basic TightBond II and III glue Harbor Freight drop cloths and oops latex/primer semi-glass acrylic latex exterior white house paint over primmer painted masonite interior doors which I constructed it out of.  I wanted something more ridged than foam but lighter than 3/4" plywood.  One of reasons foam works so well is called the sock concept done by completely covering all surfaces and when it shrinks it has become much more ridged.  Mine was ridged enough that I did not do the interior surfaces.  It is very tough and easy to repair.  I backed in to a 2" tree limb that had been cut off square dead on and broke it off.  It dented but did not penetrate the surface.  I dropped the corner of a steel platform that was more than I could lift as I was "walking" it towards the trailer and penetrated it about 1" if it had been aluminum siding it would have been several inches.  I cut a piece of cloth, lightly roughed up the surface with 80 grit sand paper by hand, wiped it off with brakeclean on a rag, let it dry out, brushed on TightBond II glue in a thick even coat then brushed on  the cloth using glue watered down enough to smooth every thing out.   A day later I painted it with several coats of paint and let it dry.  You can hardly tell their is a patch in bright sun light and it is stronger there than every where else.  Making sure you have a good surface for the glue to bond to is important and I would over lap the edge by several inches as it does shrink.  If you read the forum you will find all sorts of helpful info, even a hammer test!  It doesn't shatter or crack like fiber glass.  Using two thinner sheets of foam and heat you can make really tight bends but if you want to cut kerfs a soldering gun with 10 gauge wire does it with no dust.

You know since it's so hard to get 4wd vans, I bet you could builld a super-awesome 4WD flatbed TRUCK/camper deal that would be naturally dry and lightweight, with an opening to the cab. Now that sounds like a really great project.  I like how you can patch it up easily too.  You could probably weld some aluminum framework and then bolt the insulation to it, maybe use aluminum corner molding for the edges, then in one step you have your skin and insulation all done.  You could copy any design  you liked, even with curves etc.
 
Surfboards have been using polyurethane foam with polyester resin since the late 50's. EPS foam and XPS foam with epoxy resin has been used much less frequently since the early 80's. Polyester resin eats EPS XPS foam.

I've not seen the titebond glue saturaion other fabrics method.
I would not try and make a surfboard with it.

A depression in a roof, I thinkl I would gorilla glue down some foamboard insulation. Shape a crown in it with a long sandinng balock with 36 grit, then saturate fiberglass cloth with epoxy resin, and then protect the epoxy from UV light with something else, whether paint or some elastomeric coating.

But some things do not like to stick to cured epoxy, especially if the epoxy had dew form on it in the first 48 to 72 hours. The amine blush ( white tacky powdery ugly stuff) can be washed offf with a little soap and water and a scotchbrite pad, then things will stick to it, most likely. Best to not allow moisture to touch epoxy until fully cured.

http://www.fiberglasssource.com/sunshop/index.php?l=product_detail&p=88

This epoxy above, is pretty good, for the price. but I can go drive ad buy it, not sure of shipping costs.
Epoxy hardeners should be viewed as caustic. Some people are instantly sensitive to it and break out in a rash, others develop a sensitivity to it with exposure.

Noe acetone required with epoxy though, Clean application tools with distilled white vinegar. I like a 50 50 mix of DWV and isopropyl alcohol better, but this has become my goto cleaner for just about everything.
 
So I found out you cannot use titebond II on water-laden areas like rv roofs, it will soak through eventually.  I did manage to repair my leak situation with a heavy layer of resin then cloth then saturating the cloth with resin and pushing out all air bubbles.  I couldn't believe it, even my low-spot, around vent, and edge which always leaked before, all dry as a bone.    No more leaks, and this is where caulking and other roof patches had failed.  So far so good.  But I AM going to use the titebond II and cloth method to repair some interior wall damages.  I made a whole list of mods to do after my last trip, mostly to do with storage, dirt, clutter, and how to put on solar panels without making big holes in the rubber roof is my next challenge.
 
Look at the first pictures, they picture titebond II, so I just assumed .... didn't know they made a titebond III! THANKS for the input, I'll have to look for titebond III, it's $30/gallon so that's a lot less than resin and easier to use.
 
IIRC
The ones using Titebond II also painted it over with exterior latex.

Glad your resin fix worked.
 
Latex paint sticks better to Tight Bond II for some people so they use it as once it is painted with latex exterior paint water should not be in contact with it so it does not matter. I used both II and III my Latex seemed to stick to both but I had dry warm dry weather for a week to dry the glue /canvas before I painted on the paint. Still water tight after years in the desert.
 
Yep, gonna go this route with the existing house in a box. Replace the roof. Watched a video today where the guy swears by the TiteBond II and not the III. However, both labels show "Waterproof". He strongly recommended using Kool Seal on top of the PMF, rather than the latex paint. For the desert sun, anything that keeps the roof cooler is a plus in my book. R/R of the roof should commence this week. So excited!
 
rvpopeye said:
IIRC
The ones using Titebond II also painted it over with exterior latex.

Glad your resin fix worked.

I had done it while camping so when I arrived home I went up there and really inspected it.  The reason it had kept leaking before despite eternabond etc was that the right corner roof and all the gunk and tape and caulk I'd loaded on it, had separated from the base, one couldnt tell without yanking at it, so while it looked intact the water was crawling over the neat corner molding right between the layers and dripping way under and causing some rot, thus the depression around the center vent.  So I yanked up the corner a bit, and forced in with brushes about a half can of resin/catalyst into the void and then weighted it down.  I'd seen on This Old House this is how they fixed rotten windowsills.  Then when that set up good I re-fabric-resined it but pulled the fabric all around the corners and really stuck it down.  I went through 6 dollar tree plastic bowls and 6 brushes...waited until the resin is at jelly stage to really glue it into position, nitrile gloves worked to smooth it all out.  Next I'll paint it with some exterior paint.  So even though there's a slight depression, it's not going to leak because I cloth-resined around the base of the vent.  So the edge leak caused the mid-vent sinkage, etc.  On the inside where water had snuck out through the internal layers and dripped out of the vent I just used Titebond III shoving it into the few crumbly layers and propped it up with 2x4s to apply upward pressure.  Then I used strips of fabric soaked in 1:1 TB3/water to reinforce the edges, then reinstalled the flange, looks tight.  The weather is very hot so it set up nicely.  

I was even considering building a 96" long shelf for my tents, sleeping bags, folding chairs, in the upper sleeper, towards the nose.  In order to do this I'm thinking I'd have to drill bolts with nuts/washers right through to the exterior of the RV to hold brackets for that much weight, so I'm going to resin the protrusions and cover them with eternabond too.  This last trip, clutter was the bane of my rv existence, and I plotted every nook and manner to add shelves+storage.  I also removed my very heavy thigh-bruiser banquette table and am figuring out how to do a U-shaped couch with a rotating table.  IF IT WORKS I'll post the picture, I'm going to use 1" galvanized pipe, flange and PVC.    When I bought a Class C I was sure I'd want to sleep up top -- but my couch plus a pad is probably the most comfortable bed I've ever had, however when it's folded out there's no room.  The banquette is silly for a single class c rv-er, I think...that a huge cushy U-shaped couch and moveable table big enough for laptop and cup of coffee is more suitable.
 
GypsySpirit said:
Yep, gonna go this route with the existing house in a box.   Replace the roof.  Watched a video today where the guy swears by the TiteBond II and not the III.   However, both labels show "Waterproof".  He strongly recommended using Kool Seal on top of the PMF, rather than the latex paint.  For the desert sun, anything that keeps the roof cooler is a plus in my book.   R/R of the roof should commence this week.  So excited!

Tight Bond III does a better job of sealing out water as HDR said and if adhesion is not an issue then I would use it, but if it will never see water it won't matter.  Do a test piece and see if the Kool Seal will stick to your Tight Bond/ canvas or check the foamies section of tntt as they have done many tests.
 
I've watched so many videos and read so many blogs on this. There must be dozens of different ways to do this! TB2 vs TB3, using canvas drop cloths vs. bedsheets, using just foam, foam attached to wood, having to perforate the foam, not perforating the foam... my head is spinning. I'm collecting the supplies now, have the TB and latex paint. Hitting Harbor Fright this afternoon to see about drop cloths. Acccckkk!
 
I just kept it simple, it worked. I experimented a little, it worked. It is basically so simple what ever you do as long as you let it completely dry before adding layers or coats of latex paint it works. I used a section of PVC pipe cut a little longer than the drop cloth was wide to roll the cloth on, glued the end of the cloth and did about a foot at a time unrolling the cloth off the tube that I had taped the other end of the cloth to and rolled it up. Kept it wet with a spray bottle of water till I got out the wrinkles and positioned where it needed to be. Left about a foot extra cloth on the edges for mistakes and shrinkage. It is fixable if you have a problem area so do your best to get it right but don't sweat it if you don't.
 
Top