2000 Chevy Express project

Van Living Forum

Help Support Van Living Forum:

This site may earn a commission from merchant affiliate links, including eBay, Amazon, and others.
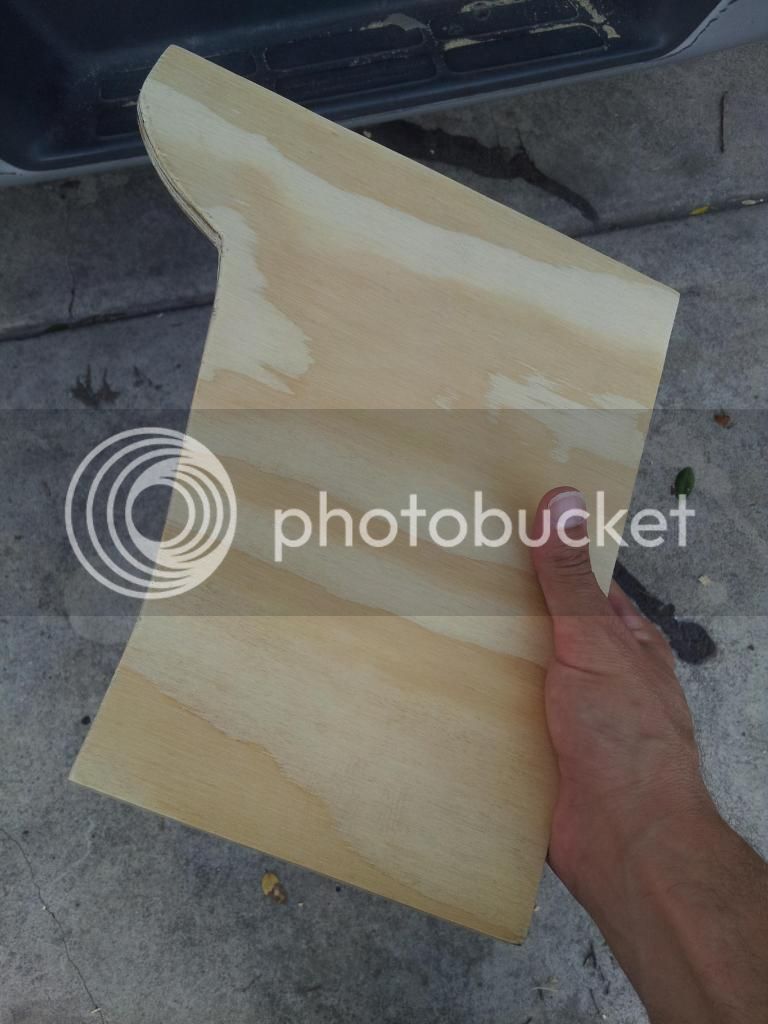
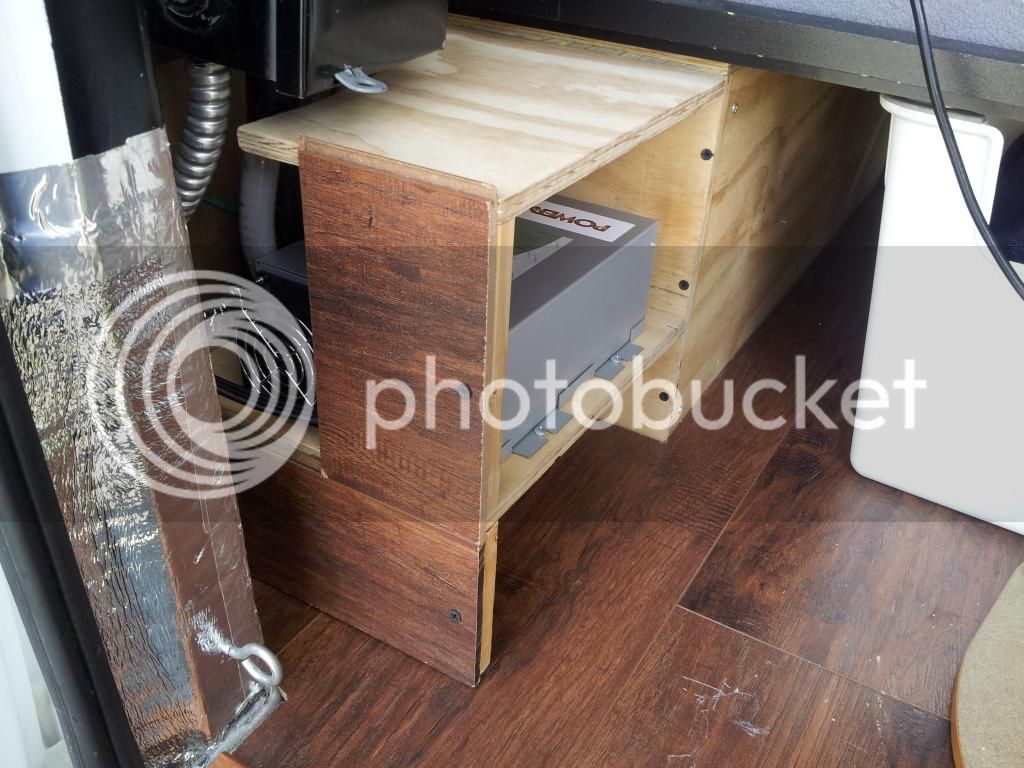
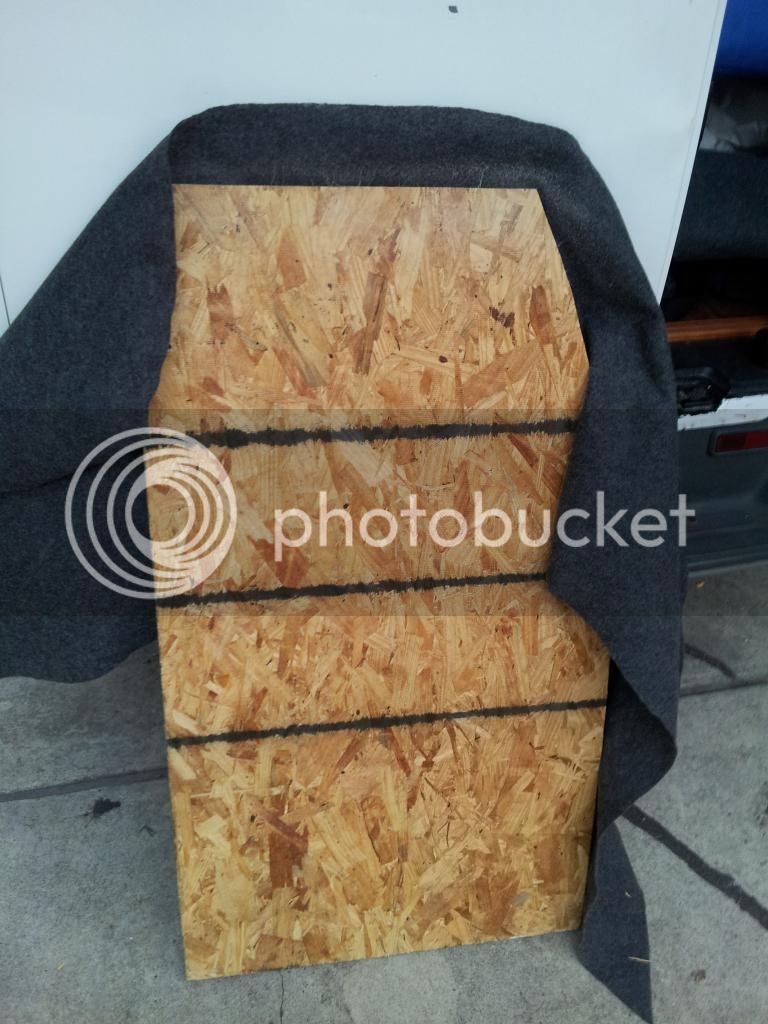
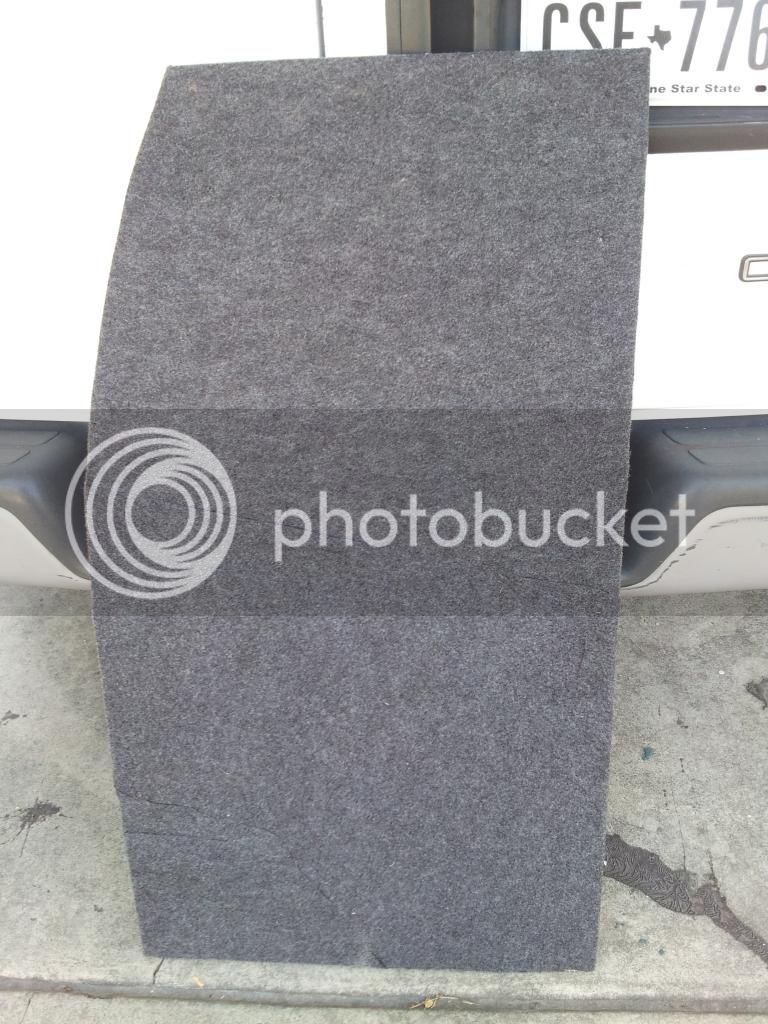
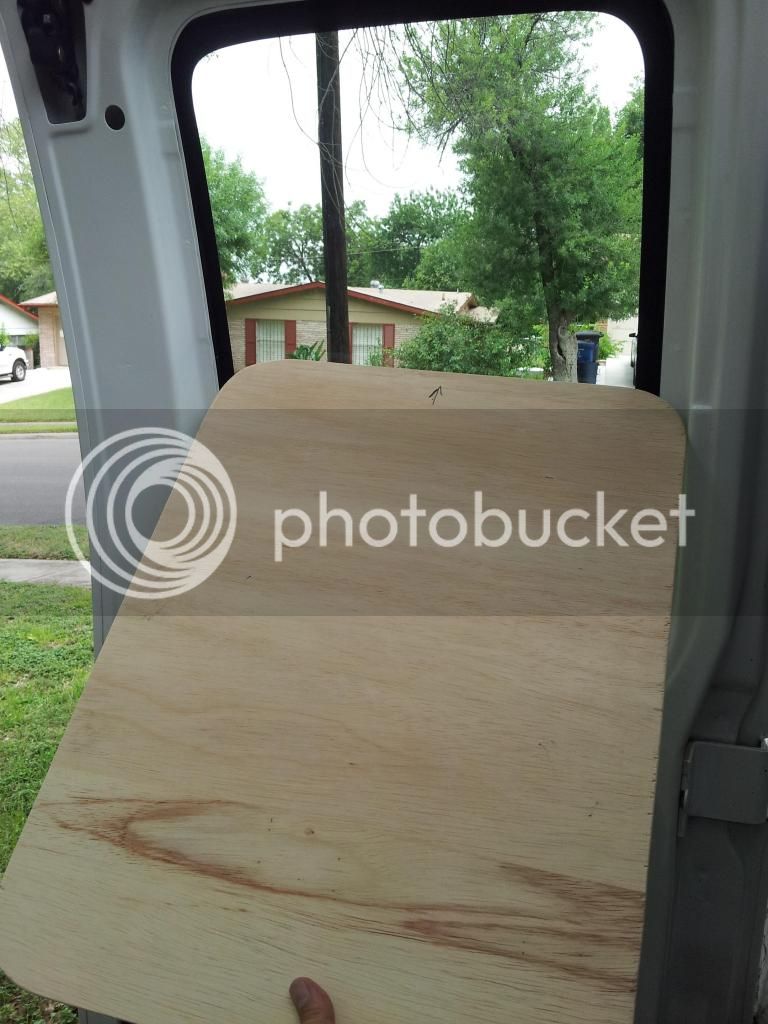
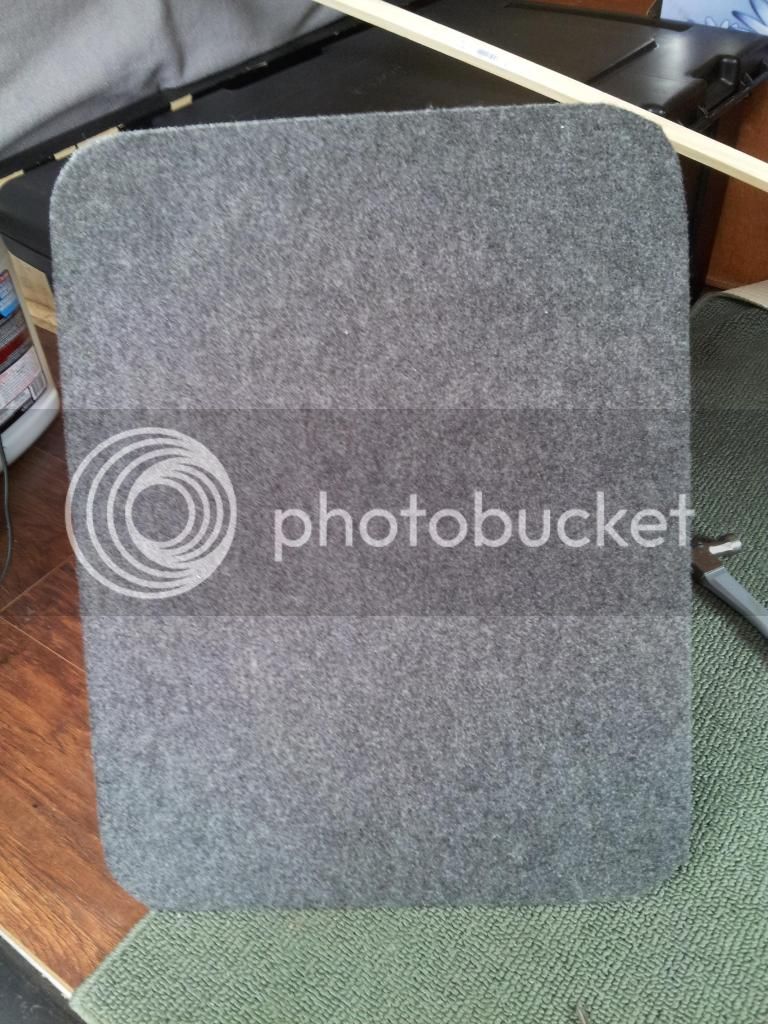
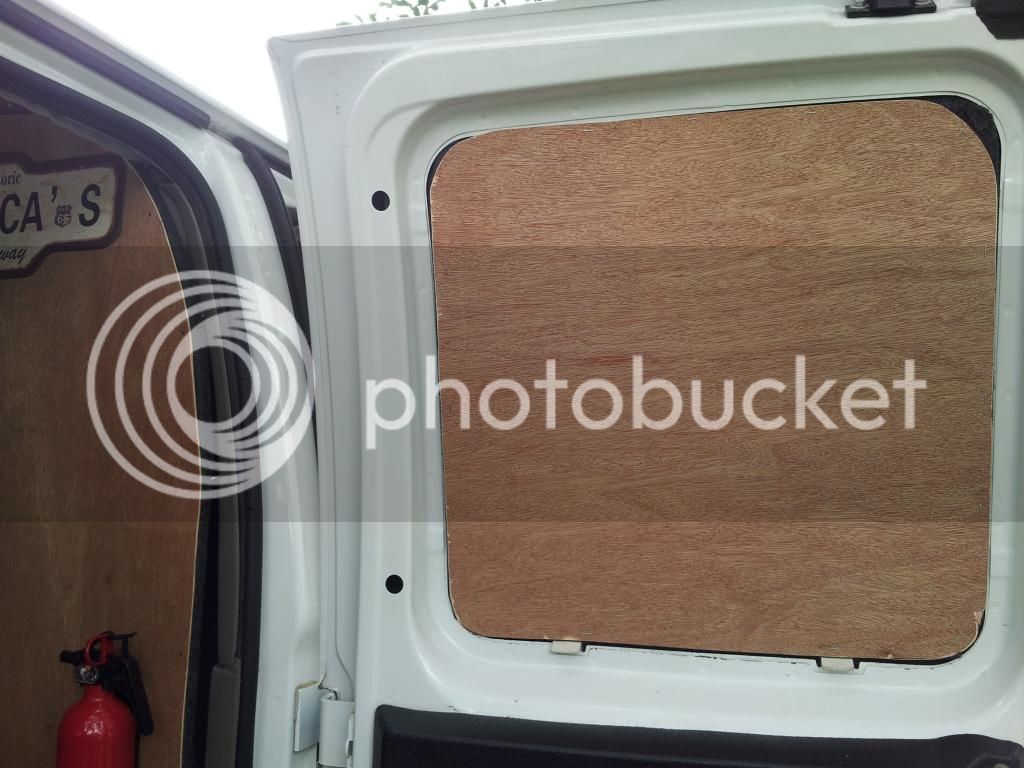
I decided to make some privacy inserts for the side doors. I cut pieces of both 1/4" and 1/8" plywood to sandwich together. I had grey felt left over from the partitions, so I wrapped the 1/4" in the felt with adhesive and stapled the trim piece to the back of it.
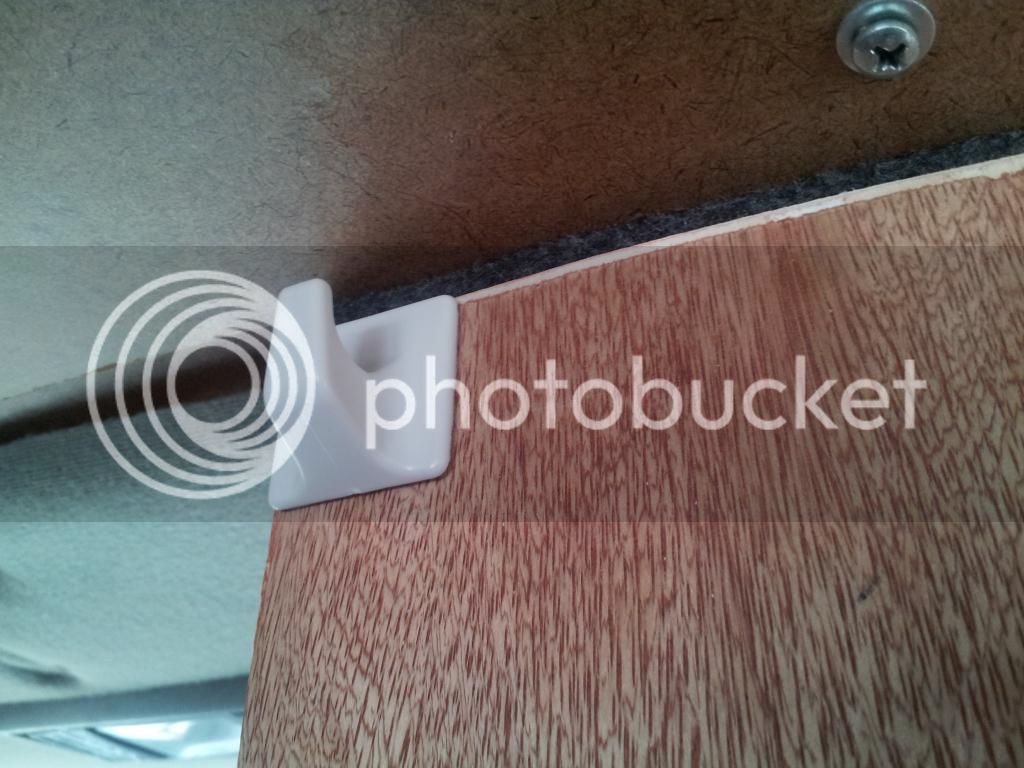
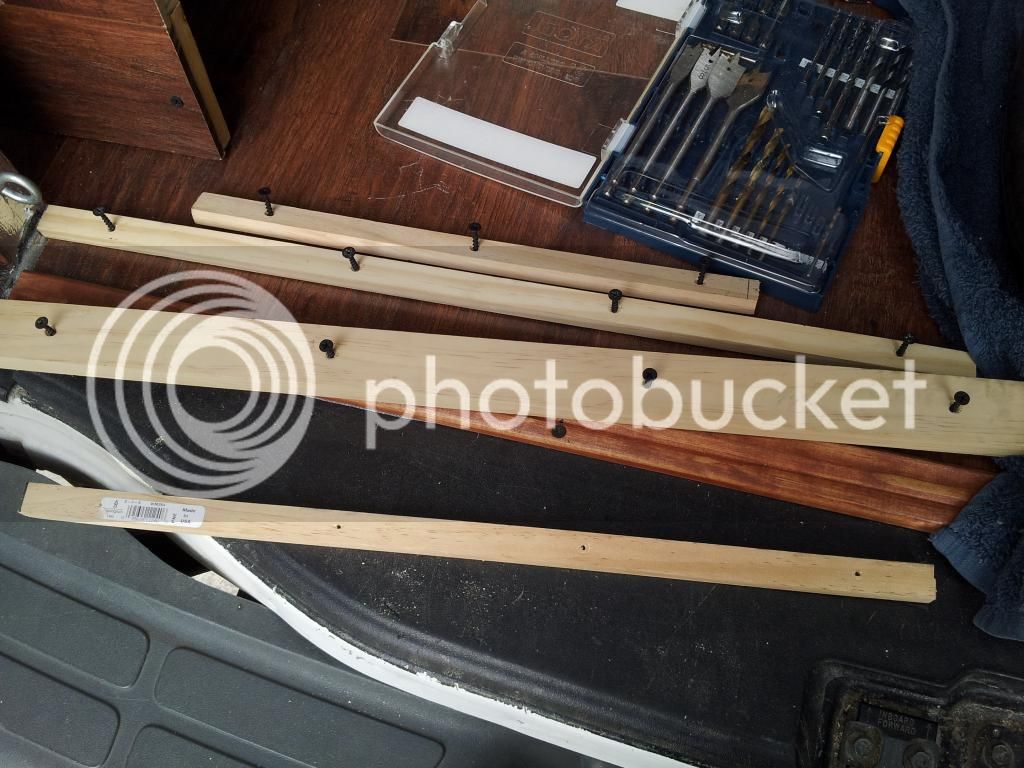
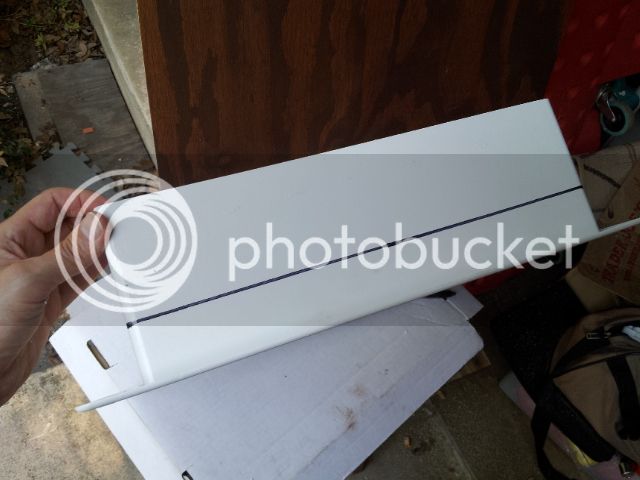
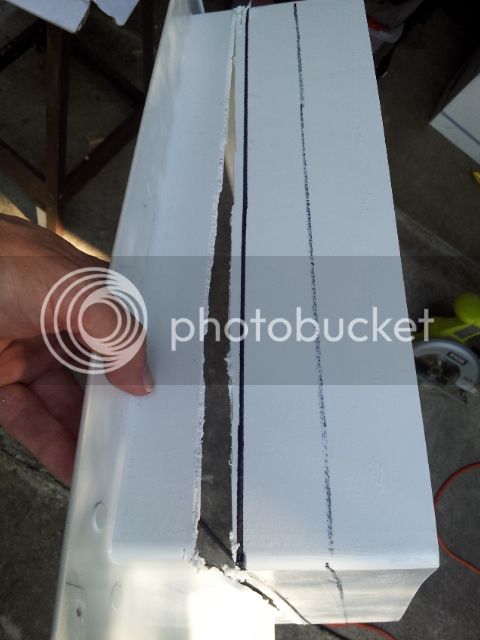
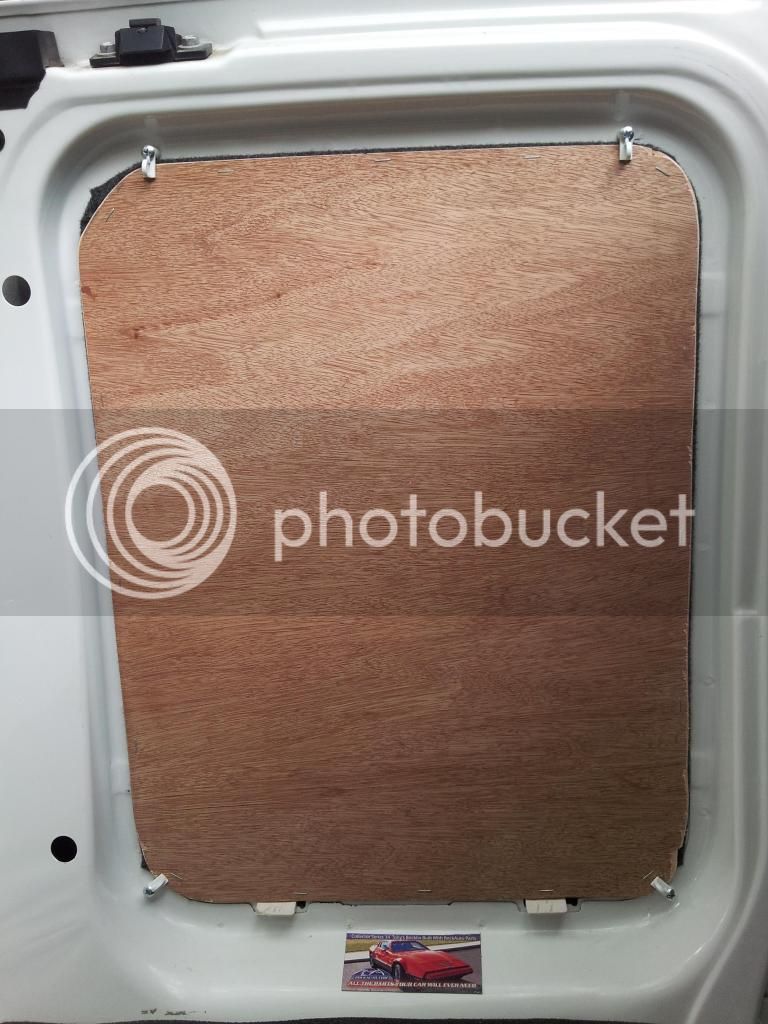
I found these window screen clips on Amazon (http://amzn.com/B00FMYP8Y2) to hold them in with.
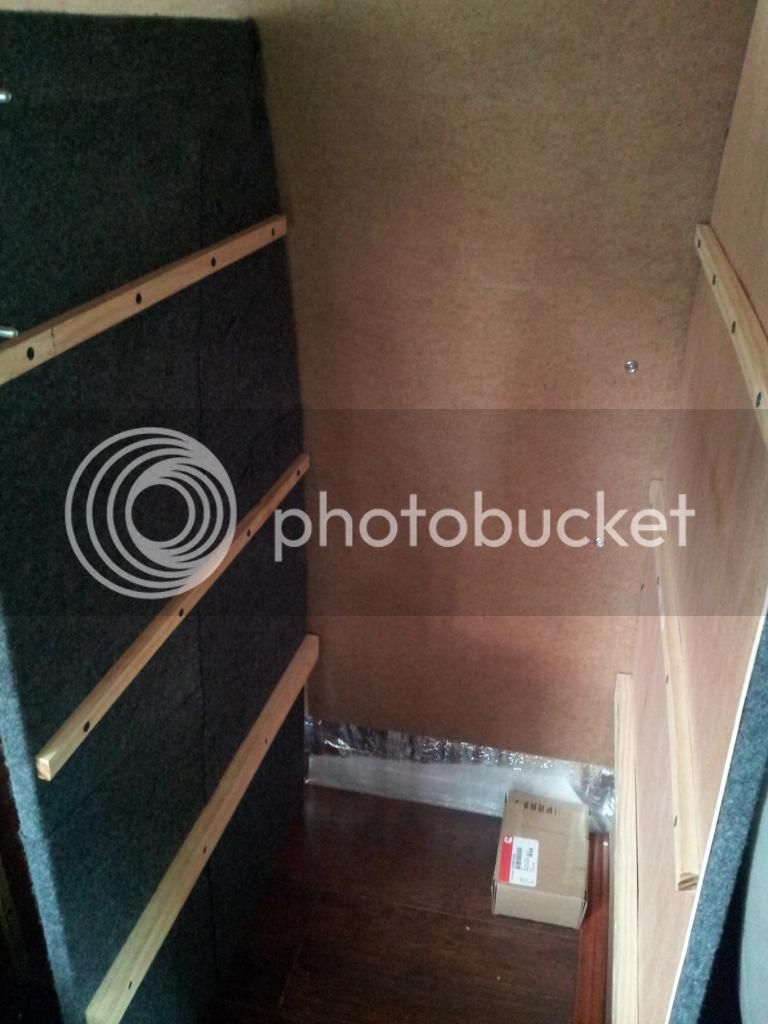
The 60% door insert was so close in size I can pop it into the window mold and it almost stays by itself, I just used one retaining clip on that side.
These were probably over complicated to make and magnets with blackout curtains would accomplish the same thing which is what I'm trying on the back windows. I just had this plywood left over and it matches the interior.


20140719_124913.jpg


20140719_134725.jpg


20140719_134657.jpg


20140719_140238.jpg


20140719_124833.jpg
 
Somebody threw out a shelf system on the side of the road. I reclaimed pieces of it to make these:

Tabletop to take advantage of space above battery box

20140720_135628.jpg


Nightstand for bedside stuff

20140720_141439.jpg


20140720_141448.jpg
 
Touched up front facing roof area. Makes it look halfway decent for the rest of the summer. Later this year I'll have to redo the whole roof.
Oh, I got a vent cover too.


20140613_135952.jpg


20140721_152835.jpg


20140721_153538.jpg
 
dvdchris said:
Installed new outlet on driver side for power converter to plug in at.

20140708_123741.jpg

Hi got a few questions for ya I like to ask:

#1. How do you install a power outlet in your van or what do I need to have to get a similar set up like yours?

#2. Is there a write up for this somewhere on the forum or book you can refer me to?

#3. Are you a electrician or a DIY kinda guy?? :)

Thanks for any help
 
It is surprisingly easy to wire a power outlet. I am not an electrician.
The van I got was pre-wired with the generator, breaker box, and power transfer switch. I removed the ratty old outlet and wiring and installed new wires and outlet.
There are books at Home Depot on wiring; as well as YouTube videos. I watched many having to do with van electrical installs.
To do it right you need to cut a hole in the side of the van.
Theres a lot of info on this forum under the electrical section, and Vandweller Steve has good info at http://vandwellersteve.blogspot.com/p/electrical-systems.html

Sorry its been a while; I've been on the road for almost two weeks and am currently in Colorado Springs.


When it comes to installing a generator and transfer switch, I would leave that to a professional.
Triple check everything. It is easy to reverse the hot and neutral when wiring the 'backwards' male plug port on the side of your van. YouTube 'RV hot skin' and watch the videos on how to test for that.

Also I found a wealth of info on battery systems, including making a home and mobile battery banks at http://battery1234.com/
There is free audio presentations (episodes of The Survival Podcast) on how to build them, Amazon links to the products, and you can pay for a packaged video presentation.
 
Thanks for the detailed posting. This is really an impressive piece of work!
 
On my trip I changed out the annoying GFCI outlet with a standard one; as well as screwed a better outlet box to my power panel board.

20141015_123536.jpg


Wanted to build a box around the power converter to protect it and the exposed contacts from things coming into contact with it/them. Still working on the side cover; I will drill holes in it for airflow. Used scrap leftover pieces from the flooring too.

20140921_133701.jpg


20140921_145333.jpg


20141010_213759.jpg


Easy curtain hang mod. I found these plastic hooks at Home Depot and got a matching size dowel rod. Cut the dowel down to length needed. Affix hooks to partitions and I have an easy up/remove curtain.

20140919_141448.jpg


20140919_141503.jpg


20140919_141634.jpg


20140919_142533.jpg
 
Working on finishing out a shelf system behind the driver partition. Got a more sturdy TV mount and moved TV to much better location. Bluray player finally has a home; and mounted my inverter.
First, lets look at what I've been looking at for a while. The furring strips are guides for future shelves and partly structural since the partition is actually two pieces.

20140701_171543.jpg


Time to build another wall. I used leftover 3/4" OSB, same as the other partition walls. This one will be shorter because I used the entire length of the leftover piece I had. I can put a piece connecting the ceiling and adding the top shelf later on. I used my leftover felt to wrap this with.

20141023_183502.jpg


20141025_142912.jpg


I cut identical length shelf guides for the new wall.

20141029_133519.jpg


Shelf guides screwed into new wall

20141029_141422.jpg


Used a pair of Simpsons L-angles at the bottom, screwed down through the floor panels into the subfloor

20141029_164206.jpg


Temporary cross piece screwed in to hold things and one shelf cut and roughed in. My party equipment is seen here

20141029_171432.jpg


Top two shelves sanded and stained installed. Also used some trim i had left over to hide the plywood edge. There are small rounded cutouts in the rear of each shelf to allow the cords through.

20141110_162120.jpg


underside detail

20141110_162035.jpg


New sturdier TV mount installed with 1/4" toggle bolts

20141126_154225.jpg


Final shelf so far. The two installed shelves are structural and permanently screwed in. The bottom one still needs to be stained but will be removable so I can transport equipment to jobs. The shelves are 3/4" sanded plywood.

20141126_154145.jpg

 
Thank you.
If anyone is interested, this is the initial TV mount I had. http://amzn.com/B003O1UYHG
It was ok; I ended up slightly bending the piece that mounts to the wall due to the way it was attached.
After doing more searching, I found this one http://amzn.com/B0088RIV1W and several of the reviews were from people that used it in an RV, van, or truck. I found it to be much sturdier than the last one and I like that it has two separate attachments to the wall plate.

I also ordered a couple of dome lights and a backup camera.
 
Bdog1 said:
My platform has 14" clearance for storage, this resulted in a little hidden storage above the wheel wells that was boxed in. I made a lift out panel for access.  Here's a pic where you can kinda see it. Sorta!

zepe8y7e.jpg


The drivers side is used by the rear AC on my van though.

My woodworking skills are primitive at best, I built the platform to free stand without using the walls for support to try control squeaks.

y5eqaged.jpg


My desk area ties in top and bottom and sounds like a school bus going over bumps.  Need to make improvements.

uty3e4yv.jpg

Nice Build, there is a picture on page 8 that shows some kind of shifter sticking out of the floor, what is that?
 
dvdchris said:
Thank you.
If anyone is interested, this is the initial TV mount I had. http://amzn.com/B003O1UYHG
It was ok; I ended up slightly bending the piece that mounts to the wall due to the way it was attached.
After doing more searching, I found this one http://amzn.com/B0088RIV1W and several of the reviews were from people that used it in an RV, van, or truck. I found it to be much sturdier than the last one and I like that it has two separate attachments to the wall plate.

I also ordered a couple of dome lights and a backup camera.

WOW that second one listed is a heck of a deal! 

Mike R
 
Turned my Insignia TV into a 12 volt TV with this item.

http://www.amazon.com/dp/B00DVZYA20/ref=cooltidbits-20

[font=helvetica, arial, 'lucida grande', sans-serif]This is awesome; many of the newer small TVs are 12 volt since they have externalized the power supply. I ordered this little item and can now power the TV directly from batteries.[/font]
 
After dealing with sagging ceiling panels, I decided to redo the ceiling.
I got this concept from Traveling Troy on facebook and YouTube. 
This will give me a professional finished look and allow me to finally install the trim on the Fantastic Fan.

First, I got these 4 foot 1/4" trim boards from Home Depot to screw into the crossribs. This will give me solid wood attachment points and no longer have to worry about screwing into metal here on out.

20150608_155852.jpg

20150608_155912.jpg


Using the straight edges of the Fantastic Fan, I lined up my first plank and screwed it in.

20150609_155725.jpg


20150609_164530.jpg


These are tongue and groove appearance boards designed for wall and ceiling application. Extremely light, far lighter than the hardboard that was previously up there.

More to come.
 
Cutting Fantastic Fan trim:
I inserted a thin cardboard into the trim slot and marked off how deep it was. 
I drew a line with a marker all around.

20150609_172013.jpg


I probably would recommend a rotary cut-off saw or hacksaw to do this. I used my jigsaw with metal cutting blade. 
The blade gets so hot the cut sort of melts back together after you cut through it. You can sort of bend/break the seam though.


20150609_172807.jpg

20150609_195354.jpg


I used rough sandpaper to smooth out the very jagged plastic bits along the cut.
I almost ended up cutting off too much; forgot to allow for the depth of the wood planks. Still, it worked ok.
Test fitting

20150609_173651.jpg


I placed another piece of that 1/4" trim under the pine plank for stability and a backer to screw into.

20150609_195817.jpg


20150609_200222.jpg


20150609_200202.jpg
 
Thank you for showing what you did with the vent trim piece.

I was having a problem figuring out how to end up with the neat look because just like yours, my ceiling isn't going to be deep enough to take up the whole of the lip on the vent cover.

Now I don't have to worry about it...problem solved!!
 
Top