Canyoning.Cat
Member
- Joined
- Mar 15, 2017
- Messages
- 13
- Reaction score
- 0
[font=Lato, sans-serif]This follows on from Day 1 and 2.[/font]
[font=Lato, sans-serif]So, it was the third day at Danny’s and I wasn’t expecting on doing a whole lot, but before I knew it, we were on our way to Home Depot, Nicki sitting between the seats.
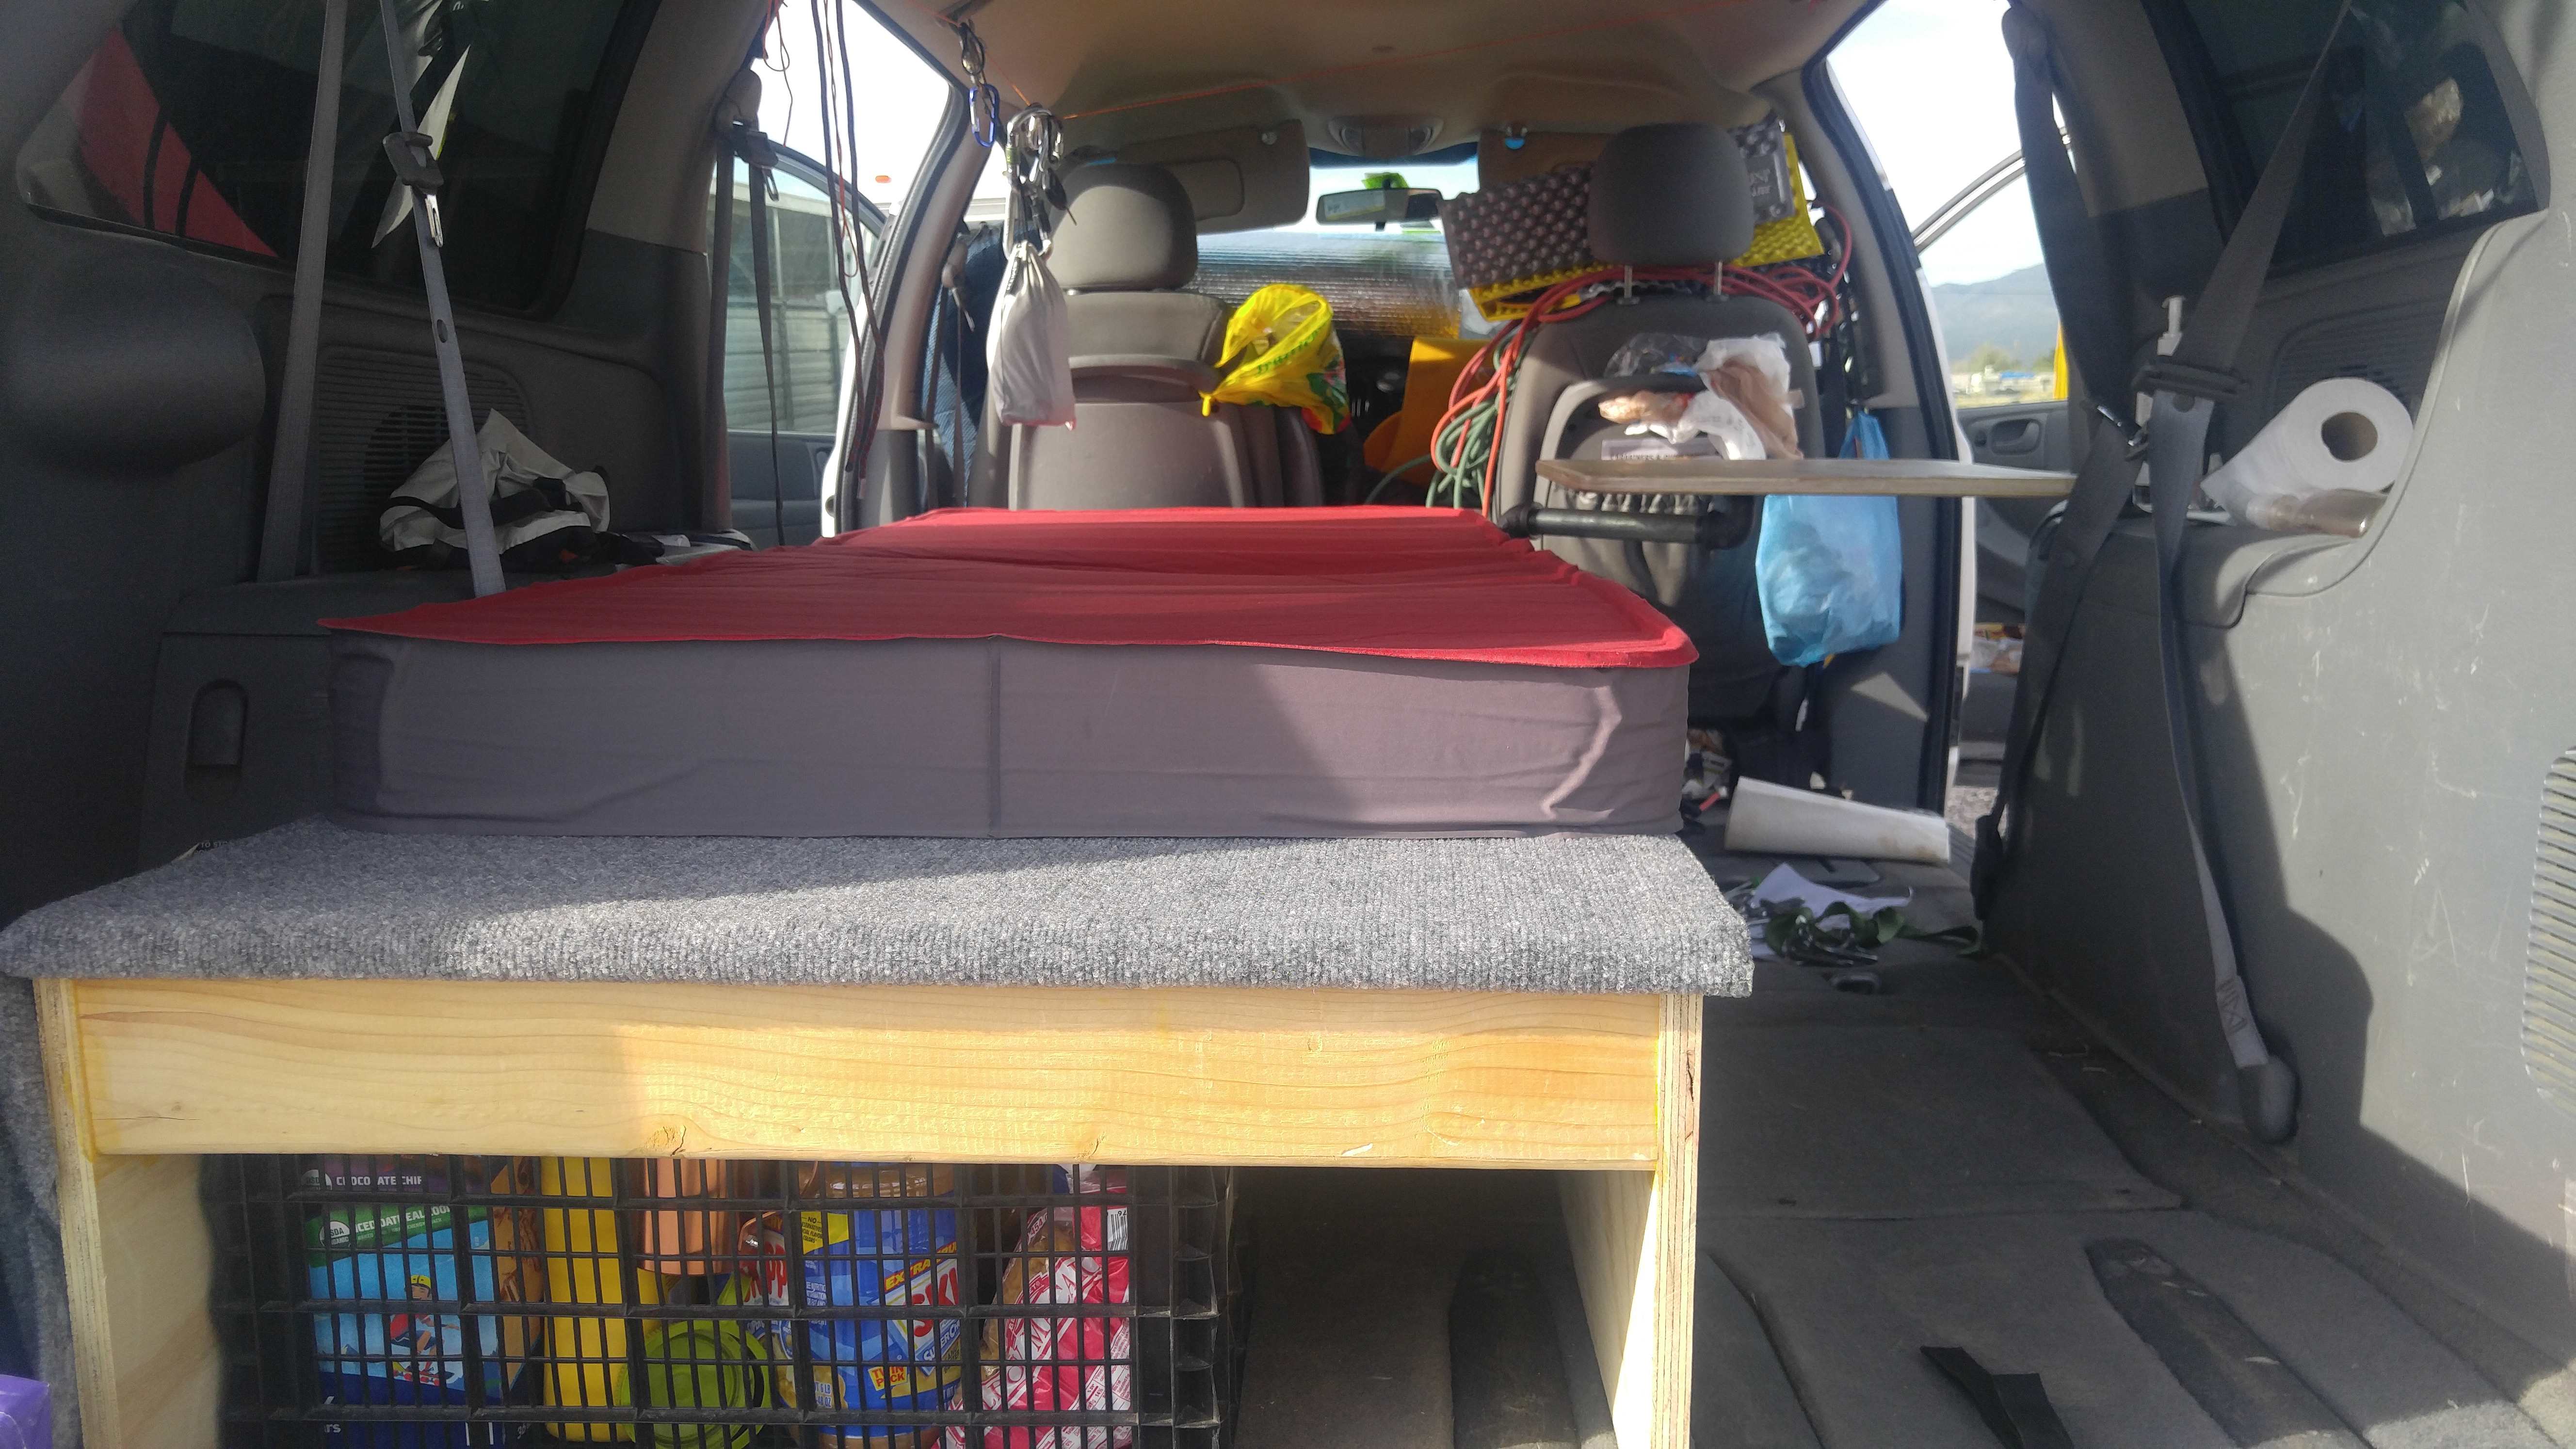
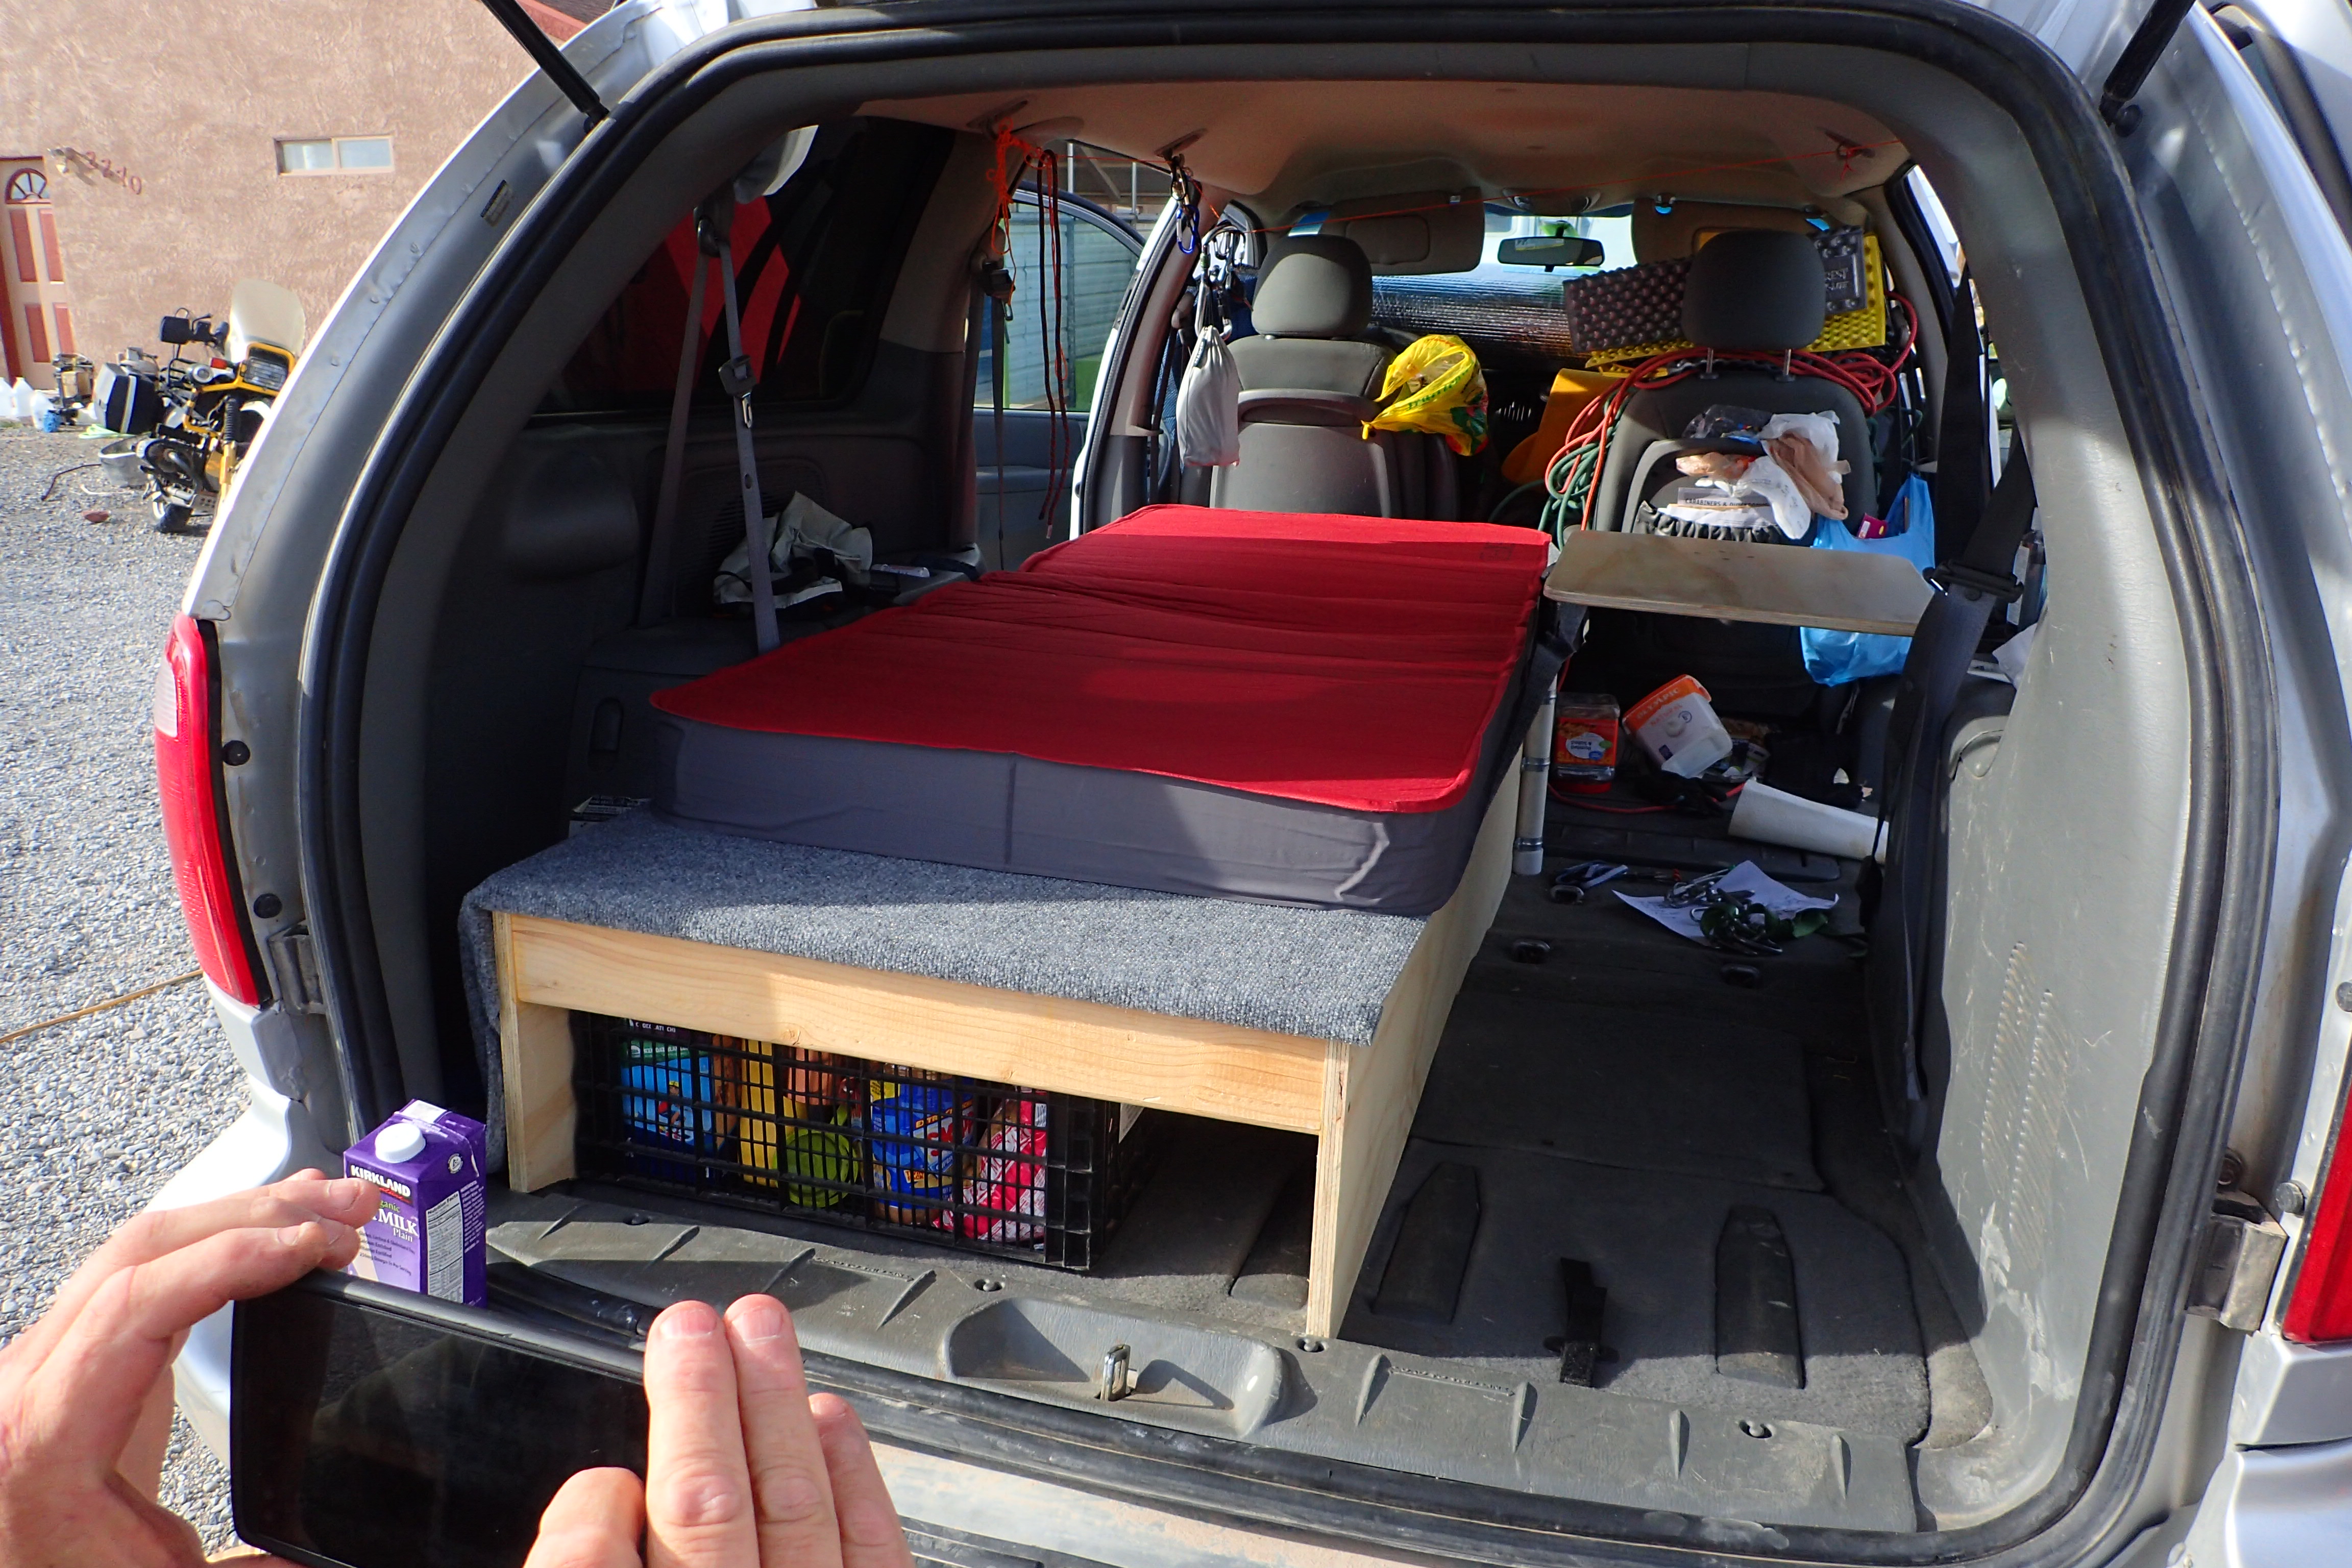
There were two main goals in mind. The first was to cover the top of the bed. We quickly found a role of indoor/outdoor carpet that would work well.
The second job was more complicated and involved a rotating table, made predominantly from plumbing pipe (the design would be based on Derrick and Paula’s swivel table video).[/font]
[font=Lato, sans-serif]
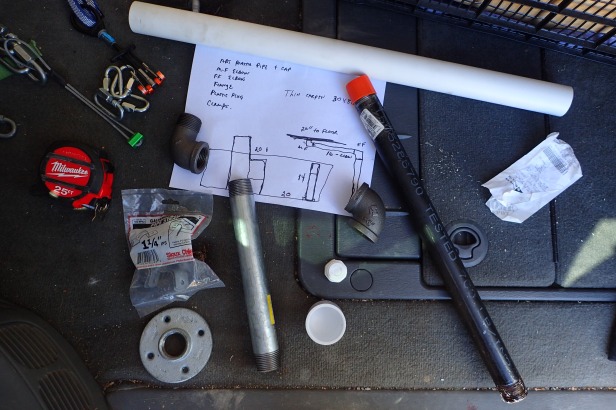
We had recorded the rough dimensions we needed and soon had two lengths of 1″ steel piping (M-M), two right angle pieces (one M-M, the other M-F), a flange to fix the table to the piping, a PVC sleeve that fit snugly over the 1″ pipe, and end cap, and a plug to go into the end of the steel pipe so it would spin more easily in the PVC end cap. We also picked up a few brackets to fix the mount to the side of the bed.[/font]
We had recorded the rough dimensions we needed and soon had two lengths of 1″ steel piping (M-M), two right angle pieces (one M-M, the other M-F), a flange to fix the table to the piping, a PVC sleeve that fit snugly over the 1″ pipe, and end cap, and a plug to go into the end of the steel pipe so it would spin more easily in the PVC end cap. We also picked up a few brackets to fix the mount to the side of the bed.[/font]
[font=Lato, sans-serif]
 [/font]

[font=Lato, sans-serif]When we got back it was relatively easy to put all the pieces together. With Danny’s help, I cut the PVC sleeve to the right height and then cut a piece of cardboard to use as a mock tabletop. We progressively cut pieces off the template until it was a practical size.
Before we could position the post of the table to the bed, we used an angle grinder make one side flat so it would sit parallel to the side of the bed. Sitting on the chair, we then positioned the table so it was comfortable to work on, swing the table around to see how it would move and if it would collide with anything.
The lid of the bed was then marked so a small section could be cut out.[/font]
[font=Lato, sans-serif][img=413x275]https://i2.wp.com/eclecticcats.files.wordpress.com/2017/03/p3170004.jpg?w=421&h=281&crop&ssl=1[/img]
[img=183x275]https://i1.wp.com/eclecticcats.files.wordpress.com/2017/03/p3170005.jpg?w=187&h=281&crop&ssl=1[/img]
[img=601x901]https://i1.wp.com/eclecticcats.files.wordpress.com/2017/03/p3170006.jpg?w=612&h=918&crop&ssl=1[/img][/font]
[img=183x275]https://i1.wp.com/eclecticcats.files.wordpress.com/2017/03/p3170005.jpg?w=187&h=281&crop&ssl=1[/img]
[img=601x901]https://i1.wp.com/eclecticcats.files.wordpress.com/2017/03/p3170006.jpg?w=612&h=918&crop&ssl=1[/img][/font]
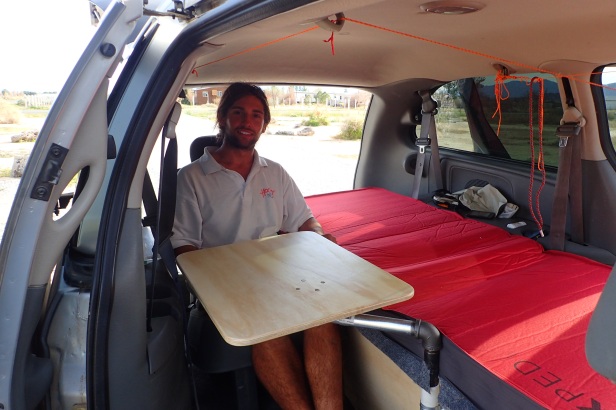
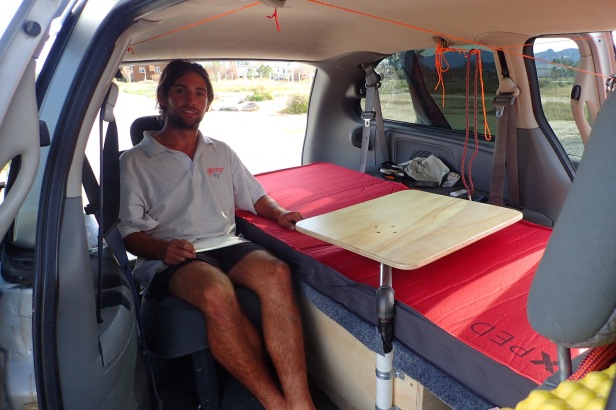
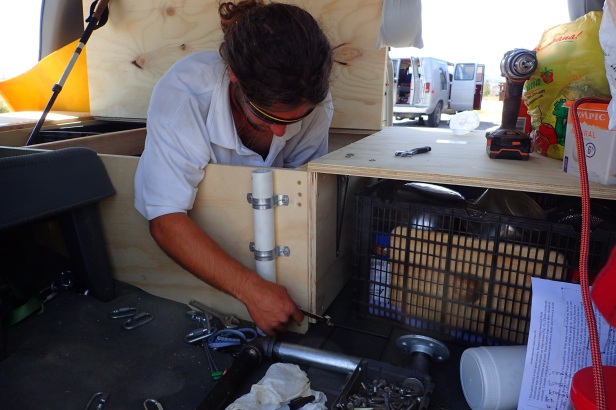
[font=Lato, sans-serif]After cutting a recess into the lid handle, we put the mock table in place holding the table stand/post against the side of the bed frame to mark the location of the holes that would fix it to the side. Holes were drilled and the PVC sleeve was bolted to the side of the bed with a few clamps.[/font]
[font=Lato, sans-serif]
 [/font]

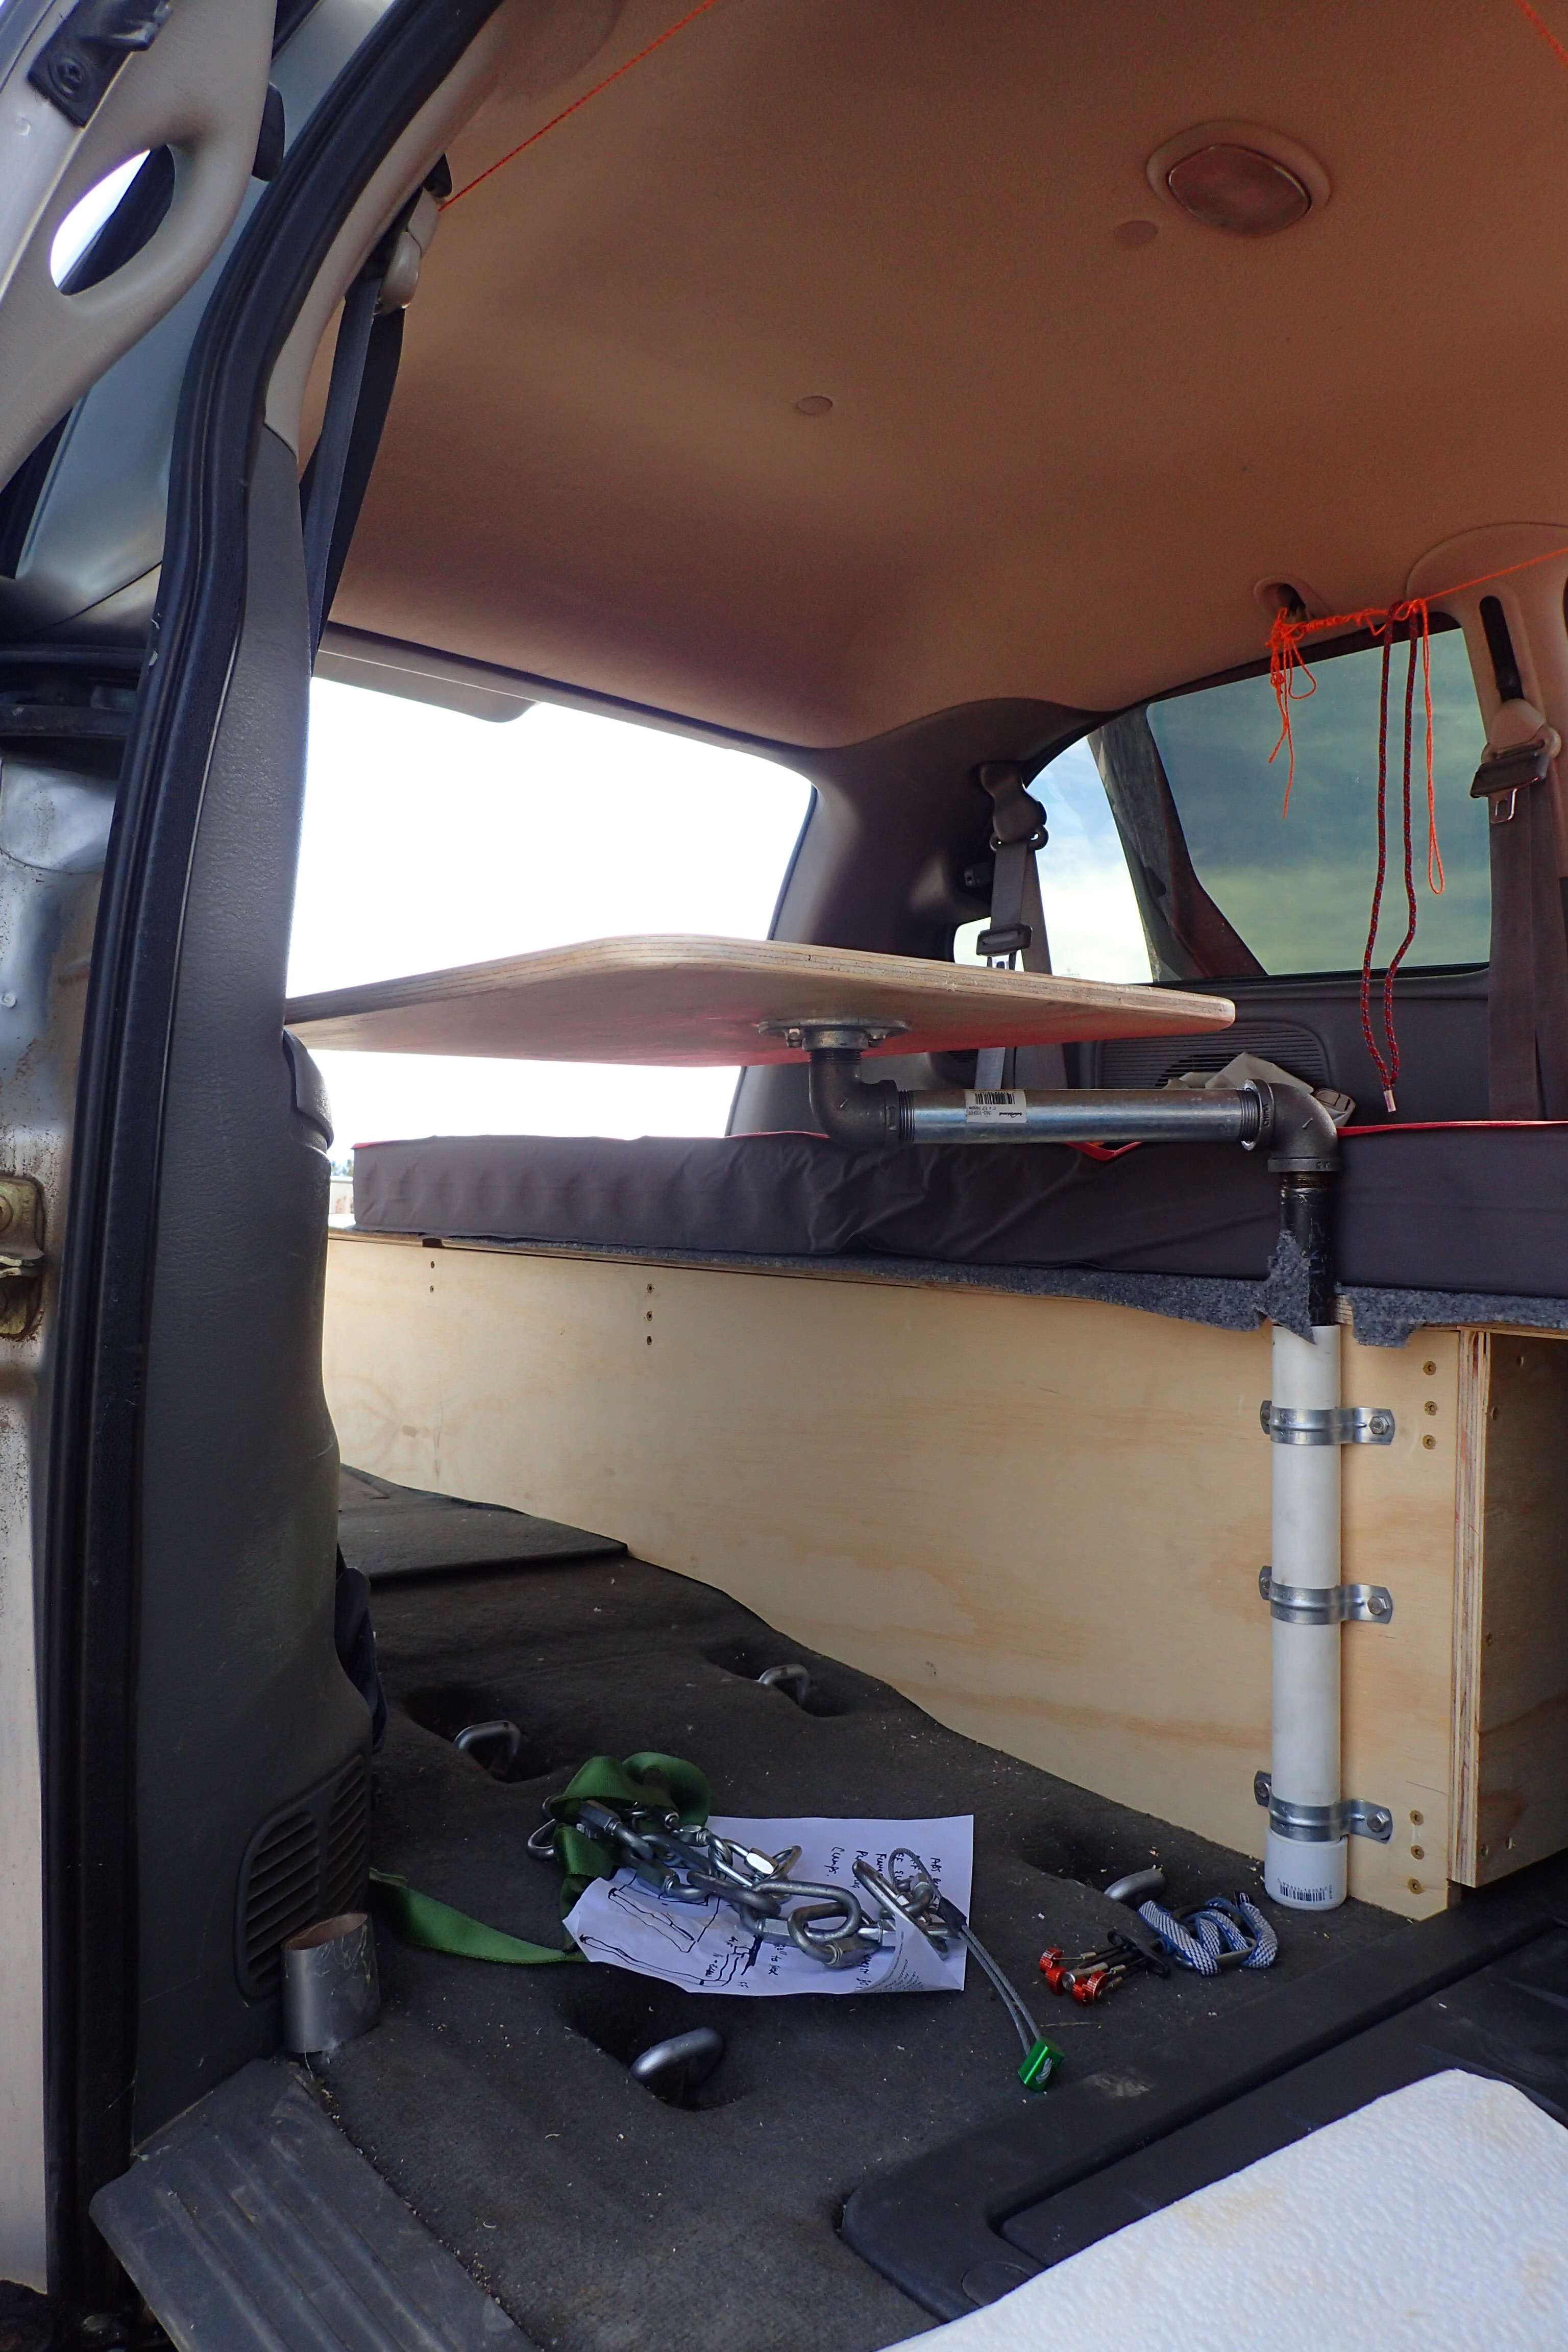
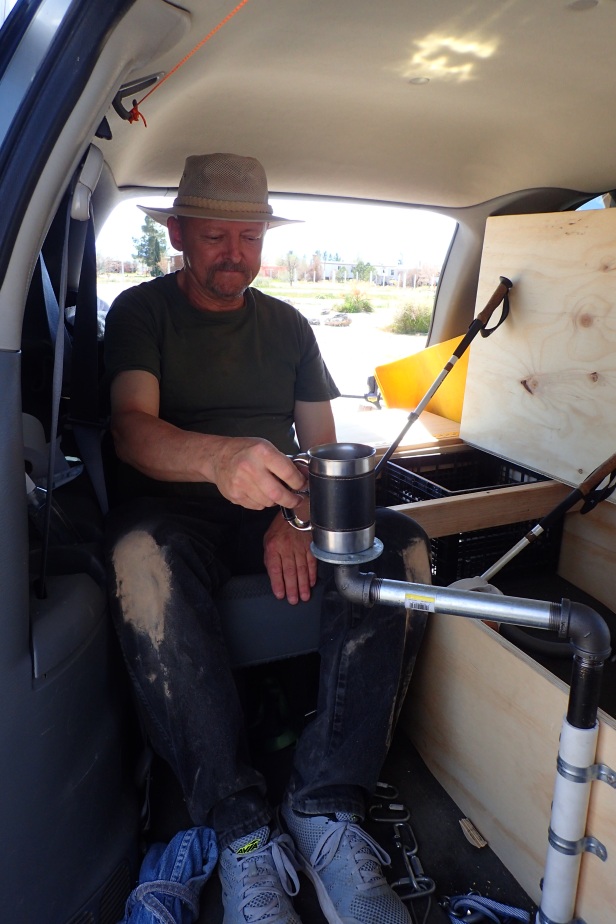
[font=Lato, sans-serif]The table stand slid snugly into its home creating a super sturdy cup stand![/font]
[font=Lato, sans-serif]
 [/font]

[font=Lato, sans-serif]The cardboard template was again put in place (to appease my sanity) before I cut a piece of ply that would become the table top.
To make the table a bit more friendly, we used a circular lid to radius the corners, removing them with a jig saw. A Japanese chamfer/angle(?) plane was then used to take the edge off.[/font]
To make the table a bit more friendly, we used a circular lid to radius the corners, removing them with a jig saw. A Japanese chamfer/angle(?) plane was then used to take the edge off.[/font]
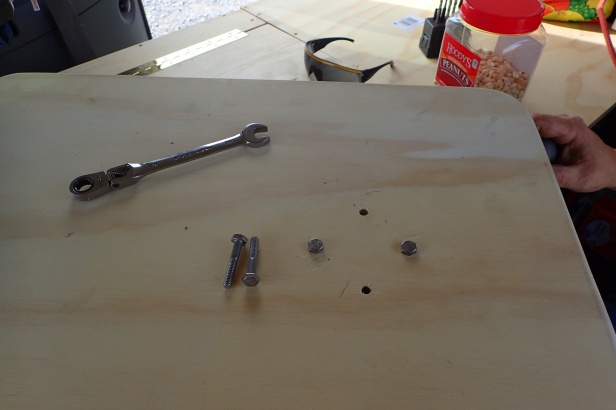
[font=Lato, sans-serif]The table in place, holes were marked, drilled and soon some bolts went in. Tightening the bolts sunk the hex heads into the wood. But some of them started spinning and would not tighten, and with them recessed there was no way to get a spanner (aka “wrench” for Nth Americans) on them (prevent them from spinning). The answer; a hammer. Brute force sent them home and with the thread now showing we could hold onto the thread with some vice grips to stop the bolt from spinning with the nut.[/font]
[font=Lato, sans-serif]
 [/font]

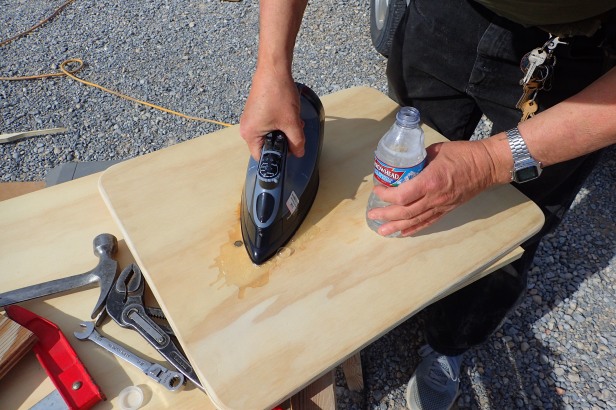
[font=Lato, sans-serif]Whilst hammering the bolts in, I had put some dents in the table. Danny went inside and returned with a clothes iron. I was a little confused… he put water on the surface and after letting it soak in a little, literally ironed out the indents I had inflicted on the table. What a neat trick. I remember saying something along the lines of “it actually worked” and Danny looked at me, his expression almost of disappointment that I had doubted his plans.[/font]
[font=Lato, sans-serif]
 [/font]

[font=Lato, sans-serif]I smoothed the tabletop carefully with an orbital sander. This took some time and putting the sander down it was a relief to have the table pretty much finished. I returned to the van putting it in place and brushing my hand over the smooth surfaces.
We applied a few coats of polyurethane and whilst drying packed away some tools, and began on the laying the carpet on the bed surface.[/font]
We applied a few coats of polyurethane and whilst drying packed away some tools, and began on the laying the carpet on the bed surface.[/font]


