[font=DejaVu Sans, sans-serif]The final LIVE video broadcast went well, except for some sound problems, which I'm working on right now.[/font]
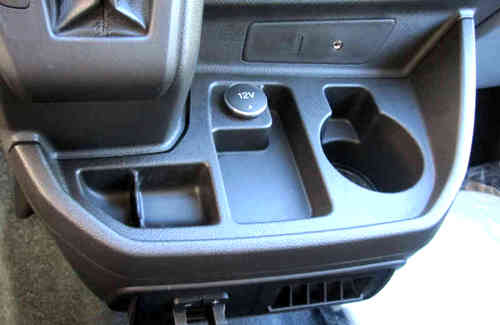
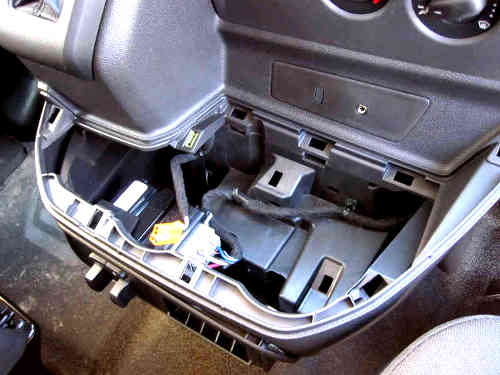
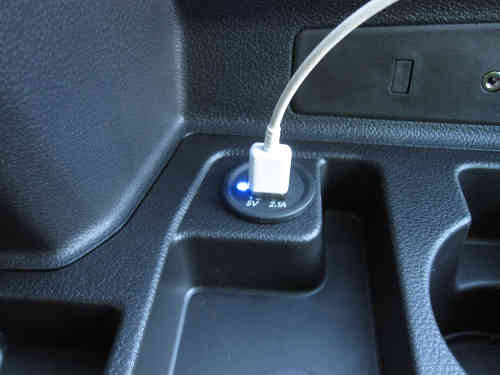
[font=DejaVu Sans, sans-serif]The focus was on replacing one of the two 12V outlets in the cabin console of my Ford Transit.
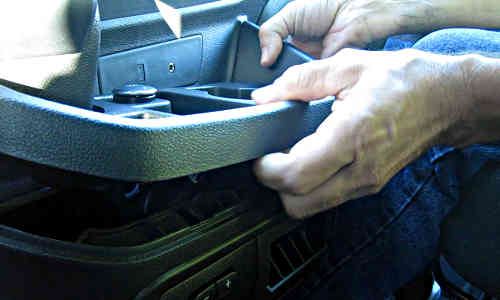
I didn't need many tools, only two sharp and pointy box cutters. The top panel, which contained the socket could be pulled apart fairly easy by hand with a little wiggling.
It's attached to the main console with about seven standard clips.
[/font]
[font=DejaVu Sans, sans-serif]Besides the T-shaped 12V connector, the area underneath only contained the trailer brake controller, that I had installed as an option. The same space also allows room for the Upfitter switches option.
[/font]
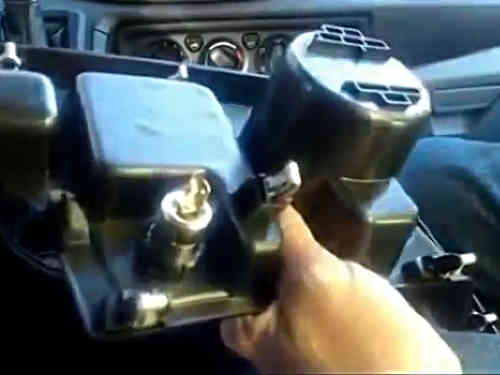
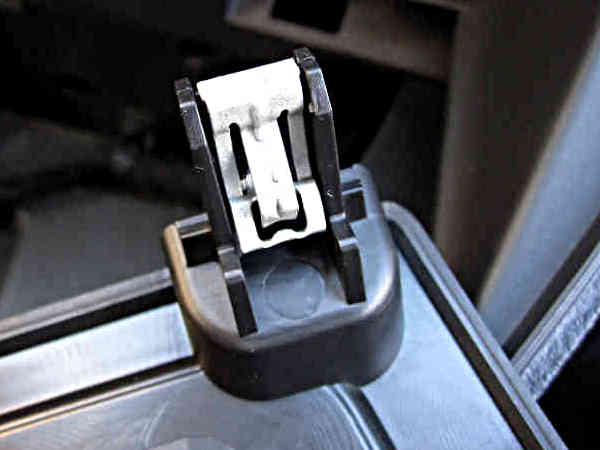
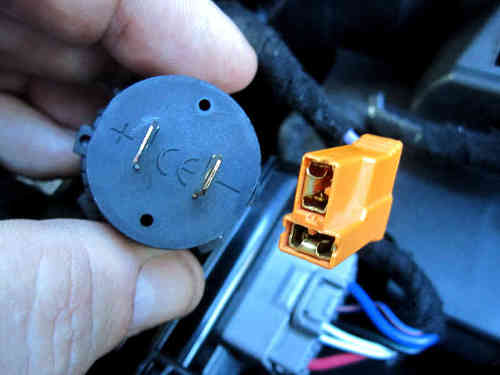
[font=DejaVu Sans, sans-serif]The tricky part was how to remove the old socket, which is held to the frame with two plastic 'springs'. Forget about those and focus on the metal, inner tube, which is attached with two smaller, but similar 'plastic springs' to the outer, plastic shell. By pulling these pins outward, the inner tube is released and subsequently the outer plastic shell can be taken out of the panel.[/font]
[font=DejaVu Sans, sans-serif]The only adaptation I had to make, was a short extension wire with spade connectors, to connect the T-shape connector to the parallel prongs on the new Dual USB charger.
[/font]
[font=DejaVu Sans, sans-serif]This could be a 10-minute job and suitable for most DIY'ers.
[/font]
[font=DejaVu Sans, sans-serif]In the coming days, I will write up a more detailed article with more images on the website and will publish a real detailed step-by-step guide with all the videos, images, tools and other resources to download for those who are interested.[/font]
[font=DejaVu Sans, sans-serif]
You can watch the full video here![/font]
[font=DejaVu Sans, sans-serif]This was a great experience and I learned a lot to make the next LIVE video broadcast even better. That will be the installation of a parking sensor in my rear bumper. Follow my website for updates or
subscribe to be automatically notified of the next broadcast.[/font]