2001 E-350 extended WB build

Van Living Forum

Help Support Van Living Forum:

This site may earn a commission from merchant affiliate links, including eBay, Amazon, and others.
AbuelaLoca said:
I'll be dealing with all these things shortly, dr_nelson, so thanks for sharing! I have those tracks too, two rows!

HDR, I'm in Missouri... if someone near here is heading your way soon, you can definitely have mine! I'll try to be careful taking them out (I'll try to have my labor be careful).

AbuelaLoca, it is practically impossible to destroy these things. And it's nothing complicated to take them out, just time-consuming and not fun (at least when you're doing it alone). I dare to say I prefer filing taxes or changing bed-sheets (I hate both) over removing metal tracks.
 
Not much progress...

At the moment, I feel like I am eating a gigantic elephant... will have to do it one bite at the time.
 
I understand how it seems so slow to get everything done. But it looks like progress to me!


Sent from my iPhone using Tapatalk
 
looks to me like your doing fine. silly tedious jobs are no fun but once your done you will feel good about it. highdesertranger
 
509a5522b43b9bd2de31772e68624b1d.jpg


Had a bad hailstorm yesterday. the van survived. i am glad i did not have my solar panels mounted, yet


Sent from my iPhone using Tapatalk
 
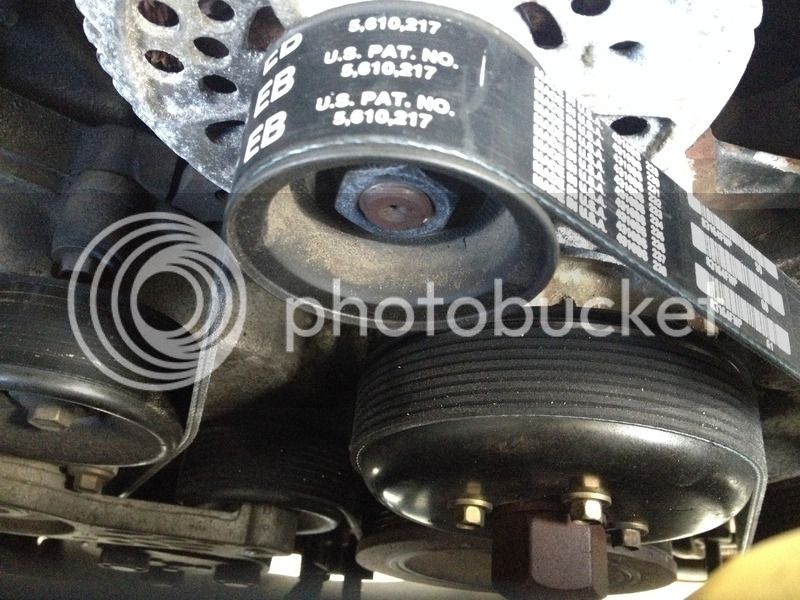
Today, I got a 'Serpentine Belt Tool' and a Ford/Motorcraft serpentine belt.
My breaker bar didn't fit, i.e. there was not enough space to get it inside the tensioner hole.

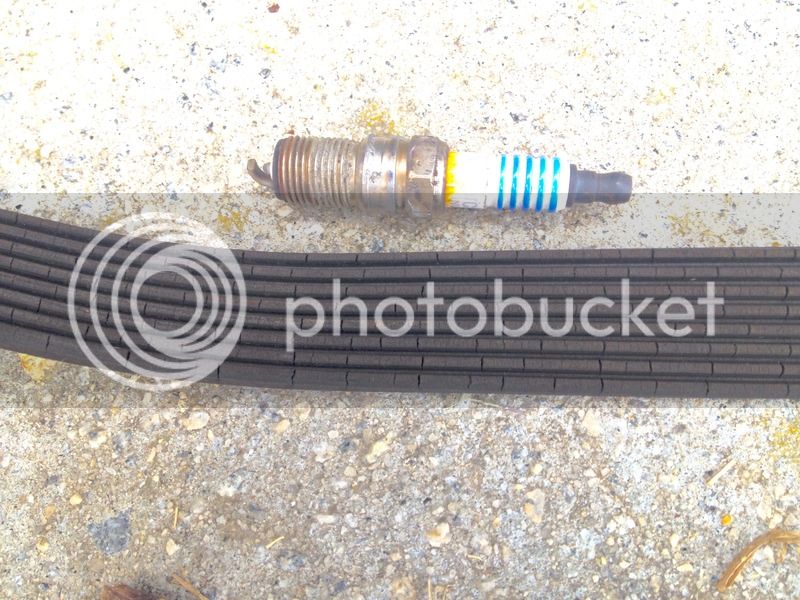
When I changed the spark plugs, I was able to see in what an ugly state the serpentine belt was. Tons of cracks per inch:
FCA61D05-6194-42A7-948B-51A1425F1A3A.jpg


0F0A437E-E58F-43A7-9F95-ED30B3341254.jpg


Replacing the drive belt was really easy. I am starting to like this van...
I also noticed that one of the idler pulleys will need to be replaced soon, too.

New belt looks fresh and I didn't tear it after starting the van:
60339EAE-D0B5-4652-9EB3-30D099CE3053.jpg


I just wonder when I can start the build...
 
The floor is almost ready for the subfloor. Before / after:
[img=249x186]http://i58.photobucket.com/albums/g...0a9a811-9137-4cff-a79e-30eab2eb69ab.jpg[/img]

My van had running boards. Although they might be comfortable, I just don't like the looks, at all.
[img=322x242]http://i58.photobucket.com/albums/g245/dr_nelson/Van Build/01515_9a0lVFIUxu7_1200x900.jpg[/img]

After removal, this is what I find in the door step, on the right and on the left:
[img=600x450]http://i58.photobucket.com/albums/g...A53C1F8-F20F-475B-8935-3C082DD01F91.jpg[/img]

[img=597x447]http://i58.photobucket.com/albums/g...C7D24A0-6CB4-4244-B207-0763E350A55C.jpg[/img]

Question: Will some JB Weld Waterweld epoxy do the trick to both seal the cracks and prevent it from further cracking?
(to weld it would be probably best. But I don't know how to weld and I don't have a welder)

Another thing I found today, that those "wheelchair" doors hold water. The corners (see green arrows) were just filled with rusty water. Seems the water has no where to go from there. I think I'll just put rust paint over it and fill it up with some sealing caulk.
[img=405x304]http://i58.photobucket.com/albums/g...08c0eb1-084e-4e75-ad34-65bfdf72e364.jpg[/img]

And a little bit of history. I am happy to report that I have one of the world's finest fiberglass products on my van. Here is the proof:
[img=407x255]http://i58.photobucket.com/albums/g...8073D1B-5FE7-4A01-8778-5A375006542B.jpg[/img]
It was manufactured by Tri-Glas. Sadly, they had to shut down the plant in 2007, after 30 years in business. Found this article on the web.
 
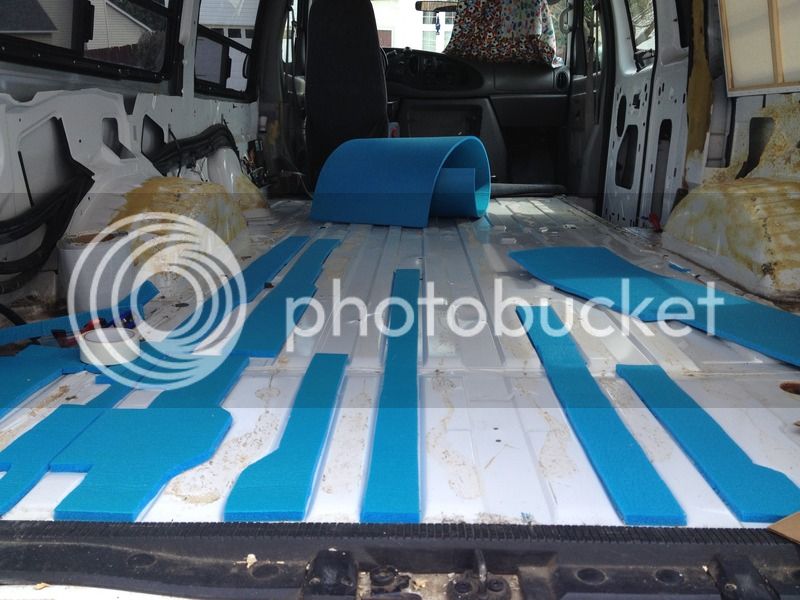
Floor Insulation started.
Closed cell camping foam mat in between the rips; used double-sided carpet tape to hold it in place for now. I know the carpet tape will dry out, but once the polyiso and plywood go on top, it will stay put.
AF1FCAB5-8DE8-4EF7-9379-9C516CBE59E9.jpg


I know to insulate the floor is almost impossible. So, this serves more to level the ribs and to make the van more silent (sound deadening). But maybe this is still better than nothing... might keep the heat/cold in for 2 mins longer.  ;)
As I go along, I will have to seal most of the 100 holes in the floor.
 
The mail woman brought me some wind deflectors today. She is so nice!
Installation was easy and quick... and more fun than sound-deadening/insulating the floor. I was done within 5 mins.

If I could go back, I would buy deflectors that come down a little more, so I could open the windows even more without anyone really noticing. But it's good enough. I plan on having floor vents anyway, along with a roof fan.

[img=471x353]http://i58.photobucket.com/albums/g...1493BFF-F199-4081-8F64-A82FF257D9A0.jpg[/img]
 
Reached a milestone today; at least for me. In my 42 years, I have never cut a hole in a vehicle.
Until today, because today is roof vent day.

Quickly tested the fantastic fan by hooking it directly to the battery, i.e. holding the positive and negative cable to the starter battery.
Worked. Nice!

I will get 2 x 180W and 1 x 100W solar panels. This was crucial for the position of the roof fan. I would have like the fan to be more towards the back, but not over the bed. It was like Tetris... this is the constellation I decided on. At least, the fan will be more or less over the kitchen:
[img=534x400]http://i58.photobucket.com/albums/g...772BD94-F70A-4554-A82F-3038BDA7E2AF.jpg[/img]

To catch the fiberglass debris, I put some garbage bags from the inside:
[img=527x396]http://i58.photobucket.com/albums/g...46E2EA0-2425-42DA-AF9F-0C6EA903963A.jpg[/img]

Deep breath, and then drilling:
[img=628x471]http://i58.photobucket.com/albums/g...598B08A-2E9A-48E0-9019-E45FB47DF8EA.jpg[/img]

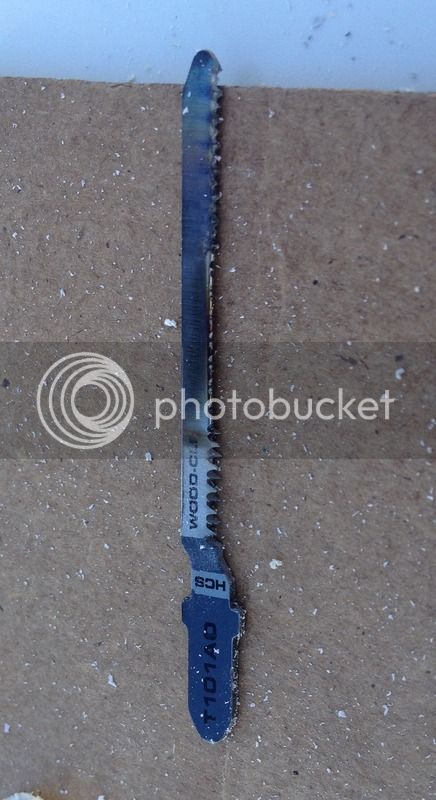
After cutting just a couple of inches with my jigsaw, I noticed it wouldn't go any further. The 'wood' blade looked like this - all teeth gone. Is fiberglass that strong?
0C6102B2-7729-4076-866A-DA94EF7D991B.jpg


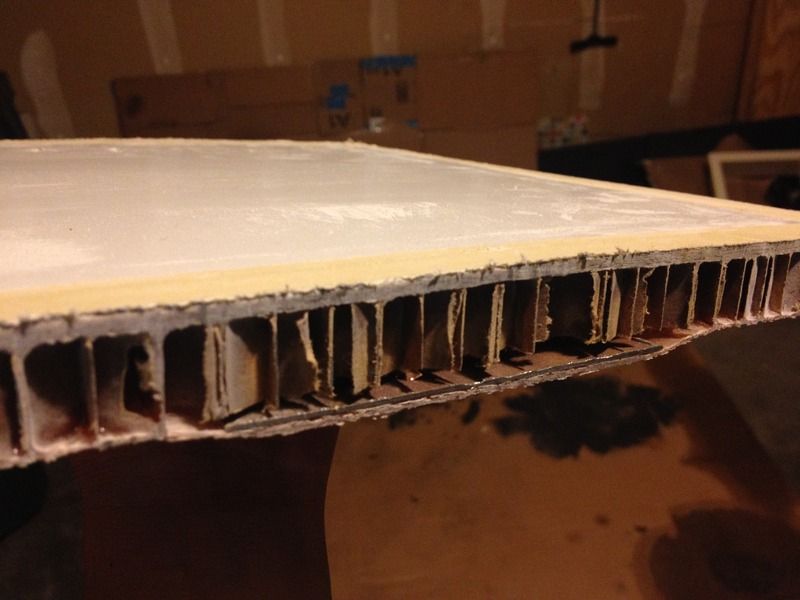
The reason was... my fiberglass top has metal in it. I thought those were wood-enforcements, but they're actually metal. Also, it has a honey-comb-like structure in between:
45A0F939-190D-4413-B1B2-ECEF5D3506BC.jpg


I used Butyl Tape and Dicor Lap Sealant to seal it. It was already dark, so no pics.

It's in and it works!
[img=475x356]http://i58.photobucket.com/albums/g...4013B95-7EF7-437B-B56C-448B45289032.jpg[/img]
Of course, this is not the final electrical install.
 
really the only way to properly fix those cracks is to weld them. you could try to take a small drill(1/8 or less) and drill out the ends of the cracks. you MUST find the end. then JB Weld it. I really don't have much faith in that working but you never know. if you don't drill the ends out the JB Weld will fail in short order. BTW if it were to be welded you still must drill out the end of the cracks. highdesertranger
 
HDR, thanks for that advice. I didn't know one can drill out an end of a crack.
I hope I did it right.

Before:
[img=323x406]http://i58.photobucket.com/albums/g...F23EB36-C9FB-45C8-A028-F3ADD272917A.jpg[/img]

Drilled out multiple ends:
[img=325x446]http://i58.photobucket.com/albums/g...5E8006C-FB2F-4196-8B9D-A7A7857B1698.jpg[/img]

[img=323x487]http://i58.photobucket.com/albums/g...177E083-5434-4FAA-8002-E0586B08D0C5.jpg[/img]
(this really is at the end of the crack. I could tell by pressing on the crack.)

Painted rust-protect over it:
[img=328x531]http://i58.photobucket.com/albums/g...f11d889-a846-4751-aae8-5c5fbb6b2b47.jpg[/img]

I think it will be ok without welding, because there is not much stress since the running boards are gone. But I think I'll re-inforce with some metal plates...
 
Here is the promised pic of the sealed roof fan (Dicor Lap Sealant self-leveling stuff). Looks like it could need some more:
[img=469x353]http://i58.photobucket.com/albums/g...EEFB60C-A6EF-4499-9A7C-2D36CA47661B.jpg[/img]


Need some more JB Weld Water-Weld. Used one roll and some pennies to cover the 100 holes in the floor:
[img=475x356]http://i58.photobucket.com/albums/g...27C87F8-6454-4ED2-B07B-6E17F51BBCFB.jpg[/img]

[img=474x356]http://i58.photobucket.com/albums/g...F711EE7-2766-4F1A-8319-2D4CD4B7D38E.jpg[/img]
 
AbuelaLoca said:
Ugh... I hope I have as much patience!! Nice work!

Thanks!
Actually I do not have much patience... but if I don't do a half decent job now, I think it would require even more patience to fix it once everything is "covered and built over".
 
Top