Partial Subfloor to Anchor Galley?

Van Living Forum

Help Support Van Living Forum:

This site may earn a commission from merchant affiliate links, including eBay, Amazon, and others.

VanFan

Well-known member
Supporting Member
Joined
Jan 9, 2011
Messages
1,249
Reaction score
212
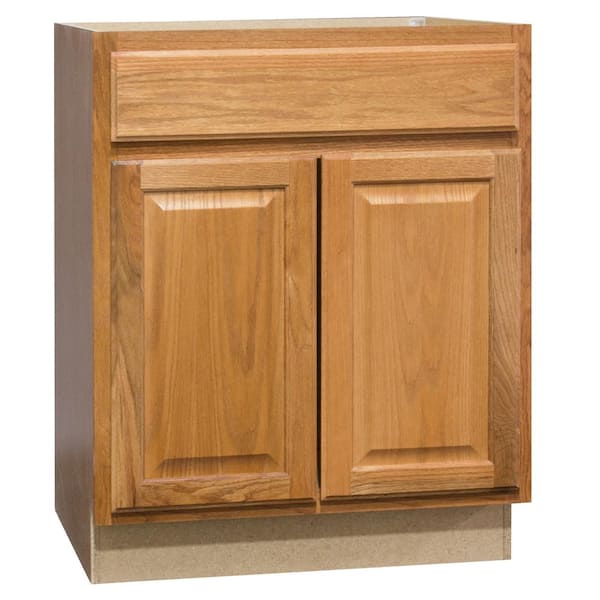
Thinking ahead a bit to our next modified conversion van, I want a simple galley this time around. I do not intend to gut the conversion, but don't know how to go about securing a base cabinet or similar to the van behind the driver's seat. One thought is to place a partial, floating subfloor (1/2" or 3/4" plywood) on top of the carpet behind the front seats.

My first concern is trapped moisture. I suppose the ply could be sealed. Would some kind of moisture barrier be at all effective/feasible?
 
Make a bracket and attach it to the wall or rib inside the wall.
 
Really wouldn't be comfortable putting plywood over carpet. Can you remove that part of the carpet and either bolt or glue the ply to the metal floor? Bullfrog's idea is probably best. Using some plusnuts on the metal wall and bracketing it in.
 
Carpeting generally being made of soft fibers can wick up moisture and it cold be transferred to adjacent areas of the carpet including to carpeting that has plywood placed on top of it. A moisture proof overlay on top of it or under carpeting would not stop the moisture from a spill onto the carpet in front of a cabinet migrating on into the carpet extending under that cabinet. You also could not even use some type of vacuum water extractor to get to the carpet under a fixed in place cabinet. It would be a nuisance to have to empty a cabinet and remove the fasteners to take it out of the way so that wet carpet underneath can be dried.

I myself would not want to install carpet in an area where water is used. For nomadic lifestyles a throw rug placed on a non skid mesh underlay that can be removed and laundered or hung outside to dry is a better option than wall to wall carpeting.

Van builds require a lot of visualizations before final choices are made. Visualization is aomething that gets better with practice and it can easily be turned into a habit that is always part decision making for things such as builds and buying of materials. You too can get into that habit very quickly🙂
 
I've plywood covered the metal floor of my Van behind the front seats to the rear doors as a starting point. The floor area the kitchenette cabinet will have linoleum to rest on extending out away from it on 3 sides to deal with spills when cooking.

I got the cabinet free. (a bathroom lavatory cabinet missing the marble top) I've cut roofing particle board and painted it to serve as a top. This will have a sheet metal covering also. The metal sinks are smaller than I'd like but they were cheap........so I've laid the top out so that if I find larger ones I can easily retro fit them

medium-oak-hampton-bay-assembled-kitchen-cabinets-kvsb24-mo-64_600.jpg


I'll have a fold out table installed on the left door. It will be about the same size as the door.

This is the layout of counter top.

Van Counter Top.JPG

The kitchenette will sit in view with the side doors open.

On the back side of the cabinet I will have two aluminum bars (2"x 43"x 1/4) attached at top and bottom to attach to the vertical roof braces of the Van. At the lower front of the cabinet I'll install "L" shaped angle metal bolted thru the floor.

I'll install a shelf over top of this for a small microwave, coffee percolator, and condiments all of which will be secured.

But this is how I'm doing mine if there are any ideas you want to use from it.
 
Bullfrog: When you say "brackets," I'm not sure what you mean. Without knowing what I plan to install at this point, I probably shouldn't ask you to elaborate, but would you? LOL.

I am currently thinking along the lines of a 30" wide vanity-type cabinet, possibly a student desk, and have even considered just setting up a folding table when stationary as needed. They idea of a hinged counter top attached to the wall in intriguing, too. I really only want a surface to heat a kettle of water or make a simple meal, since I cook outside and have a very effective set-up for that. I will want to incorporate a basic sink and gray water containment system.

My current set-up does include a sink with a five gallon water bottle and a 2-1/2 gallon gray water jug, but it is at knee level (space constraint), and has no real counter space. The new van will be 2' longer, which means the driver's seat can be raked back while leaving a tad more vertical space for a counter.

The walls of the new van will be lightly insulated and upholstered (an upfitted conversion/touring van). That will make it more challenging to find the ribs, but I believe detailed engineering diagrams are available for the base chassis, which should help. I've only seen videos of plus nuts being installed in existing holes in ribs, which will be harder still to find and, if I recall, must be drilled out a bit to accept the plus nut.

Might L-track be a good option? It seems securing at both the wall and floor would be best. Of course, any attachment is only as strong as the weakest element, so it might be overkill. 80/20 appeals in that regard. Pre-cut kits I've looked at are too wide (pricey, too).

There are also quick-release seat anchors in the floor, but I have not found those especially useful in my current van.

Carpet would not be my first choice for flooring, either, but I won't be removing it from the new van. (The carpet in my '96 has held up surprisingly well, but my "water works" is fully contained, and I don't cook in the van.)

Thanks to everyone for helping me think this through. This element is one of only a few hurdles I need to clear, but right now, it looks pretty tall.
 
Last edited:
I've plywood covered the metal floor of my Van behind the front seats to the rear doors as a starting point. The floor area the kitchenette cabinet will have linoleum to rest on extending out away from it on 3 sides to deal with spills when cooking.

I got the cabinet free. (a bathroom lavatory cabinet missing the marble top) I've cut roofing particle board and painted it to serve as a top. This will have a sheet metal covering also. The metal sinks are smaller than I'd like but they were cheap........so I've laid the top out so that if I find larger ones I can easily retro fit them

medium-oak-hampton-bay-assembled-kitchen-cabinets-kvsb24-mo-64_600.jpg


I'll have a fold out table installed on the left door. It will be about the same size as the door.

This is the layout of counter top.

View attachment 34573

The kitchenette will sit in view with the side doors open.

On the back side of the cabinet I will have two aluminum bars (2"x 43"x 1/4) attached at top and bottom to attach to the vertical roof braces of the Van. At the lower front of the cabinet I'll install "L" shaped angle metal bolted thru the floor.

I'll install a shelf over top of this for a small microwave, coffee percolator, and condiments all of which will be secured.

But this is how I'm doing mine if there are any ideas you want to use from it.
Very much along the lines of what I've been thinking and quite helpful. The sticky spot for me is no subfloor, but the wheels are starting to turn a bit.
 
Last edited:
Plus nuts, commonly known as Rivet nuts are easy to install if you purchase the river puller made for them. They do require drilling a hole of a diameter that matches the nut but the hole size is a known standard and you can find out the correct drill size when you purchase the nuts.

Do purchas a spring loaded center punch if you are going to be drilling into metal. It creates a small divot impression on the metal at the exact center of where you want the hole. That divot keeps your drill bit from skating sideways along the hard metal surface. That reduces effort, potential damage to your project as well as the potential for injuries to your hands from a runaway drill bit.

I am always willing to give one-on-one lessons in the basics of tool use and safety tips for such things as drilling and putting in Rivnuts to persons who want to gain such skills. I installed thousands of rivnuts during my years of work in aircraft fabrication and also taught others that skill. I will be in Quartzsite and the Yuma areas this winter.
 
Do purchas a spring loaded center punch if you are going to be drilling into metal. It creates a small divot impression on the metal at the exact center of where you want the hole. That divot keeps your drill bit from skating sideways along the hard metal surface...

I am always willing to give one-on-one lessons in the basics of tool use and safety tips for such things as drilling and putting in Rivnuts to persons who want to gain such skills. I installed thousands of rivnuts during my years of work in aircraft fabrication and also taught others that skill. I will be in Quartzsite and the Yuma areas this winter.
Thank you for the drilling tip. Although I don't personally plan to be in the West this winter, your generous offer of one-on-one lessons will be a great gift to others.
 
Latest thinking on this is to use a wall cabinet. They come in the right size (30"x30"x12") for the space and I should be able to add a 15" deep counter top fairly easily.

I wonder whether using a pair of long runners (perhaps 2x4''s?) under the cabinet might be a decent option. The current bed frame is metal and secured via former seat belt hold downs in the floor. My thinking is that one of the runners could be attached to the bed frame at floor level, with the cabinet attached to that runner. A second runner, closer to the wall, would only go as far as the wheel well. An additional tether should probably be added to the wall higher up.

Still just brainstorming this and wondering what others have done.
 
^ Except a wall cabinet has a taller door and won't have room for the sink

a base cabinet can be made smaller and fit tight to the upholstered wall by scribing....

and to mount a base cabinet a wood cleat is added to the floor/carpet to fit inside the base .....CAREfully screwed to the floor or even just glued to the carpet

then the cabinet is fastened thru the toekick.............the cabinet top rail replaced and fastened to the wall also
 
If you can measure and cut wood accurately you can make a custom sink cabinet. It is not that complicated of a structure. Get some big cardboard boxes to cut up and make a full size trial version including the countertop. That will clarify your thinking about what actually fits in the space. It also puts a stop to overthinking it all in your head and instead gives you a real life size visual plan to work with.
 
^ Except a wall cabinet has a taller door and won't have room for the sink

a base cabinet can be made smaller and fit tight to the upholstered wall by scribing....

and to mount a base cabinet a wood cleat is added to the floor/carpet to fit inside the base .....CAREfully screwed to the floor or even just glued to the carpet

then the cabinet is fastened thru the toekick.............the cabinet top rail replaced and fastened to the wall also
Had not thought about the sink depth. It seems a hole could be cut in both the counter and the cabinet top to accommodate it.

Scribing is not something I knew about. It looks like it could be useful here. Likewise, cleats. I only found info online about French cleats, which I don't think is what you are talking about, but they are a clever concept.

Thank you!
 
If you can measure and cut wood accurately you can make a custom sink cabinet. It is not that complicated of a structure. Get some big cardboard boxes to cut up and make a full size trial version including the countertop. That will clarify your thinking about what actually fits in the space. It also puts a stop to overthinking it all in your head and instead gives you a real life size visual plan to work with.
I probably will not be building a cabinet, but really appreciate the reminder about cardboard mock-ups! I saved a screen door box for just that when I briefly contemplated a full self-build. It will definitely be helpful. (I would not make a fitted garment without at least one muslin, after all.)
 
My current thinking is to build a small galley frame with 80/20. Initially, it seemed like an expensive option. However, since I have limited space, tools and know-how, it might end up costing less for a better outcome.

Looking into prefab cabinet units was discouraging. What I've seen may not be great for van use because of low quality/porous materials.

The open frame will help avoid the problem of moisture underneath, so leaving the carpet in place should not be as much of a liability. Securing the frame is something I still have to work out. I'm considering using ratchet straps to fasten it to the driver's seat pedestal on one end, and the rear passenger seat quick release mount on the other.

This galley will be tiny because of our north/south bed layout and short van choice, so I hope to be able to add a counter extension with undermount drawer slides and, possibly, a perpendicular flip-up on the end the sink is mounted on. I have no idea how a flip up might be supported, since it is an open frame concept.

Any suggestions for the countertop?
 
The companies that sell 80/20 have all the accessories you need for adding drawer slides as well as hinge up and lock in place counter top extensions. Plus they sell small angle brackets you can use to secure a cabinet to the metal floor of the van. Do not be too terrified to crawl under the van and check to see if you have clearance to drill
a small hole for and install some pull rivets or well nut fasteners for hold down brackets. People sure do seem to get petrified at the idea of putting a few extra fasteners into the metal floor pan or ribs in a van. You can use waterproof rubber expanding fasteners with a threaded metal insert in them for a thru the floor pan installation that accepts machine screws. Those are called “well nuts”or sometimes “expansion nuts”.

Get some digital downloads of 80/20 catalogs and enjoy browsing through them.
 
Last edited:
Top