Framing a warped and dinged floor

Van Living Forum

Help Support Van Living Forum:

This site may earn a commission from merchant affiliate links, including eBay, Amazon, and others.

adi

Well-known member
Joined
May 14, 2012
Messages
57
Reaction score
0
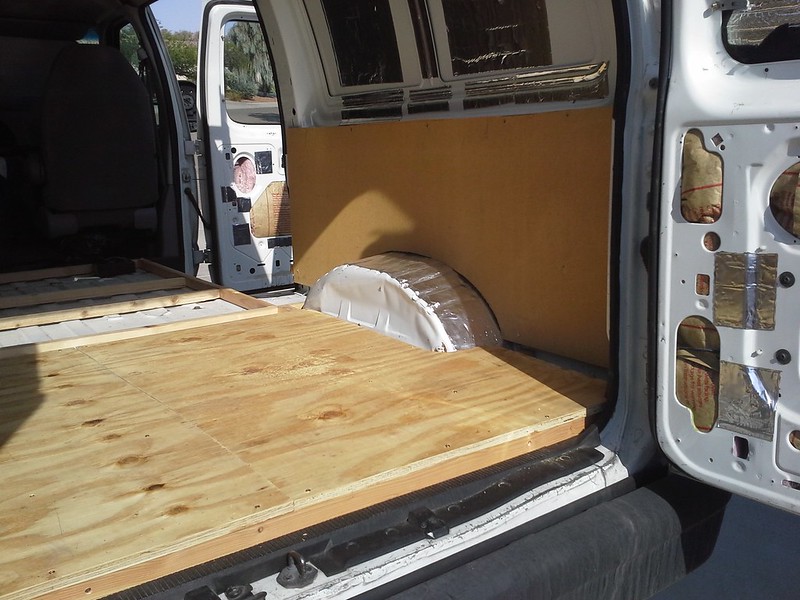
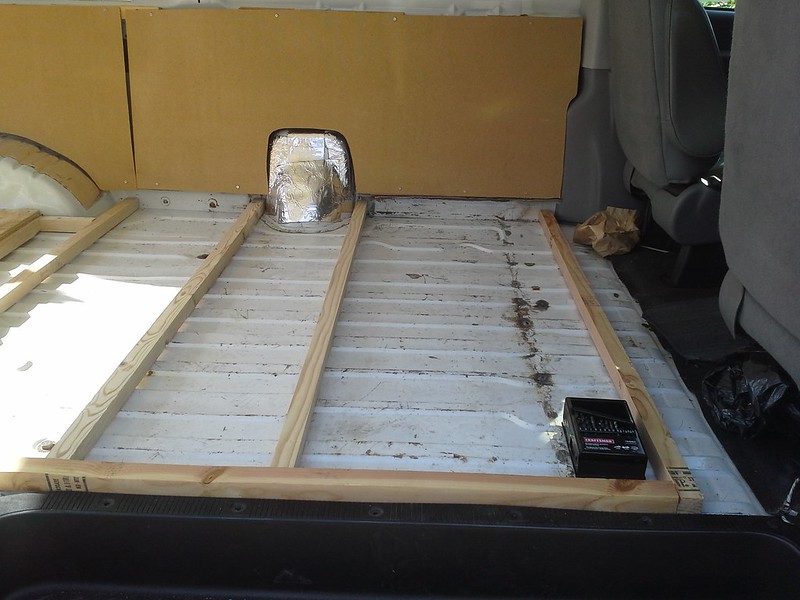
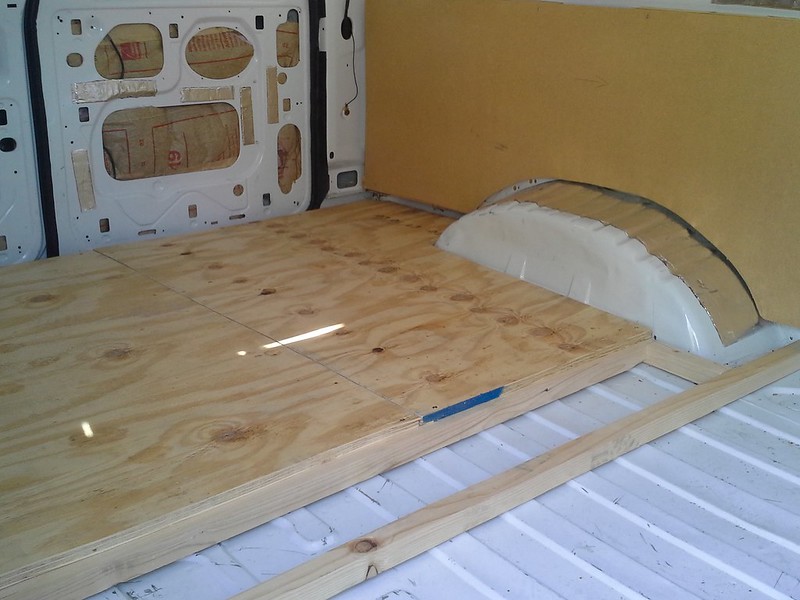
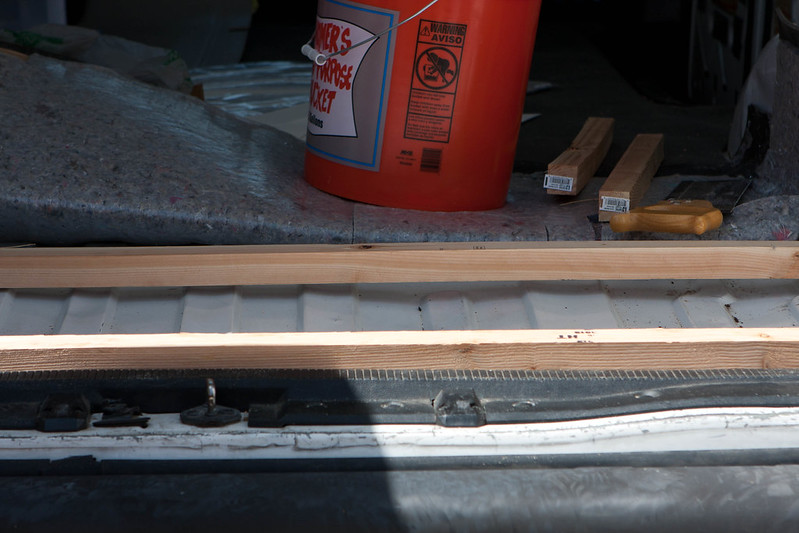
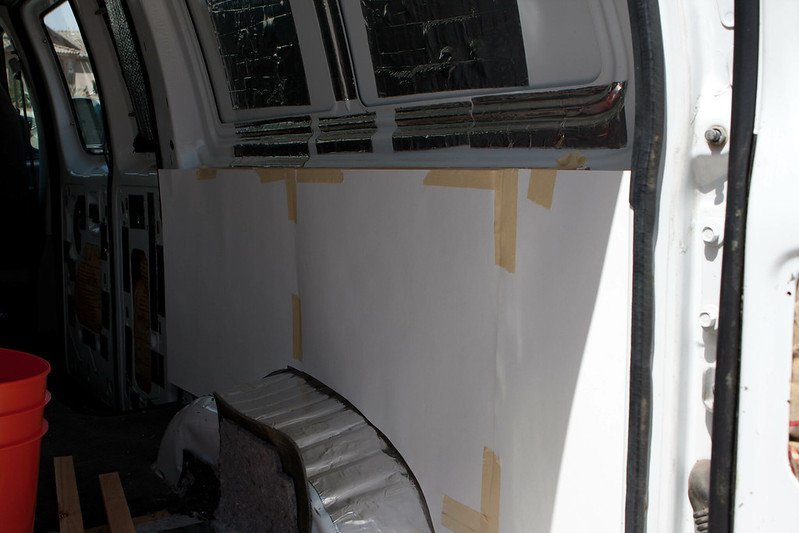
So I started on the project today to frame my floor, but ran into some issues.<br><br>The plan is to put down a framework of 1x1's, with rigid insulation between them, and ply on top.<br><br>However, the previous owner apparently tossed heavy cargo around a lot, so the floor is dented and dinged like crazy. This brings up 2 questions:<br><br>Do I just make sure the top is level, then add blocks and wedges below the framework to support it? Do I try and have a body shop un-ding and level the floor?<br><br>Secondly, this will add a lot of air gaps, mostly above/below the insulation. Should I worry about either filling that space, or preventing air movement between different chambers?<br><br>The wood itself isn't 100% straight either, so I might just put up with a warped floor for this first attempt, but you can see the gaps below the far cross board. <br> <br><br>The template for the side boards.<br> <br><br>And behind the side templates:<br> <br><br><br>
 
<SPAN style="COLOR: #888888"><STRONG><EM>Hi there, adi</EM></STRONG></SPAN><BR><SPAN style="COLOR: #888888"><STRONG><EM>I reckon as long as there are two points that your timber framing sits level at from side to side and end to end, giving you the flat even floor (without sag when you add weight) I wouldn't worry to much. Having an air gap between insulation and lining is beneficial. Your conversion work looks pretty good to me, good on you keep it going. blocks and wedges are the go.&nbsp;</EM></STRONG></SPAN><BR><SPAN style="COLOR: #888888"><STRONG><EM>Geoff</EM></STRONG></SPAN>
 
Just shim up your boards and stuff insulation in the gaps. Make the top level.
 
+1 for the above 2 posts. A thicker plywood flooring will also help prevent any sag and add insulation value. 3/4 inch may be overkill, but it's what I'd use.
 
If you use shims, run a sheet metal screw through them into the floor, so the they don't slip over time. Wouldn't waste any money repairing the metal floor. Wouldn't leave an unshimmed gap longer than about 12"

Proper use of shimming will level the warped 1x1s (or did you mean 2x2s?)

 
<span style="font-size: x-small;"><strong>use 2x4 framing flat or 1 1/2 " deep ....</strong></span><br><br><span style="font-size: x-small;"><strong>blkjak ....</strong></span>
 
the 1x1's are a good idea, especially since they will give you more space.&nbsp; I would use 3/4 inch plywood.&nbsp; The disadvantages of 1x1's over larger sticks is the fact that they aren't as strong and don't give you as much space for insulation.&nbsp; I am saving up to build my camper on my short bed 3/4 ton truck.&nbsp; I plan on insulating the wooden sides first, as they are easier and I sometimes plan on using the truck for work, so insulating the existing bedspace is not as advantageous.&nbsp; Although, doing the floor might be a good idea.&nbsp; Seeing as though I live in phoenix and heat is an issue and the exhaust is under the bed.
 
Yup, I'm down here in Tucson, I felt that the floor is just as important as the roof for keeping heat out. <br><br>I got the lower 1/2 of the sides done, picked up some plywood and more of the 2x2's (rarely work with lumber, but the are 1/2 of a 2x4, so yeah) to get to work on the floor. I know I'm going to be taking it out and putting it in multiple times as I go along, so being able to disassemble it in a comfortable amount of time is needed as well. <br><br>For now I'm going to just frame and plywood over it, and eventually add rigid insulation, plastic liner, thin sound deading foam, and some sort of molding to finish from sides to the floor. Almost had a 100 degree day last week though, so its going slow for now.
 
Nice and cool 97F today, so I did some more work.

Completing the rear of it first so I can build a bed.


Ply screwed onto the 2x2 boards. Supports my weight just fine for the most part, will add a few more boards to make sure I never have issues.


What its like underneath the rear ply. These pieces aren't secured yet, just laying it out. Will add front-back runners along drivers wall and around filler neck, along with more inboard.


A less sunny shot. Edge of ply is supported, but seam between the two pieces is not yet. You can also see the thin board for the lower walls, cut using paper template.

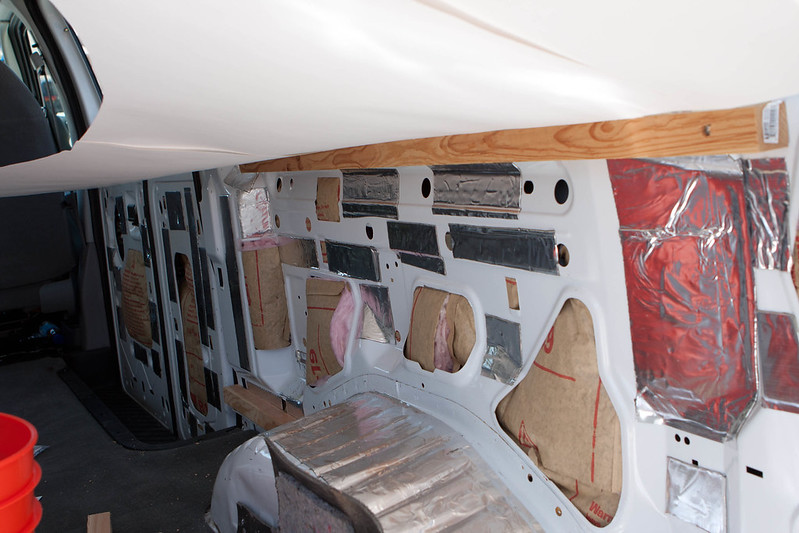
Once everything is cut and done, will remove it all, vacuum, and start putting on lower layers. So far the plan is dynamat-like deadening between the ribs, plastic barrier on top of that, layer of thin closed cell to isolate wood from metal, and then rigid insulation board with a foil back between the framework. Also have a lot of holes to fill, either get my neighbour to weld them up, or might seal with silicon. The dark line in picture 2 is where a previous wall was welded in (I assume).

This is my first wood project in my life, so it has been fun. Jigsaw for ply cutting, hand saw for the 2x2's.
 

Latest posts

Top