ArtW
Well-known member
nice setup!


Almost There said:It does look good!
One little piece of advice though - paracord stretches under tension and then does not return. You're going to be adjusting the length of those cords on a regular basis.
Suggest you try a marine outlet for some amsteel. To learn how to handle it, head on over to hammockforums.net cause it's virtually impossible to tie knots in.
") Great job.
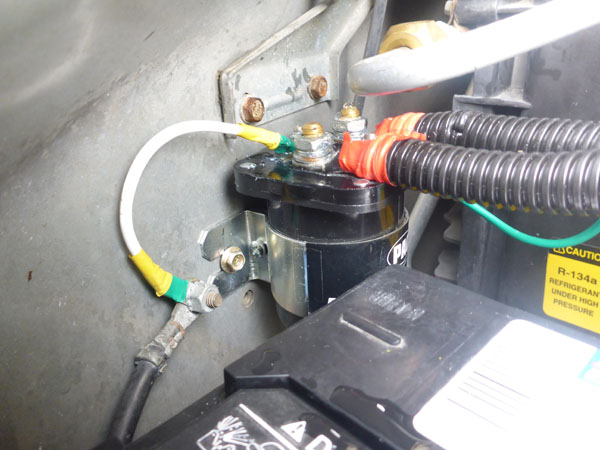
Great job.galladanb said:I simply can't figure out how to set up the alternator to house batteries trigger line.
Would it be possible for you to say and show exactly how you hooked up the trigger line?
What fuse location was used? I assume you found a circuit that is n with the key, but only after starting the engine?
HAPPY BUILDING!!One Awesome Inch said:Great build! Thought I'd check it out. Quick question... how long and wide is your bed?
Enter your email address to join: