FarOutVan: Ford Transit 2016 DIY campervan conversion for MTB & splitboarding

Van Living Forum

Help Support Van Living Forum:

This site may earn a commission from merchant affiliate links, including eBay, Amazon, and others.

FarOutRide

Well-known member
Joined
Jun 27, 2016
Messages
56
Reaction score
0
Hi!

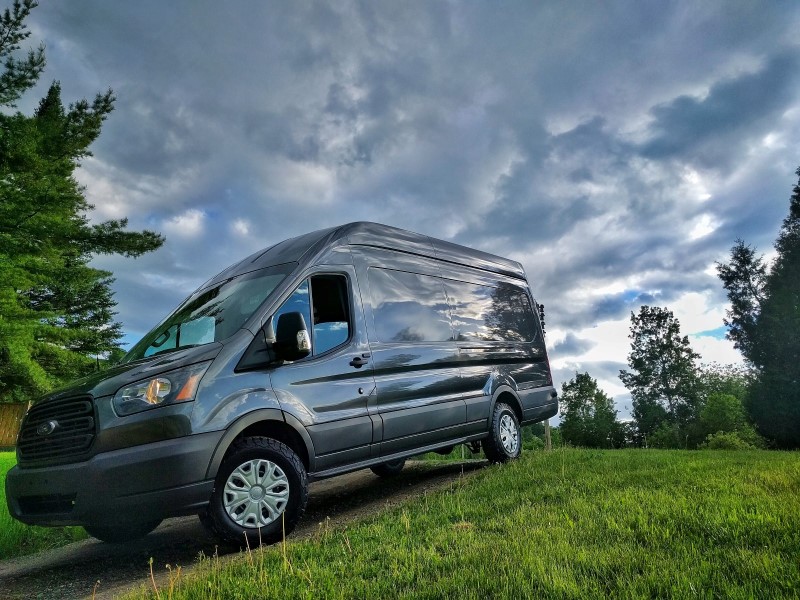
So we finally took the plunge and bought (and received) our Ford Transit (148" wheel base, high-roof, extended-length). This is a pretty big deal for us, as the van also come with this promise for 2017: to leave our jobs, sell the house and travel the america for at least a year (or more if we can support it financially) and just RIDE (splitboarding & mountain-biking). Then, after the trip, we will relocate permanently on the west-coast, in the mountains, somewhere, and use the van for our (shorter) travels...


We're not skilled with tools, but we're motivated and are willing to learn throughout the process. Let's see how it will work out!!


Our build will be documented in our Build Journal we gathered information about the conversion in our Van page.

Here is what we did so far:

1- Switched the tires for BFG KO2 225/75/R16
First-Ride-Avila-Resized.jpeg


2- Installed the Maxxair Fan. See our post here.
Fan-Installation-resized.jpg


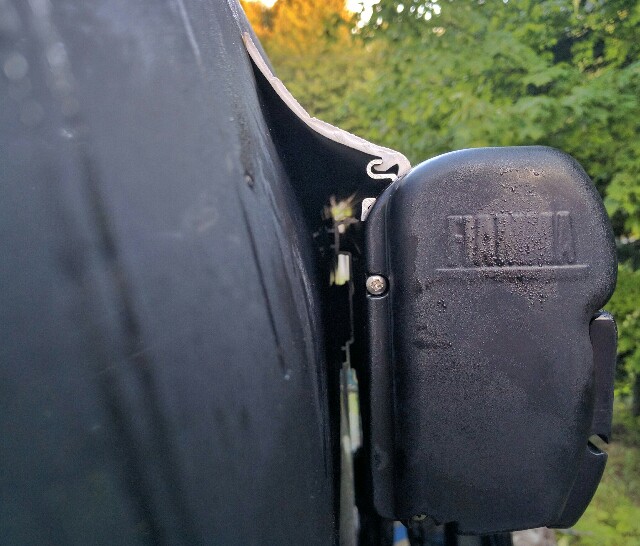
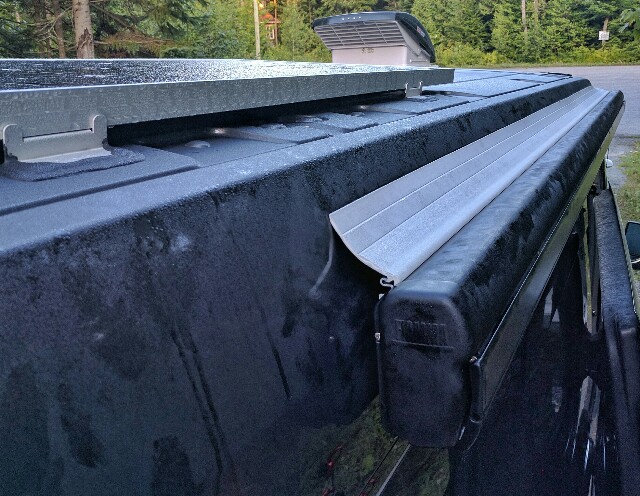
3- Installed 2x 160W solar panels using 3M VHB tape. See our port here.
Solar-Panels-Installation-e1466256218743.jpg


We're currently working on the floor & installing the thinsulate. We will post as we progress!

CHEERS!
Maxxair-Fan-Installation-reward-resized.jpeg
 
Welcome to the CRVL forums FarOutRide! You are taking some huge steps for sure. Congrats! We'll be watching your build!

To help you learn the ins and outs of these forums, this "Tips & Tricks" post lists some helpful information to get you started.

We look forward to hearing more from you.
 
Awesome looking vehicle so far.  Welcome and best of luck.
 
highdesertranger said:
boy if you installed those beer taps in your van,  I am there.  highdesertranger

The taps will stay in the house; BUT i'm sure a 2.5 gallons keg & tap would fit in the van! The only issue is to keep it cold without using all the refrigerator space  :dodgy:
It would not be too difficult to build a insulated box with a Danfoss compressor, but those compressor are not cheap  :s
 
Welcome aboard FarOutRide!
I really liked the first pic with the clouds reflecting off the van side.....
That would make a great graphic !
 
We bought 2 DiscountVanTruck.com swivel seat plates with the intention on installing them on both driver & passenger side. To install on the driver side, you have to perform the handbrake mod as described here.

A few notes:
1- With the dual AGM batteries, the big bolt in the center of the swivel will interfere with the battery. No room for swivel here. Would it work with the SwivelRus?

2- The holes pattern did not match with the van base, so we had to elongate 2 holes.


Complete story & installation notes here:
http://faroutride.com/swivel-seat-installation/


01-Swivel-Seat-Installation-e1467366466331.jpg


Cheers!
 
Amazing amount of work went into your pages. Thanks for the links.
 
Looks awesome! What are some of the main places you're going to hit up on your road trip? And any ideas of where you want to end up relocating?
 
SUV_RVing said:
Looks awesome! What are some of the main places you're going to hit up on your road trip? And any ideas of where you want to end up relocating?

Our complete (but growing) "wishlist" map is here.
Notably for mountain biking: Sedona, Moab, Downieville, Park City, Bend, British-Columbia, Yukon...
Skiing: SLC, Jackson, Oregon, British-Columbia, Alaska, Yukon...

We're not sure where exactly where we are relocating; this part of our life is a black box for now... that's one thing we want to figure during the trip :)
Somewhere in British-Columbia interior probably!
 
WOW just gonna quit those high paying jobs and become sno hobo's. I am impressed. Did you do the solar install ? That platform should be trouble free for quite some time. Are you working on the road?
 
wagoneer said:
WOW just gonna quit those high paying jobs and become sno hobo's. I am impressed. Did you do the solar install ? That platform should be trouble free for quite some time. Are you working on the road?

That's one way to put it ;)
It's not the type of trip we want to do when we are 65 years old... gotta do it now!

We did install the solar panels, but we're waiting after the cabinet is built to perform the rest of the installation (charge controller, battery, etc). For now we use the van battery (we got the dual AGM battery option).

We don't plan to work from the road; unfortunately our jobs (or field of work) are not location independent...
 
Very nice, enjoyed going through your website "how to's". I am in the middle of converting a 2016 Mid roof Transit. Enjoyed


Sent from my iPhone using Tapatalk
 
The Webasto AirTop 2000 STC was quite a challenge for us to install.
It took us almost 20-30 hours to perform the job, while others reported having done it in about 4-6 hours. Oh well. :blush:

We're done with the install and are very satisfied with the result. We're having one of the warmest summer, so we did not have the "chance" to use it. We tested it, however, and it worked :)

Cheers!
http://faroutride.com/air-heater-installation/

Webastro-How-To.jpg
 
Just a quick update on the Fiamma Rain Guard.

We ordered 4 meters of the "L" model (9cm width) via Ebay. We received it in just a few days.

It took less than an hour to install. The seal really snap into the awning, feel very secure and has a "OEM" look.

We got heavy rain and it did what it's suppose to do, except locally at one place above the sliding door where there is a few drops leaking. Not a big deal, we might add a tiny bit of sealant between the seal and the van to complete the installation.

I think it was worth the $.

Fiamma-Rain-Guard-Cross-Section.jpeg

Fiamma-Rain-Guard.jpeg
 
FarOutRide said:
Just a quick update on the Fiamma Rain Guard.

We ordered 4 meters of the "L" model (9cm width) via Ebay. We received it in just a few days.

It took less than an hour to install. The seal really snap into the awning, feel very secure and has a "OEM" look.

We got heavy rain and it did what it's suppose to do, except locally at one place above the sliding door where there is a few drops leaking. Not a big deal, we might add a tiny bit of sealant between the seal and the van to complete the installation.

I think it was worth the $.

Nice install on the rain guard. I didn't know it was even available.

How much space does it take up above the awning brackets?

I'm asking because the Fiamma awning is going on this winter and it's a little tight for space between the upper windows that came with the van and the gutter. Is there another smaller rain guard maybe?
 
Almost There said:
Nice install on the rain guard. I didn't know it was even available.

How much space does it take up above the awning brackets?

I'm asking because the Fiamma awning is going on this winter and it's a little tight for space between the upper windows that came with the van and the gutter. Is there another smaller rain guard maybe?

A piece of clear plastic vinyl tubing (not pipe) like they sell at the lumber yard works wonders.  The warmer it is outside, the easier it is to install.  Buy one a little larger in diameter than the space between the awning and van.  Press one end in while pulling it to stretch it a little.  Keep pulling and stuffing it down in the gap.  If it ever dries out and starts to leak, a little self leveling sealant would cure it or simply replace it.  The tubing is not expensive.  It is easier to install with two people.  One to hold the start while the other pulls and stuffs.

Here is an example: http://www.lowes.com/pd/SimpleAir-1-2-in-x-20-ft-PVC-Clear-Vinyl-Tubing/3825897

It comes in different diameters
 
Top