Minivan Project - '04 Sienna

Van Living Forum

Help Support Van Living Forum:

This site may earn a commission from merchant affiliate links, including eBay, Amazon, and others.

SoulRaven

Well-known member
Joined
Aug 7, 2011
Messages
6,759
Reaction score
9
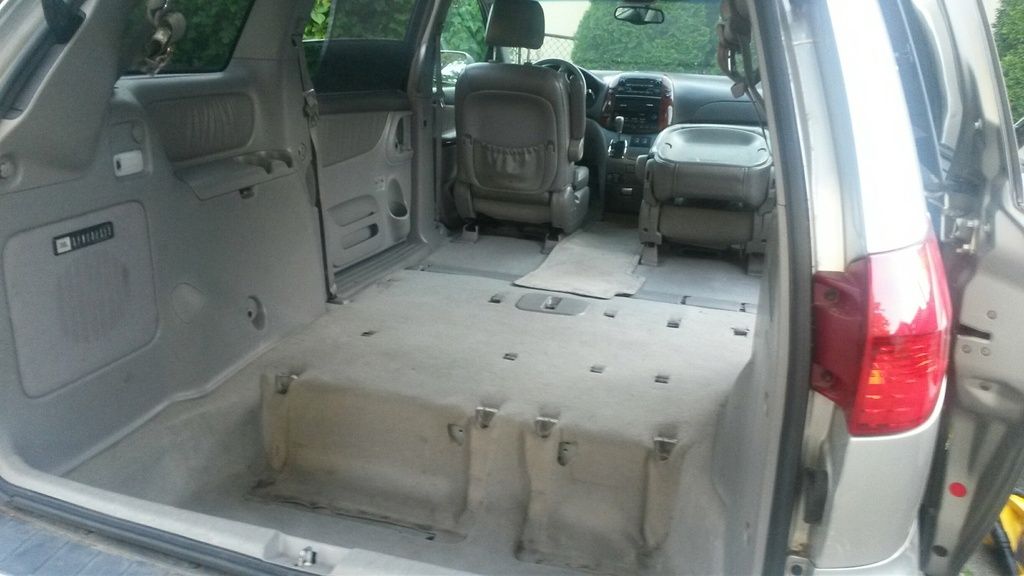
Day 1 with the minivan that is to be my new home - a 2004 Toyota Sienna clearly well "loved" by lots of little kids in its former life, if the candy wrappers, coins, and broken toy parts are to be believed. ;)

Today was spent removing the back two rows of seats, front center console and base, and lots and lots of cleaning and general acquaintancing with all the parts.

Removing the base of the center console left bare metal underneath, which I "fixed" with the rug from the center seats set lengthwise.

She's a blank canvas now.


20150607_203220_resized_zpswpzed1mn.jpg
 
Wow, quite a deep hole in the back. Could make for some interesting possibilities.

Congrats on the new van!
 
I agree... I see battery storage and more in that hole. Good luck with the project. I'll be watching...
 
I too can't wait to see where you take this. That hole in the back is 14" deep. I can't wait to see your plans for it. What a find Bitty. It looks like a Toyota LXE or Limited model. Nice find. Nice value. Congratulations.
 
Thanks, everyone! Yup, it's an XLE model. :D Packed with a lot of interior features that should make living out of it a lot easier with my fit out style than my G20 van has been.

I'm definitely thinking battery storage for the hole. Another thing I'm weighing is the lack of spare wheel, as well as lack of space to put one. Theoretically, I could probably put a spare wheel in the hole too, though since i tend to stick to the city and have AAA I'm leaning towards not.

Today's project is ozone. Due to a medical condition of mine called Multiple Chemical Sensitivity (MCS) I cannot yet safely breath the air inside the van without a gas mask on, not even with all the windows and doors fully open all day. There's still too much "new car" chemicals offgassing out of the upholstery. I had hoped with some time to air out in the hot sun and some time for my body to potentially adjust to it it'd be alright - that sometimes works - but today it became clear stronger measures are necessary.

I refer to it as "terraforming", the process of making a space chemically tolerable for me. Ozone is just one tool of many that I use, but it is the most dangerous and specialized. I use a purpose-made ozone generator (NOT air purifier) that emits high concentrations of ozone, unsafe for any living thing to be around. This oxidizes the chemicals in the air and on the surface of anything it touches, inducing what's basically a highly accelerated aging process. You can read more about it here if interested. I currently use a Jenesco FM-14 and have found I prefer this brand after over a decade of experimentation with ozone machines.

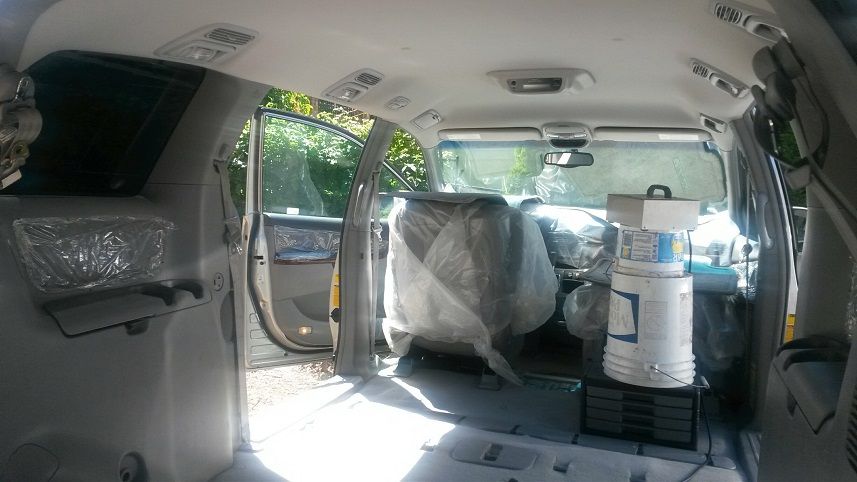
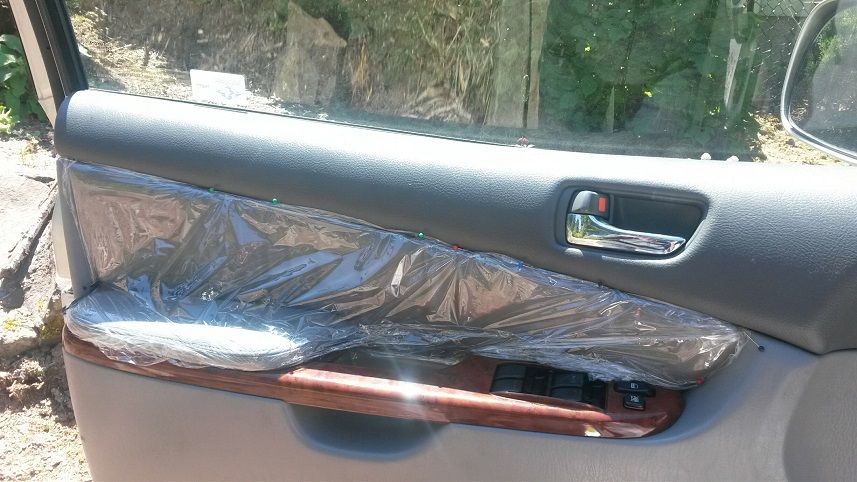
I enlisted someone to help me cover over as much leather in my van as possible, because I don't want the ozone getting to the leather. It will result in discoloration and ugly cracks. A friend who insisted against the precaution saw their brand new leather couch age ~20 years from ozone treatments. It pains me to risk it at all in my nice van, but breathing isn't optional.

Van%20ozone%20interior_zps1zsbhdeg.jpg


The ozone machine has been propped up with whatever is convenient, because as a gas ozone is heavier than air and tends to drop. Therefore you want to place it high up if you can.

No tape would stick to the van's plastic interior, so it took some creativity to make anything work. We settled for plastic wrap with pins slid into the cracks to hold it in place.

Van%20ozone%20door_zpsjybvaqa0.jpg


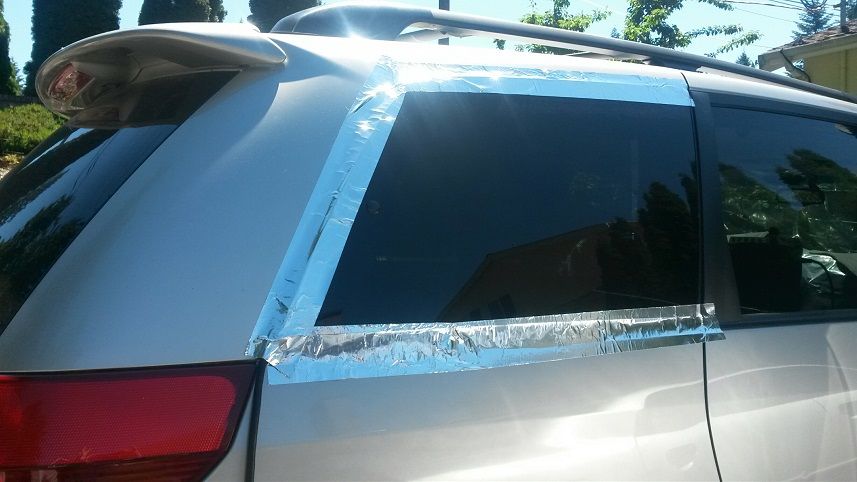
Since ozone is so hazardous and I'm doing a major treatment, it's important to seal the gas inside as much as possible. I ran the electrical cord out one of the back windows and used tape to seal off the rest of the gap in the window.

Van%20ozone%20exterior_zpsllmcp7mb.jpg


Now it's just a waiting game. The process will take at least all of today, if all goes well I might be able to breath the air in it tonight but most likely tomorrow will be the soonest, best case scenario. If I've miscalculated the amount in either direction then it could easily be a multi-day process.
 
Nice find Bitty. I hope the ozone treatment goes quickly and as planned. I helped fix up a home for someone with the same condition. We found an older home to start with - pre WWII so it had few chemicals in the original build. It was a tough project because so much of our current building materials have Formaldehyde in them - something she had a particularly strong reaction to. I've been researching ways to build without so much chemical off gassing as I want to build a new tow vehicle that I can also use short term independent of my cargo trailer. The biggest problem is the off gassing of the original vehicle parts, especially in the interior as you're dealing with. I'm not overly sensitive to it, I just think it's a good idea to not breath so many chemicals after all the stuff I've subjected my body to in 35 years of construction work. It will be interesting to see how you deal with different issues. Please document as much as you feel up to.
 
Good luck with the Ozone treatment. Hopefully it is a short process for you. Look forward to seeing your build.
 
Hey, nice job and good luck! It looks good. I am going to do something similar with an Odyssey... :)
 
I, too, am going to be converting a minivan. I am getting my Toyota motorhome ready to sell and then will look for a van. I was also, leaning towards the Toyota Sienna. Seems like the most dependable, of the minis. I am so glad you are posting your conversion. I have been scouring the net, looking for ideas. I have been checking out the kitchen areas of the Teardrops. Thinking of getting my brother to build me something like that, in the back of the van. Don't know yet, for sure. Too many choices.
Will post my project as soon as I get started on it.
Thanks for the good info on the ozone. I am also very sensitive to chemicals, especially the new car smell. I was hoping that the smell would be gone from a 10 year old vehicle. If not, now I know what to do about it.
 
Oh, man... you guys are so great on here!! I don't want to 'usurp' the thread, but I have a Sienna.. I've even outfitted it for temporary camping a time or two..... BUT...
I was thinking of getting a big old conversion van. But NOW..

My little 'Salsa' IS all I need. (I was kind of thinking this ANYWAY...but you guys REALLY gave me that extra 'umph' to keep me 'up' and happy about my decision. :):)

THANKS TO EVERYONE on this forum!!

Okay.. back to the OPs business... I can't WAIT to see what she/you come up with for Your little Toyota!
Keep us posted.
 
Alright someone finally motivated me to do a huge push to take pictures of my current setup. There are a LOT of pictures, so I figured I'd stick them all here to avoid spamming the other thread. :p

Starting with the front...

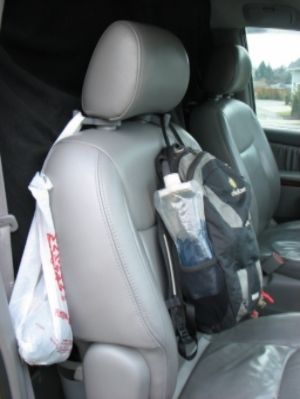
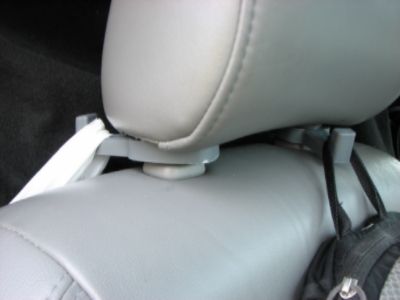
Seat hooks! These have proven invaluable to me. I have them on both driver and passenger headrests.


edb5effc-ade2-4c8e-a0e7-1e68248211bf_zpsy0xcyvat.jpg


The one with the bag is my "thrift store bag" I've pulled it out for viewing purposes but it's usually completely hidden. This is for small-ish items destined for donation, to get them out of my hair. The backpack is my EDC backpack. By hanging it on the hook I can access it easily from the driver's seat and unzip it with one hand. The hooks swivel, so when I have a passenger or just need it closer to reach me the backpack is hanging down the side of the seat rather than the front.

Close up:

e9b0cf15-6eb7-4d81-8fdb-fb81465befbc_zpsxvqmokqn.jpg


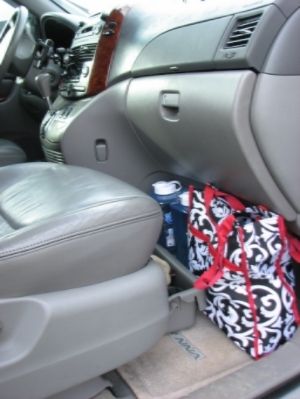
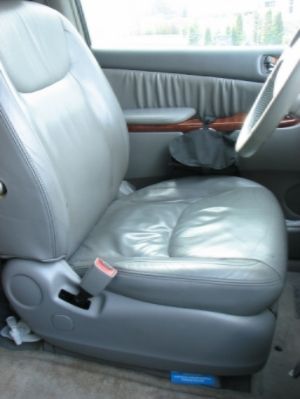
A small plastic drawer resides beneath the passenger seat--the van came with it. I store shoes there, currently a pair of winter boots. In the summer I can fit as many as 4-5 pairs of shoes in there. The colorful tote is my "storage bag", where I toss anything destined for storage. It has a pocket where I keep a small notebook and pen to write down anything I plan to retrieve from storage next time I'm there, and also a velcro closure on top, which I've found essential.

41f45d65-7c0a-4c2d-a496-0ed77d3b8175_zpsxdurg34n.jpg


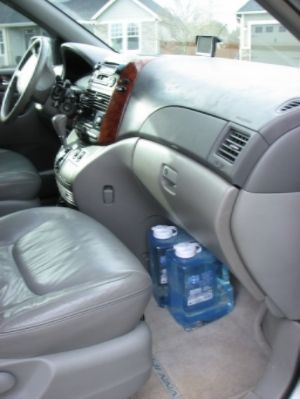
I toss it in the back when parked, leaving just the two water jugs in view. I hope to integrate them into the back of my setup soon. You can see the drawer disappears entirely:


IMG_2540_zpst7f0ornh.jpg


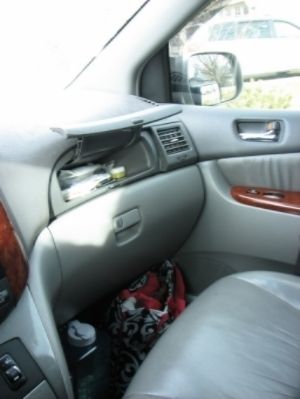
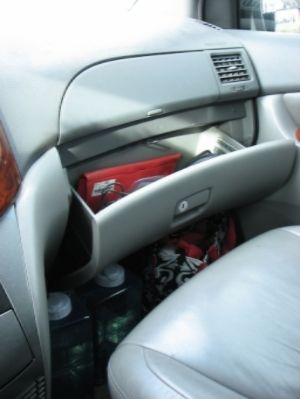
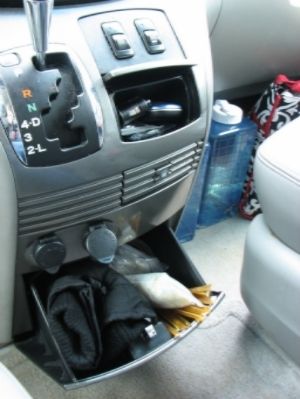
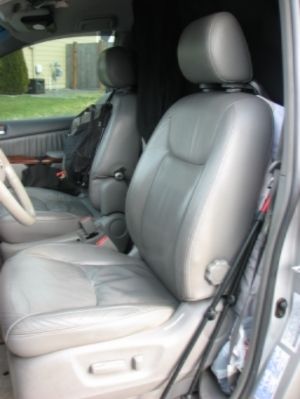
The Sienna has a LOT of compartments up front to stash things:

ff056c28-9e23-4950-a407-4b6150e4105d_zpsckgnntyh.jpg


704ae797-3c76-4b1a-b48c-2db46c944c59_zpsoijqmyjy.jpg


83929dc4-d69b-4275-abdd-3310e57c76c8_zpsrzfcetb1.jpg


In the above picture, the upper small container has a cover that comes down over it. The items in there are a permanent fixture in my setup: a small dumb phone with a battery that lasts forever, the cord to charge it, a spare battery for my current phone, and an additional cigarette to USB port converter. Also there's a cup-holder not far beneath it that slides out, and next to it is a coin holder, where I actually keep a leatherman micra multitool handy.

All of the three glove compartments just kinda have stuff that migrates around, from a GPS to snacks to gloves to an ice scraper to whatever. This is seriously a good 5 times more space to store things out of sight up front than my old Chevy G20 had--and that's after having removed the center console!

3564ae7a-a870-4ec3-9489-eae135db3f8b_zps0kbqczk8.jpg


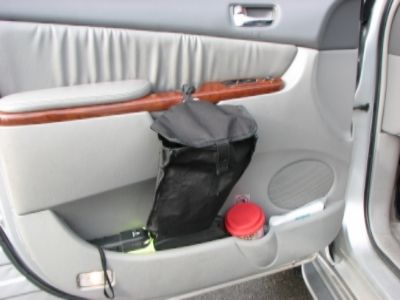
This is my driver's side door. The black thing is a litter bag, which I fitted both here and to the passenger door as well. Other items kept there are a stun gun/flashlight, reflective safety vest, 12V air compressor (works AWESOME), baby wipes in a portable case, and a thermal insulated travel cup.

I generally just use the cup for water. I keep it in the door when parked, but for driving I move it to the cup holder. I have a slimline 1.25 gallon water container kept just behind the driver's seat, which I can pull out with one hand while seated and use it to pour myself a glass. This is handy for the times I spend all day running errands.

e158f40f-432b-4722-b8c4-9193faeb6651_zpszmv53qu6.jpg


Bottom left corner you can only just see the spigot when my divider curtain is pulled back. Note the bit of blue towards the right hand corner--that's my handicap placard slipped beneath the plastic molding, on hand but (mostly) out of sight. I keep the second one in my EDC backpack for when I'm riding with someone else. When parked in a particularly seedy spot, I take pains to hide it entirely. I personally suspect keeping it a bit visible has probably saved me from a few forgetful times of parking it in a handicapped spot without putting it up on the dash or mirror.
 
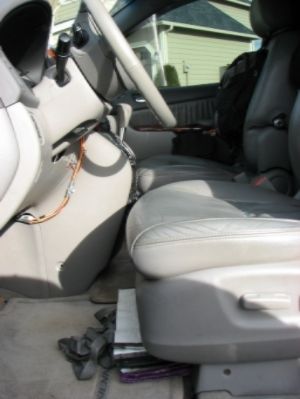
There isn't a drawer under the driver's seat, but I keep3-4 large reusable shopping bags there, which I've slid out to demonstrate (bottom of pic):

95a59683-b83f-4c4b-abf7-f9d414a90fcf_zpsyxb4vwzx.jpg


They disappear entirely underneath the seat, out of sight. I also roll up plastic shopping bags and stash them inside the crease in the passenger's seat, I can get about 5-6 of them in there before they begin showing. Also, because they are in the crease, they are accessible from either the front or the back.

And a small reusable bag stashed on the back of the passenger side visor, where clips from the other side keep it in place:

372e31f6-a8c2-4fc8-9455-bd41ce8a0499_zpsslbf6hnb.jpg


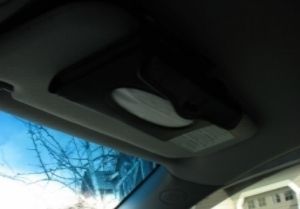
This visor accessory is actually a kleenex holder, but once the tissues ran out I discovered it was more convenient to stash napkins there, obtained free from orders of fries and whatnot. This way I always have napkins on hand in the front.

c72f1c14-cc07-4c2a-a00d-e9d0065b7984_zpsg1gxlg2j.jpg


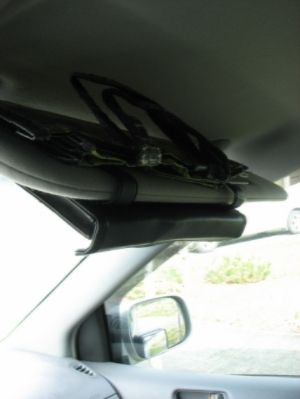
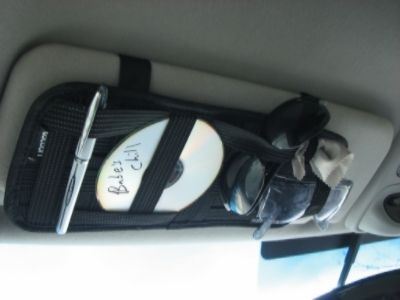
Driver's side visor has a generic organization thingie that keeps stuff out of the way and within reach:

53eee544-ef04-4192-8334-792f5d46bdcc_zpsedqp9qj5.jpg


I traded my wheelchair for hiking poles a couple years ago, and even though I can sometimes walk without them they're still needed nearly every day. I stow them right between the driver's side and the door (left side of pic):

92d4ebc3-c532-4ded-9cb6-449c9f4273b6_zpsk3yisp2i.jpg


Note near the center of the pic you can see what's left after the armrest was removed. I took out both armrests, as they interfered with my hips fitting between the front seats for easy access to the back. For reference, I'm only about 92 pounds. I could still get back with them in, but it took awkward positioning and being up high rather than sneaking in low. Fast access between front and back is important to me, and this was more comfortable.

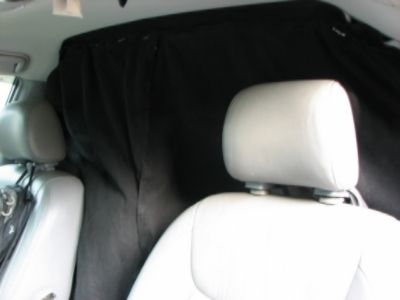
This is what my blackout dividing curtain between front and back looks like from the front:

2a5be5c3-ff20-4d99-b8f4-f811e429bcd3_zpsbxpna4tz.jpg


The fabric is Duvytene. The ceiling accepts velcro very well, which was super handy. The opening between the two curtains is secured with magnets, which works well. The curtains were designed to come down entirely as needed so I could have a clear view out the back window. That part isn't working so well. I could get into further details in another thread, but if you're learning from my mistake note that velcro sticks well, magnets work well for the opening, but if you need to have a view out the back there will be complications.

Tinting my front passenger windows to the legal limit gave me greatly increased peace of mind, as the blackout curtain becomes completely invisible from the outside in daylight. At night, it takes light shining directly on them, e.g. headlights.

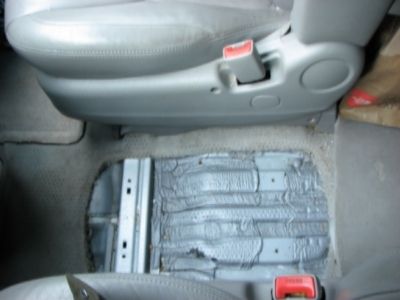
I removed the front center console for easier access to the back. Since opening a sliding door exposes my setup, and I'm still at 100% city living, I always access the back through the front doors. After removing the console, there's still a plastic tray that was bumpy and balance-tipping to step on. After removing THAT, you get this:

fcac8187-70a6-4ebf-aa01-bd1277b68d19_zpsekjx1xpk.jpg


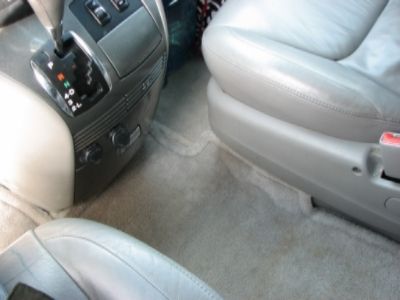
That was uncomfy to step on too and has screw holes clear through the body. So I took the floor mat originally from the back seat area, and laid it down lengthwise to get this:

71901d37-fc08-4121-97c0-ac77404d028e_zps36xmaipq.jpg


It fits almost perfectly, doesn't slide around, it's totally comfy to walk on and doesn't draw any undue attention whatsoever! I was so pleased with how that worked out.
 
On to the back!

Just behind the passenger seat:

487a6bfd-4ec2-4284-9e32-b522a92a1c61_zpsecmgp98p.jpg


The brown bag is for recycling. The white bin behind it is a catch-all for tapes (electrical, masking, duct, packing, scotch, etc) and inbetween the bin and the seat itself is where I stash my laptop and charger when not in use. That's one leg of my bed, which is a massage table, and just underneath it is my main trash bin, barely reachable from the front or from on top of my bed, and easily if I'm on the floor or sitting on my food bin. There are more storage bins behind and to the other side of it.

I learned it's important my main trash can have a cover of some sort. So much stuff has accidentally fallen into the garbage and been tossed, which is why I eventually moved it to this location. I hope to eventually get one with a cover, but this has proved an adequate temporary solution.

ba8f8285-416f-4165-a29e-401b4e93b91d_zpsb5hsqofo.jpg


Here's the view all the way back--that's the same leg of the bed as the previous picture. You've got the bed/massage table to the left, front-opening storage bins beneath it with things stacked on top, my little dehumidifier is taped to the floor just to the right of them in the picture and my fridge is on the far right, sunk into the "basement" hole left behind after the rear seats were removed. In hindsight I would not recommend the fridge being placed in there as it was a tight fit and there isn't enough ventilation for it to run as efficiently as it ought to.

The floor is a dreamy soft version of closed cell foam, the same stuff often used for sleeping pad insulation while hiking. I sampled about 6 different kinds before discovering a really soft one at this place; their XPE version is incredibly soft and feels absolutely amazing on bare feet and insulates well, which is what I wanted. There are permanent dents in it from my setup, in hindsight I would coat it with something first to make it more durable. I'm also wrecking it a bit because I refuse to cut up the 2 yard piece I got, as my setup is still changing quite radically (e.g. for last summer there was basically no floor in the back, I made it all into a bed).

I never let shoes onto the floor in the back. Let's just say it's comfy enough for extracurricular activities and I like to keep it that way.

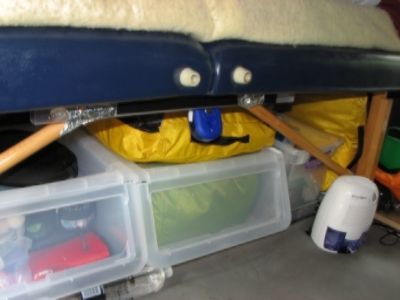
Better view of the bins:

6ad6fe45-bf27-4ba7-bc49-f942c76e8c40_zpszbq5toqq.jpg


Note how the design of the folding massage table interferes with access to storage under the bed. It's less than ideal.The blue thing is my current light, and LED light designed for hanging in a closet. There's also an LED strip light taped there that's no logner functional, hence the blue light as a temporary solution until I figure that out. Isn't my dehumidifier cute?? I taped it to the floor because it kept falling over or getting kicked over.

The yellow thing on top is a packing cube. I recently began keeping all my clothes in packing cubes--they're like zipping stuff sacks that not only keep things more compact but also in a in a functional shape!

I love the hard plastic bins. I use them to organize my storage unit as well. They're stackable, and all contents are accessible while they're stacked on top of each other, and have removable wheels. My tiny storage unit has these stacked up taller than me, and I simply roll them out to access everything behind them when needed.

Notice the water bottle at the bottom of the picture, these roll under the lip of the bins and stay there. when I'm hanging out in  he back I mainly drink from these 1 liter bottles and refill them.

2c283e9e-0215-48ef-8a00-9e00ce224df7_zps8d1aspci.jpg


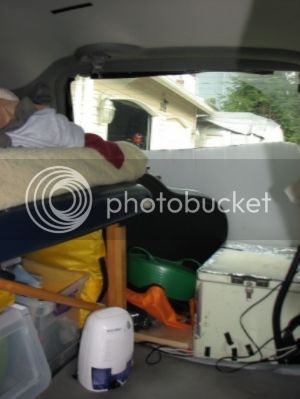
A more realistic view of the back. The pale yellow thing on he bed is the memory foam mattress topper with homemade cover, and there's miscellaneous bedding piled atop it. There is not enough room between bed and ceiling for me to sit upright (I'm 5'2"). Behind my bed becomes a catch-all for anything bulky that otherwise interferes with my living space. Currently there's a full size guitar (in case) and that green thing you see is a Tubtrugs that I use ass a sink when needed, mainly in the summer..or in emergencies to contain extreme diarrhea.

 The fridge has wires taped to it to get them out of the way so I'm finally not stepping on the anymore.

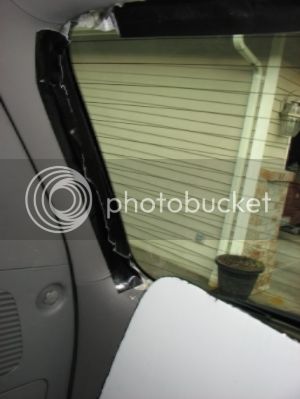
The white thing just below the window is the inside of my back window insert, made of corrugated plastic with Reflectix and then Duvytene glued to the back of it. Window inserts have been incredibly stubborn in this van. Reflectix wouldn't hold its shape with repeated removal and insertion to the windows, causing it to bow and simply fall out. Adhesives do not stick to the walls. I eventually managed to create part of a "lip" by using plenty of acetone first, then double-backed carpet tape, THEN putting gorilla tape over that. The result looks kinda cruddy but it works:

8722e565-a393-4ae6-9511-43bc0b9b78e6_zpsqwcrhjdt.jpg


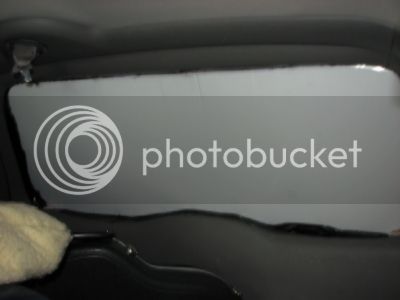
Unfortunately it's so labor intensive that with my recent health issues I haven't been able to complete it. As you can see from this next picture, with the insert in there's still some light leak (that's sunlight coming in, upper right corner where I didn't manage to create a 'lip' with tape yet):

660d2e37-aff1-4f31-a404-fcd37f4b9e78_zps3ztv4rzu.jpg


The rest of my back windows are in similar states--mostly blocked but with enough light leak that I eek by on very dim lighting. The sole factor here is not having the time and energy to dedicate to improving that part of my setup yet. But I'd definitely recommend the corrugated plastic.
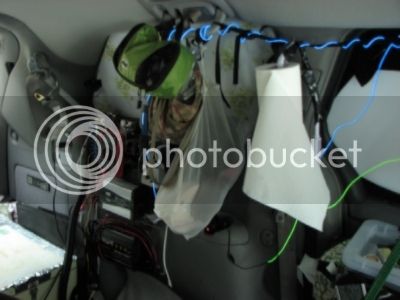
94de8287-ae5d-4d74-92e5-8e0814bcaa1f_zpsgfixay9g.jpg


This is the rear driver's side of the van. In the lower left corner you see my fridge, then next to it is the panel where all my electrical stuff is mounted. My dad took a sheet of plexiglass and drilled it into the plastic molding, taking advantage of one of the rear side compartments so there was no need to remove any molding. Two of the three bags hanging up hold my undergarments, and another hold batteries and chargers. The paper towels are hanging from a strap I tied between the two handlebars to create more hanging options, helpfully illuminated by the blue LED stringy light wrapped around it. I used tape to hange the paper towel holder from it after various other solutions kept failing, and now I cut the tape apart to replace a role and re-tape it.  The lights were a gag gift last Christmas that I capitalized on--powered by AA batteries, some nights they're the only lighting I use. Dim, but mostly doable. I also utilize a headlight (not pictured) that I keep attached to the handlebar at the head of my bed which I can always find in total darkness.

See a bit of plastic storage bin in the lower left corner of the picture? Those are the two smaller stacked bins. You can see them in the background of this picture:

1042fa65-39a5-4969-bf5d-5d738b808e5e_zpsgxgir5ki.jpg


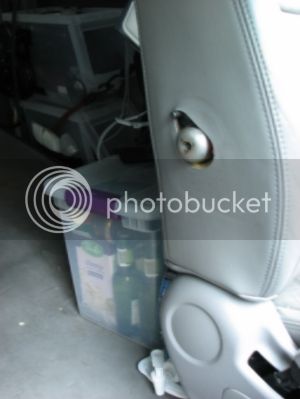
That's the view of just behind the driver's seat. The ugly nub on the side of the seat is from removing the arm rest, the spigot is from the slim water container, the bin is my "food bin" containing everything except the bread and refrigerated items. The stacked bins in the back fit alongside the widest part of the van against the sliding door. They're taped together and held upright with bungee cords (previously with the seatbelt tied in interesting ways, which failed when I began loading the bins with heavier items). In order to open the sliding door safely, the bungee cords should be undone, then it can open fine. When stopped in an area safe for my setup to be exposed I open this door for easier access, as there is enough room between the two bins pictured to enter and exit with relative ease.
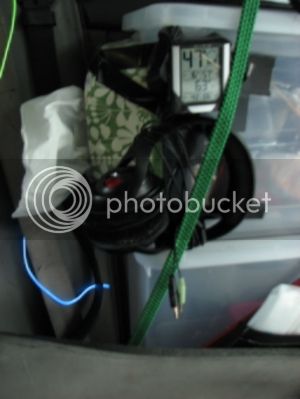
c9e0c357-4bc8-4c96-9055-6508f2640897_zpsbyd9av9t.jpg


The side and back of the two stacked bins. A kleenex box is taped on--when empty I simply remove the tape and tape on a new one. Also taped on is a thermometer/hydrometer that displays highs and lows as well. I've found this important when my system is inadequate for the current temperature extremes to know exactly what I'm dealing with. The headphones are held in place solely by the bungee cord and very handy. To the far lower left corner is a pocket I made of gorilla tape that houses a packet of baby wipes and occasionally additional items.

87836582-ff89-4705-ae2f-79dd50a0ad1a_zpsjjvtpesn.jpg


The top of the upper bin serves as the surface of a nightstand, becoming a catch-all for small items. It also has the magnet base of this O2Cool fan taped onto it, a solution I discovered at the end of last summer allowing the fan to both stay put but also be easily removed and temporarily placed elsewhere when needed. The fan itself is currently in storage but keeping the base here means come summer it'll be a breeze to set up again.

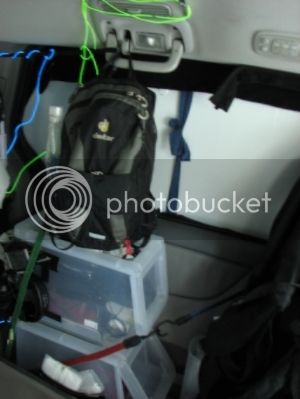
When I'm in the back, my EDC backpack resides on the hook as pictured above, remaining easily accessible yet completely out of the way. I'm not sure if all Sienna models have this, but my XLE limited has one of these hooks with every ceiling grab bar and they are both handy and strong. Even with a very full pack, including a laptop, I don't worry, it hasn't given me any indication of weakness.

Not pictured, but directly opposite to this is another one beside/over my bed, where I currently hang up my bulky coat, which keeps it out of the way and partially contributes to my warm covers at night.
 
bf060287-8eb4-4f6a-8c32-829a91e406cc_zps18h0yynq.jpg


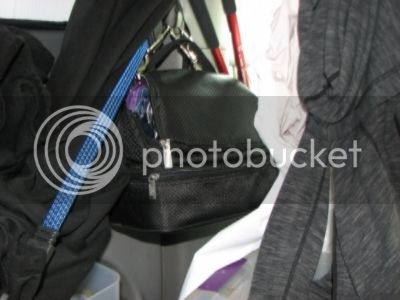
This is directly behind the driver's seat. You can see the red hiking poles between the seat and the door. The blue bungee cord holding up the stacked bins attaches to the grab handle next to the sliding door. To the right there's a grey sweatshirt and a white raincoat, hanging from a hook on the driver's seat headrest. Beneath them is the corner of my food bin.
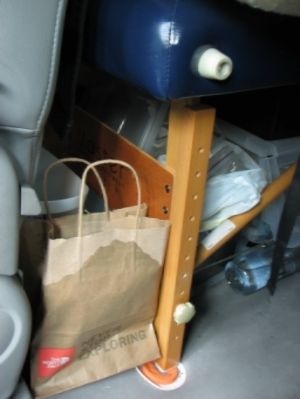
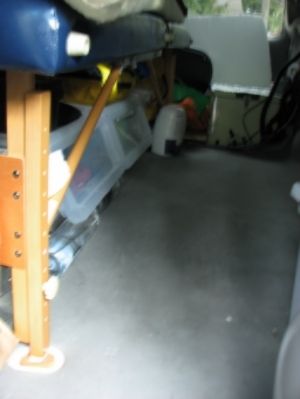
And the big black thing in the middle? That's my current potty system packed into a lunch box, secured to the grab handle with panic snaps, chosen because they're easy to release one-handed (and I already had then anyway). Most of the upper compartment is taken up with a piddle pail; it also contains toilet paper, half gallon ziplock bags (both to fit the piddle pail inside and also for emergency pooping), baking soda to control odor, an emergency pee bladder for when I'm too ill to empty the piddle pail in a timely manner, and a small spray bottle of isopropryl alcohol for cleanliness. I should note that even though I keep toilet paper in this kit and have needed to use it on occasion, I tend to grab a kleenex instead as they're more convenient.

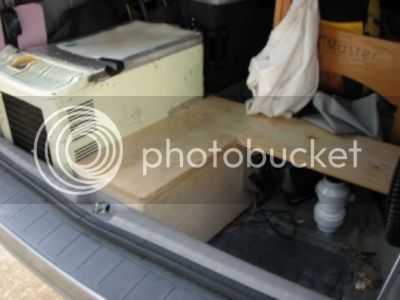
Now for the very back! I pulled out the general "stuff" there so you can see the "build" part of it.

cffa6a4f-bebb-429a-b4a6-65b75679e18a_zpspqsqxkwa.jpg


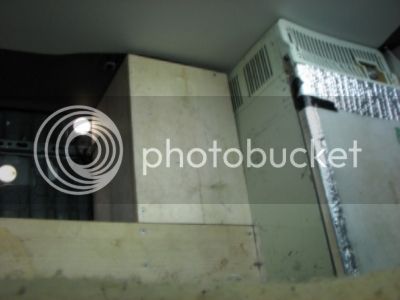
The white thing is my laundry bag, attached to the end of the massage table. The battery is in that wooden box built next to the fridge. There's a bit of a "shelf" that's solid enough for me to sit on. In the summer it's nice to sit on this with my feet in the foot well. I can even give myself a washcloth bath and dump the dirty water through established "drainholes" using a funnel.

e4fcd388-45e5-47cb-a6bb-b6d7507452ea_zpspt5sgssp.jpg


Here's another angle, you can see two of the holes in the upper left corner. The van comes with several of these plugged with rubber stoppers. I most often use them for plugging into the grid.

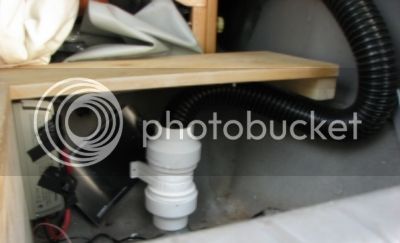
Beneath the wooden shelf:

17316078-4d68-4759-babb-a5d3faa3a43b_zpsuoict8dj.jpg


On the right is I believe the 12v to 12v charger. In the middle is a somewhat failed experiment--an engine fan fitted to one of the "drain holes" with a hose-type thing attached to the other end. The goal? To draw cool air from underneath the van when too hot in summertime. It works, but the fan is so ridiculously noisy it ruins any hint of stealth and I may as well roll the windows all the way down. ::p might fiddle with it more this summer, but for now it sits useless but out of the way.

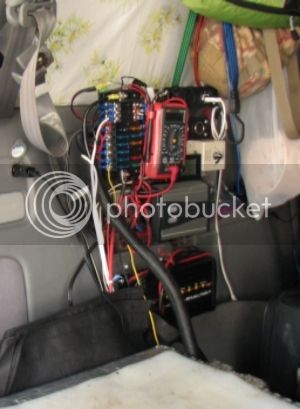
Skipping to the other side, here's a better shot of the electrical panel. The top of the fridge is at the bottom of the shot. Spare bungee cords hang behind it, and various spare electrical stuff is stashed directly behind it. moving clockwise there's the fusebox (currently without cover...it's somewhere), multimeter hanging on a hook, various USB and 12V sockets, switch to the failed experiment fan, a dimmer switch that went to the now broken LED strip light (yes, I'm thinking about switching the switches), a meter that continuously reads out voltage, amperage, and tracks how much electricity is actually used, inverter (the grey and charcoal colored box) and grid battery charger (black box on the bottom).

35418172-870c-493d-9c80-c704e7909629_zpswuwvsruc.jpg


Not on the panel, at the far left of the shot you can see something plugged into the 12V socket in the van wall. The socket is only live when the van is running, so I plug the dehumidifier into that unless on shore power.

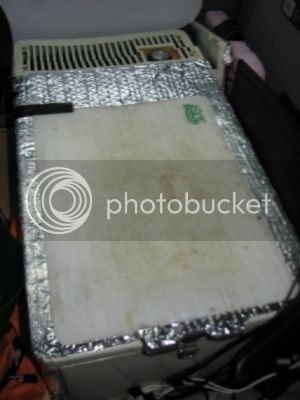
The fridge is an old marine fridge/freezer I got off craigslist for $100 that works perfectly, if noisily. First I added Reflectix on top and most sides, and then secured a cutting board to  the very top where i do most food prep (just make sure to get everything I want out of the fridge FIRST, lol!):

d2109e44-e59d-4ec6-aa5c-216f71fc132e_zpsmzxl1p1v.jpg


I found this worked better than a separate cutting board because the top is bowed inwards a bit, so using double-backed tape to adhere a flexible cutting board to the surface means juices don't run off the sides, even if I'm parked at an incline.

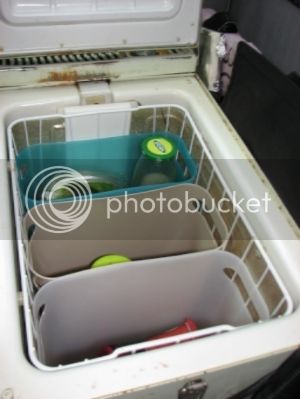
I needed some organization and found these small wastebaskets fit perfectly:

05d675f9-7074-49a0-9b4e-2ddf369d037e_zps5ow1cn1g.jpg


Being able to pull out a single bin with everything needed for, say, sandwiches, means lest time with the fridge being open and less electricity used.

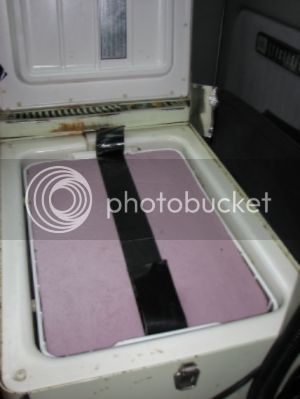
I also added some insulated rigid foam left over from my previous van build to increase efficiency:

887b343c-ca95-478b-be1d-b379395feeae_zpsxcttwtqi.jpg


There's an identical piece underneath all the cans. When I get large bulky items I can remove all the cans, or for tall items I just remove the upper foam piece. I have done double decker fridge/freezer with them, but found the "freezer" portion too difficult to access, wasting energy when I tried to, frustrating me, and ultimately forgetting about the "freezer" items. :p

And there you have it! Always a work in progress...
 
A place for everything and everything in its place. Amazing how much stuff you can get in that small space.
 
Bitty!!! I just love what you have done with your van. You are an organizing genius! Thank you for sharing the narrative and your photos. I'm going to probably read this post many, many, MANY times.

Hugs,

Gigi
 
Brilliant work!! Life has dealt you many lemons, but you have done a tremendous job of turning it into some marvelous lemonade!
Bob
 
You know what they say...."When life gives ya lemons........find someone with a bottle of vodka"  
KinA
 
Top