Refinished my headlights on the cheap.

Van Living Forum

Help Support Van Living Forum:

This site may earn a commission from merchant affiliate links, including eBay, Amazon, and others.

TMG51

Well-known member
Joined
Sep 1, 2014
Messages
2,069
Reaction score
3
Since I've had my van the headlights have been pathetic. They were just so hazy and dim it was actually not possible to visually discern the difference between low and high beam - I had to look at my dash to see if my high beams were on! For a while I flipped between high/low in traffic out of habit and then stopped bothering altogether, conceding that I could not see beyond 50 yards anyway.

I got around to addressing that. Those kits you see in stores? Sure they work, probably, but you don't need them. I bought some 600 grit sand paper and an assortment of 1,000, 1,500, 2,000, 2,500 grit sand paper and set about refinishing my headlights. The final trick is applying an acrylic, non-yellowing, UV resistant spray to keep them from oxidizing again. See below. I used a Rustoleum 2x brand clear coat.


Here's the driver's side headlight which I took out first to refinish, before doing anything to it.
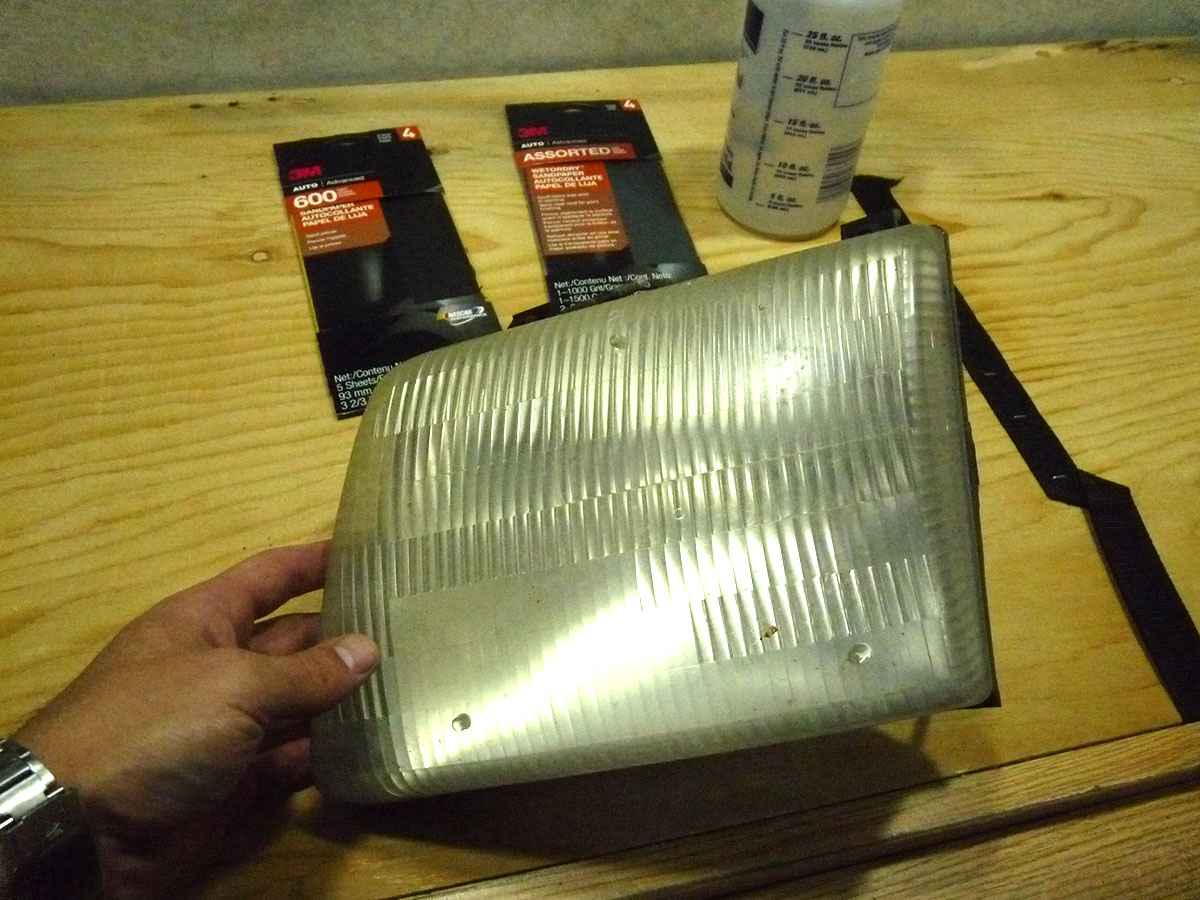
vt7A1wL.jpg


I decided the whole sanding process would be easier without these plastic nubby things so I cut the three of them off each lens. Much simpler and faster to just sand the whole face after without avoiding these obstacles.
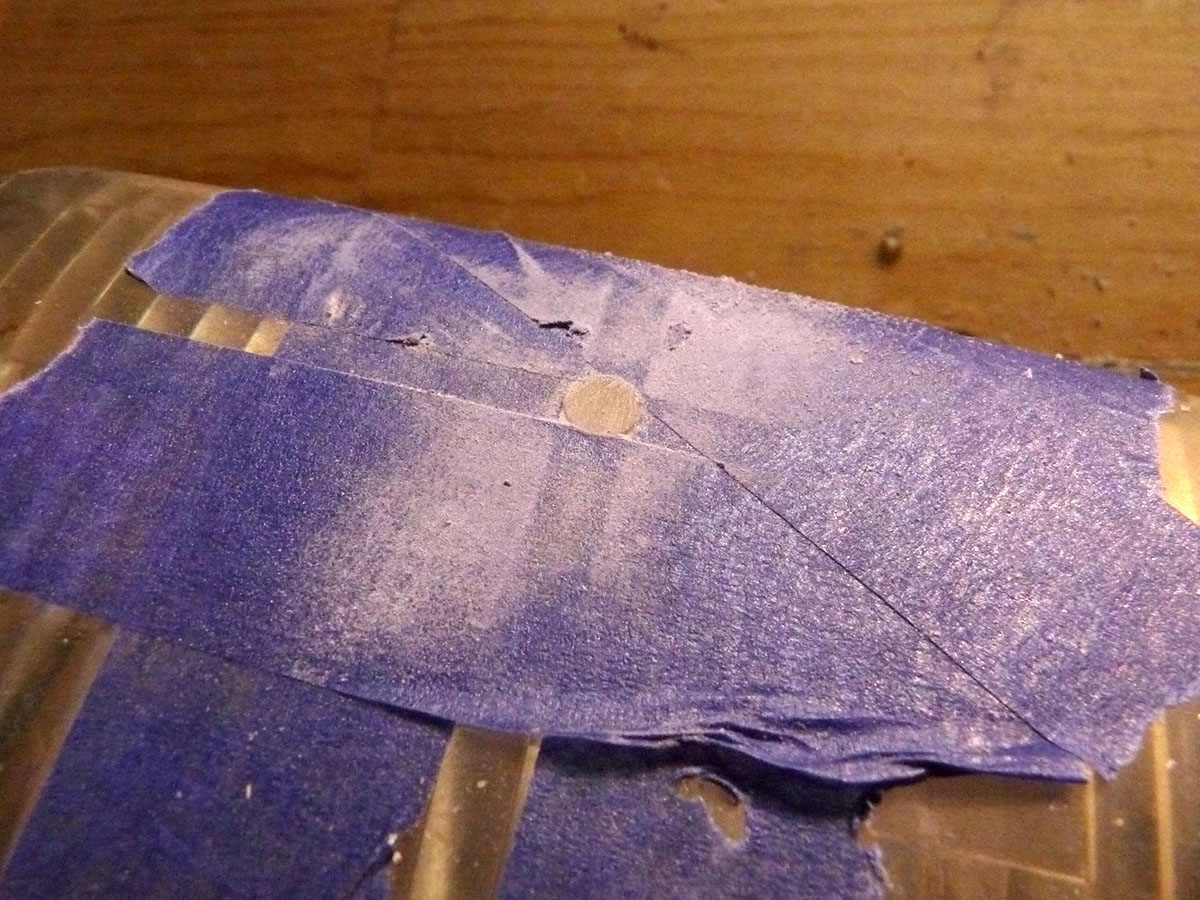
Yyjn7E7.jpg


After a while with some 600 grit, all the oxidization haze is gone and it's just a haze created by the sanding - this is good, time to continue smoothing it with finer grits...
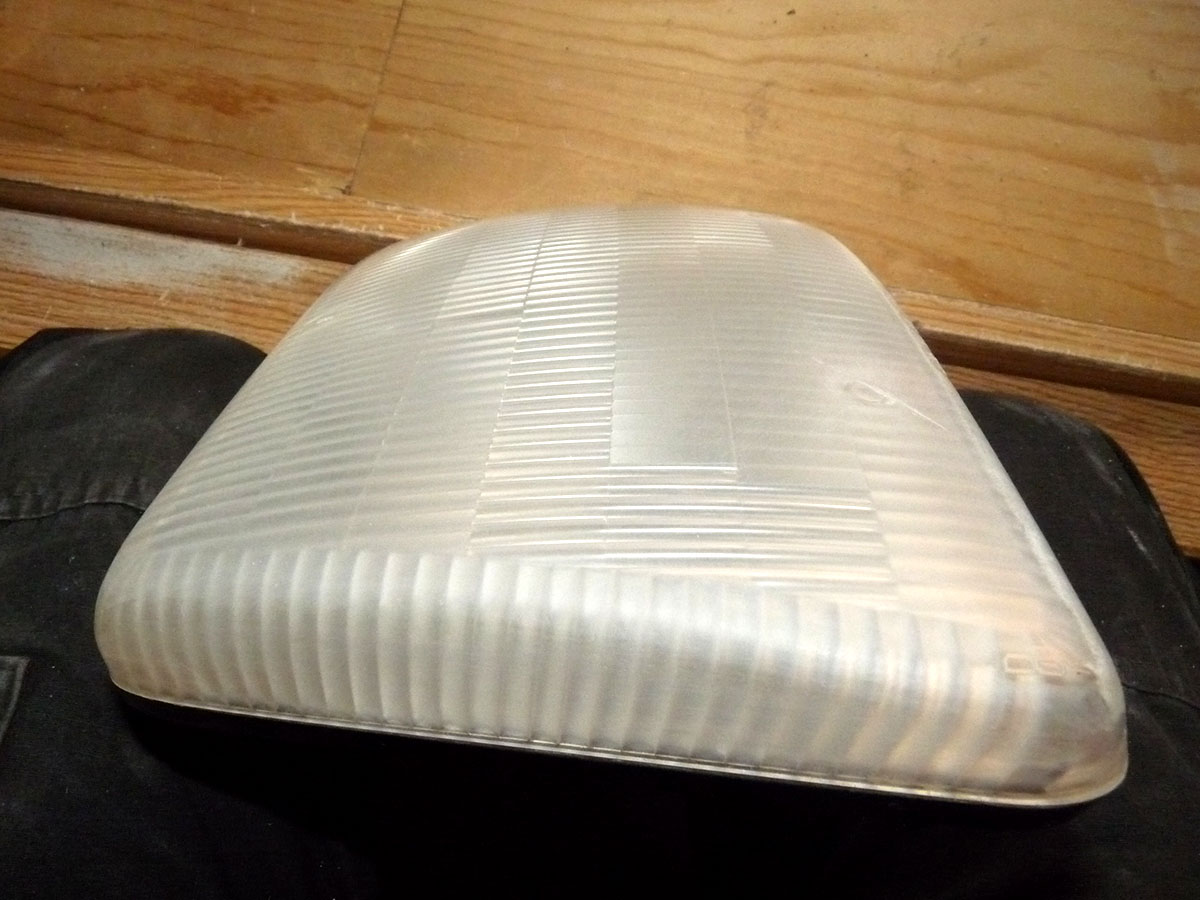
1oTQjG1.jpg


At this point I'd been up to 1,000 grit and went out to check my progress against the passenger side light. Can already see how dingy and hazy the passenger lens is compared to the one in my hand.

l5lr9x6.jpg


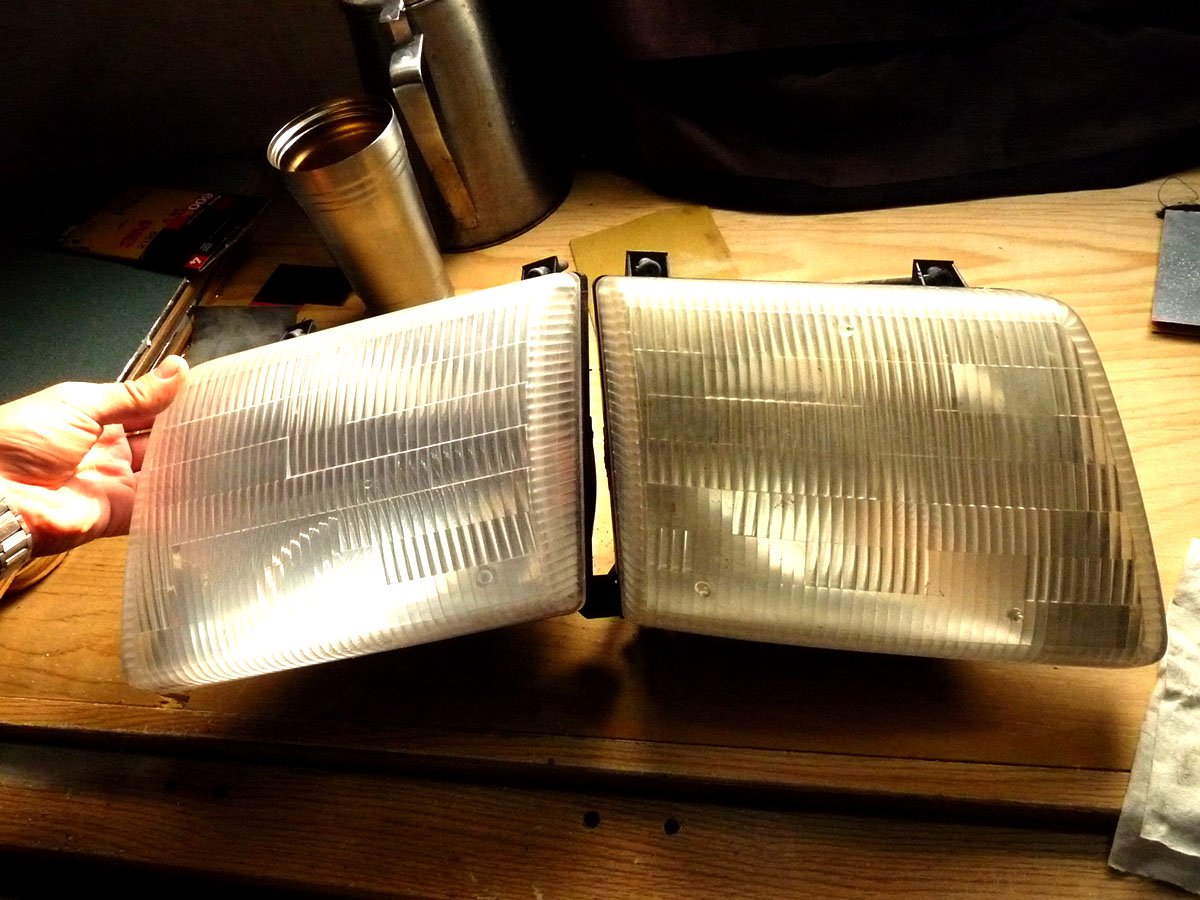
Now I've finished sanding the driver's side headlight (left) but not yet applied clear coat. See how much darker the passenger side headlight is!
mA4r2Io.jpg


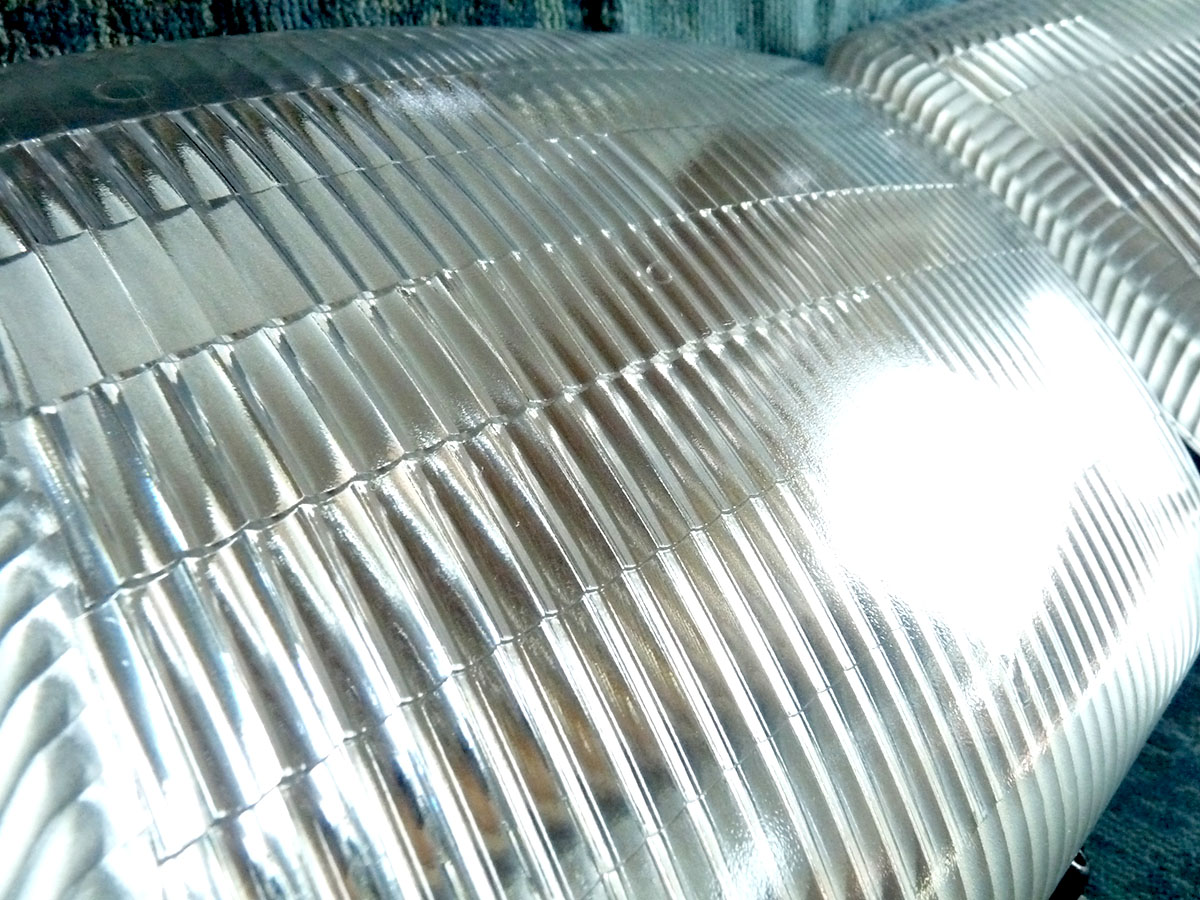
...aaaand after sanding both and applying clear coat, here's how they look. Crystal clear. The clear coat really is important to finish it off.
DIJ6npJ.jpg


For the sandpaper and clear coat I paid around $12. That's for both headlights. It took me about 2 hours start to finish, and that includes disassembling my headlights, sanding, cleaning with alcohol, arguing with a maintenance dude, spraying clear coat, and reassembling. (Does not include dry time, I left them out a while.)

It made a huge difference! Low beam vs high beam is like night and day now. I can actually see where I'm going. Totally worth the minimal labor for anyone with hazy headlights.
 
TMG51 said:
Since I've had my van the headlights have been pathetic. They were just so hazy and dim it was actually not possible to visually discern the difference between low and high beam - I had to look at my dash to see if my high beams were on! For a while I flipped between high/low in traffic out of habit and then stopped bothering altogether, conceding that I could not see beyond 50 yards anyway.

I got around to addressing that. Those kits you see in stores? Sure they work, probably, but you don't need them. I bought some 600 grit sand paper and an assortment of 1,000, 1,500, 2,000, 2,500 grit sand paper and set about refinishing my headlights. The final trick is applying an acrylic, non-yellowing, UV resistant spray to keep them from oxidizing again. See below. I used a Rustoleum 2x brand clear coat.

*******************************************************************************************


I had no idea you could do that to headlights!   When I filled up my Ranger tonight I noticed how discolored the headlights are,  They are so bad that sometimes I turn them off and back on while looking out the windshield and it's still hard to be sure some times if they are working.  I'll have to get my son to do it for me as I'd probably take twice as long to sand and wouldn't be able to fully close my hands for a day or two.  Carpal Tunnel, & Diabetic nerve damage, & Arthritis all at the same time can sure slow a old girl down even with power tools.......I can just see me dropping a saw or drill on my foot and the safety features going on vacation so they keep running.     :huh:   I have already book marked this post and filed it in my pick up living folder...now if I can remember how to find it?????

Thank you for this post,        Texas Jbird  

******************************************************************************************* 

                                                    LOOKING GREAT!    :)

DIJ6npJ.jpg


For the sandpaper and clear coat I paid around $12. That's for both headlights. It took me about 2 hours start to finish, and that includes disassembling my headlights, sanding, cleaning with alcohol, arguing with a maintenance dude, spraying clear coat, and reassembling. (Does not include dry time, I left them out a while.)

It made a huge difference! Low beam vs high beam is like night and day now. I can actually see where I'm going. Totally worth the minimal labor for anyone with hazy headlights.
 
Nice job.

Those plastic nubbin things are for an optical headlight aiming machine.  Somebody once claimed they could not pass inspection with those nubbins ground off.  I've no idea if this is true.

Did you use water with those finer grits?

Regarding wetsanding surfaces in general, Sometimes a drop of dawn dishsoap in a dish of water really makes wetsanding kind of enjoyable, and no dust.  If the water beads off the surface to be sanded, then the dishsoap helps remove oily contaminants and helps the sandpaper to 'cut' better, as well as helps the spray coating not 'fisheye'; when applied

Good idea to  Wrap the sandpaper around something flat and squarish and kind of flexible for a curved surface

Folding the sandpaper tends to wear out just the areas where your fingers exert pressure, and when using coarser grits, could possibly  leave low spots and or scratches one winds up chasing around the sanded surface, like herding cats.

I remember you saying the previous owner added headlight relays to get maximum voltage to the headlight bulbs.  Have you ever put a digital voltmeter directly on the bulb terminals with them on low and high beam?  One of the three terminals is ground, the other two are low and high beam.  They are easy to reach on my van, not sure about your year

My voltage drop pre relayed  harness was close to 3 volts
Post harness this is now 0.3 volts and light output is easily 30% brighter.

One can see how this is done here:

http://www.danielsternlighting.com/tech/relays/relays.html
 
SternWake said:
Nice job.

Those plastic nubbin things are for an optical headlight aiming machine.  Somebody once claimed they could not pass inspection with those nubbins ground off.  I've no idea if this is true.

Did you use water with those finer grits?

Regarding wetsanding surfaces in general, Sometimes a drop of dawn dishsoap in a dish of water really makes wetsanding kind of enjoyable, and no dust.  If the water beads off the surface to be sanded, then the dishsoap helps remove oily contaminants and helps the sandpaper to 'cut' better, as well as helps the spray coating not 'fisheye'; when applied

Good idea to  Wrap the sandpaper around something flat and squarish and kind of flexible for a curved surface

Folding the sandpaper tends to wear out just the areas where your fingers exert pressure, and when using coarser grits, could possibly  leave low spots and or scratches one winds up chasing around the sanded surface, like herding cats.

I remember you saying the previous owner added headlight relays to get maximum voltage to the headlight bulbs.  Have you ever put a digital voltmeter directly on the bulb terminals with them on low and high beam?  One of the three terminals is ground, the other two are low and high beam.  They are easy to reach on my van, not sure about your year

My voltage drop pre relayed  harness was close to 3 volts
Post harness this is now 0.3 volts and light output is easily 30% brighter.

One can see how this is done here:

http://www.danielsternlighting.com/tech/relays/relays.html

For the record, I did briefly consider whether the nubby things could serve a purpose, and even theorized they might be for aiming / calibration. I promptly decided I didn't care and cut them off anyway.

I'm aware that wet sanding is recommended. I did it dry. If you're not yet sensing a pattern, I like to disregard some aspects of life.

I'm perfectly happy with how it all turned out.

I remember reading your post about voltage drop to headlights. It made an impression on me as an opportunity for improvement, but I still haven't thought about it long enough to figure it out yet. That oughta be a good next step after lens restoration though.
 
Fantastic job!

I used the Sylvania headlight restoration kit for mine, cost $20. I knew in theory a person can buy all the components separately, but for me this was simpler. It included the sandpaper as well as three different products that contributed to the process, the last one being the UV blocking acrylic. I wish I had taken before and after shots because the results were truly stunning.

The kit I got carries a lifetime warranty on headlights restored with it. I'm sure yours will hold up just as well!
 
Apparently the DEET in bug repellent can also work to decloud headlights.  Sounds like a wonderful product to work into one's skin eh?

Cloudy lenses not only reduce available light for the driver behind them, but it causes excessive glare to drivers on the other side of the road.

On the candlepower forums, the automotive lighting subforum, the  2 highly self important moderators love to repeat how all restoration kits are just a temporary fix that will come back in short order and be worse, that all aftermarket replacement housings are absolute junk, and that one must buy New OEM housings at ridiculous prices to have safe effective and legal forward lighting.  Ask them about putting LED bulbs into halogen housings and they have an  apoplectic fit.  Quite amusing. 

I think they got beat up in high school one too many times, as they love to belittle people asking questions, But their knowledge of automotive lighting is quite vast.

One of the reasons they claim that restoration kits are ineffective is that they do not address the reflector and its possible oxidation, which will reduce light output.

I had a bookmarked a spray on product which was claimed to be much more UV resistant than others used for headlights, but cannot find it.  It was in an orange can and was about 20$.  I was considering it for covering epoxy, as epoxy is hard to get a really glossy finish with, and degrades in UV light.
 
SternWake said:
Apparently the DEET in bug repellent can also work to decloud headlights.  Sounds like a wonderful product to work into one's skin eh?

Cloudy lenses not only reduce available light for the driver behind them, but it causes excessive glare to drivers on the other side of the road.

On the candlepower forums, the automotive lighting subforum, the  2 highly self important moderators love to repeat how all restoration kits are just a temporary fix that will come back in short order and be worse, that all aftermarket replacement housings are absolute junk, and that one must buy New OEM housings at ridiculous prices to have safe effective and legal forward lighting.  Ask them about putting LED bulbs into halogen housings and they have an  apoplectic fit.  Quite amusing. 

I think they got beat up in high school one too many times, as they love to belittle people asking questions, But their knowledge of automotive lighting is quite vast.


One of the reasons they claim that restoration kits are ineffective is that they do not address the reflector and its possible oxidation, which will reduce light output.

I had a bookmarked a spray on product which was claimed to be much more UV resistant than others used for headlights, but cannot find it.  It was in an orange can and was about 20$.  I was considering it for covering epoxy, as epoxy is hard to get a really glossy finish with, and degrades in UV light.

Use spar varnish for UV protection of epoxy, couple coats last a long time and it's cheap. It's for marine applications and contains UV protection, it also gives you a glossy finish.
 
grrr, another reason a dislike newer vehicles and their plastic cr*p. highdesertranger
 
TMG51 said:
It made a huge difference! Low beam vs high beam is like night and day now. I can actually see where I'm going. Totally worth the minimal labor for anyone with hazy headlights.

GOOD JOB! and THANKS for the tutorial.   :D  I will have to check back for a re-read as time permits.
 
Nice! I now feel more capable of taking care of my 10 yr. old headlights that I've been staring at as I pass by lately.
Thanks for saving me all that THINKING about what/how/where.. etc.
 
I need to add this to my long term project list. My headlights are just about same as yours before staring. My high beams so put out noticably more light though
 
Top