Introducing...Tilikum and my modification log

Van Living Forum

Help Support Van Living Forum:

This site may earn a commission from merchant affiliate links, including eBay, Amazon, and others.
I would suggest using an adhesive such as White Sikaflex-221 to install furring strips and dabs of it to keep the foam from moving and squeaking.

Use a few self-tapping screws to hold the strips in place while adhesive dries... these Self-Drilling Screw, Modified Truss Head are great, the build-in washer head keeps strips from splitting out. They take a #3 phillips...#2 doesn't cut it.
 
Tilikum and I will be bonding over the next couple of days, which is to mean I don't have anywhere to go for Thanksgiving so I'm going to work on my van.

I promised to explain what a jibber jabber was. I needed some kind of metal with holes in it to serve as brackets for installing the furring strips. I found this:


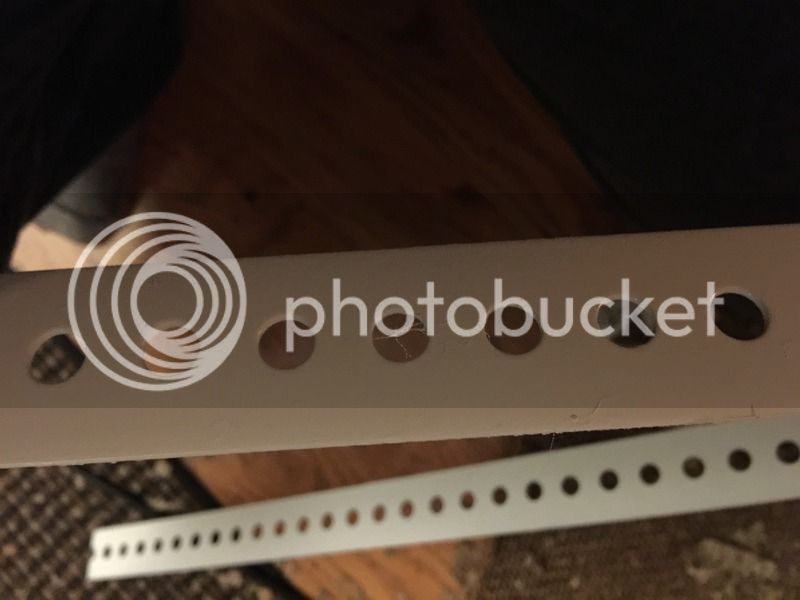
I don't know what it really is, I was at Lowe's and it was in the same place as angle brackets, square brackets, bed railings, ect. Still don't have a description, so it's a jibber jabber.

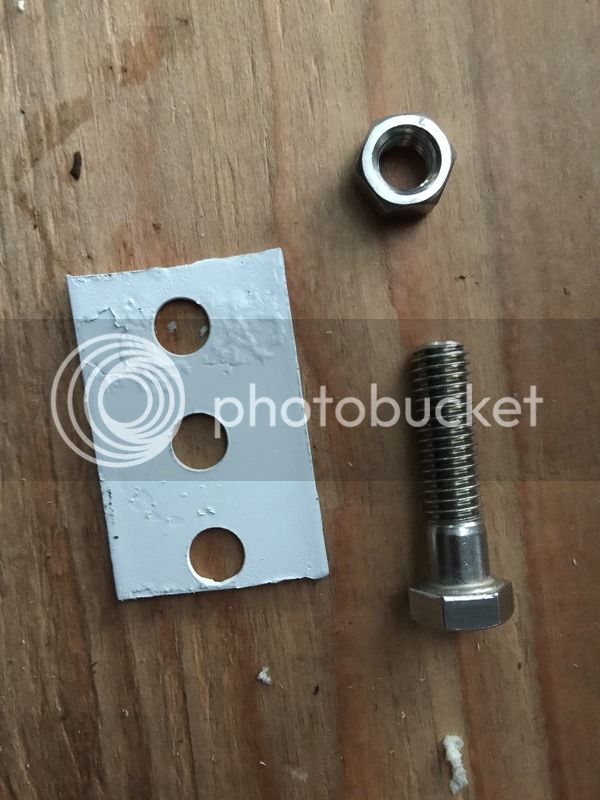
Once I got the jibber jabber primed and painted, I cut it down into pieces that will fit in the cutouts of my ribs.
So the jibber jabber became a useful bracket. The brackets hold the furring strips securely and beautifully.


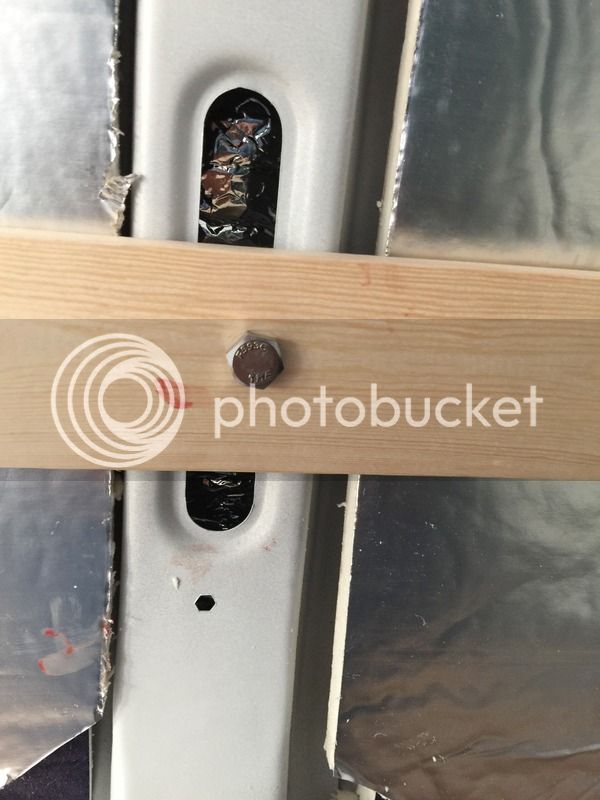
I have nearly half the insulation in the van now. Getting the furring strips on the roof was a nightmare, I have the wood held in place with wire right now. I do need to stuff another half inch of insulation on the roof, or else it will be useless. I did order some Sikaflex from Amazon. I also have Gorilla Glue, Liquid Nails, a buffet of adhesives.
Tomorrow will be a long, hard work day.

A cautionary tale: Carpentry is a skill that takes many years to learn and master. It's not something you can learn from the latest YouTube star. My work so far is very primitive and not at all finish carpentry. If you're building your van out and you have no carpentry skills, build something first. A bed, doghouse, book case, something that uses cutting, measuring, and power tools.
 
I worked all day in the pouring rain. Eight hours of working in cold, dreary, constant rain. All I could think of "I sooooo wish I were in Ehrenberg right now."
But I did get so much accomplished. The van now has 1 inch of polyiso on the walls and roof, and the furring strips are all installed ready for walls. I have to work with my floor more, I might do that yet tonight or tomorrow. At least I can work on balcony with the compact circular saw.


And the roof is done. I know total amateur job.


The only problem I can't solve now is the doors. I have Reflectix and two layers of polyiso all trying to hold on to one another. I almost put 1x1 wood strips on it but I really don't want to drill through the metal. Right now Reflectix brand aluminum tape is holding it all on the metal
 
Walden if you had been near me you could have joined me for the community Turkey Day meal that Sultan puts on every year. I hope you made some progress today. It was pretty nice for most of the day.
 
Headache said:
Walden if you had been near me you could have joined me for the community Turkey Day meal that Sultan puts on every year.  I hope you made some progress today.  It was pretty nice for most of the day.

Thanks Headache.
I think i'm at a stopping point though. I'm terrible with the jig saw, bent a blade the first time I tried it. The compact circular saw is too big for my hand to get around. I think the I'm going to have to hire someone to put the walls up and finish the floor. I have the bead board mostly cut to size.
 
Well, my van has walls, sort of.

I was able to find some think plywood that flexes, it's called Revolution, and it looks pink. I have pink plywood walls in my van.

Almost too embarrased to post this, but this is how bad of a carpenter I am:


I needed to get something on the walls so I don't bang around the insulation.

Uh-oh, boo-boo.


Tilikum says, "Why can't you leave me alone and let me be a carport queen?


Now, here's the kicker, I have to make a new bed!!!  :mad:  After all the labor I spent on my colorful bed, it's too big. It's either make a new bed or the rest of my stuff doesn't fit. When I looked at the Ford Transit, it look like a cavern. Now my Chevy looks teeny tiny.

Take this as a cautionary tale for newbies, don't over plan so much you have to get rid of stuff or rebuilt because you misestimated measurements. Or else, measure correctly. Or is that measure twice and cuss once?  :angel:
 
It's easy to bend a saber blade , make sure you keep the base plate flat against what you're cutting with a bit of pressure . Cut slowly and it will be smoother too. I like to use blades that are thinner on the back than on the tooth side (tapered) on plywood .
Can't tell you how to make your hand bigger for the other saw !!!

That doesn't look so bad for a first effort.
Try making a cardboard template for cuts that aren't straight.
And , yes , measure at least twice before you mark the wood , then one more time before you turn on the saw .
 
rvpopeye said:
It's easy to bend a saber blade , make sure you keep the base plate flat against what you're cutting with a bit of pressure . Cut slowly and it will be smoother too. I like to use blades that are thinner on the back than on the tooth side (tapered) on plywood .


Also, there's different saw blades for different purposes. I just went ahead and bought the economy sized blade kit that had several of each type of blade in it. There was a backing sheet that showed you what the tooth count was on each type and what it should be used for....helped a lot because cutting plywood is different than cutting 1x2's.

You'll learn pretty quick how to cut nicely with the jig saw. If you sew, think of it like sewing something, just without the seam allowance. For now try to cut right down the pencil line - you are using a pencil line aren't you... :D

When you want to cut around a wide bend, just go even slower than you are on the straight cuts and when you want to go around a 90 degree angle you cut in a wide radius on the scrap side and then go back from each edge of the curve and cut straight in to the corner, being careful to stop in time so you don't cut in to the part you want to keep.

Maybe Bob can put together someone for a workshop seminar on power tool use for y'all at the RTR.
 
I got a different DeWalt jigsaw, cordless. It ate through the plywood like butter. I got some blades for regular wood and thin blades for making curves on thin plywood. It's actually fun to use. Here's the thing, I can't sew buttons! I mean literally, I got this basic sewing kit together, and tried to learn to sew by hand...can't do it. So I'm back to my crappy carpentry skills. I swear I can't make a straight line. I can't keep a straight line in my head.

This new bed better turn out right. At least I know what mistakes I made and what I can do better this time.
 
Going slow makes staying on the line easier.
You can also use a straight piece of wood as a guide.
Measure from the edge of the saw base plate to the blade and clamp the guide that distance from the line. A couple of C clamps and a piece of 1x4 or even another piece of plywood will do it.
 
Cut twice and it's still to short eh? I hate when I do that, and it happens way to much considering I consider myself a professional! I find I am most prone to making a mistake when doing math on the run. So to avoid it, I usually stretch out the tape measure and then count out the second measurement from the end of the first, if that makes sense. Also, templates are definitely your friend. It may seem like they double the time involved, since you have to make the template, then cut the actual piece, but they save you time in the long run. And sometimes material too, if they help you see a mistake you're about to make.
 
Here is Tilikum's final look, with all of the furniture in and securely screwed down.


There is no space left. I mean none. I guess I can get my yoga in while I crawl around the furniture. I think of the other things that need to go in. Under the bed storage? Good luck getting to that. Buddy Heater? Hahahaha.


I do like my kitchen though. I positioned the kitchen cabinets and the cooler to get at them from the doors outside. I'm looking now for nooks and crannies, everything has a place.

Not much van feng shui, but it makes for a good game of Twister! :p

It is very nice to camp in though. Most luxurious thing I've camped in yet.
 
Looking good! So, when do you start testing her out??
 
Queen said:
Looking good!  So, when do you start testing her out??

I started posting another round of goodbyes. I have another post yet with more pictures.
It's in my Captain's Log, The Long Goodbye.
 
Love those hanging organizers! Still debating the use of them in my van... the more I see them in use, the more I think it's the way to go!
 
They are over the door waste baskets. Perfect for toiletries. The cut up shoe organizers are built flimsy, but good to hold keys, lip balm, watch at night.
 
Top