"Humble Beginnings"

Van Living Forum

Help Support Van Living Forum:

This site may earn a commission from merchant affiliate links, including eBay, Amazon, and others.
Progress! We wanted to make it to a vanlife gathering in San Diego this weekend, so the mission was to get the bed done. Around 10pm Friday night we finally finished it (there was a slight incident with power saw on Wednesday that caused some delays). It was great to get out and try our new bed. At 6'1" I'm definitely a bit cramped laying sideways... if my memory is correct I think it's 69.5" wide at our bed's platform height. But, it worked and I sleep in lots of weird positions anyways. If I decide I can't take it, we can build on an extension and turn the mattress. 

Here's the finished framing:
bed frame.jpg

And the finished platform with some 1/8" plywood just to keep the memory foam mattress from squishing through over time:
bed complete.jpg

And here's a shot of the van gathering on Fiesta Island in San Diego:
gathering.jpg

I never could get all the vans in one shot, but I heard estimates of 35-40 that showed up. It was really cool to meet van people in real life, see their rigs, and talk shop. We met about 6 full-timers; the rest were aspiring vanlifers like us, or weekend warriors. At the end of the night a couple full-timers invited us to their stealth spot for the night... what a welcoming gesture! It felt like our first little taste of REAL van life, even though we've camped in it several times already. 

But, no rest for the wicked! We've got a Yosemite trip in a few weeks and NO cabinets, and our Indel TB51 has shipped but hasn't arrived yet. I've got the sliders for the rear drawers but haven't started building them yet (got some great tips this weekend though!). I still need to wire our RV battery to our starting battery, and I need to double check my roof measurements and place a solar order. Busy busy busy!


Aaron
 

Attachments

  • bed frame.jpg
    bed frame.jpg
    1.3 MB · Views: 34
  • bed complete.jpg
    bed complete.jpg
    1.8 MB · Views: 28
  • gathering.jpg
    gathering.jpg
    1.8 MB · Views: 33
We started work on the cabinets this week. I'd like to state for the record at this point that 1) I have never built cabinets before, and 2) I pretty much just have no idea what I'm doing. But... ever onward!!!!

The general idea is to build a frame to hold our stuff (IndelB fridge on a slider, folding table, sink components, water tanks) then figure out how to build doors on the front of it later. How hard can that be? I guess I'll find out.

It doesn't look like much, but this was most of the weekend for me. I'm not particularly great at this so it takes some time. One of the biggest hangups... what is "straight"? When aligning the face of my cabinets, I realized the idea of straight was a bit arbitrary. Do I align it to the wall? The wall is curved. Do I align it to the seam in my flooring? Well, let's just say I installed the flooring so I'm not sure if that is the best idea. Do I make it perpendicular to my bed? See previous comment about who installed the flooring, ditto for the bed.

In the end I made a rectangular frame for the base against the floor, then roughly squared it off between the bed, walls, and flooring seams to come up with something that might possibly be straight enough. I know it doesn't sound like the most technical method, but in the end the alignment will be judged by eyeballs rather than rulers and t-squares so that seemed like the way to go.

Here is what I have so far:
cabinet.png

I have an EXTENDED E350, and I installed our full mattress sideways to maximize space. Even so, as soon as we started blocking out space for the cabinets it seems like the entire space was consumed in a matter of seconds! It really reminded us that we're talking about living in a van!

It took about seven different rearrangements to finally get everything in the positions you see in the photo. The fuel inlet and wheel well leave just enough space for the 15 gallon water tank. But the other consideration was if it would fit in the orientation you see, or if we would have to turn it 90 degrees. That would have really consumed our storage! Fortunately, I had to deepen the cabinet a couple times to have enough room for the fridge and the handles in order to be able to have a cabinet in front of it. Once that happened, I was able to fit our tank in this way and everything started falling into place.

A note about the fridge, an Indel-B TB51 from Truck Fridge. Dometic seems to be the most popular, but they established their reputation with Danfoss compressors in their fridges. Now I believe they use their own compressors. Does that make a difference? I have no idea. But Danfoss is tried and true. So the question was, should we buy the fridge with the great reputation or the fridge we had never heard of that had the compressor with the great reputation? I was on the fence, but then my girlfriend found Bob's video about the Indel. That sealed the deal! It gave us that little boost of confidence that somebody who knows more about this stuff than we do trusted it. I'm sure we could have been very happy with either one. (We bought the TB51 from truckfridge.com for $550 + $50 shipping, vs the Dometic CFX-50 I think we saw for about $600 with free shipping.)

We also ordered the sliding mount, at the astronomical price of $200 + $35 shipping!!! However, I would have probably spent $100 or more on heavy duty sliders and wood, and the finished product would not have been as nice. So we went with the quality product and I have to say it seems VERY robust! I was shocked at how heavy it is. I just have to compartmentalize how much I spent on that mount and try not to think about it!
 

Attachments

  • cabinet.png
    cabinet.png
    1.9 MB · Views: 38
very nice. I didn't see where anybody answered your question about silicone. the problem with silicone is nothing sticks to it and it's very hard to remove. so after you use silicone if you have a leak in the future it's very hard to deal with. I would get some of the good butyl tape and redo it. then once you have resealed it add some self leveling sealant on the seam by Dicor or 3M. highdesertranger
 
The channels in my roof are maybe 1/2" deep and my fan mount crosses two of them... so I have four channels to dam up with some type of seal. My first plan was layers of butyl tape, but that doesn't seem great. Now I feel like I should add something to that, and was considering using this: https://www.amazon.com/AP-Products-017-90891-White-Sikaflex-221/dp/B00O9VFLRS

Does the "dam" I'm talking about make sense? I'll try to take a pic of what I'm talking about. I do have the Dicor, but I want to make sure I'm all done with everything else with my fan then do that last.

Thanks.
 
I have installed hundreds of roof vents if the butyl was done right it will not leak. however it needs some protection from weathering especially when it's so thick as in the channels. and yes that Sikaflex should work but first I would redo the butyl. in the old days vans had a flat spot for installing a vent. highdesertranger
 
Very nice work! I like your bed build. I think I overbuilt mine a bit with too many 2x4"s, as this cuts down on the underneath storage. Also, completely agree with HD on his preferred vent install sticky stuff. Don't be afraid to go heavy on the sealant!
 
Thanks! I oriented my 1x3's specifically to maximize the size of my drawers, for example the top cross bar over my drawers is laying flat even though I think it would support my weight on the bed a little better if it was stood up on it's skinny edge. But then it would have protruded down into my drawer space. So, I just added enough flat 1x3's to feel it was strong enough. I think it will be fine... I just built by my gut, I'm not qualified to calculate what the proper build specs would have been. I was an engineering dropout!

I'll post an update if I crash through it!
 
Progress has been slow, and I've been getting frustrated. It's very hard for me to try to make significant progress working a couple hours at a time after work. However, I need to remind myself what we've achieved in the month of September: installed roof fan, hooked up battery to alternator and added a second battery, built the bed frame, paneled 75% of the walls and ceiling, installed LED lights and dimmer switches, built a cabinet frame and installed counter top, installed a 12v fridge. The sink is close, and will hopefully be working by this weekend for our trip to Onion Valley in the Sierras.

I'm glad I typed this out. I feel better already, vs last night when I was snapping cedar paneling over my knee after screwing it up!

counter.jpg
 

Attachments

  • counter.jpg
    counter.jpg
    1.9 MB · Views: 30
HumbleBeginnings said:
Progress has been slow, and I've been getting frustrated. It's very hard for me to try to make significant progress working a couple hours at a time after work. However, I need to remind myself what we've achieved in the month of September: installed roof fan, hooked up battery to alternator and added a second battery, built the bed frame, paneled 75% of the walls and ceiling, installed LED lights and dimmer switches, built a cabinet frame and installed counter top, installed a 12v fridge. The sink is close, and will hopefully be working by this weekend for our trip to Onion Valley in the Sierras.

I'm glad I typed this out. I feel better already, vs last night when I was snapping cedar paneling over my knee after screwing it up!

Hang in there!  Since starting my build this spring, I have built character and learned things that I didn't know.  One of the things that I've learned is that for every 1/2 hour working, you can spend 3 just trying to figure out what will be happening 10 steps down the line and fearing that if you screw up now, you will be screwed!
I found it's easier just to start doing stuff and then work through or around problems that come up.  My build is very similar to yours (see my thread Stealth Race Van in this forum).

I found the plank walls really needed to have wood screwed as furring strips on the side ribs.  As you found, there are just too many holes, and unless you want to waste a lot of boards or have planks that look like Swiss cheese, the furring strips are a must.  I hated putting them because now I'm loosing another inch on each side.  The upside was I just gained another inch to install more insulation.  Even if you're not worried about temps, the more you have, the quieter your ride will be.
 
That is really beautiful work guys! Guess the time it takes, is the time it takes but you've got a gem* there!
 
Nice looking van !
I like it.

Best to scribe ends to be cut.... but my guess you learned how to do that already... it works for tile, parquet flooring, linoleum tiles...
Ez peasey !
wheels
 
Artsyguy said:
I found the plank walls really needed to have wood screwed as furring strips on the side ribs.  As you found, there are just too many holes, and unless you want to waste a lot of boards or have planks that look like Swiss cheese, the furring strips are a must.  I hated putting them because now I'm loosing another inch on each side.  The upside was I just gained another inch to install more insulation.  Even if you're not worried about temps, the more you have, the quieter your ride will be.

I've definitely felt the consequences of my decision to NOT install any wood studs behind my paneling. However, since I'm 73" tall trying to sleep sideways in a 70" wide van, I constantly remind myself what an extra inch or two would have cost me!
 
My photography skills are a bit lacking, but I finally have all 8 LEDs in the ceiling and we're ready for a two night test run this weekend. Next week we leave for 5 days in Yosemite!

Who needs cabinet doors anyway?  :D
cabinets and lights.jpg

(after this picture was taken, we installed the trim piece around the fan)
 

Attachments

  • cabinets and lights.jpg
    cabinets and lights.jpg
    1.9 MB · Views: 25
Looks like you are off to a great start, HB !

...it's possible to use cardboard and to scribe the filler strips where the sides meet the lid. Then trace that onto your stock after trimming on your line.
You can make a simple divider by firmly taping a pencil to another pencil. Important that it remains a fixed distance.

If you are cautious and precise, and bevel one edge, you can do it without a trim piece.

Best, wheels
 
SUCCESS!!!

My big objective since starting this build Labor Day weekend was to have the van ready for a trip to Yosemite on October 6th. Well, I just got back and the van worked great. We still have a lot to do for storage and cosmetics, but the electrical, fridge, ventilation, and sink all worked great. The best news is that I parked on Friday morning with my two 100Ah batteries charged from the alternator on the drive up, and we ran off of those until we drove away on Tuesday with charge to spare! Our voltage was 12.5 when we left (I don't have a fancy meter yet).

I'm very happy with this test run. I was worried we'd have to go drive around the valley after a couple days to keep our food from spoiling. Now I'm questioning whether we will even need the solar system I was planning on getting. However, I think we probably will because 1) if we want to stay in place longer than 5 days or 2) when the weather is warmer we'll consume more power for the fridge and roof fan we'll need to be able to charge in place. But for now we can do a week in place no problem without any additional charging. That feels great!
 
Hi and great job so far!

You’ve shown others that buying a finished class B isn’t necessary, just do what you did, get a good base vehicle and move forward. Help from others is usually available somewhere if the person isn’t as capable, brave or has a gf father with tools.

You made choices for yourself that others should accept (firring the walls) and then they can make their own.  Later give us more details about the plumbing, as that’s an area not many actually seem to put into their builds. How you will refill and drain out the fresh and grey water specifically...

You didn’t discuss how you wired your house batteries to the alternator, again while it’s been done hundreds of times in the forum (electrical), seeing what you chose would be interesting.
As to your comment about perhaps not needing solar, don’t fail to add it in, you won’t always be driving and the alternator won’t usually recharge your batteries to 100%.  See the many discussions about that or just add 200w of solar through a good quality 20 amp or higher controller.  (I’ll let you read up on the PWM vs MPPT controller wars.). Same with battery choices, though you’ve already bought your first set, just be aware of the trade offs between marine batteries, FLA and AGM. No criticism, just good to know info.

Thanks again for your posts, documentation and descriptions. You’ve done well!  I presume your gf helped too, so thank her as well.

Enjoy your life in the van!

TWIH
 
Thanks for the feedback! Yes, I owe some updates. I've been slow getting my pictures over. Also, some of my work on the sink install was a bit... rough. So I haven't been in a rush to share details on that! lol

I'll post more on that later, but the basic setup is a 15 gallon RV tank, 12v pump, pressure accumulator, sink. I thought about installing an external fill port, but for now it's inside. At home we refill with a hose and an in-line RV freshwater filter. On the road we could refill with a jug. My gray tank is a removable 5 gallon jug. My thinking in the tank sizing is that it's easier to find a place to dump than it is to find a place to fill.

Running the wire from the main battery was a big pain for me, mostly because of the decisions I had to make. Every option was either risking contact with something hot, something that moves, or didn't work with the length of the pre-made cables I bought. I could have saved my self some effort if I had just made my own cables, but by the time I realized that I had already bought them. Each vehicle is different, so each person will ultimately need to choose their own route for the wire. The main points were that I put a 100 amp fuse on each end of the run so if my wire ever grounds out (because I made a poor decision and it ends up rubbing through the sheath) it will kill the link. At least that's the idea. Another issue I need to work out is the individual termination points on the batteries. I've got a bit of a mess right now. I'm debating whether I want to install bus bars or just try to clean it up. I did make sure to cross-connect the batteries (alternator positive goes to one battery, vehicle ground comes off the other; positive to fuse block runs from one battery, negative to the other). The idea is to equalize the battery charging and usage; I read somewhere that if everything is connected to one battery their usage may not be equal.

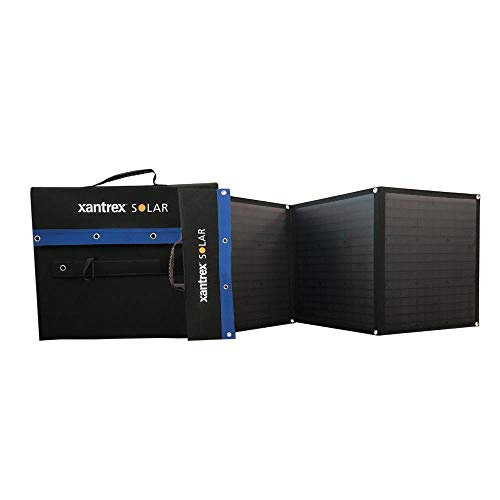
For solar I'm leaning towards a 200W Renogy kit with a 40A MPPT. That works with the roof space I have in front of my RV fan, and gives me an easy upgrade in the future if I decide to add more. I think I could fit three panels up front I if squeeze. I'm planning to put a rack on the rear eventually, but I could potentially put panels there too if necessary.
 
Top