Since this weekend will be tryout camping weekend we decided to go with quick 'n easy, since the build out hasn't really started. Seats are removed, posts to be removed today or tomorrow. Yesterday we had a 5/8" inch plywood cut from 48"x96" to 48"x70", spent about $25, placed it lengthwise and to the back right corner with spare milk crates and the box built over the wheel well for support and threw the spare full size mattress on top. There's a walk-way to the left side, and about a foot wide ledge box over the wheel well. If this works I can see using this vertical space there for storage later on.
The spare milk crates were just the right height to fully support the height and weight of the plywood and mattress and 2 adults. Will be storage for things that need to be grouped or kept from rolling around. There's still lots of storage under the bed. This set up will allow 2 adults to sleep with head near the back doors, feet pointed to the front, with plenty of elbow and turnover room.
I still have 2 sets of stacking deep plastic storage bins, 4 bins total, and the space in front of the bed behind the drivers side is where those will sit. It
will store cooking supplies, food and odds and ends. All of the camping stuff I already had on hand from my last van. The flat surface on top can be used to make coffee or whatnot should we need to do that inside, otherwise, cooking will be done outside, least for this weekend.
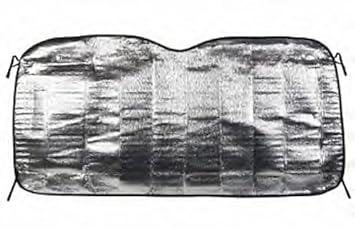
The inside still looks cavernous, even with a full size bed in there. Maybe it's the older boxy style that makes it seem huge to me. The conversion I had before must have had more molding taking up more room inside than I realized, this thing feels so spacious!! I've got pop up window shades already for the front and 2 more that will also cover the front side windows, since I aim to swivel both front seats around for seating.
Dad had an old ice chest with broken hinges he donated with hand-made leather hinges that we can use. The windows.. I had the bright idea to just purchase cheap black poster board for now to black out the long, tall windows, sticking something, probably dowels, where the previous rod holes were in each window to hold the poster board in and allow for easy removal when wanted. Cheap and quick. The back windows and big side window will have curtains hung from those Christmas light holders things that won't harm the nice ceiling lining. Already had curtains on hand.
All that's left really is to find a tent for the boyfriend's 17 y/o and maybe a few more popup chairs. I think the son is excited.
Just a two day trip, nothing huge, so not a lot needing to be packed. Chairs, a table, throw some clothes and food in there, call it good. Will be taking pen and paper to write down what is really 'needed' for upcoming trips. Yay!! Finally!!
The spare milk crates were just the right height to fully support the height and weight of the plywood and mattress and 2 adults. Will be storage for things that need to be grouped or kept from rolling around. There's still lots of storage under the bed. This set up will allow 2 adults to sleep with head near the back doors, feet pointed to the front, with plenty of elbow and turnover room.
I still have 2 sets of stacking deep plastic storage bins, 4 bins total, and the space in front of the bed behind the drivers side is where those will sit. It
will store cooking supplies, food and odds and ends. All of the camping stuff I already had on hand from my last van.
The inside still looks cavernous, even with a full size bed in there. Maybe it's the older boxy style that makes it seem huge to me. The conversion I had before must have had more molding taking up more room inside than I realized, this thing feels so spacious!! I've got pop up window shades already for the front and 2 more that will also cover the front side windows, since I aim to swivel both front seats around for seating.
Dad had an old ice chest with broken hinges he donated with hand-made leather hinges that we can use. The windows.. I had the bright idea to just purchase cheap black poster board for now to black out the long, tall windows, sticking something, probably dowels, where the previous rod holes were in each window to hold the poster board in and allow for easy removal when wanted. Cheap and quick. The back windows and big side window will have curtains hung from those Christmas light holders things that won't harm the nice ceiling lining. Already had curtains on hand.
All that's left really is to find a tent for the boyfriend's 17 y/o and maybe a few more popup chairs. I think the son is excited.
Just a two day trip, nothing huge, so not a lot needing to be packed. Chairs, a table, throw some clothes and food in there, call it good. Will be taking pen and paper to write down what is really 'needed' for upcoming trips. Yay!! Finally!!


