Okay, Since we are on the topic of ventilation, I will show what I use to make my Van a wind tunnel. Basically, in Full summer sun, with some custom made reflectix window shades in the 3 front windows, and my sleeping pillows bungee corded to the black conversion Van windows in back, the van stays below or at ambient temperatures until later afternoon when ambient temperatures fall. I can hang out inside all day on the hottest of days with with windows and doors closed and be comfortable enough.<br /><br />My first addition to my roof was the Nicro marine style Vent, 11 years ago. This is a 4" solar powered vent that only moves ~1100 cubic feet per HOUR. It has a battery so it runs all night too. It is an earlier version of this model:<br /><br />
<br /><a href="
http://www.defender.com/product.jsp?path=-1|6880|45749|320600&id=1193043"><br /><br /></a>It's best feature is that it will not leak, even at 80 mph in a thunderstorm, but it simply does not move enough air if the Van is not moving. A breeze over the vent helps, but not enough.<br /><br />After several years this vent's fan motor began clicking, especially at night when it got colder.<br /><br />In '97 I had acquired my first computer case fan (muffin fan) and placed this low cfm 4.75 inch/ 120mm fan upto the 4 inch hole and it was very obvious that much more air was being evacuated. <br /><br />A more powerful fan made me realize the Nicro's fan blade was obstructing flow. So I removed the fan blade. Then I removed the battery so it would not run at night and click all night. Then I covered the solar panel so it would not click all day. I had a real 130 watt solar panel by this time and was not worried about the minimal amp draw.<br /><br />From there I built a cedar and teak step down ring. From 4.75 inches to 4 inches. Then I started searching out better more powerful fans. The most powerful fan I had pulled 0.7 amps moved a lot of air but was too loud. I tried two fans in line, but found they just got louder without moving more air. Then I tried a Fan whose blades spun in the opposite direction inline with this fan, and the airflow increased greatly, as well as making the fans quieter. But .85 amps is too much draw, and it was still too loud.<br /><br />Then I found the Silverstone fan I posted a link to a few posts above. I extended the potentiometer (speed control dial) and installed it so I could reach it from my third chair, or from Bed. Both fans have separate switches I can reach from bed.<br /><br />Here is the counter rotating fan. It is a neat open design that is isolated on rubber footings. <br />
<br /><br /><a href="
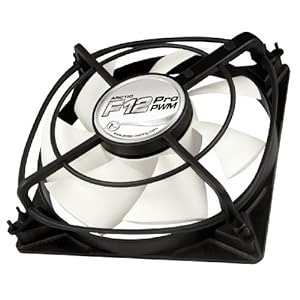
http://www.amazon.com/Artic-Cooling...mp;sr=1-1&keywords=ARCTIC+COOLING+AF12Pro">
http://www.amazon.com/Artic-Cooling...mp;sr=1-1&keywords=ARCTIC+COOLING+AF12Pro</a> <br /><br />I unfortunately broke all the feet, and all the supports, but A little fiberglass saturated with crazy glue and some screws and I got it back together again without the rubber isolation.<br /><br />The arctic cooling fan is rated at 53 cfm, the silverstone 110cfm. Obviously with the step down ring and the resistance of the mushroom vent it does not move 163 cfm, but it moves a lot of air none the less. If it is really hot with no threat of rain, I can pull off the mushroom vent and it is much quieter and moves even more air.<br /><br />I hold the arctic fan to the silverstone with some strong magnets that attract the screws provided with the fans. The silverstone fan is screwed to the step down ring, and the step down ring is held to the roof with some oak forks that come off of one of my roof supports. I have to slide it in or out for cleaning and have some small brads to hold the wires out of the way. This was a temporary design that has not been tampered with for 5 years now. In the winter time on the coldest nights I pull down the arctic fan and cover the silverstone 90% with a napkin then return the arctic fan to hold it in place.<br /><br /><br />

<br /><br />Here is a more recent shot that shows a little more:<br />
<br /><br />I'll discuss that homemade light in a later post within this thread. It will have MR16 LED's at some point in the future.<br /><br />I have found that 98% of the time, I do not need a two burner stove. I just use a single burner type which rests on a single green disposable propane bottle. I do all my cooking when sitting on the third Captain's chair, with the stove right under these fans. The ceiling does not get all dirty, but the fan blades do, and I have to bust out the q tipe a few times a year to clean the grease and dust and grime off the blades. This is not a fun task, but a clean fan is an efficient fan.<br /> Here is about 3 months of build up cooking at least one meal a day under the fans:<br />

<br /><br />I have only cleaned the ceiling once in the last 5 years, the white paper towel barely got darker, the white ceiling not noticeably whiter. I have no fear of CO poisioning.<br /><br />For my intake fans, I made a plywood cutout for 3 120 mm fans and painted it black. This one only shows one silverstone whose frame I painted black and two 'Stinger' brand fans made for audio amps. These are very powerful and draw .7 amps each. I later used a black sharpie on the white fan blades, the purpose being to make it less visible to others outside the Van.<br /><br />Here you can see the black fans are pretty much invisible from outside the Van. I have the small hole chicken wire in addition to the regular screens over these windows to make thievery more difficult. But I almost never open the other side, and this with the fans has the 1/4 inch plywood fan mount screwed into the window frame as well.<br />

<br /><br />I mounted the silverstone speed control right on this fan itself. Each fan has it's own on and off switch.<br />

<br /><br /><br />These fans are right by my head when on my bed. It is easy to turn the fans on or off or adjust speed, and the silverstone fans on low are so quiet they do not bother me at all. The fresh breeze at night is very welcome, and the white noise is appreciated if dogs start barking/ kids start screaming, ect. My curtain has a flap that can direct the air to the sides and not directly on my head/ shoulders if I so choose.<br /> <br />It is rare that I am too hot at night. If i am, a turn of the dial is all it takes. In fact, when I registered here early in the morning a few days ago, I had not slept all the night before, and was finally tired enough to sleep at about 11 am. I slept for 5 hours with all my fans on. I later found out that it reached 108 degrees that afternoon( <20% humidity though). I had no idea it was so hot.<br /><br />A large reason for being able to sleep through those temps was my Fan designed to move air around inside my Van. This is a recent fabrication of mine, and I am very happy with it.<br /><br />

<br /><br /><br />I had a variable voltage ciggy plug adaptor for my old MP3 player I have not used in years, this one exactly:<br /><br /><a href="
http://www.amazon.com/Vector-Mfg-VE...857337&sr=1-1&keywords=vector+vec+009">
http://www.amazon.com/Vector-Mfg-VE...857337&sr=1-1&keywords=vector+vec+009</a> <br /><br />I had an old adjustable neck clamp on 120 volt incandescent light wasting space in my storage unit. I took that adjust o neck and attached it to a real Spring clamp, and attached this fan to it:<br /><br /><a href="
http://www.amazon.com/Vantec-TD9238...857678&sr=1-2&keywords=vantec+td9238h">
http://www.amazon.com/Vantec-TD9238...857678&sr=1-2&keywords=vantec+td9238h</a> <br /><br />The screw holes matched perfectly the width of the fan, as if it was meant to be.<br /><br />This 92mm diameter fan is an Absolute Roaring BEAST! When I first hooked it up loose to 12.8 volts on my table, it sucked itself right across the table. Rated for 118 cfm. In my opinion, it moves way way way more air than the 120 mm Silverstone fans that are rated up to 110 cfm. Whereas the silverstones seem to have four hotspots of faster moving air that exit at 30 degree angles from the fan, the Vantec Tornado sends a dense column of air straight out across the whole Van. From 4 feet away, the column of air is no more than 16 inches wide. Outside that 16 inch wide column, A match flame barely flickers, and the flame does not stand a chance within it. Even on lower voltages, the column of air is still narrow. This fan itself is a thing of beauty.<br /><br />The vector voltage controller works as a speed controller. I modified the dial with a knob( from the silverstone speed control) so I can turn it without the use of a tool as it was designed, and can operate the fan on the 3, 4.5, 6, 7.5, 9, and 12 volt settings. The fan will not turn on the 1.5 volt setting. On the 3 volt setting it is nearly silent and sends a soft breeze and draws under 0.1 amps. It will not always start when plugged in on the 3 volt setting, but will on the 4.5 setting. On the 12 volt setting it is a roaring beast that draws one amp and is like putting your head out the window doing 25 mph. I rarely run it up there, rarely need that much wind. At 9 volts it is still pretty loud, but only draws 0.5 amps. At 6 and 7.5 volts it is not very loud and still moves a good amount of air, and are the voltages I mostly use it on, and it has been running for a month straight now at least.<br /><br />Modifying the dial takes some skill. Here are others products where wire splicing and a finger nail is all that is required to change voltage/fan speed, which might fit the bill better for those wary of modifying things. <br /><a href="
http://www.powerstream.com/dc6.htm">
http://www.powerstream.com/dc6.htm</a> <br /><br /><a href="
http://www.amazon.com/12V-2A-DC-To-Converter/dp/B000KGKFA4">
http://www.amazon.com/12V-2A-DC-To-Converter/dp/B000KGKFA4</a> <br /><br />Make sure not to put fans rated at more than 2 amps to these devices.<br /><br /><br />In my Pic above, you can see the smaller 80 mm fan next to the 92 mm fan. I was so impressed with the 80mm that was rated at 83 cfm I just had to get the 92mm and it's claimed 118cfm. It has a 6 foot cord, and I have 7 ciggy plug outlets and counting all over my van, and attachment points to clamp it darn near anywhere I desire, and aim it anywhere I desire. The 92mm fan is supposedly louder than the 80mm, but imo, the pitch is lower seems quieter to me<br /><br />As I type this,I have it on 4.5 volts aimed at my chest from 3 feet away. <br /><br />I have more fans of other brands, which I rarely use, as I do not need them, but I think I am going to make another adjusto fan with the 80mm one just because it is so freaking awesome. I have tried many different fans, and while you can certainly find cheaper, and a few that are stronger, and many that are much weaker, these are the mac daddy's of fans. The fully variable speed silverstone fm 121 is by far the best 120 mm fan. I can't stress this enough. I paid half as much for one rated at less cfm that makes more noise, has only a single speed and draws more electricity to do so.<br /><br /><br />I do not have air conditioning, and I move this fan to blow on me when I am driving. I was at a drive through the other day with it clamped to the console aimed at my neck. The clerk said he could feel it, and it was only on 7.5 volts. 12 volts elicited a curse.<br /><br />Bwahahahahahahaaaaaa.<br /><br />PS,<br /><br />If you have old desktop computers you can pull them apart for the fans within. Most will be 80mm and 12 volts dc but many other sizes are possible, and some are only 5 volts dc, but will say so on them. Red is positive, black negative, ignore the yellow wire. Easy to wire to a ciggy plug.<br /><br />If you are tearing into your old desktop, rip the magnets out of the harddrive, and stick them on your oil filter, or use them to hold things to the walls, or screens to your windows. Careful though, they are ridiculously strong magnets.<br /><br /><br /><br /><br />


